Mobile AI - BrowserStack Integration
Mobile AI Blueprints and scenarios can be run using tools like BrowserStack.
BrowserStack is a cloud web and mobile testing platform that enables developers and testers to test their websites and mobile applications across on-demand browsers, operating systems, and real mobile devices, without requiring users to install or maintain an internal lab of virtual machines, devices, or emulators.
When you do not have an infrastructure built using Appium to build and develop tests using AppvanceIQ, platforms like BrowserStack can be used.
See the BrowserStack website for more information.
BroserStack setup in AIQ
Below are the steps to be followed to download, configure and run your tests from Appvance IQ using BrowserStack.
-
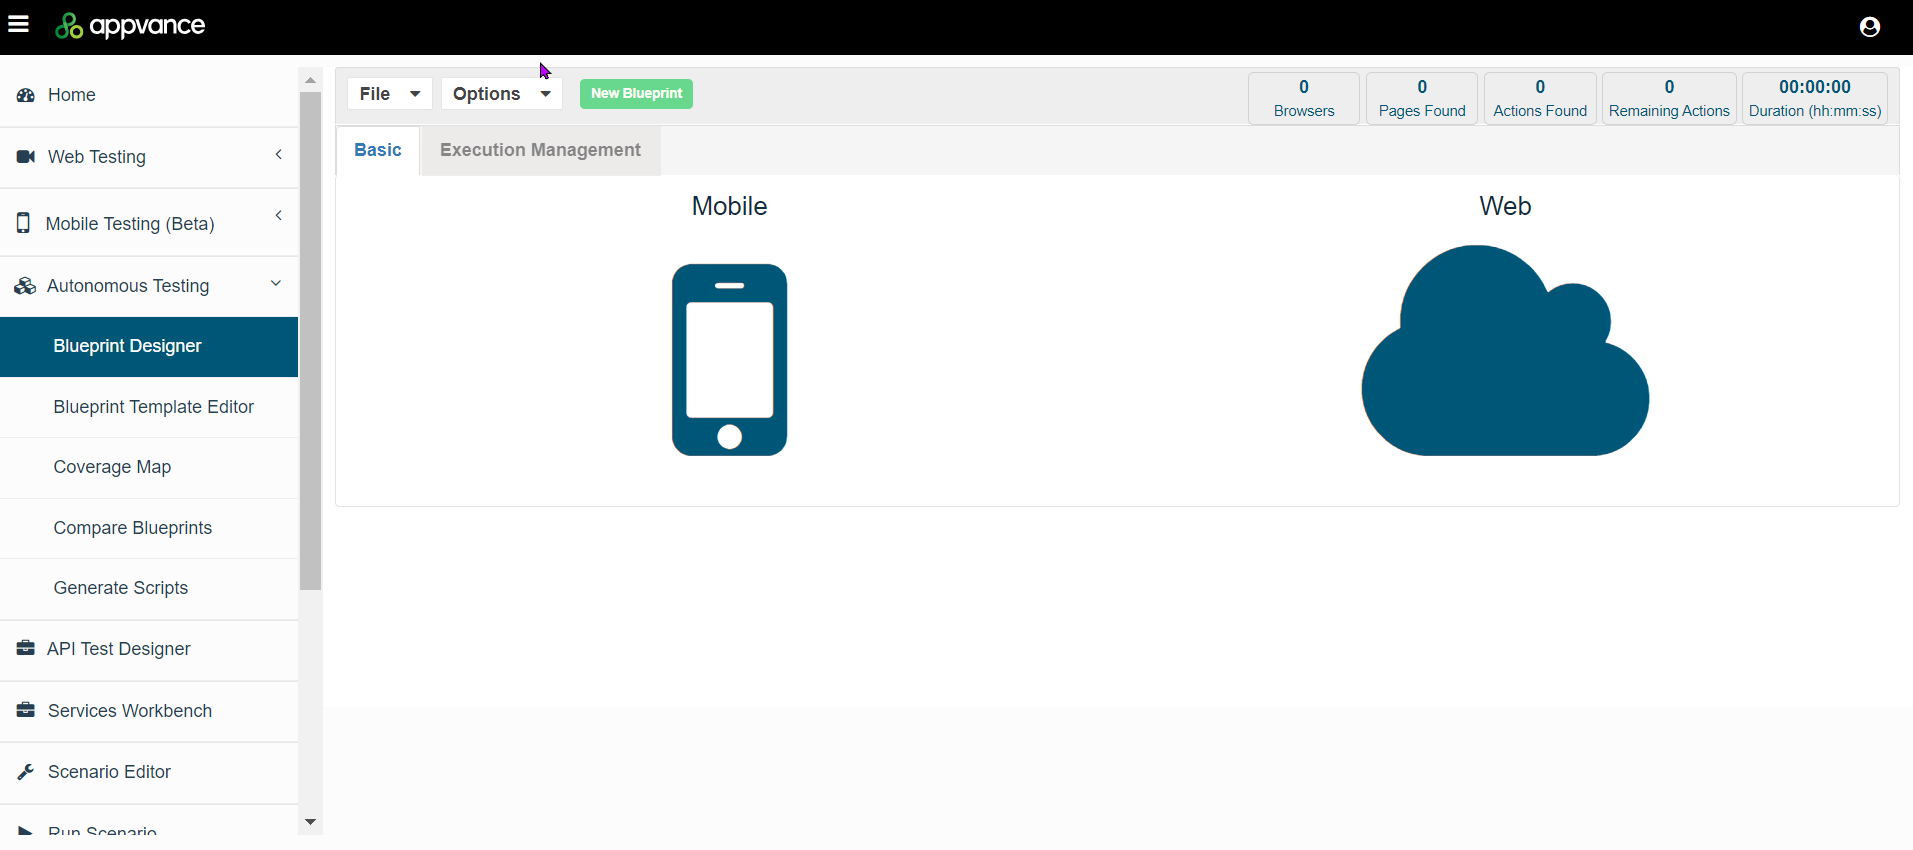
Login to AIQ and navigate to Autonomous Testing > Blueprint Designer.
-
Click Mobile.
-
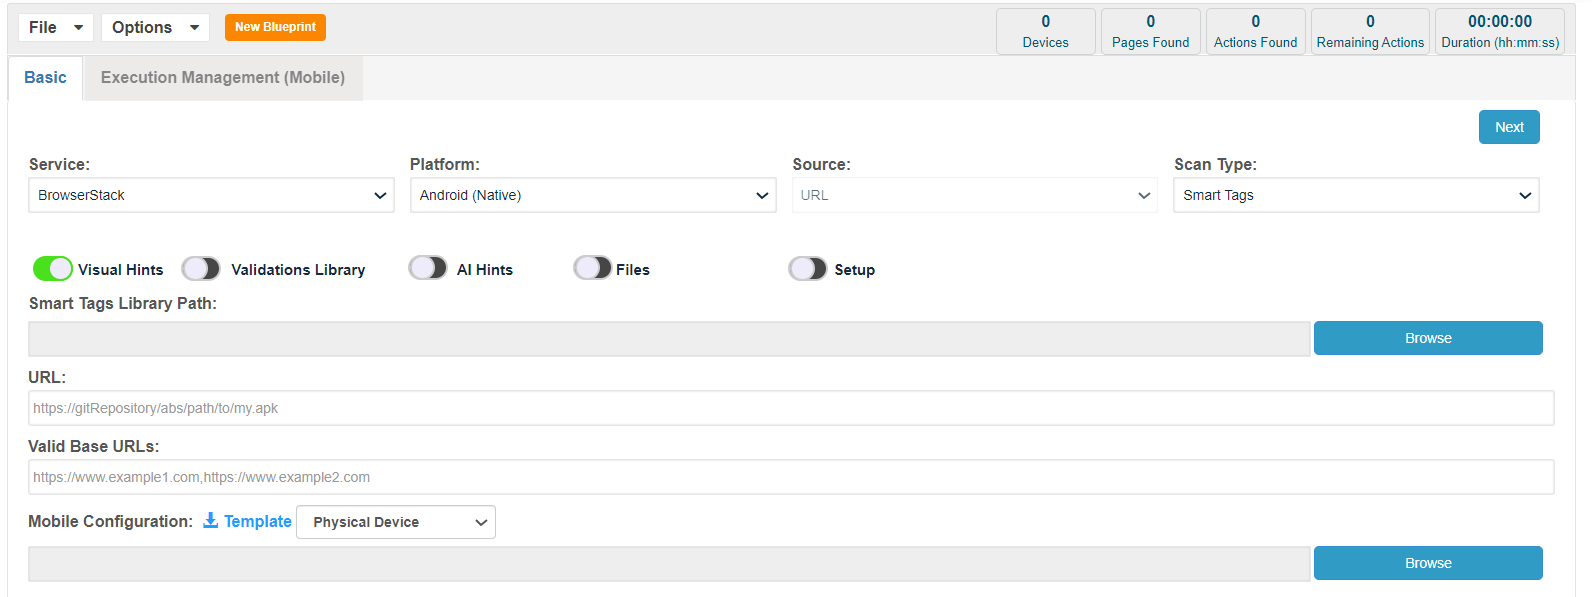
In the Service dropdown, select BrowserStack.
-
Select a Platform: Android or iOS.
-
In the Mobile Configuration section, select between a physical device or an emulator.

-
Click Download Mobile Configuration Template.
-
Open the downloaded JSON file in the editor of your choice.
Copy[
{
"serverURL": "{https://username:accessKey@hub-cloud.browserstack.com/wd/hub}",
"proxyURL": "",
"capabilities": {
"browserstack.appium_version": "{Appium version}",
"os_version": "{Android version}",
"device": "{Google Pixel 2}",
"realMobile": "false",
"project": "{name}",
"build": "{name}",
"name": "{identifier}",
"app": "{bs://hash}"
}
}
]
Getting Details from BrowserStack
-
Login to your BrowserStack account to get the details that need to be filled out in the downloaded JSON file.
-
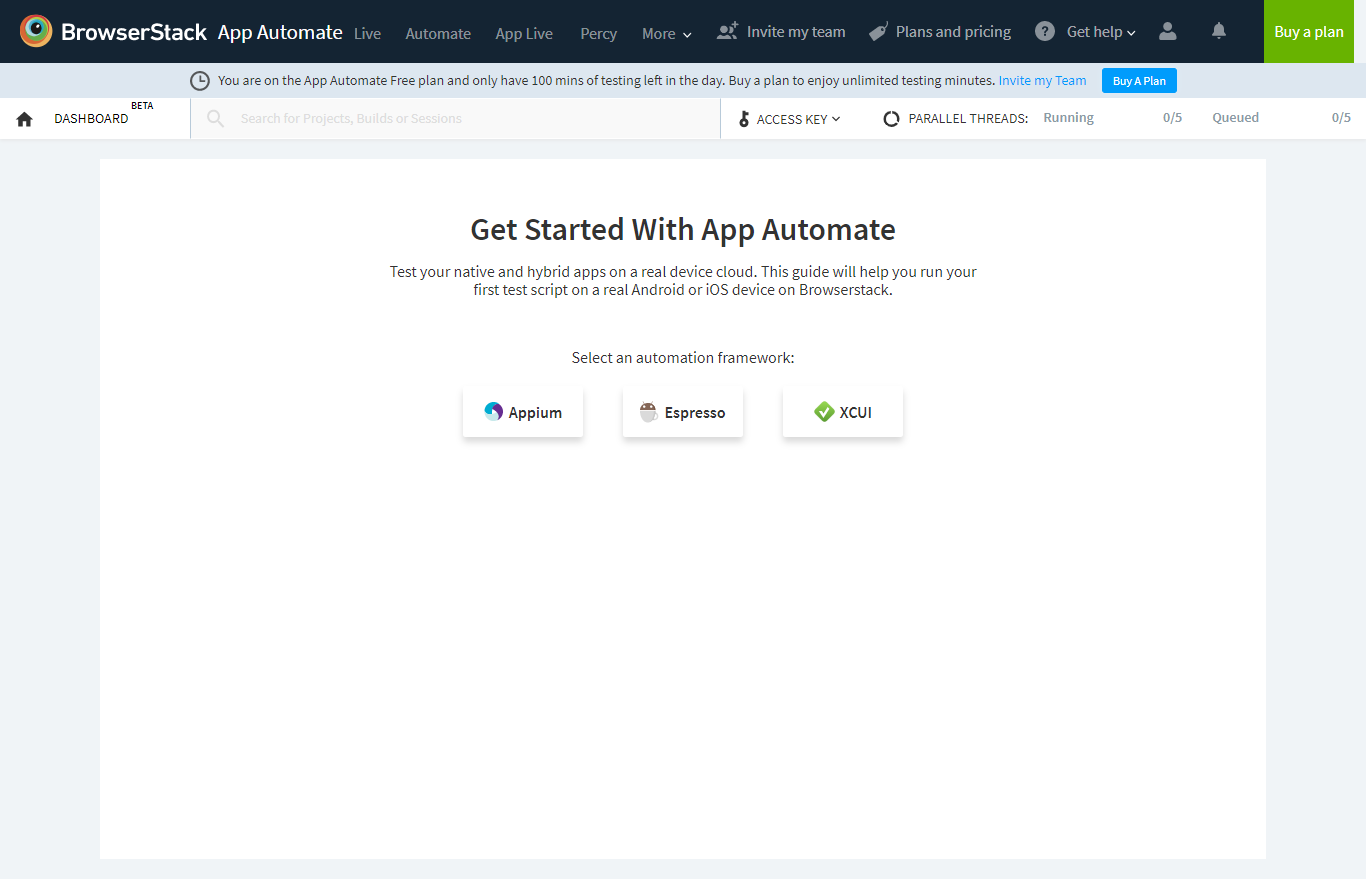
Click App Automate.
-
Click Appium.
-
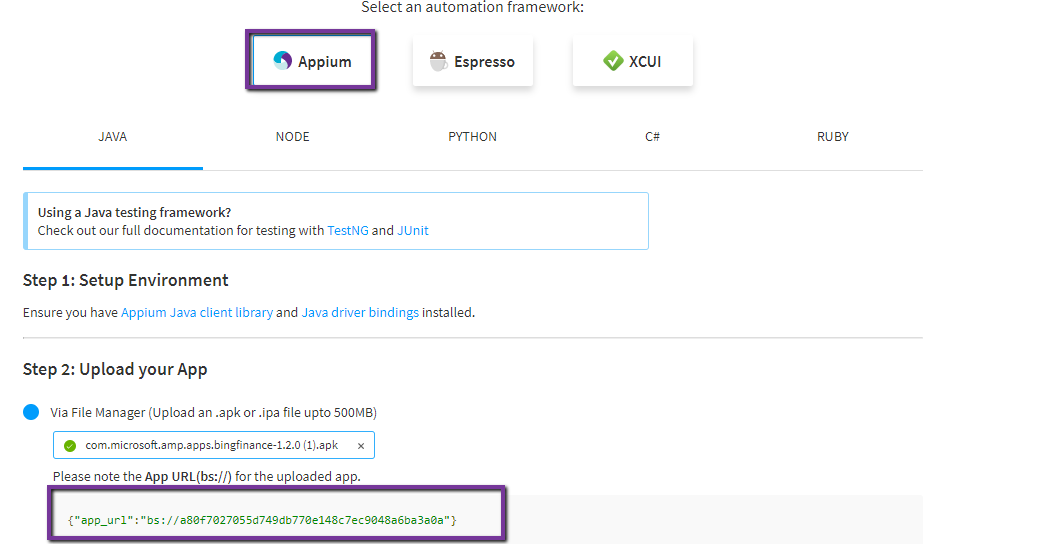
Upload your application under test for BrowserStack to create a unique id like "app": "{bs://hash}" which should be provided back into the JSON file.
-
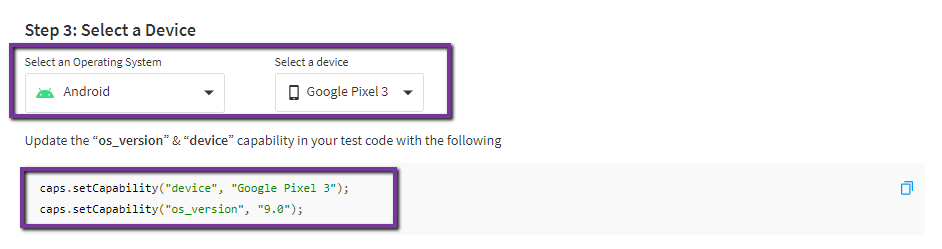
Based on your requirements, pick the device, pick the Appium version, pick the device version, etc.
-
Unique identifiers for project, build, the name are created and updated in BrowserStack, but those details can be changed. The same details must be provided in the JSON configuration file.
See the Capabilities documenttion on the BrowsrStack site for more information.
-
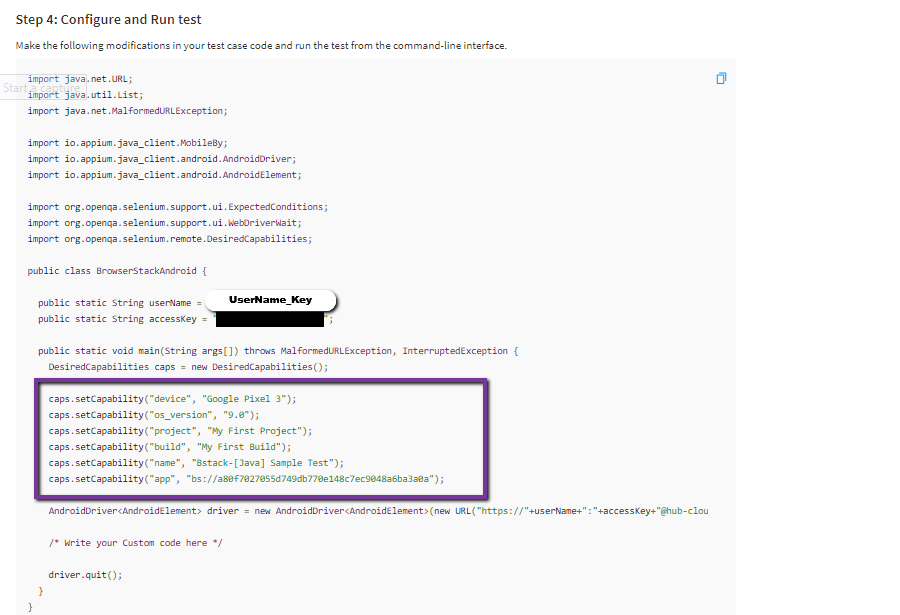
Edit the JSON file that was downloaded from Appvance IQ with all the above details.
Edited JSON file:
Copy[
{
"serverURL": "https://BrowserStack_Username:3SZyr5VqU7gxRXgeqygr@hub-cloud.browserstack.com/wd/hub",
"proxyURL": "",
"capabilities": {
"browserstack.appium_version": "1.9.1",
"os_version": "9.0",
"device": "Google Pixel 3",
"realMobile": "false",
"project": "My First Project",
"build": "My First Build",
"name": "Bstack-[Java] Sample Test",
"app": "bs://a80f7027055d749db770e148c7ec9048a6ba3a0a"
}
}
] -
From the Blueprint screen, choose scan type as SmartTags (if you have already created SmartTags), SmartTags + inputs (If you have already created SmartTags), Tags
-
Browse the edited JSON file
-
Click Next.
-
Provide the Execution details, choose CSV to map the inputs if already created or can be left blank, or choose Default, Click Create
-
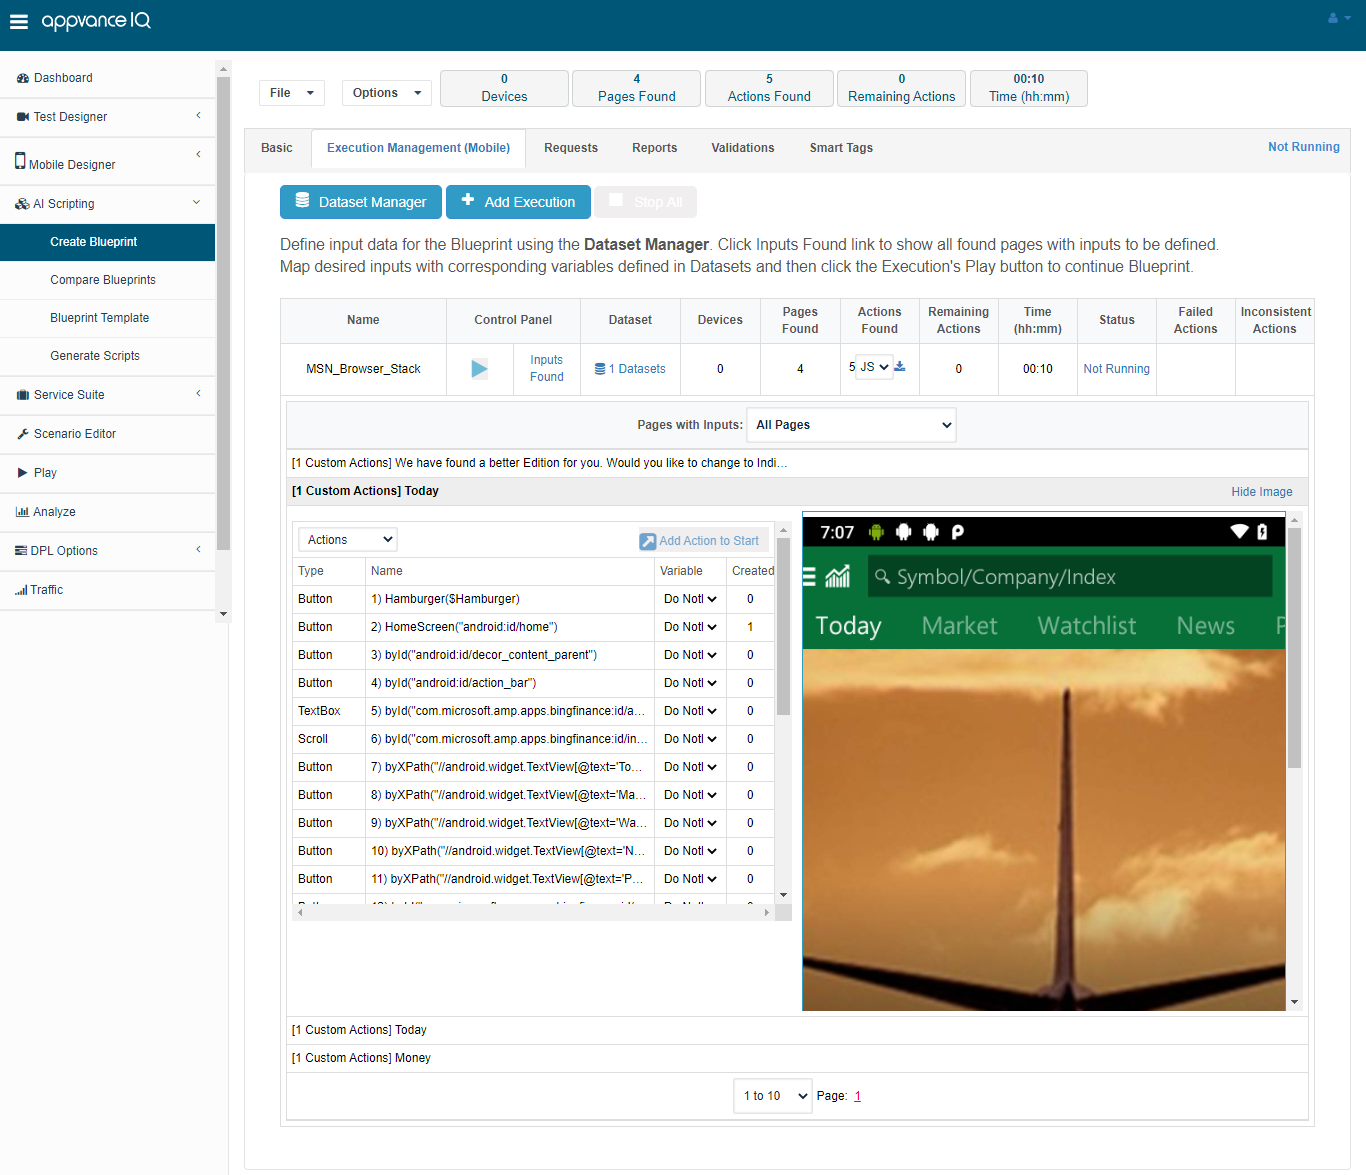
The Blueprint would be started on the BrowserStack with the provided configurations and you will start seeing the results, below is a screen-shot of the test running and showing the results in Appvance IQ