Training the AI
The following details how to train the AI for required inputs such as the “Username” and “Password” fields for the login page.
This section documents the process when using AI 3.0 (AIQ 5.0.0 and later).
-
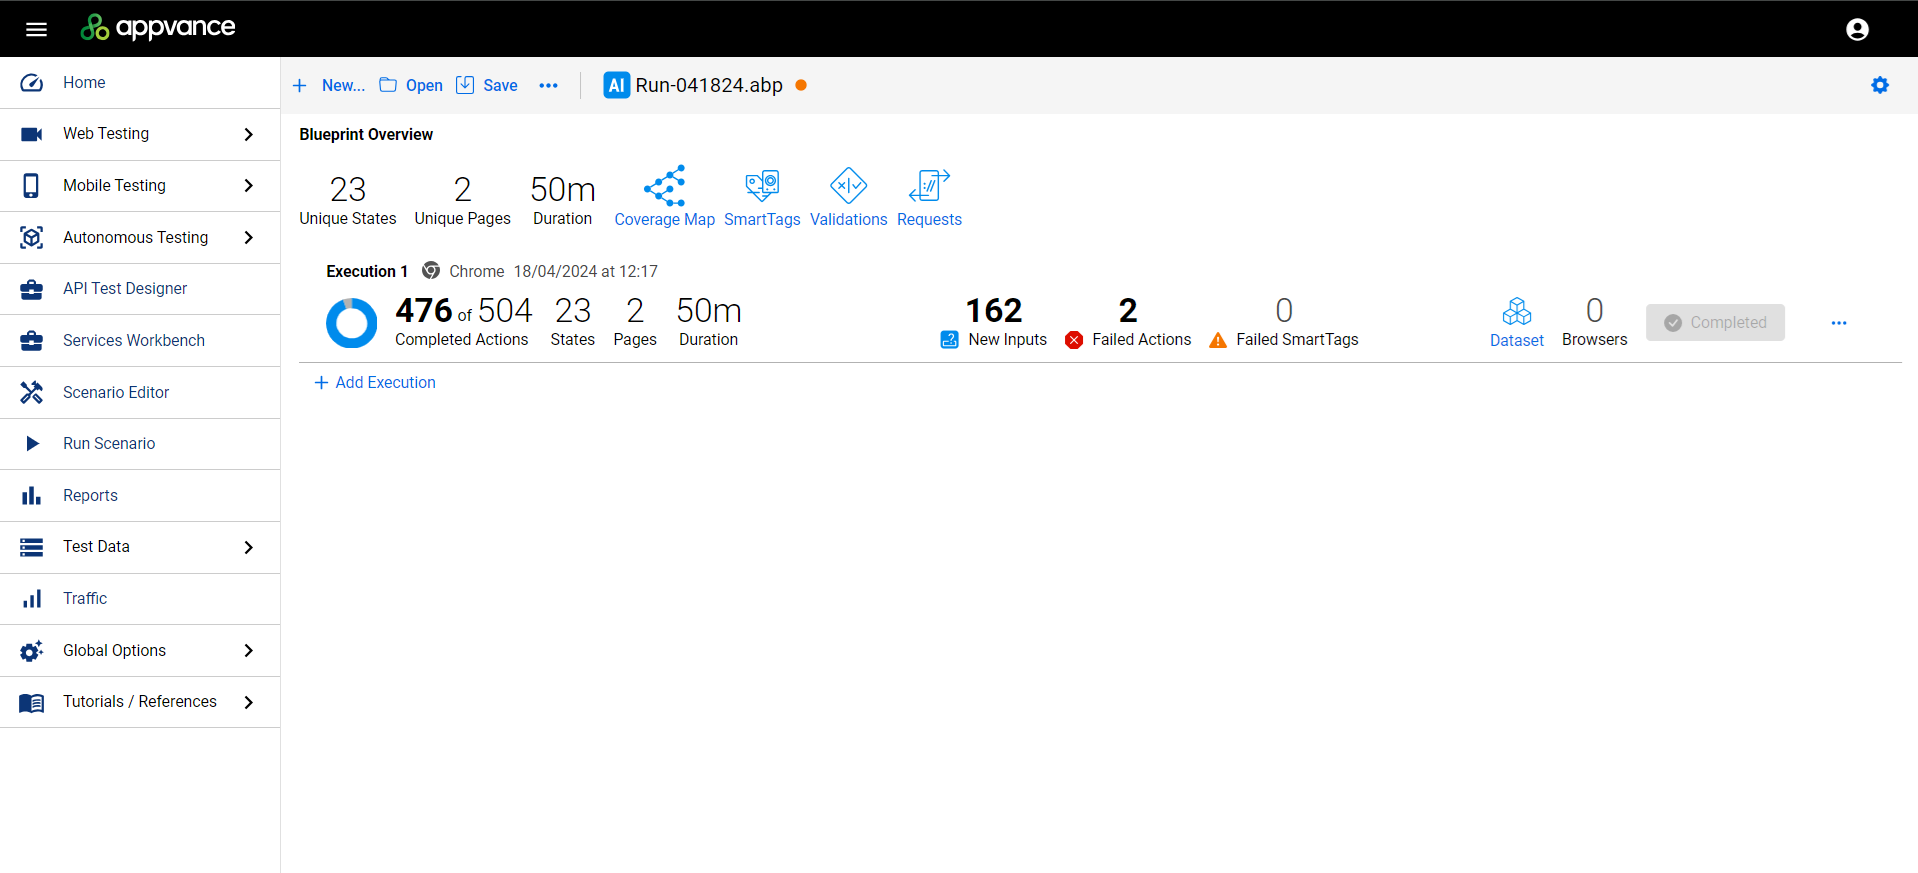
Blueprint Overview shows that the Blueprint had stopped running after entering the URL and clicking all the elements that are found on the page. The two resulting page states are displayed.
-
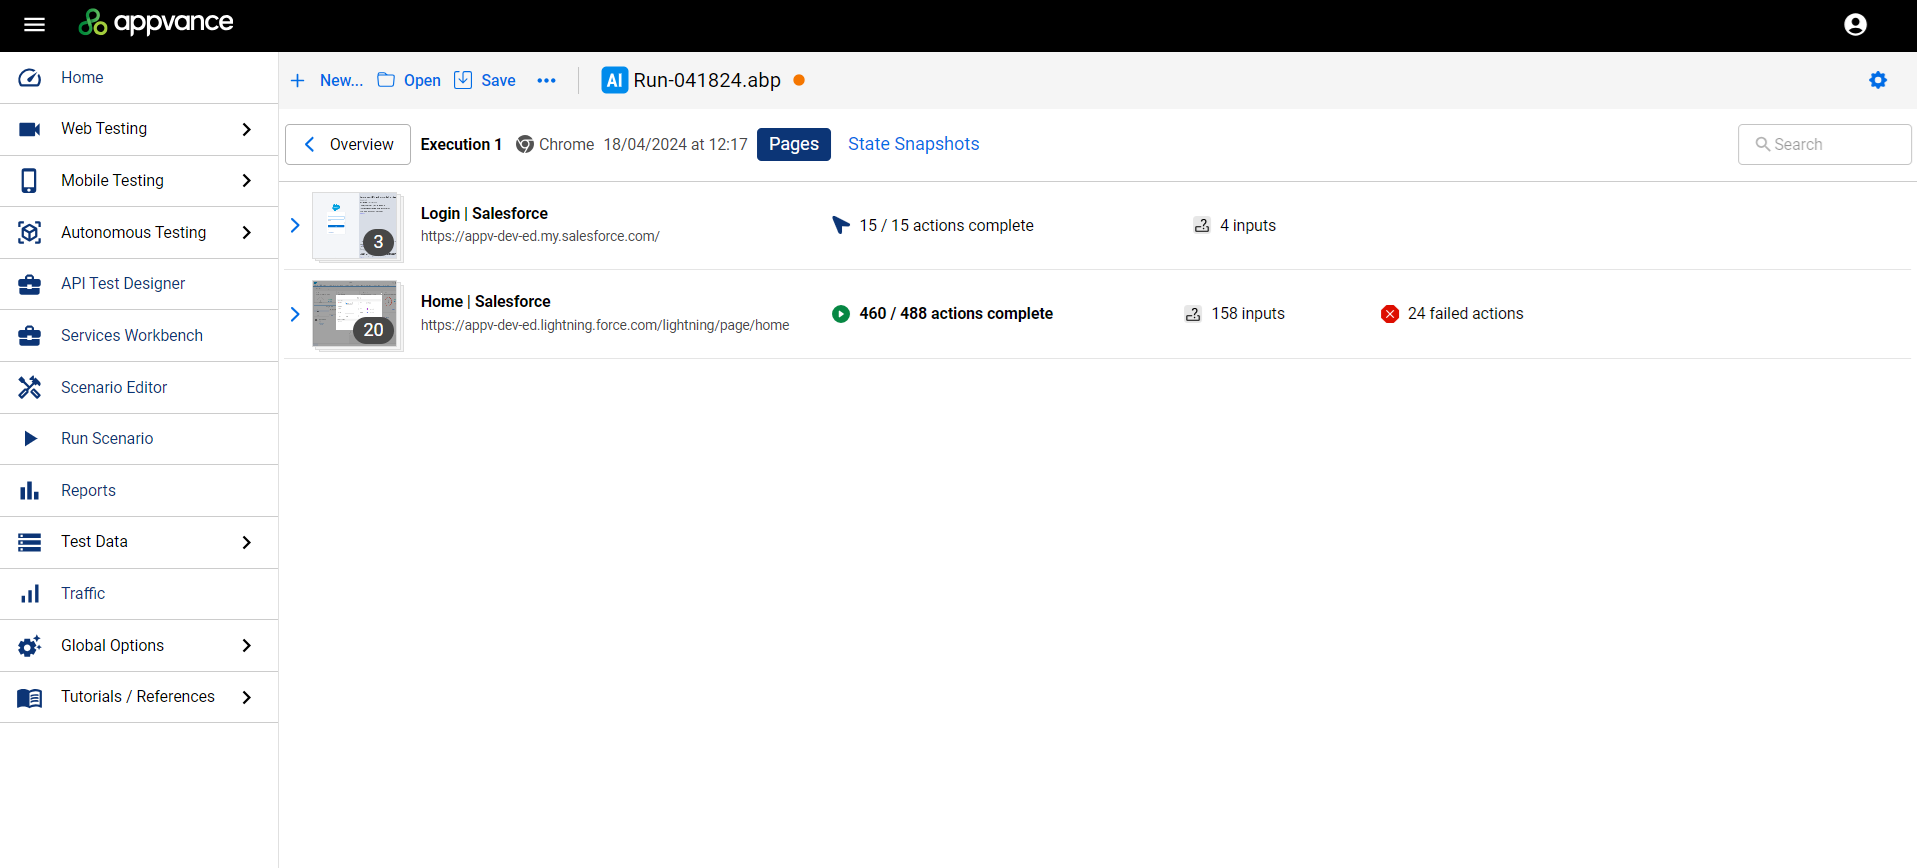
Click Pages or State Snapshots to see the page and page state results.
-
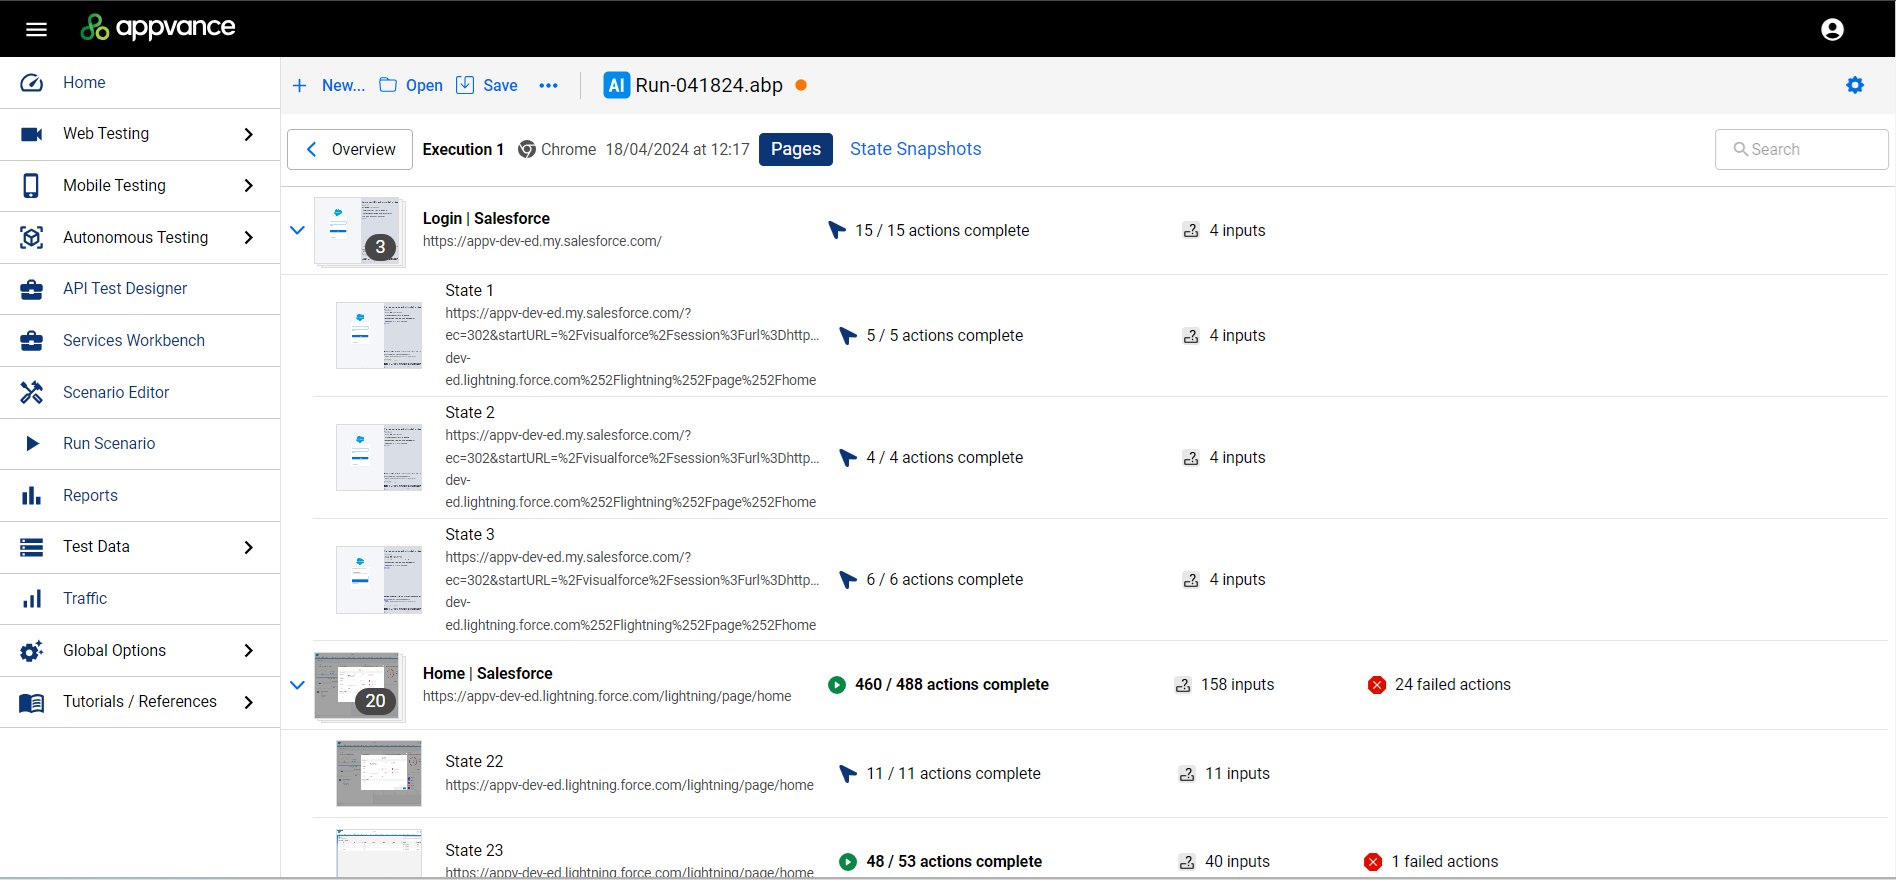
From there you can expand the page results to see more details about the pages and page states.
-
Here you can see that the Blueprint has identified unknown input on the login page for
usernameandpassword. Click Create Custom Action to begin training the AI how to process those inputs.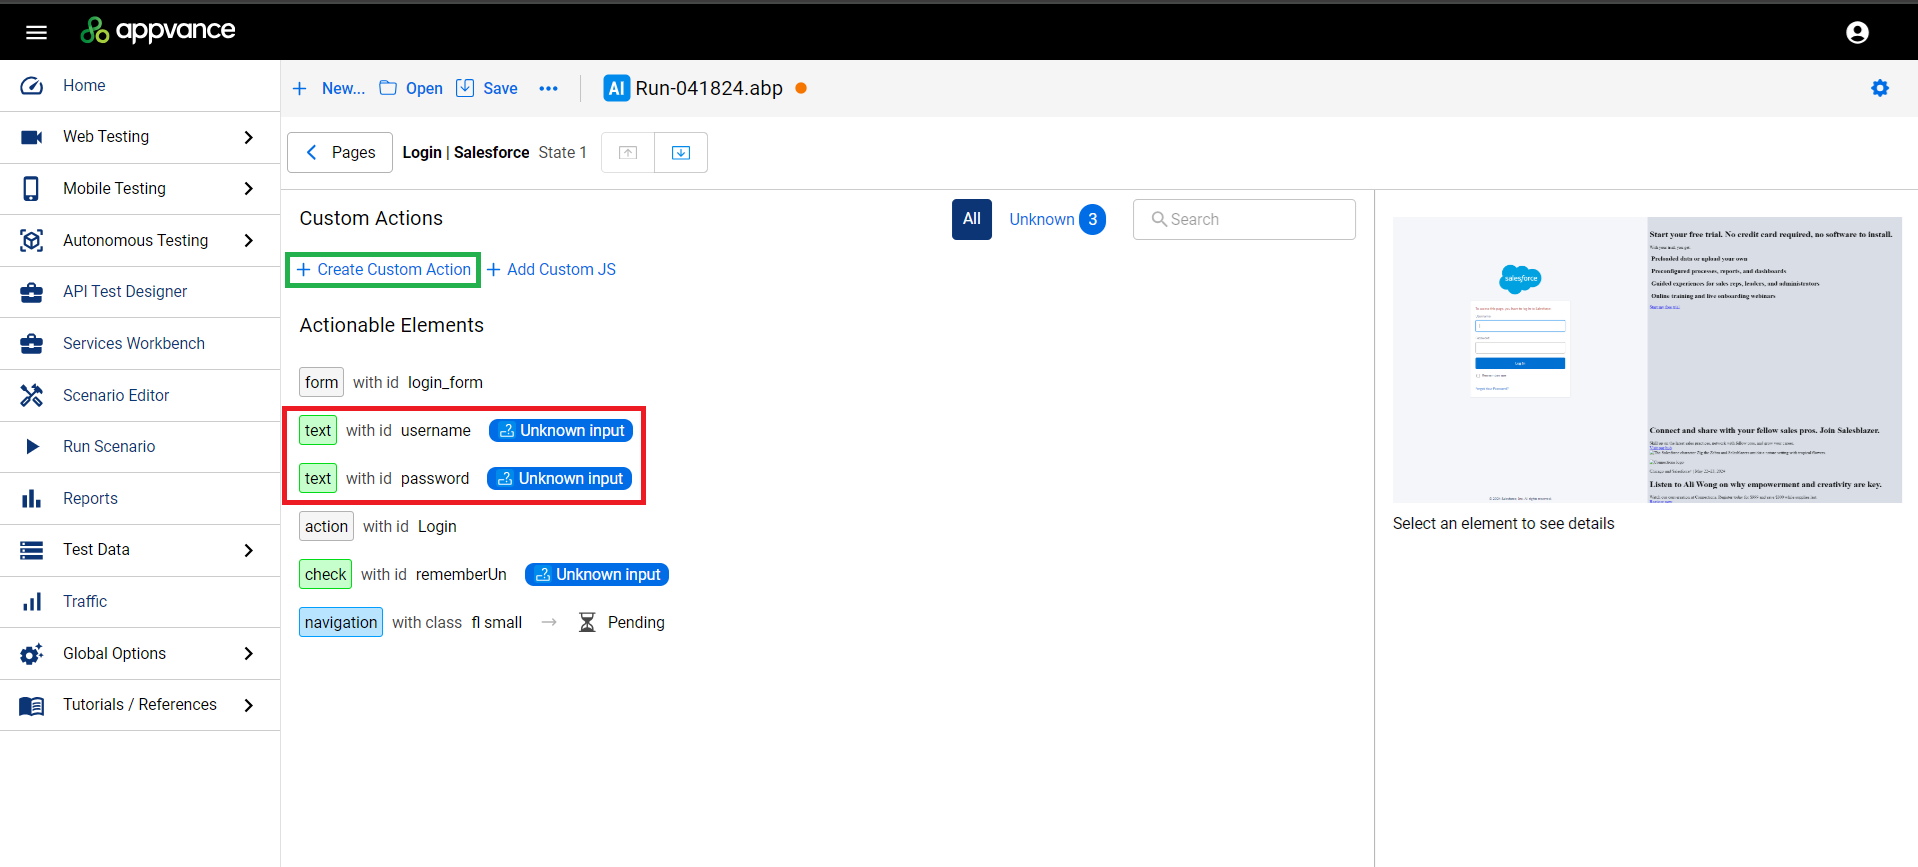
-
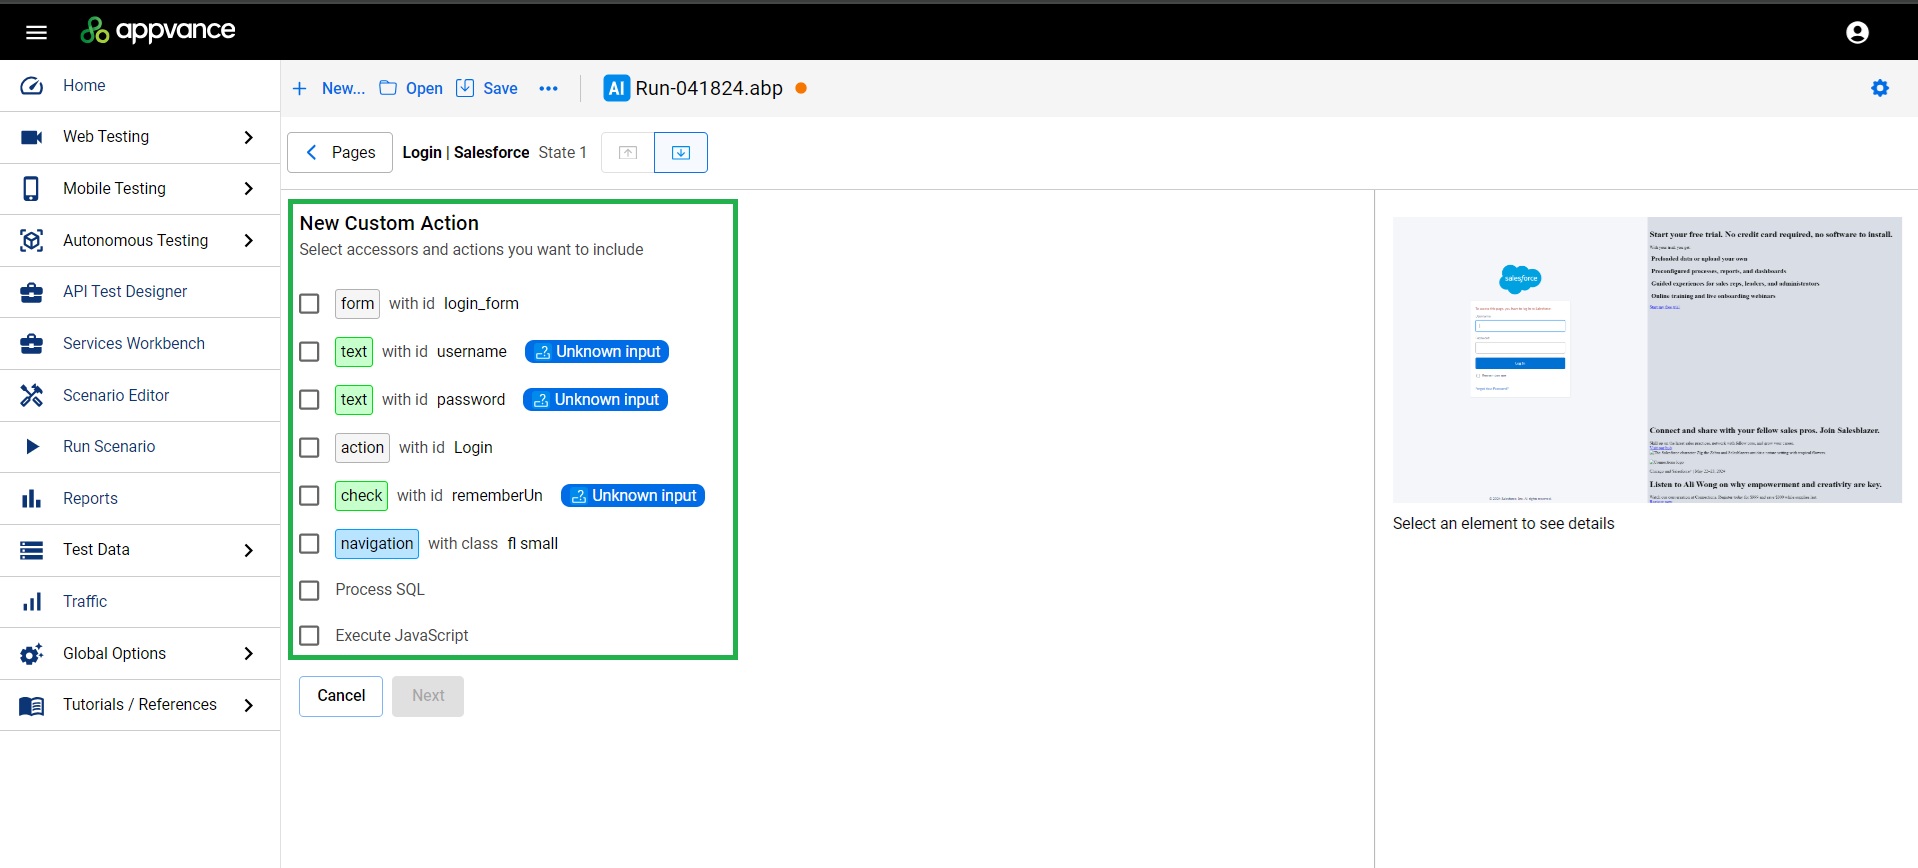
The New Custom Action section shows which actions for which you can create custom actions.
-
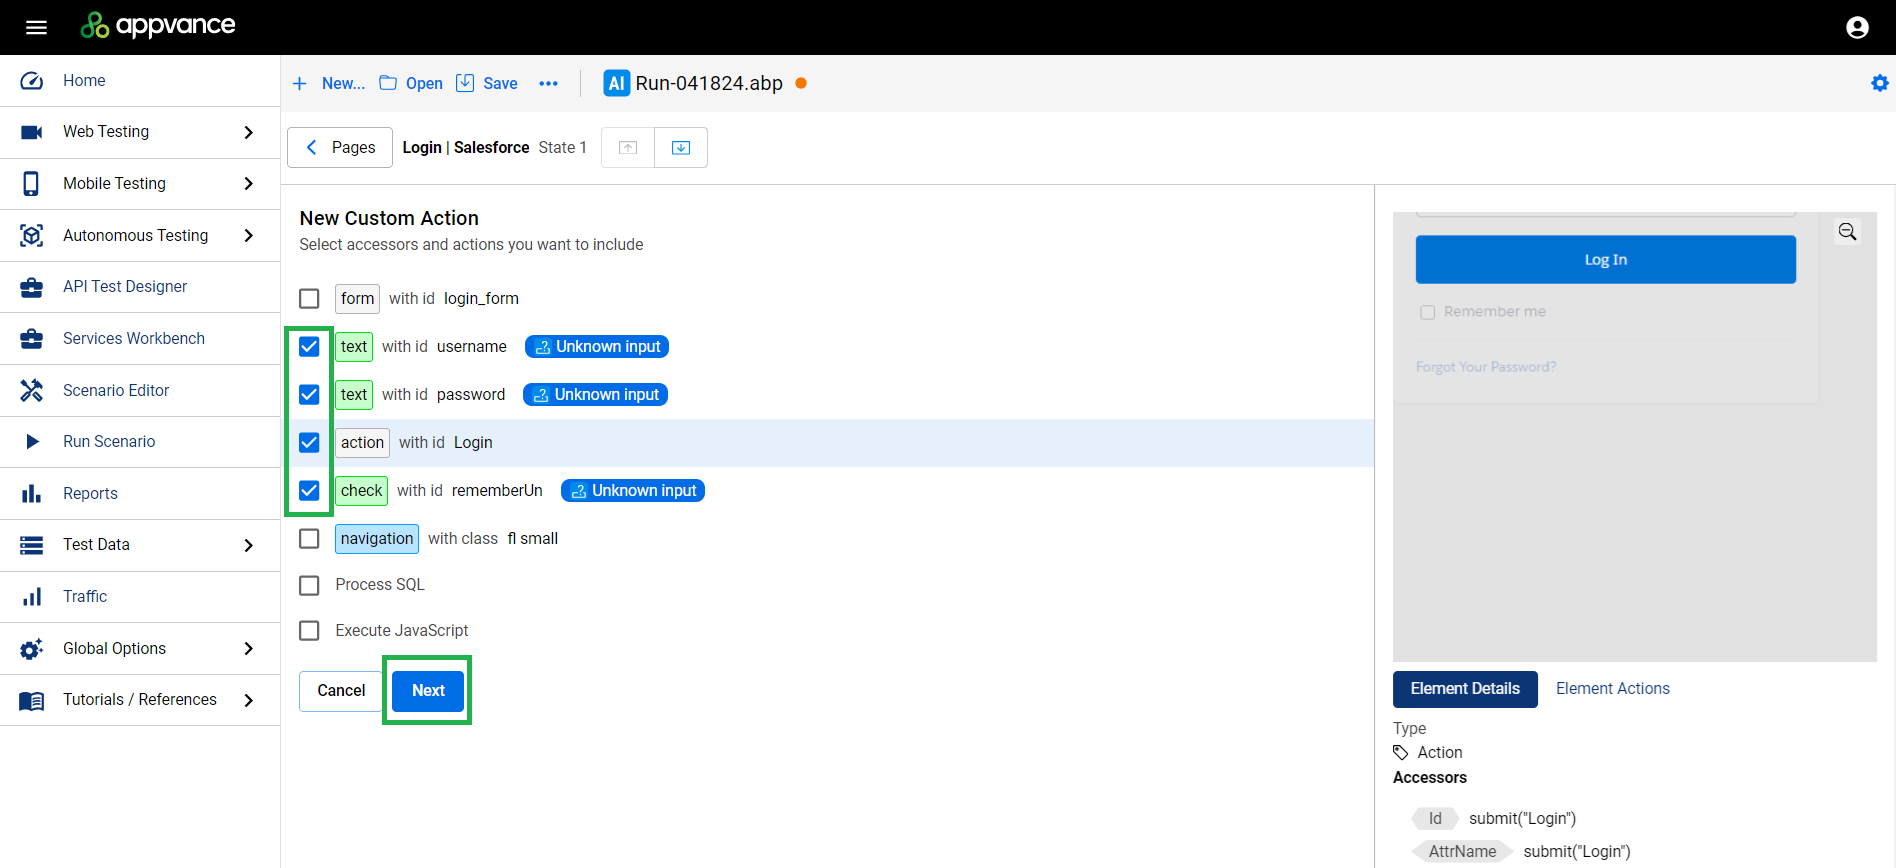
Select the checkboxs for the actions for which you want to create new custom actions. In this example it is for the actions associated with entering the
usernameandpassword.Click Nextafter making the selections.
-
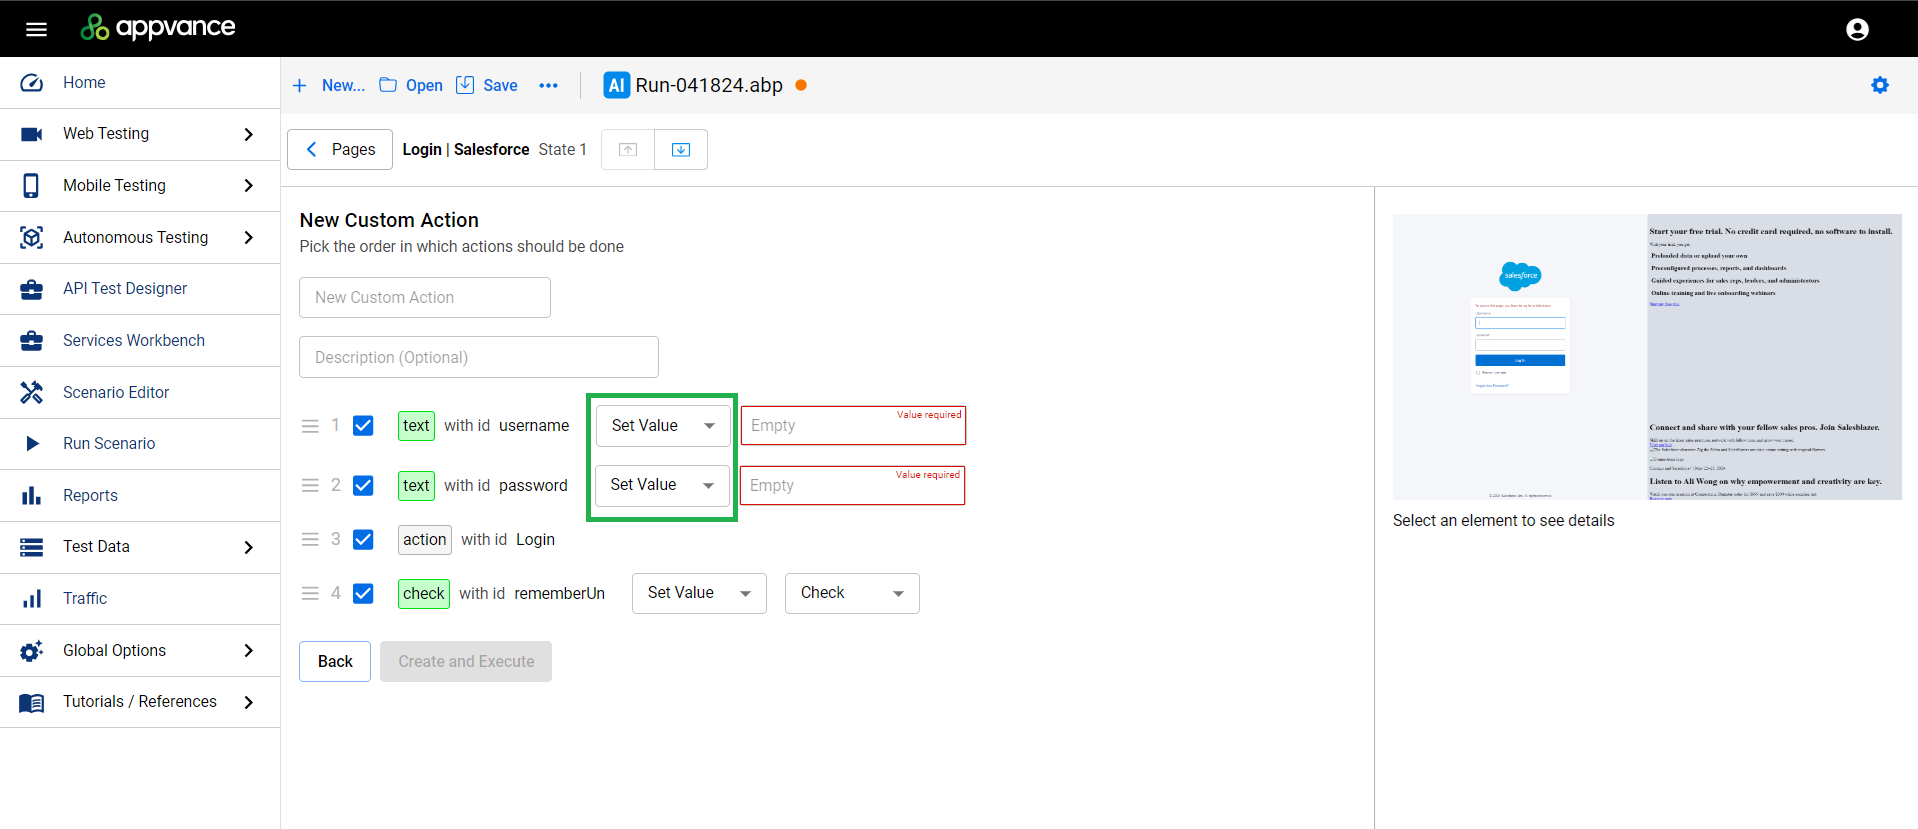
In the action dropdown select Set Value.
-
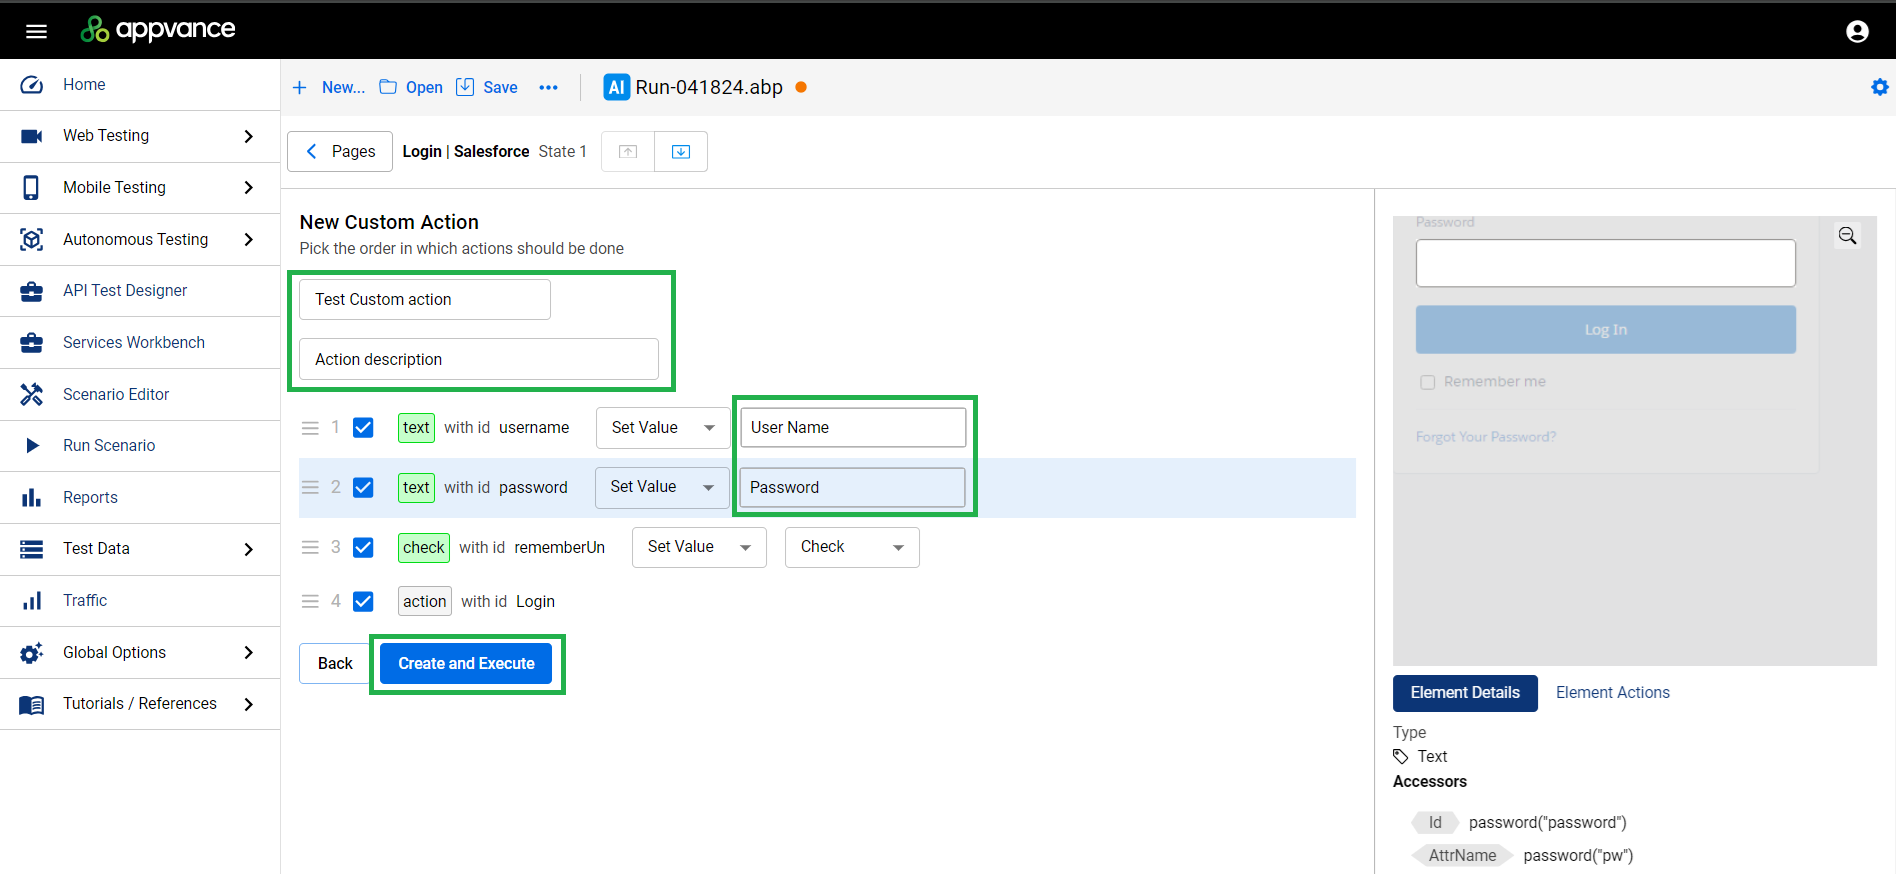
Name your new custom action. You can also enter an optional description.
In the input fields, enter the necessary values. If needed you can change the sequence by dragging and dropping the individual actions.
Click Create and Execute when finished.
-
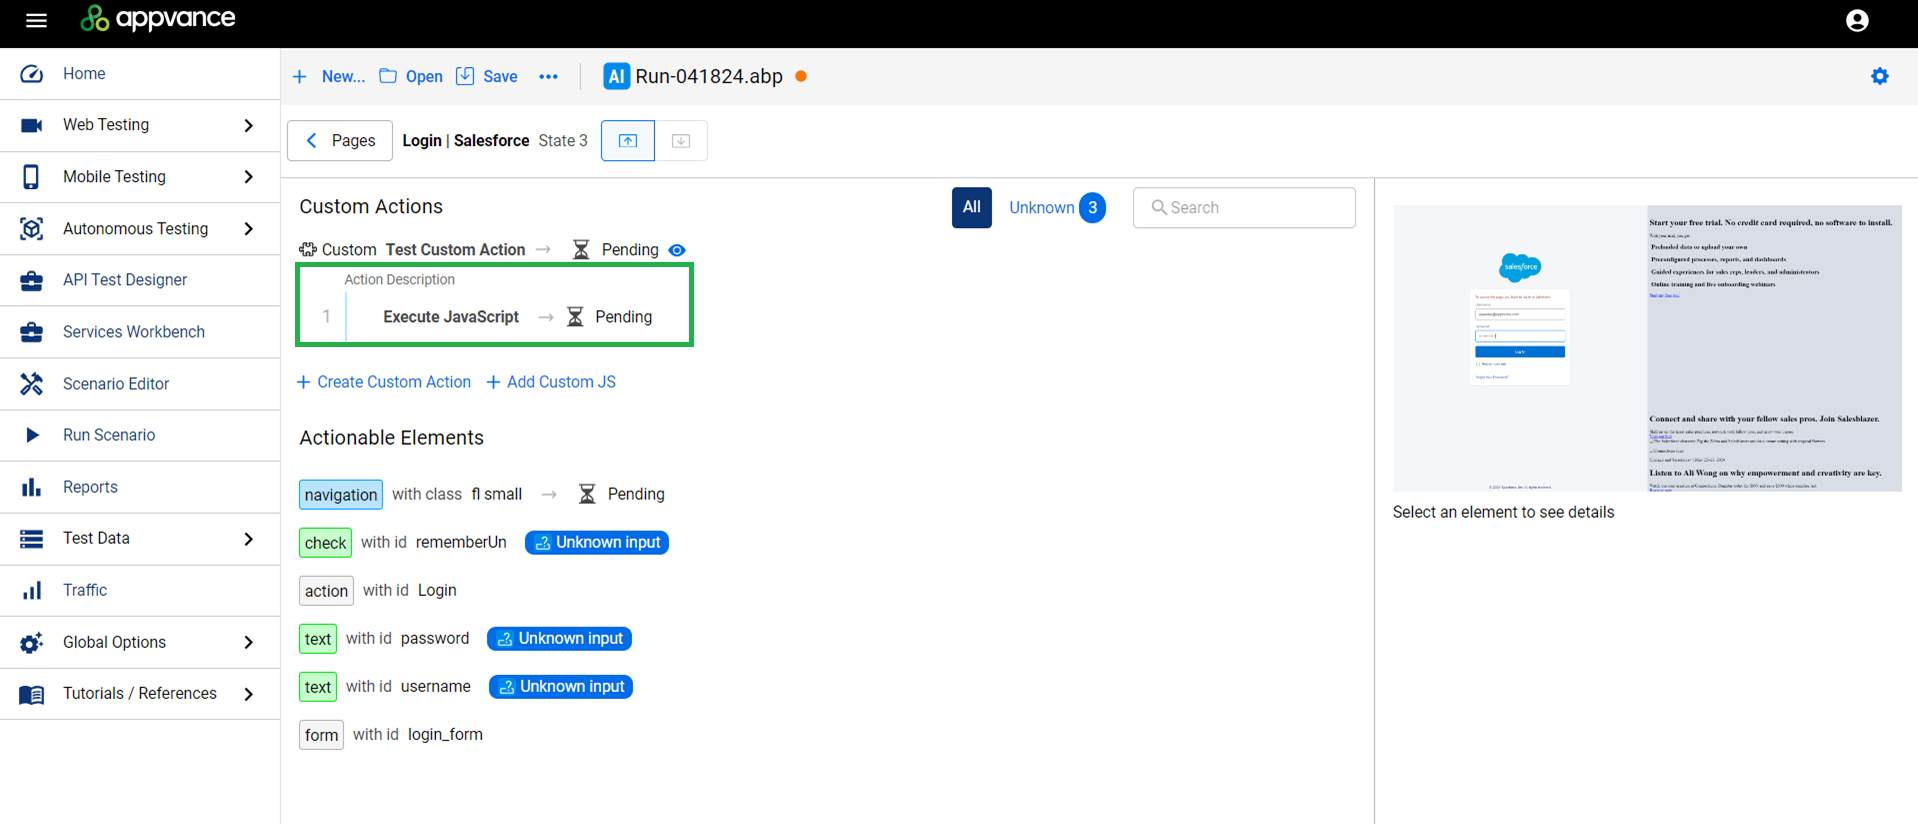
Your new custom action shows as Pending.
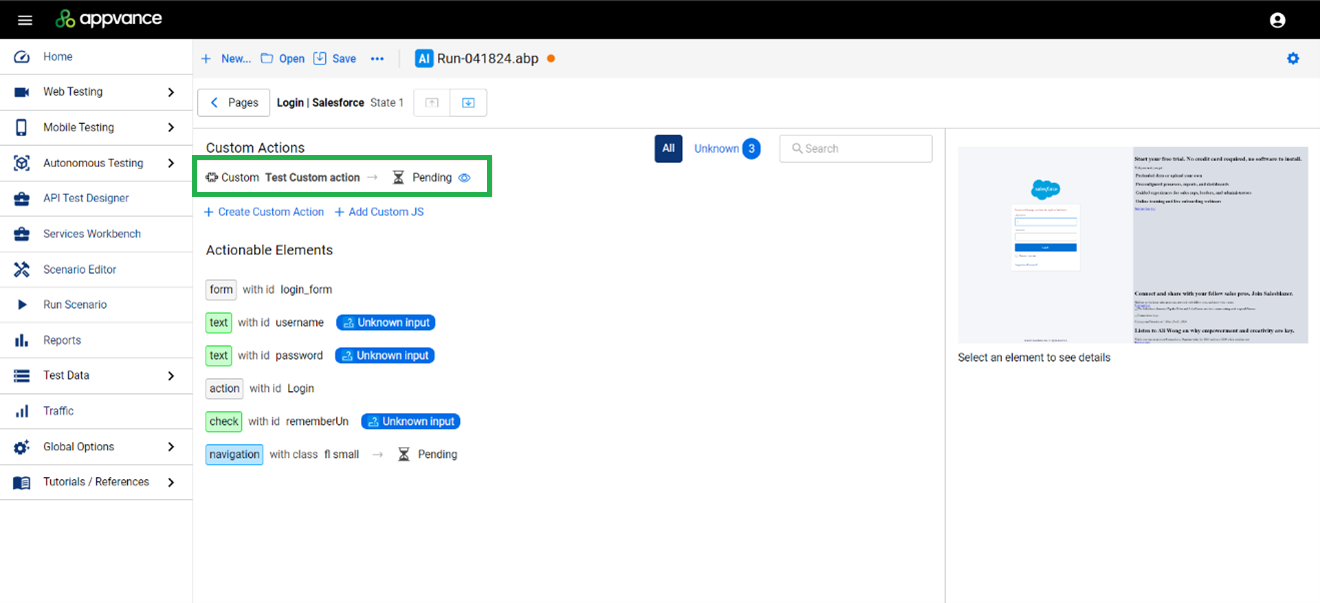
You can see all of the related actions.
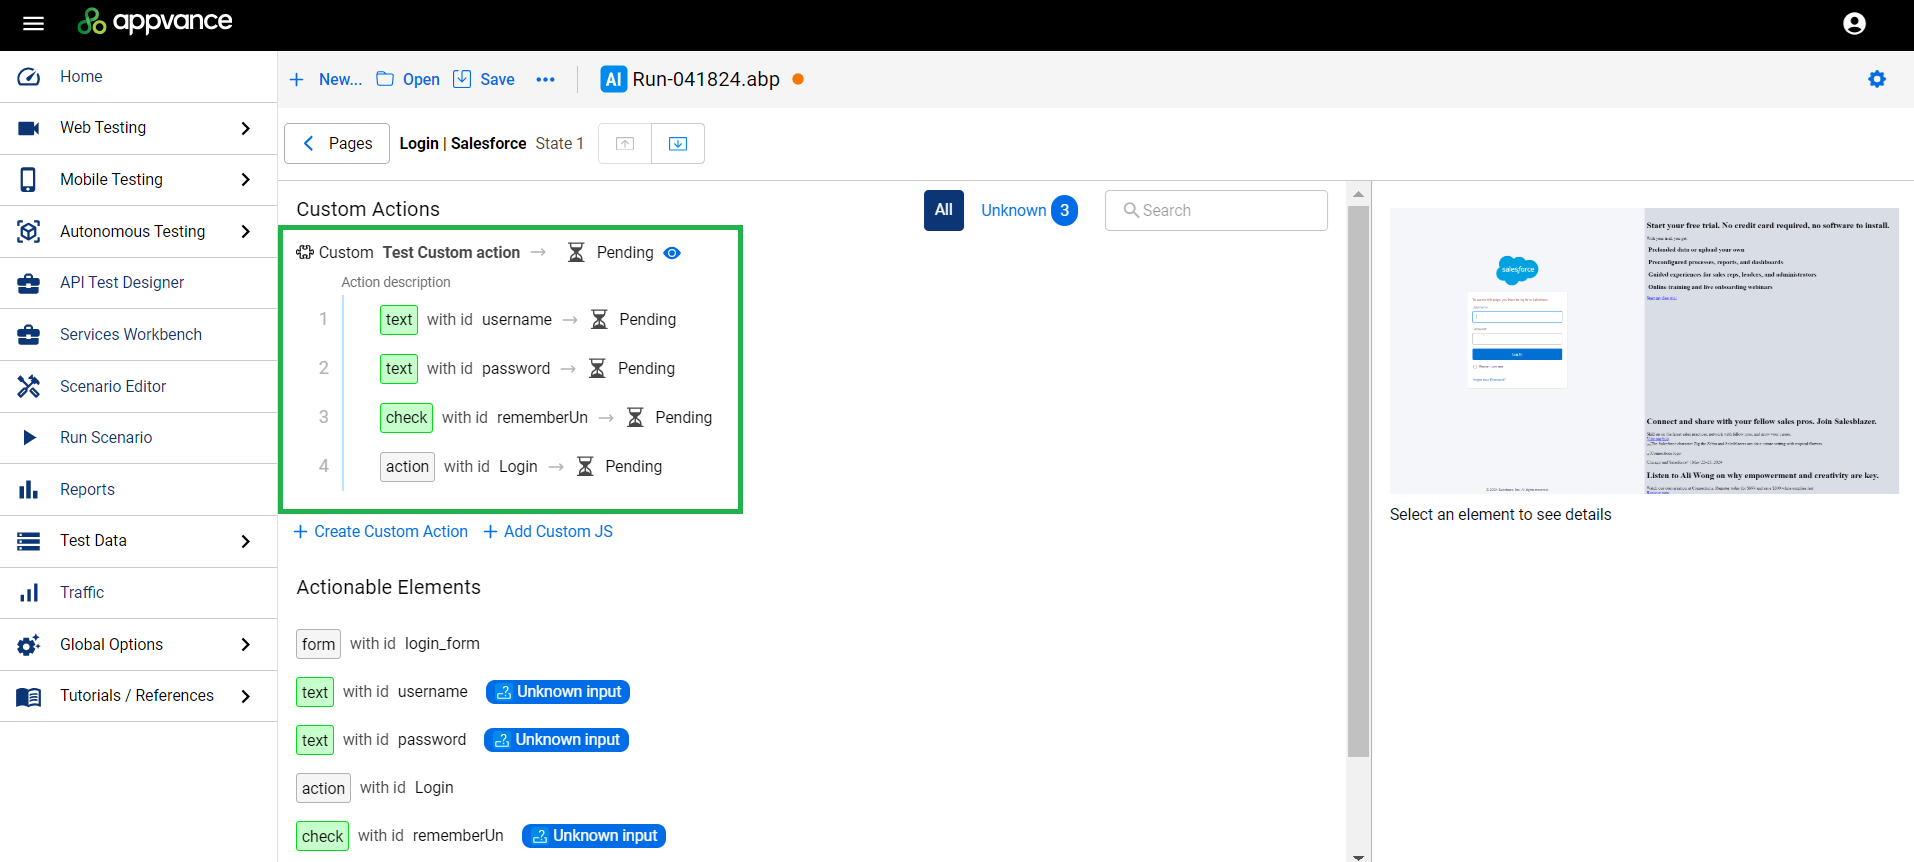
-
Click Add Custom Action and select Execute JavaScript. Click Next.
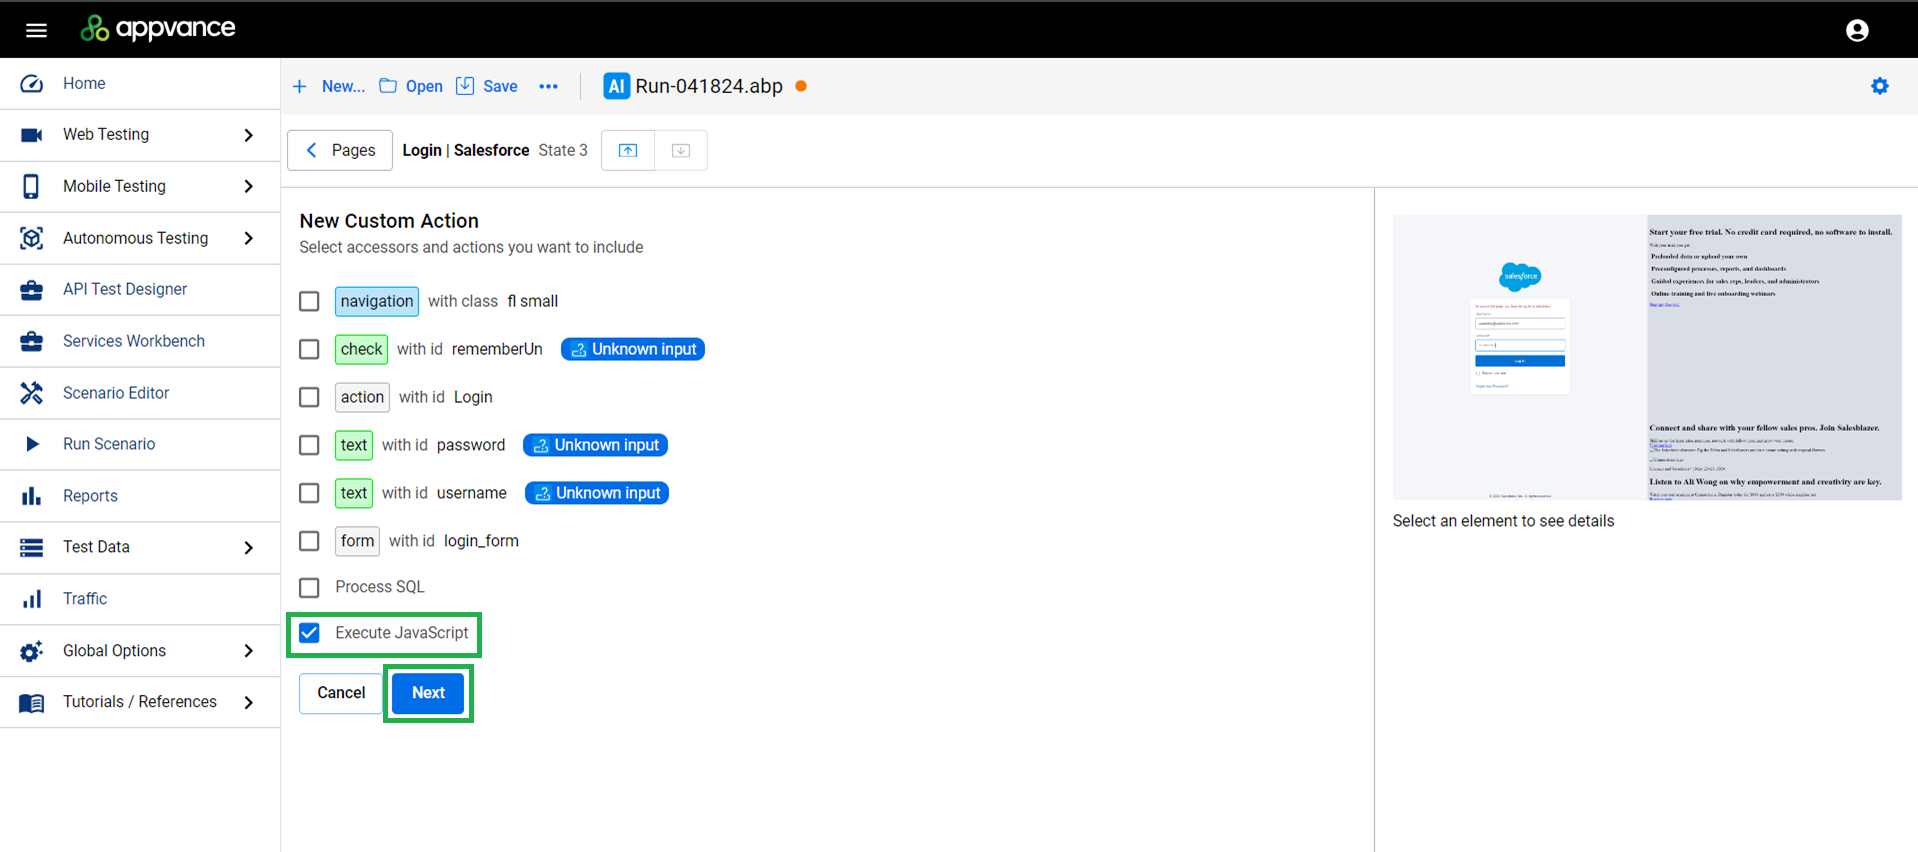
-
Enter the custom action name and description and click Create and Execute.
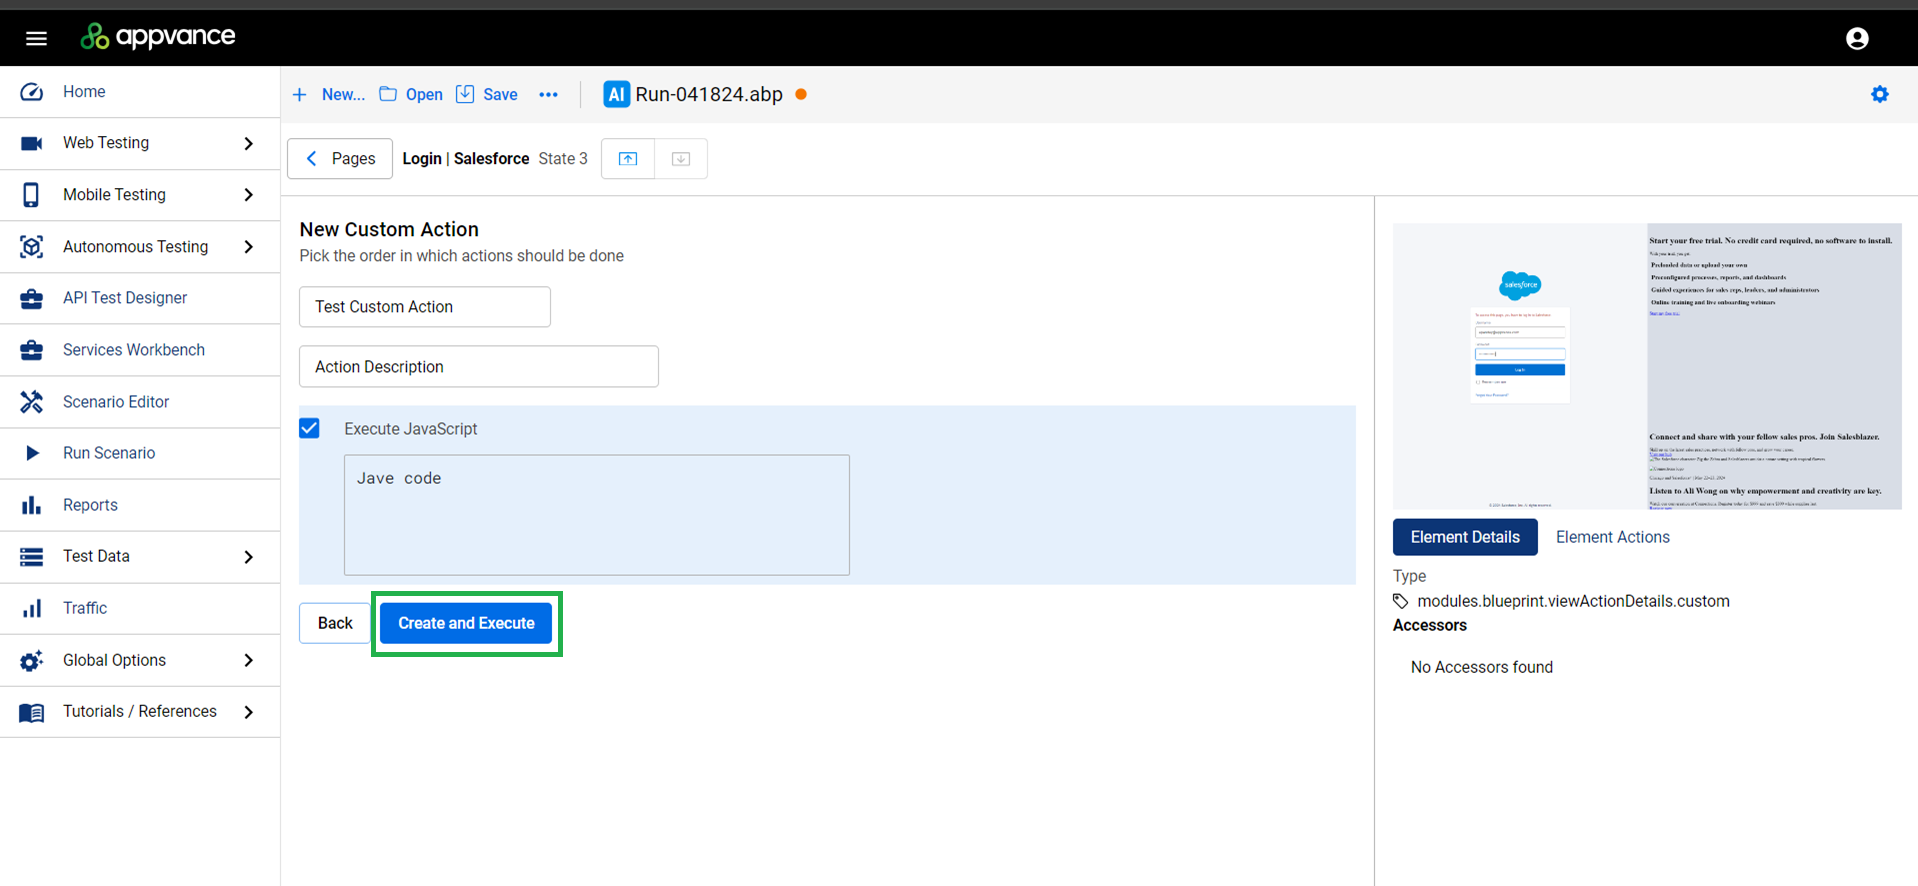
-
Your new custom action shows as Pending.
-
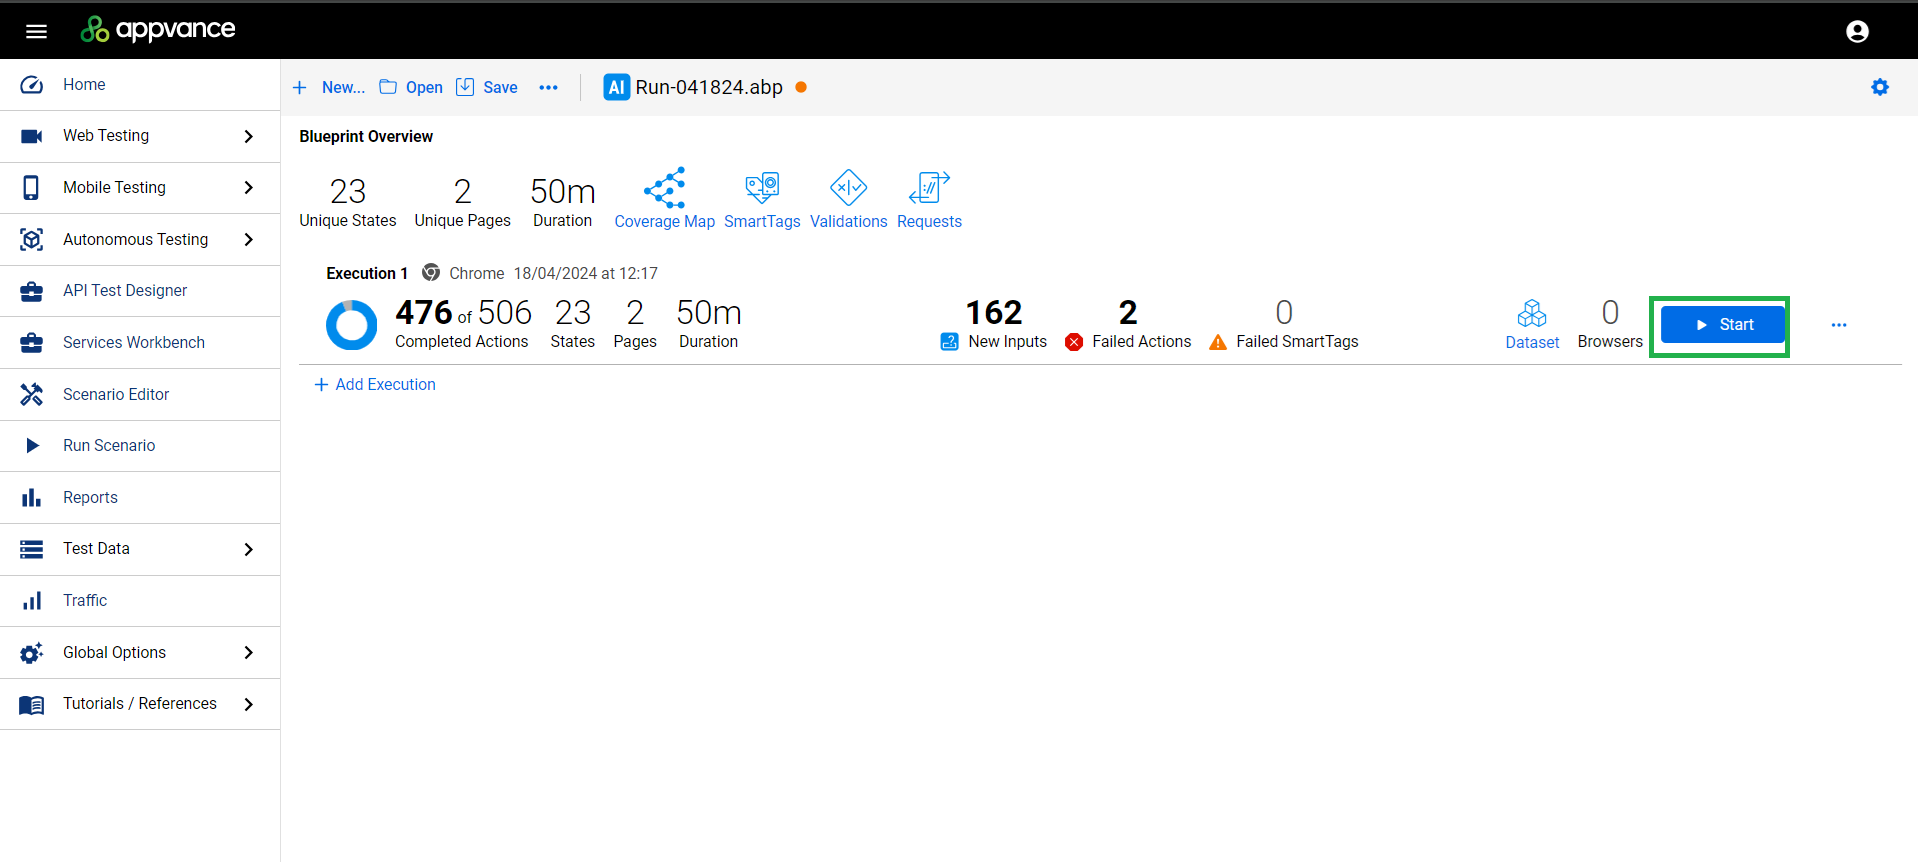
Navigate back to the Blueprint Overview page and verify that the Start button is enabled. This will tell you that the newly added custom actions can be executed by the Blueprint.
-
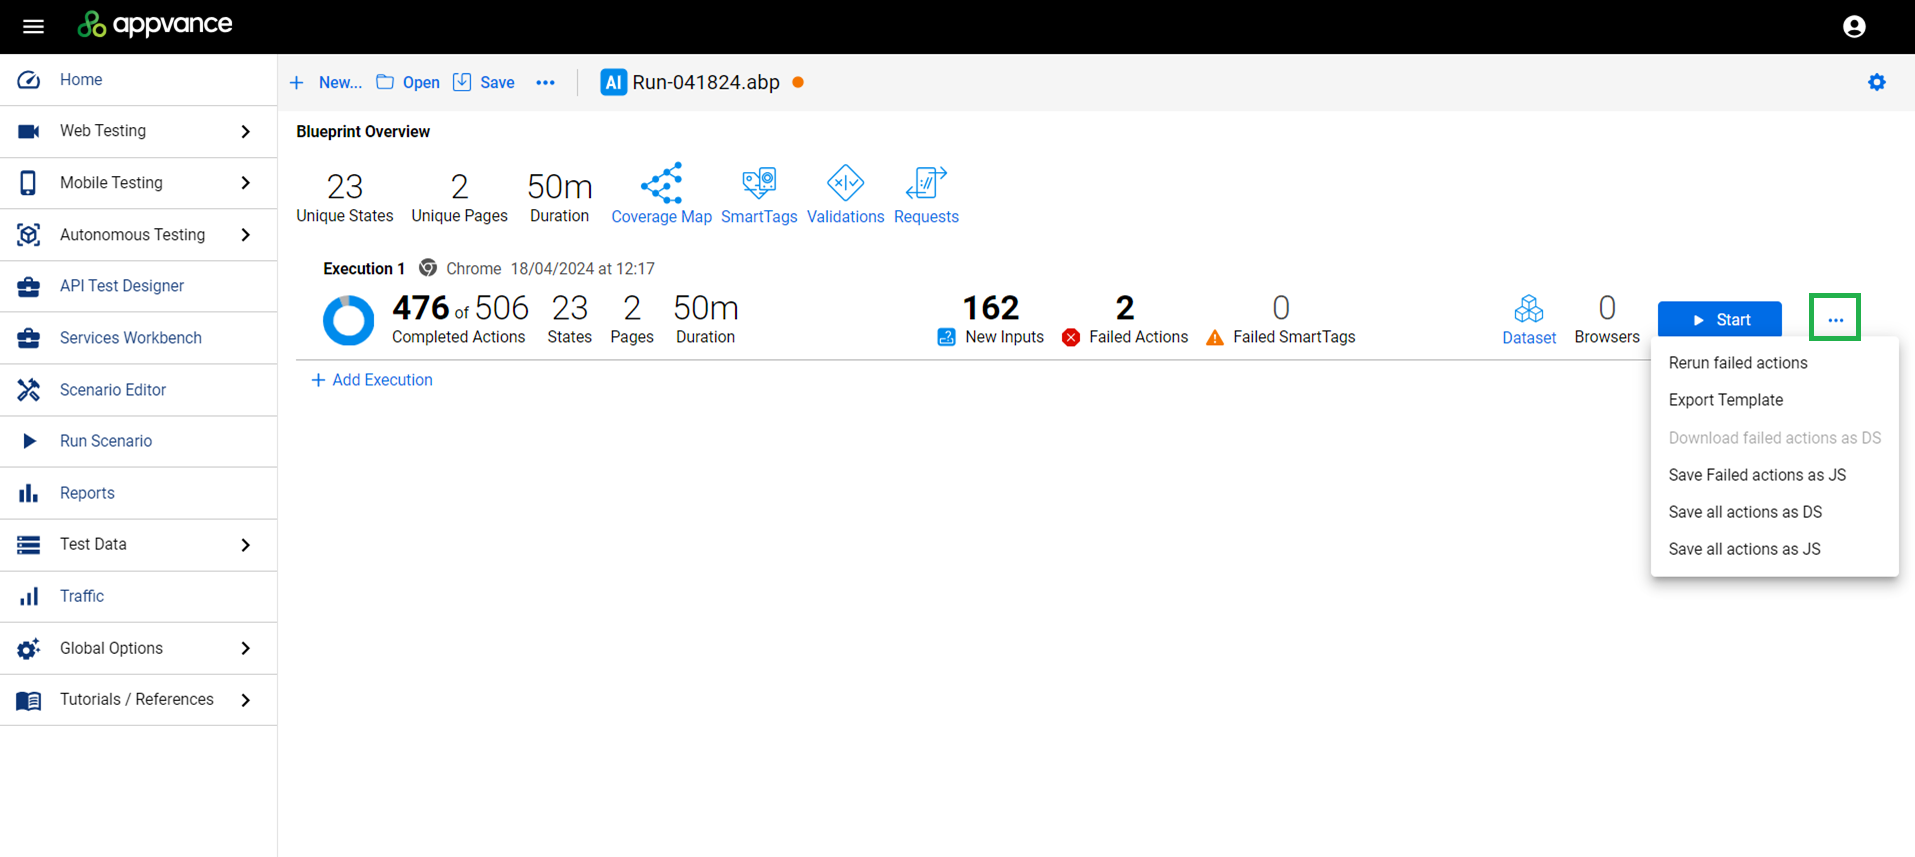
Click on additional options menu (the three dots) and check the options that are available.
-
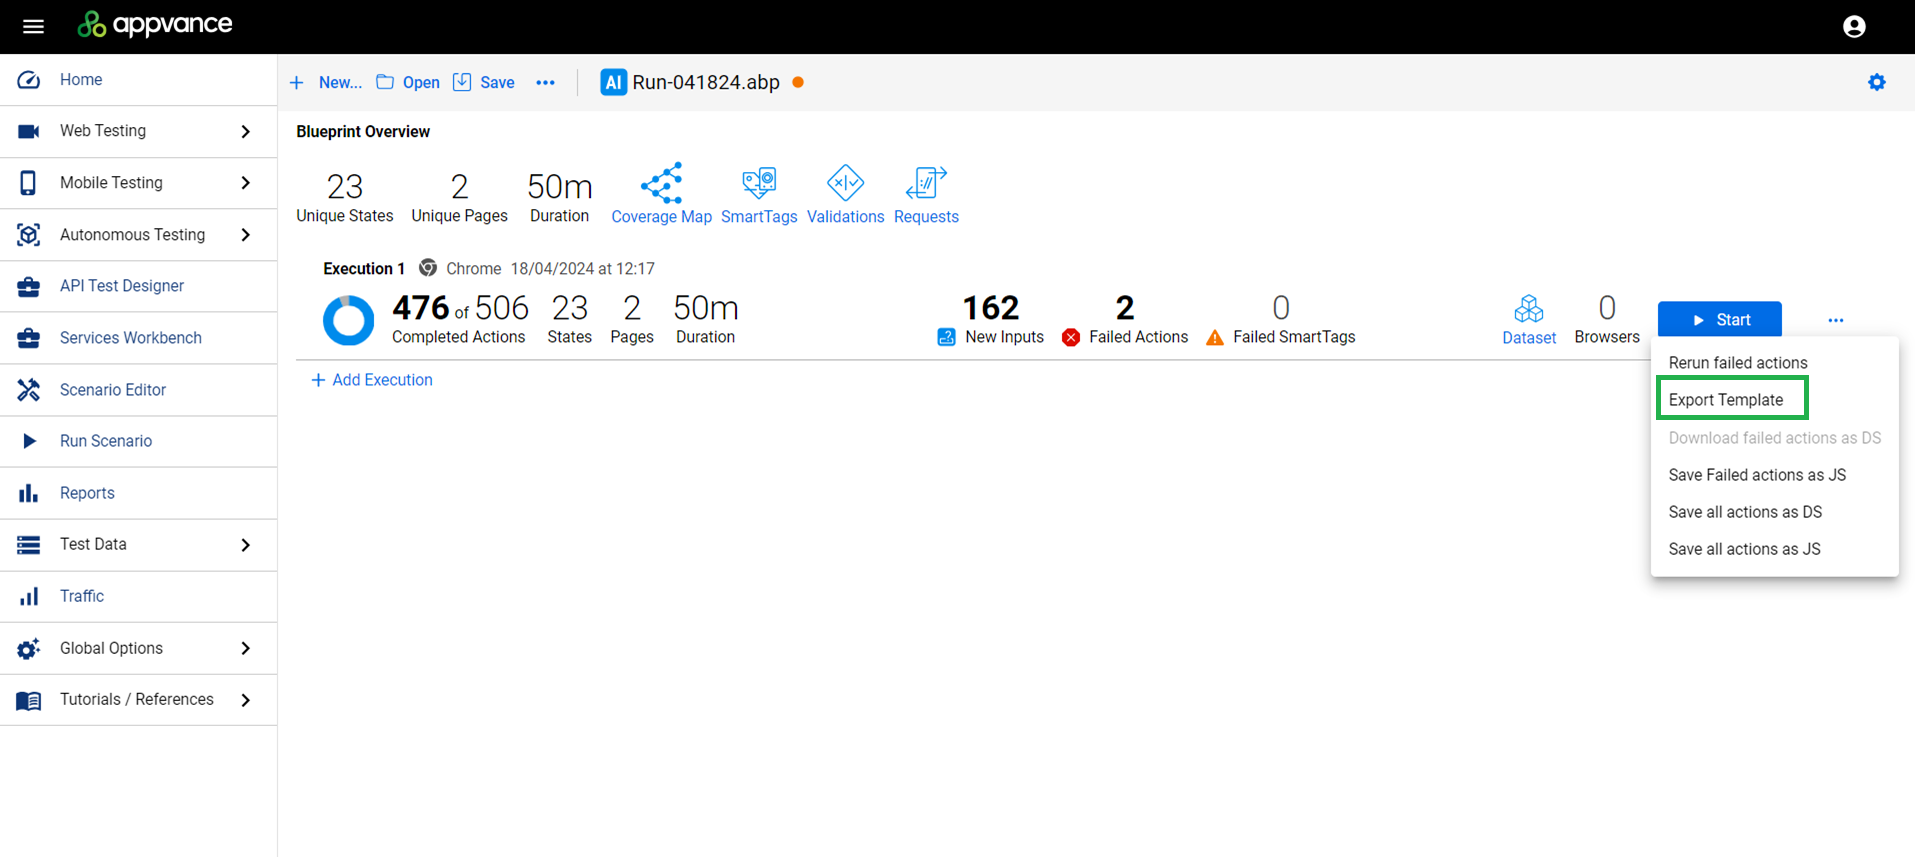
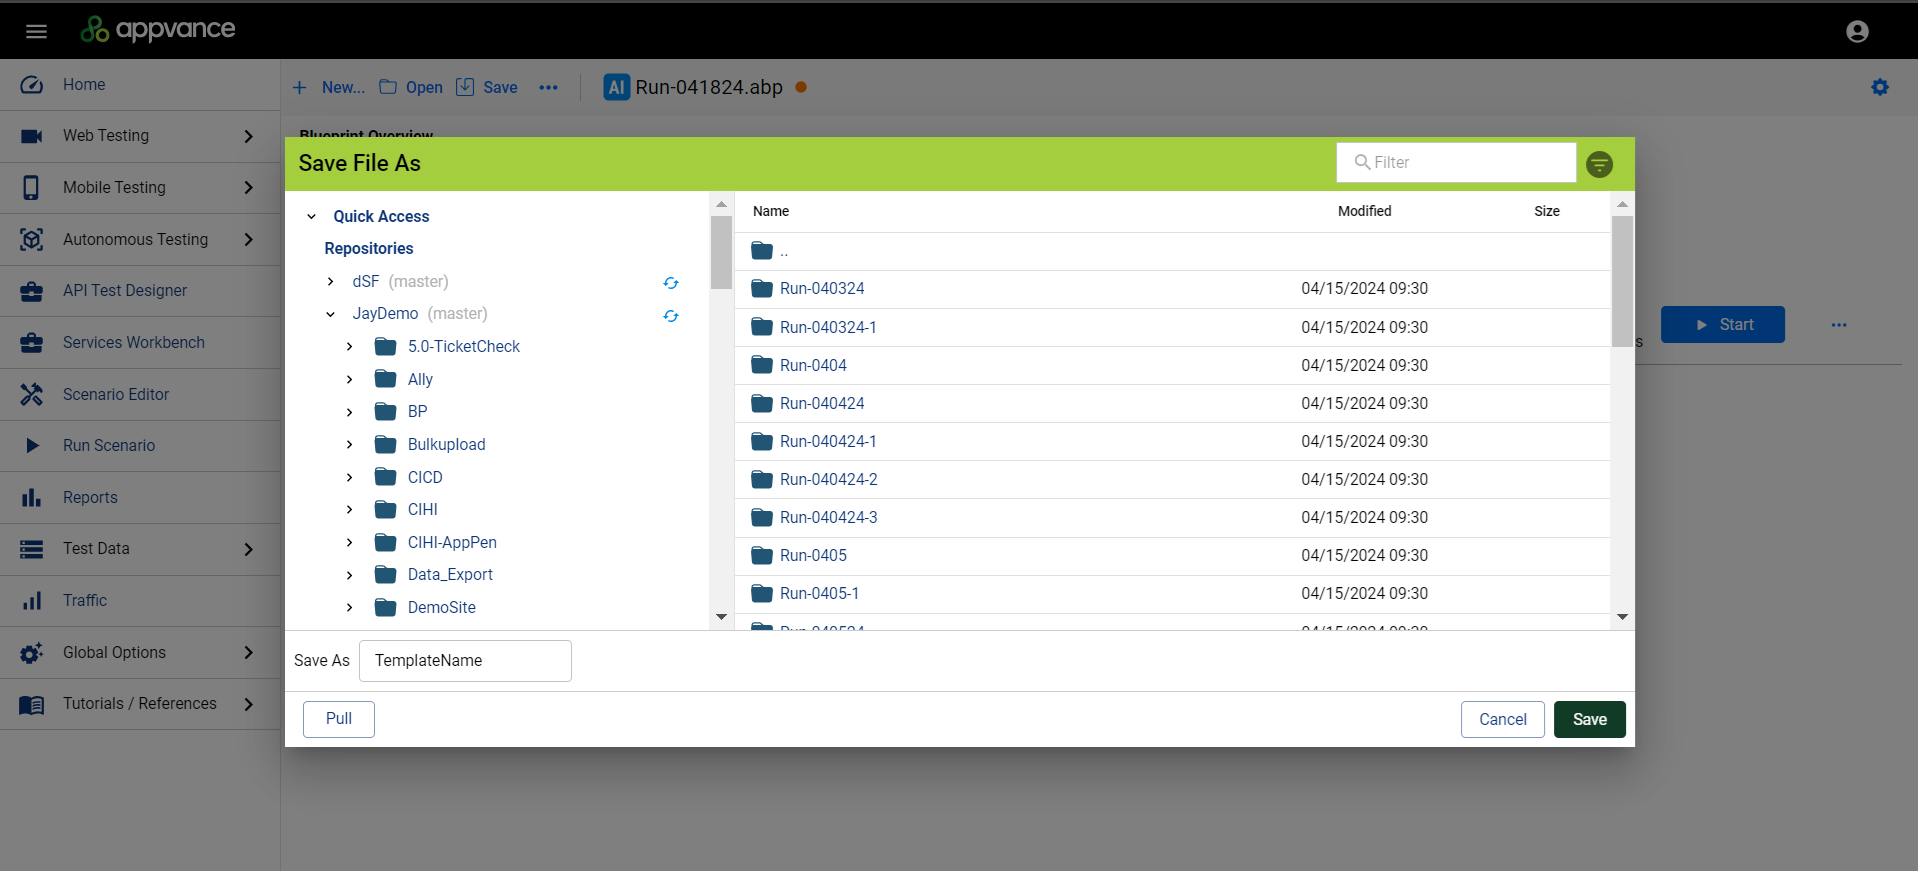
Click Export Template.
-
Save the Blueprint template.
-
Click New.
-
Click Blueprint from Template.
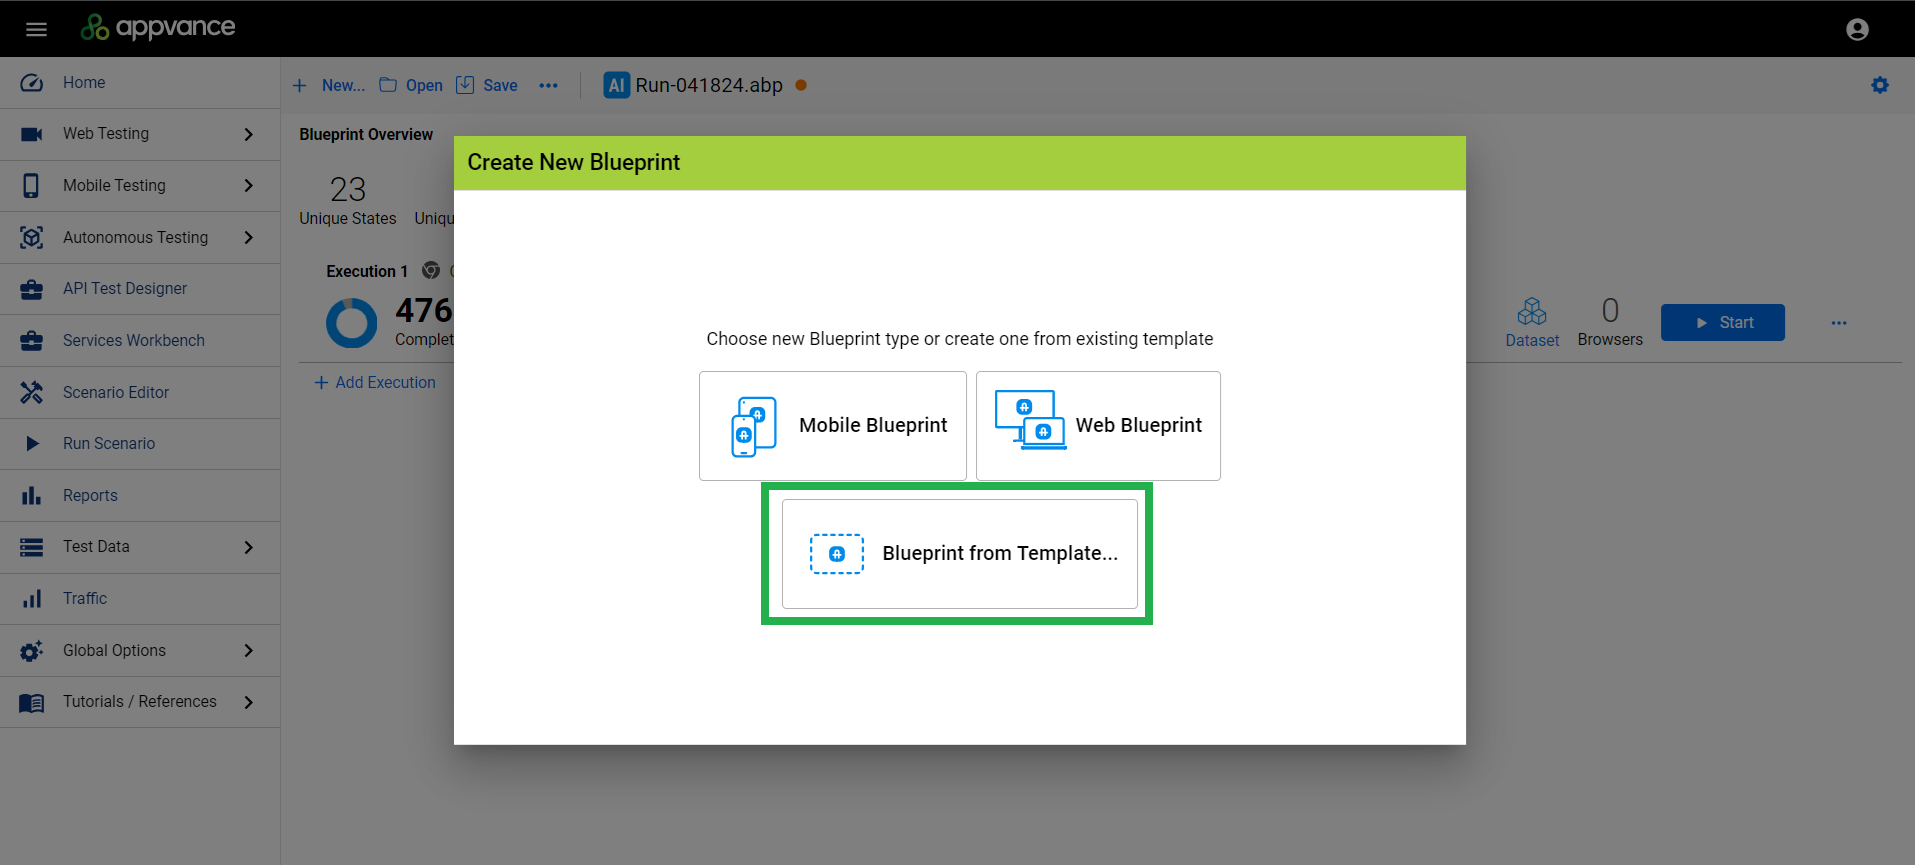
See AI Script Generation Templates for more information.
-
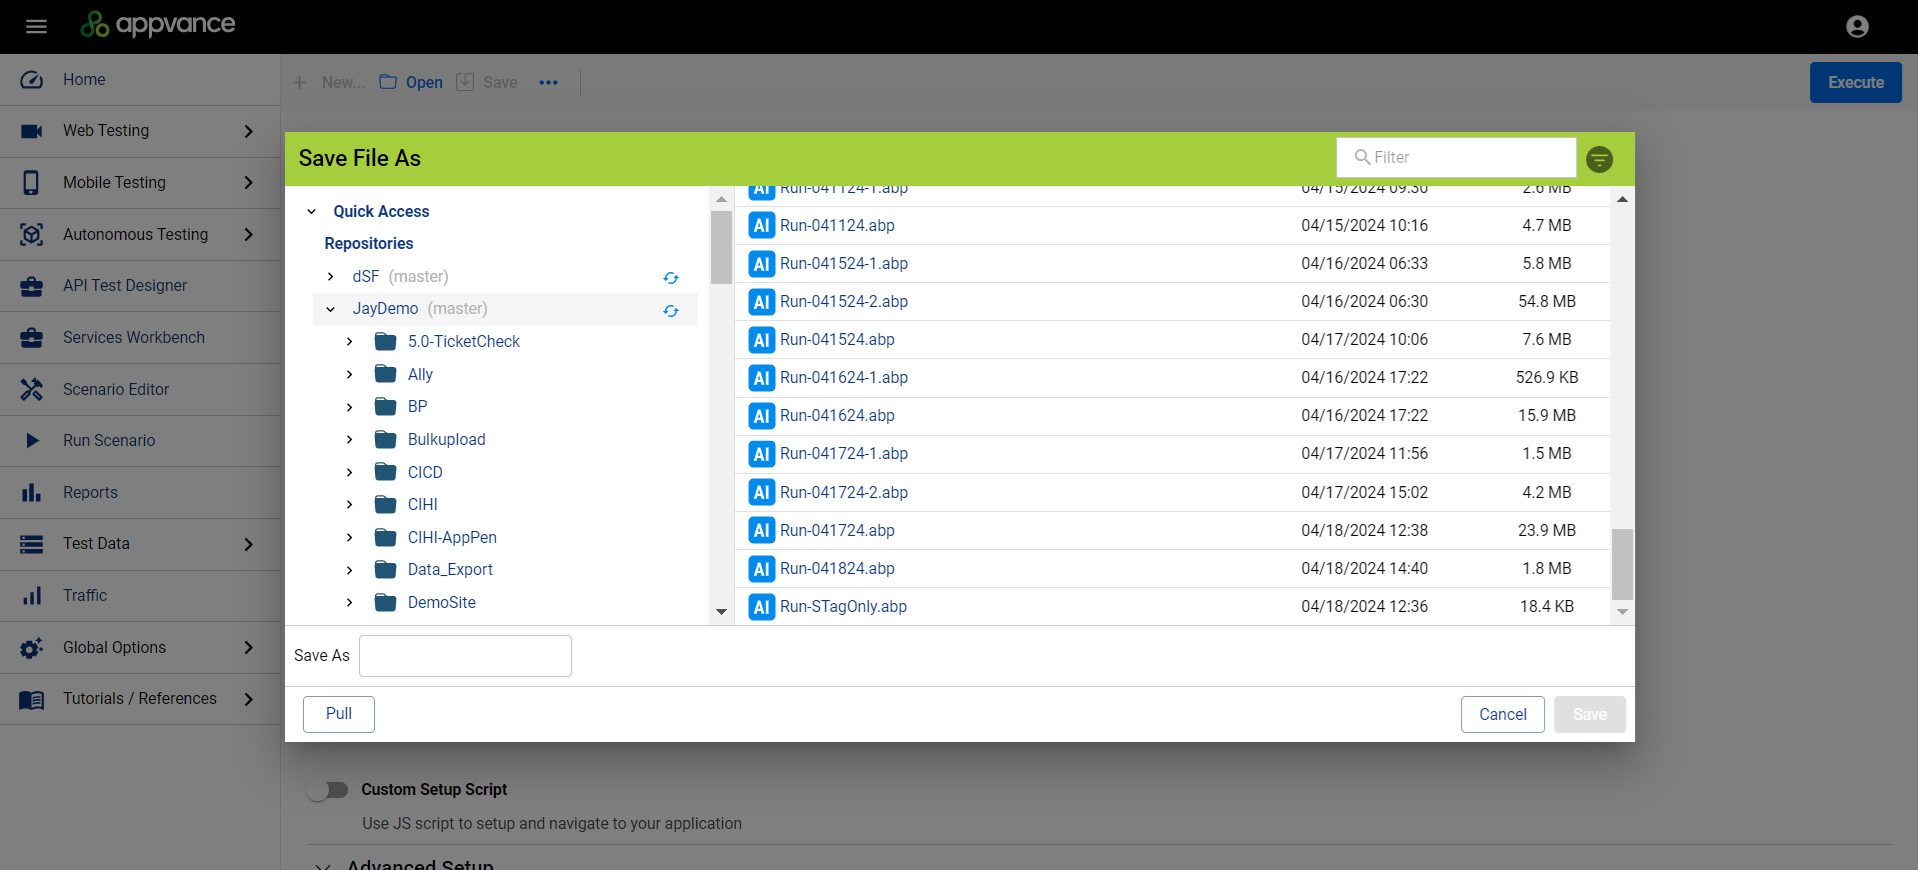
Open the Blueprint template file that you just saved.
-
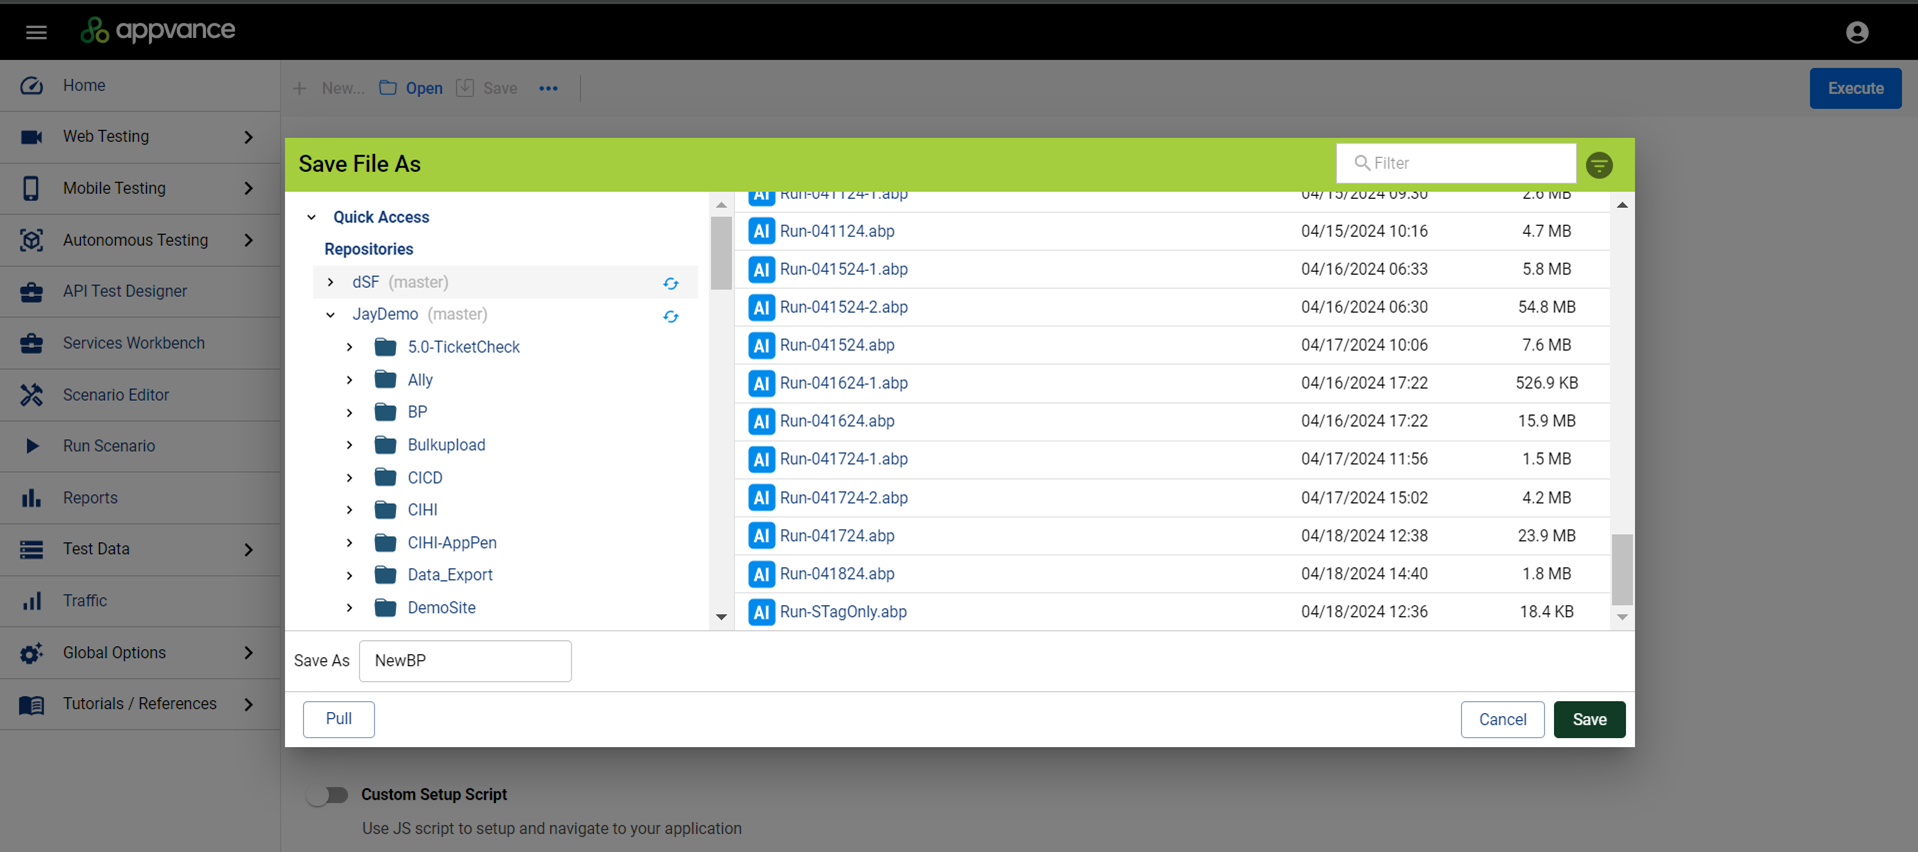
After opening the template file you are prompted to save a new blueprint file. Provide the blueprint name and click Save.
-
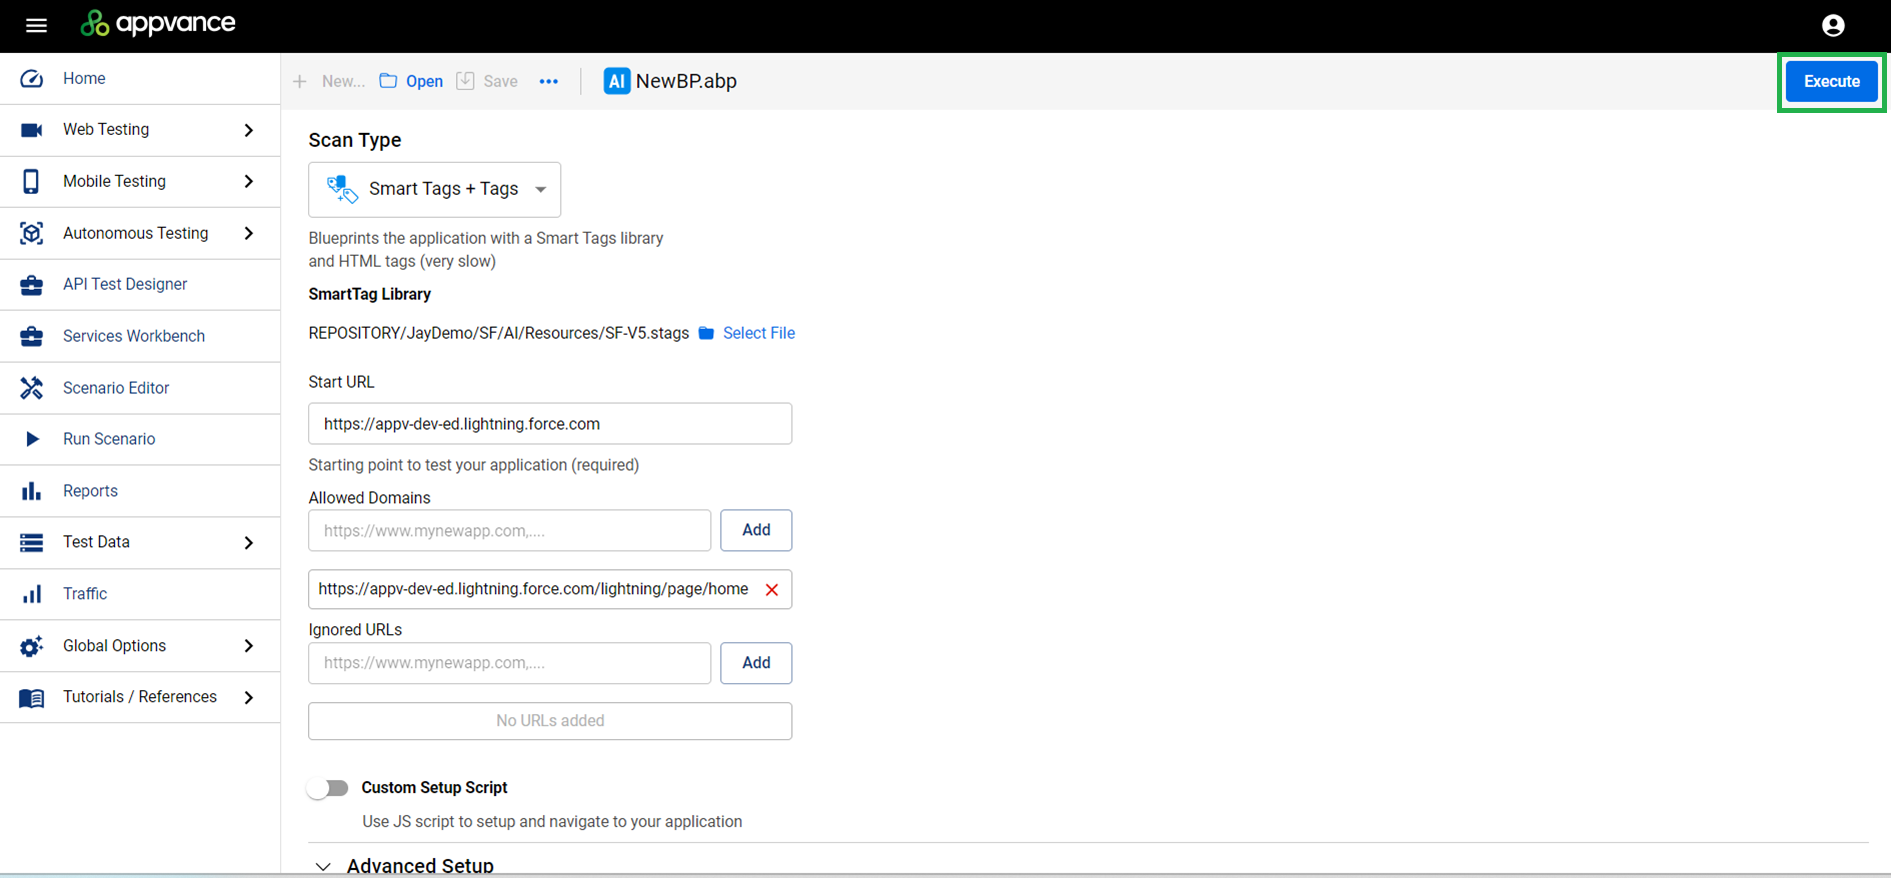
The Blueprint Editor opens. Verify the Blueprint settings and details. Click Execute.
-
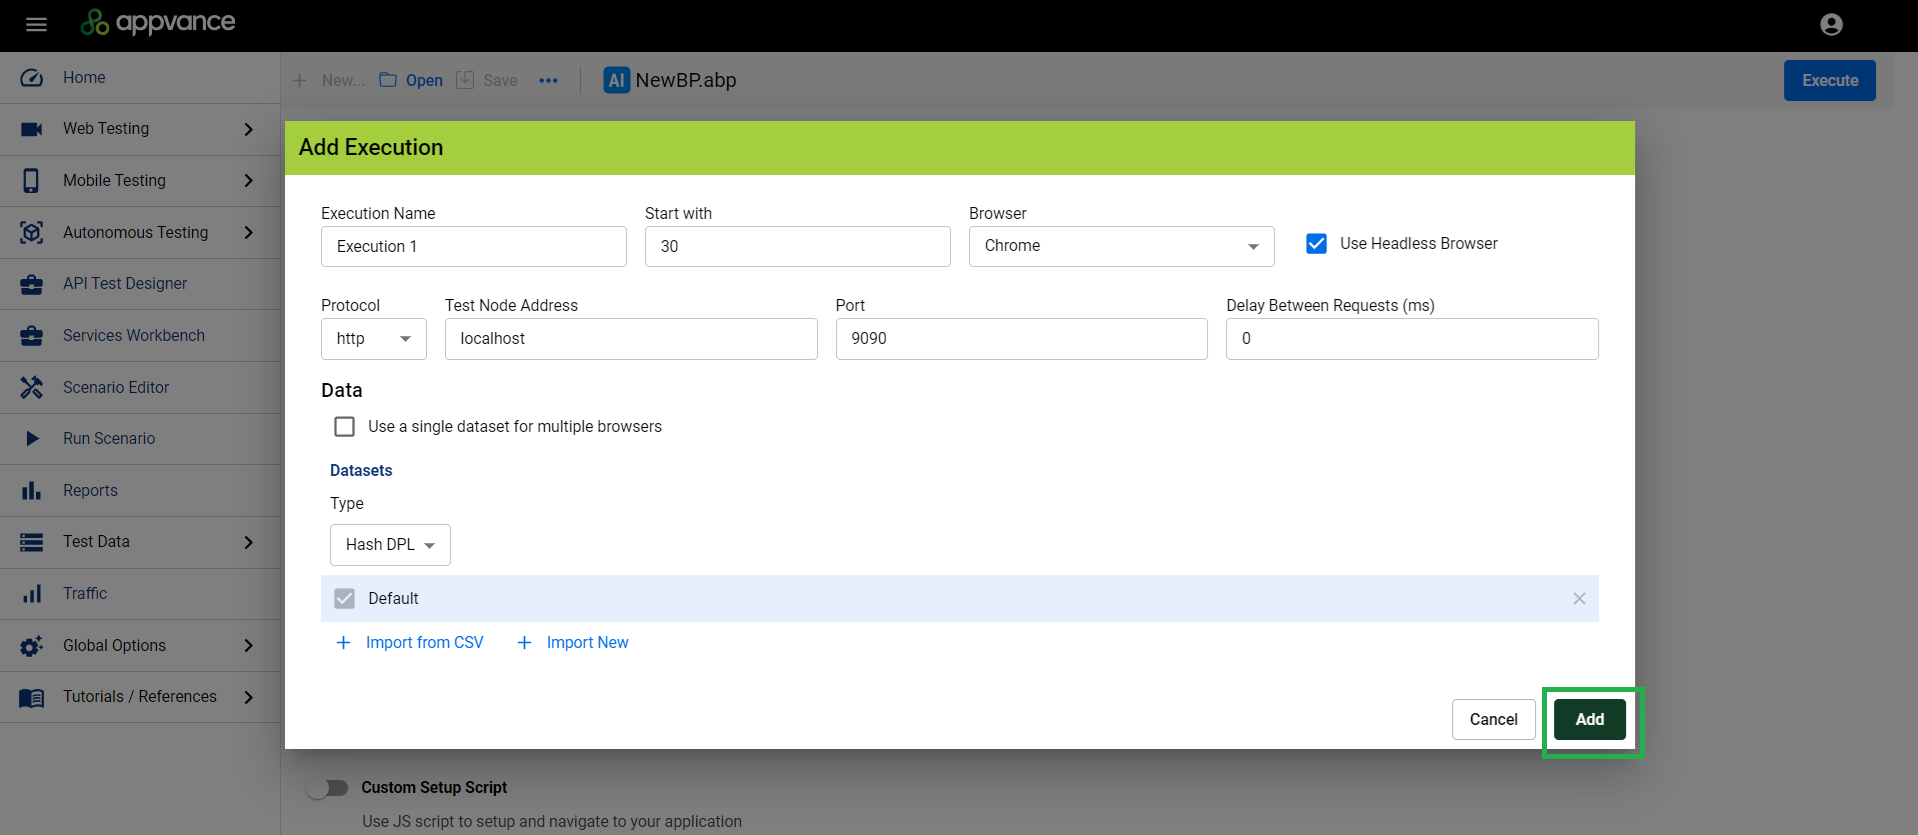
Specify the execution details, then click Add to start the Blueprint execution.
-
The Blueprint will use the custom actions you created and will be able to login to the Salesforce supplication using the username and passord details that you supplied. This will allow the Blueprint to continue past the point where it stopped in its initial execution. Use this process to train the AI by creating any additional custom actions.
For more information about working with Blueprints and configuring AI within AIQ, see AIQ AI Implementation Strategy.