Prepping your Machine for First Recording | Test Designer
Please complete all sections
1. Install Pre-Requisites
Install Appvance IQ Certificate
IMPORTANT Please note Test Designer will not function without a valid certificate
Should you have installed an Appvance certificate prior to February 7th, 2022, you must still install the new Appvance certificate.
Download Certificate
-
.cer format: https://aiq-certificate.s3.us-west-1.amazonaws.com/appvance.cer
-
.crt format: https://aiq-certificate.s3.us-west-1.amazonaws.com/appvance.crt
-
.zip (contains both .cer and .crt formats): appvanceCerts.zip
Install Certificate
Windows Steps
-
Double click the certificate file to initialize the install
-
Select Local Machine
-
Select Place all certificates in the following store
-
Select Trusted Root Certification Authorities
-
Click OK and then Next
Mac OS Steps
-
Double click the certificate file to initialize the install
-
Right-click the Appvance 2020 certificate and select Get Info
-
Expand the Trust section
-
Select Always Trust
-
Close the Get Info window
Restart Browser
Quit and reopen your browser (including all tabs) before proceeding. This will ensure your certificate is properly applied.
Confirm System Requirements
The following describes the recommended system requirements for Appvance IQ End Users
Minimal Hardware Requirements
-
Intel® i5 or i7 processor equivalent or greater
-
5 - 10 GB free hard disk space
-
6 GB RAM minimum
Software Requirements
AIQ 4.1+
-
TestDesigner-installer.app/.exe installs GraalVM11 should it not exist
-
For help maintaining multiple Java paths, see Test Designer installed however buttons still Disabled
2. Install Test Designer
Mac
-
Download TestDesigner-installer.dmg
-
Using URL. For example: https://AIQ_SERVER_NAME:8443/UI/TestDesigner-installer.dmg
-
Using Appvance IQ Login:
-
Log into Appvance IQ using the credentials provided to you (The Appvance website should have a valid certificate by this point)
-
When the Appvance IQ Dashboard appears, select Record a Designer Script

-
When the Designer Proxy Not Detected window appears, click Download Designer Script Proxy
Note: This may take as much as 30 seconds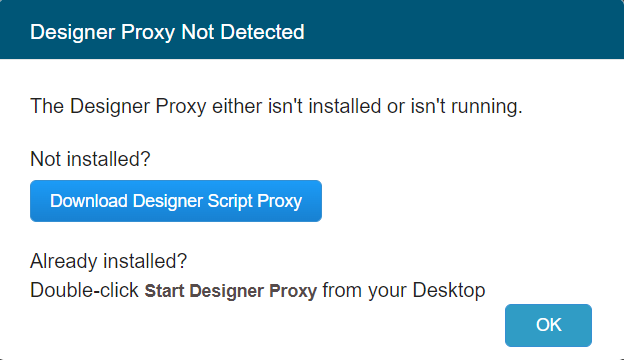
-
-
-
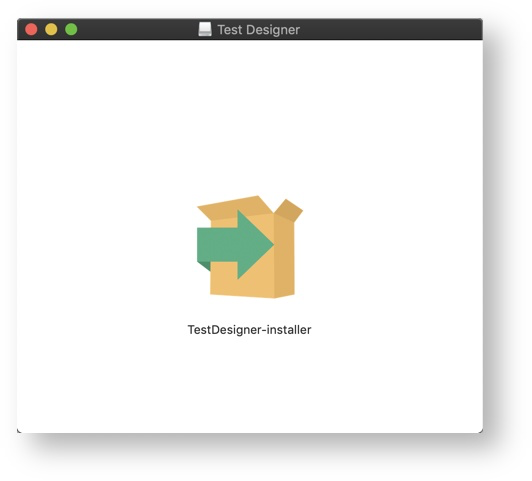
Open TestDesigner-installer.dmg
-
Double-click TestDesigner-installer
-
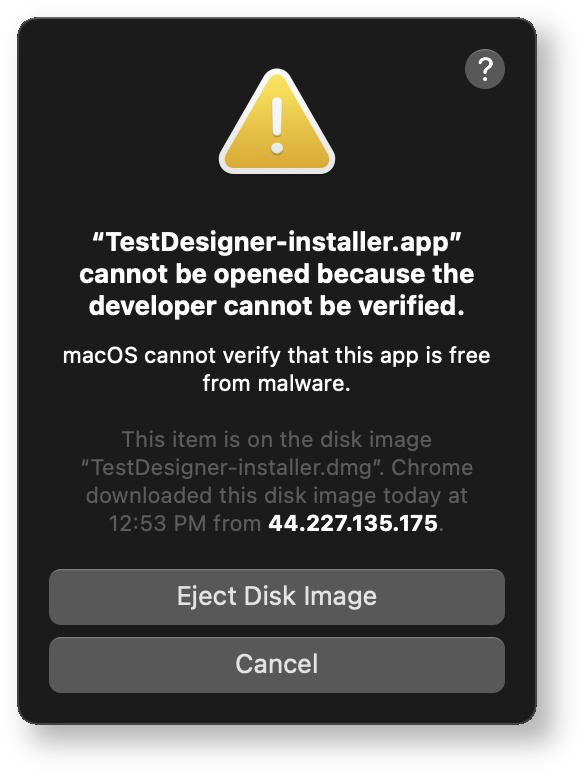
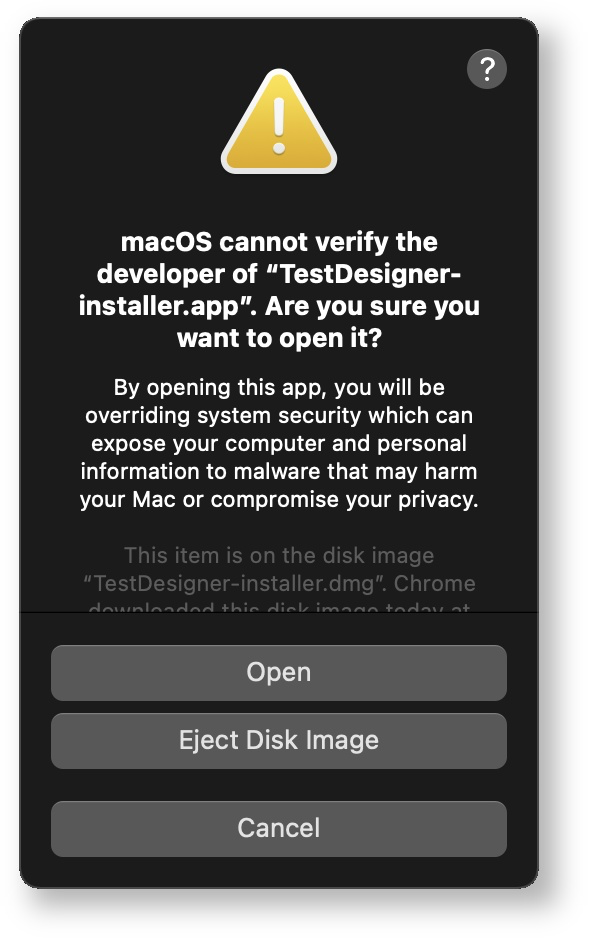
When a variation of the Cannot Open dialog appears, click Cancel (or OK)
-
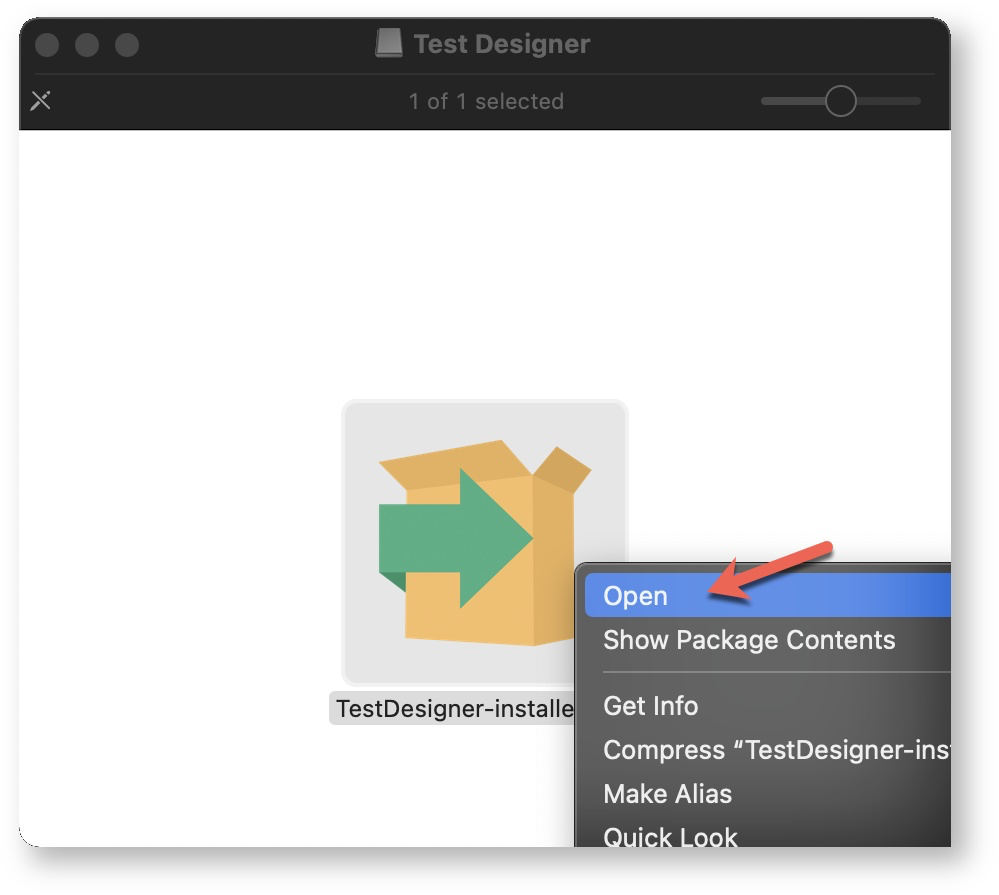
Return to the installer, right-click and select Open
-
When a variation of the Cannot Verify dialog appears, click Open
-
Enter your password when prompted
-
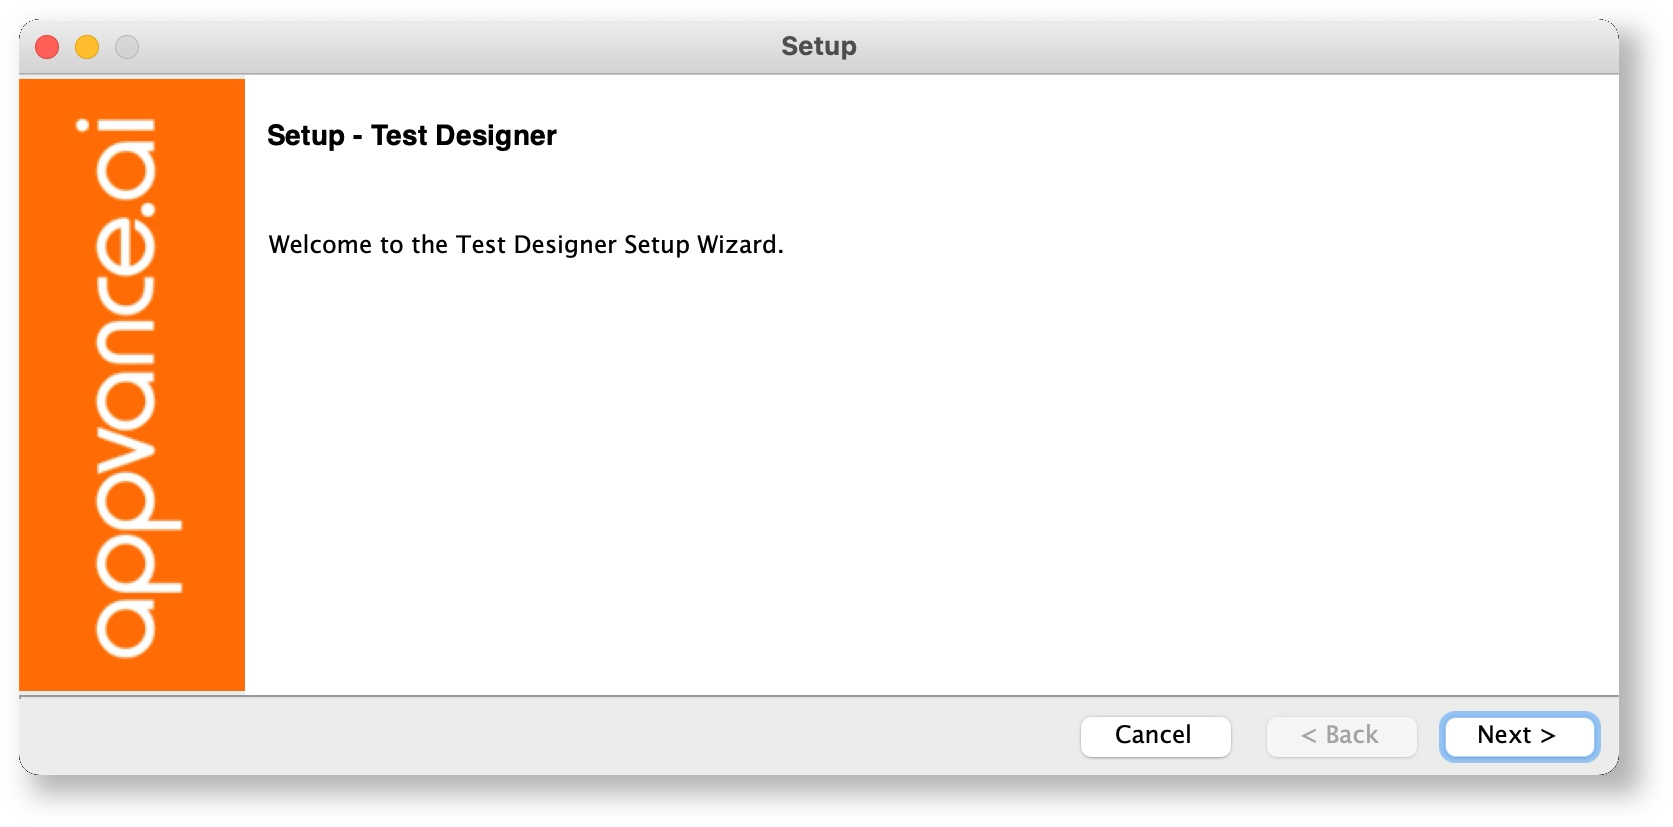
When the installer appears, click Next
-
Select I accept the agreement and click Next
-
Click Next to accept the install directory location (directory path must not contain spaces)
-
Click Next to being the installation
-
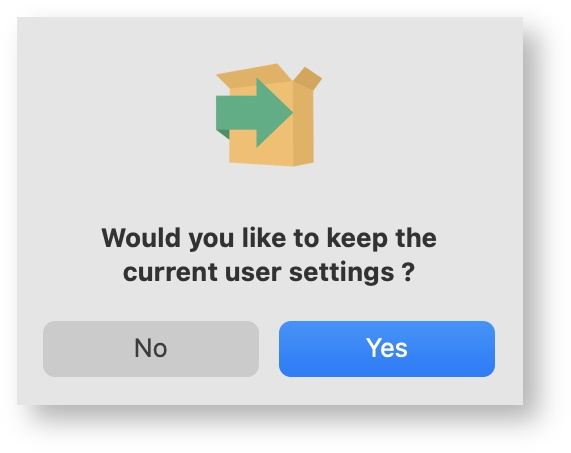
When prompted, select Yes to maintain your current user settings or No to reset
-
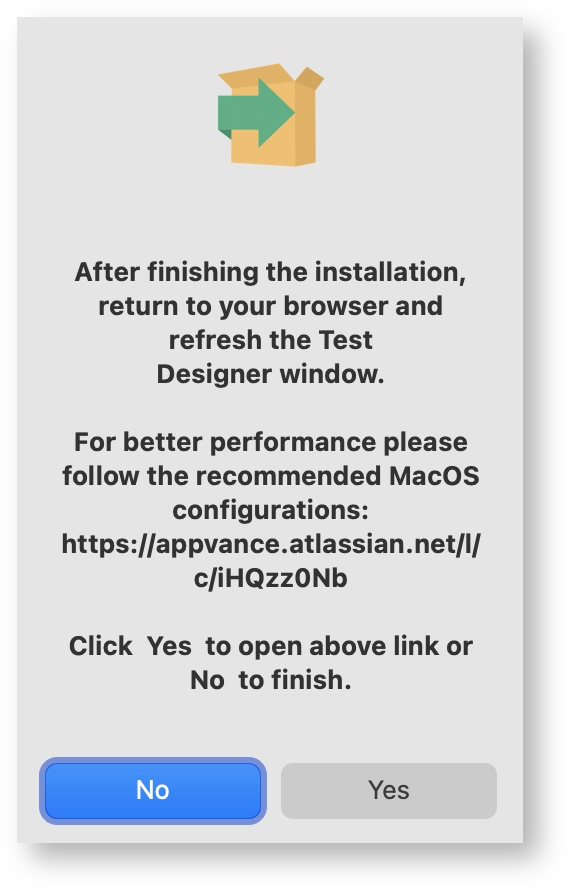
All Mac users are advised to perform the system optimization settings. Click Yes to view, and return here upon completion
-
Click Finish to complete the install
-
Go toConnect Repository
Windows
-
Download TestDesigner-installer.exe (From instructions above)
-
Using URL: For example: https://AIQ_SERVER_NAME:8443/UI/TestDesigner-installer.dmg
-
-
Using Appvance IQ Login:
-
Log into Appvance IQ using the credentials provided to you (The Appvance website should have a valid certificate by this point)
-
When the Appvance IQ Dashboard appears, select Record a Designer Script
-
When the Designer Proxy Not Detected window appears, click Download Designer Script Proxy
Note: This may take as much as 30 seconds
-
-
Open TestDesigner-installer.exe
-
If a Warning window appears, click More info and Run Anyway (or Yes)
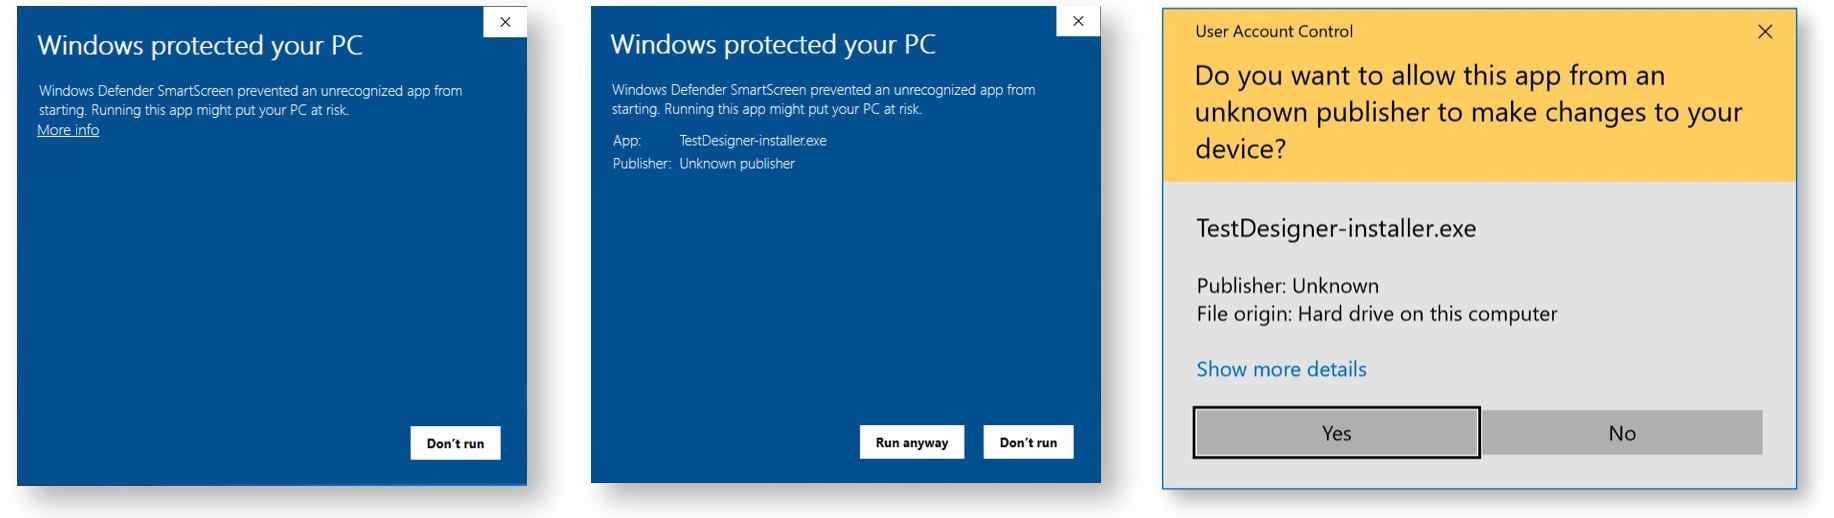
-
When the installer appears, take all default options
-
Click Finish
-
A message appears with further instructions for starting Test Designer
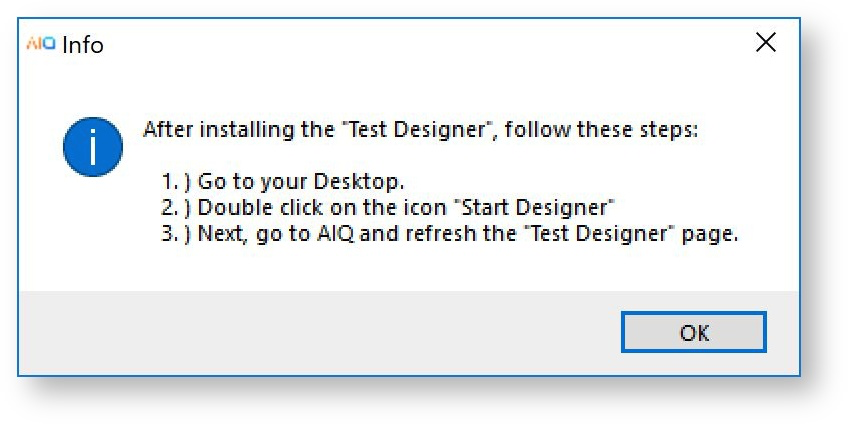
-
Click OK
-
Go to your Desktop and click Start Designer
-
If Windows and/or your anti-virus prompts you to allow AIQ to use the proxy, please enable all access options
-
Go toConnect Repository
3. Connect Repository
In this section, you will log into AIQ using your browser and connect the provided (or your own) GitLab repository
GitLab Repository
If you do not have a GitLab repository, create one here: How to Create and Setup a GitLab Account
Log Into AIQ
-
Go to your Appvance provided URL
For example: https://AIQ_SERVER_NAME:8443 -
Log in using your provided Appvance IQ credentials
If upon login you are redirected back to the login page (without error), please clear your cache for the last hour, restart your browser, and try again.
Create Repository Connection
-
Expand Global Options (bottom of the left navigation bar) and click Preferences
-
Using the provided GIT repository URL and your GitLab credentials, follow the steps in the image below to set up the repository connection
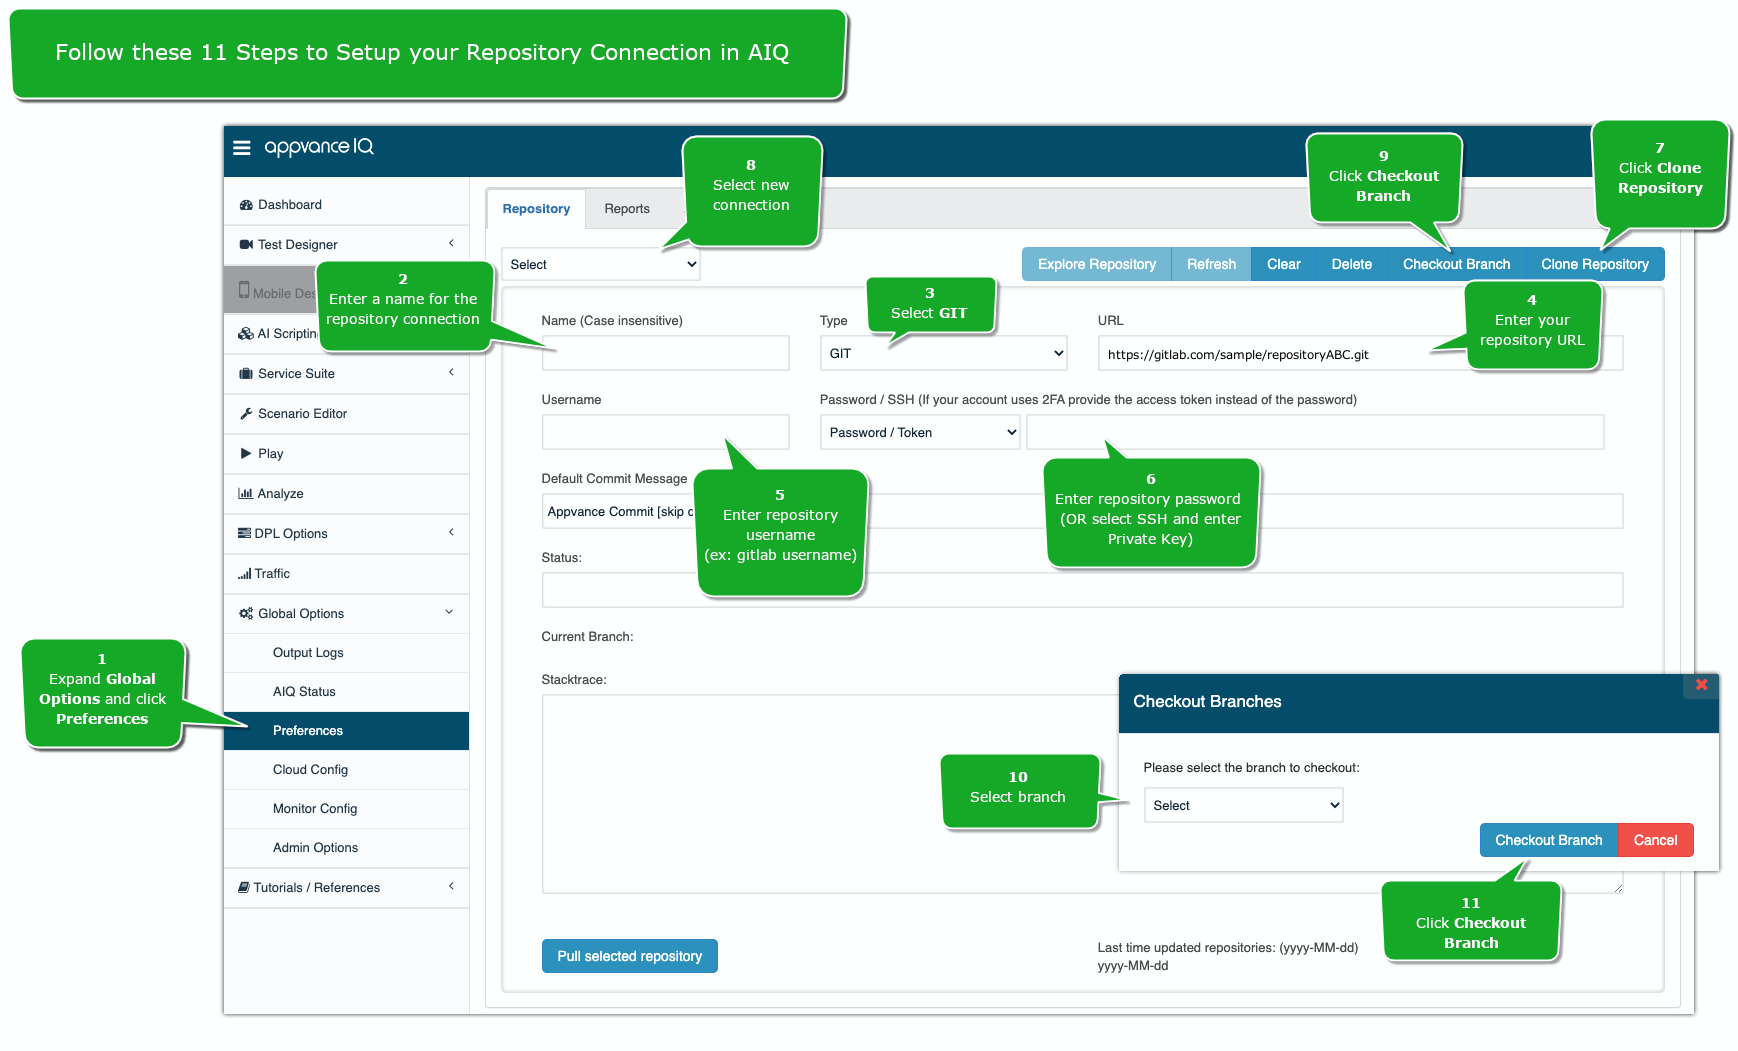
If you do not have a repository and would like to create one, see How to Create and Setup a GitLab Account