Below are examples with screenshots showing how to configure TFS to set up and run AIQ scenarios.
The integration of AIQ with Team Foundation Server is possible to achieve through the configuration of Ant tasks as an additional phase in the build process of the project within this system.
Appvance AI Plug-in for TFS is located in git at: https://gitlab.com/appvance/AppvanceRestClient.git
and the branch 'TFSIntegration' has the 'build.xml' where you will be adding the ant tasks to run scenario files.
-
The first step is to create your TFS account, go to Microsoft Visual Studio Page and click-free account under Visual Studio Team Services and create your free account using your Microsoft account
-
After successfully creating your account, log in to your TFS domain using the credentials and the domain created (Ex: https://appvance.visualstudio.com/)
-
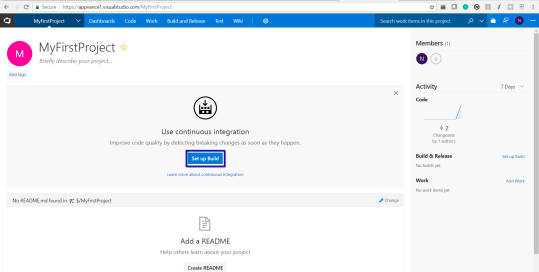
After you log in, you will see no projects by default, click the 'Set up Build' button under 'MyFirstProject'
-
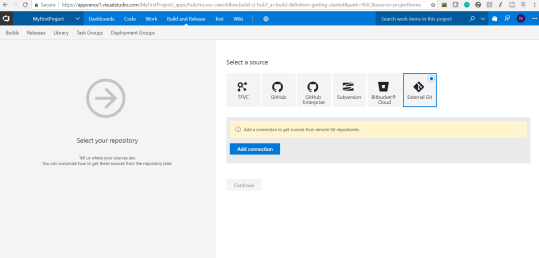
The next step would be to choose the source, since ours is External GIT, choose External GIT and click Add connection
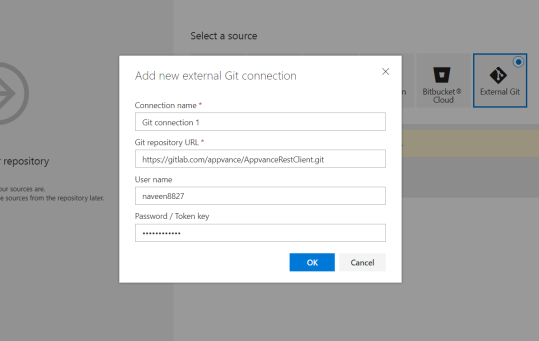
Provide Connection Name, GIT Repository URL, and your GIT account credentials, and click OK for the connection to be added
-
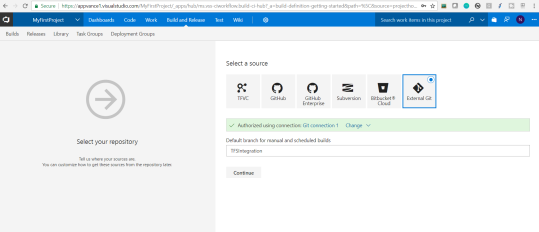
After clicking OK, a message would be displayed of connection authorization and you will have to mention the branch as 'TFSIntegration' since the related files and the 'build.xml' are located in that branch
-
Click Continue
-
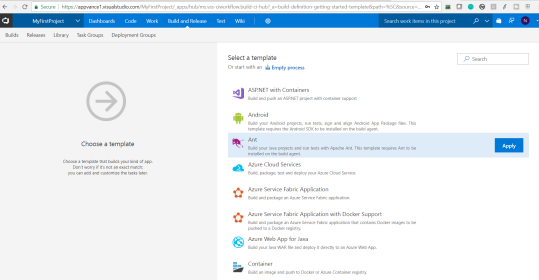
In the next step for selecting a template, Choose 'Ant' since our job is going to use 'Ant' builds. Click Apply
-
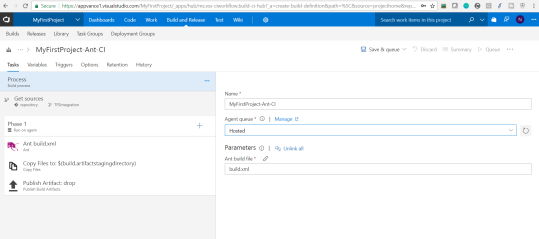
Under Tasks, mention the Agent queue to be 'Hosted' and Parameters to be 'build.xml'
-
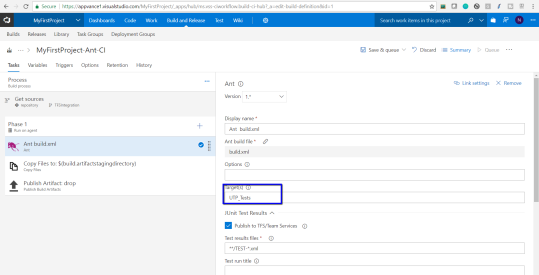
Select Ant 'build.xml', and mention the target to be 'UTP_Tests' as shown below
About Targets and 'build.xml' file:
-
Now lets talk about what is 'UTP_Tests' that is mentioned under Target and also about 'build.xml' file
-
amazonaws.com/appvanceivy/projects/CIPlugin/master/latest/ivy/CIPluginNoDeps.jar" dest="CIPluginNoDeps.jar"/>
<java classname="com.appvance.enterprise.ci.CIPlugin" failonerror="true">
<arg value="http://REMOTE_MACHINE_DNS:8080"/>
<arg value="$scenarioFilePath"/>
<arg value="$username"/>
<arg value="$password"/>
<classpath refid="IvyPath"/>
</java>
</target>
In this example: you will notice the following and also these are the ones that need to be changed based on your environment and examples.
-
<target name="UTP_Tests" description="Triggers custom task for AIQ Tests Scenario" depends="init_test_path">
In this, you will notice the target name that needs to be exactly matching with the target name in the TFS build.
-
<arg value="http://REMOTE_MACHINE_DNS:8080"/>
Remote Machine DNS: Public URL of the remote machine where AIQ will be running that will be used to run the test scenario located.
Example: <arg value="http://ec2-x-x-x-x.us-west-2.compute.amazonaws.com:8080"/>
-
<arg value="$scenarioFilePath">/
Scenario File Path: File path in the remote machine where the scenario file is located, you must provide the full file path including the .scenario file name.
Example: <arg value="C:\AIQ_Builds\appvance.scenario"/>
-
User-name (user-name): User-name to log-in into AIQ.
-
Password (password): Password of the given user name to log in to AIQ.
-
-
The next step in this process is to modify the project´s build.xml file to add the custom Ant Task in order to invoke the Appvance CI Plug-in executor, this task must invoke the main class named "CIPlugin" which takes the above-mentioned arguments (all of them are required):
-
You can add as many as Ant tasks to your 'build.xml' file to call many scenarios to run from TFS
Coming back to the build being created in TFS:
-
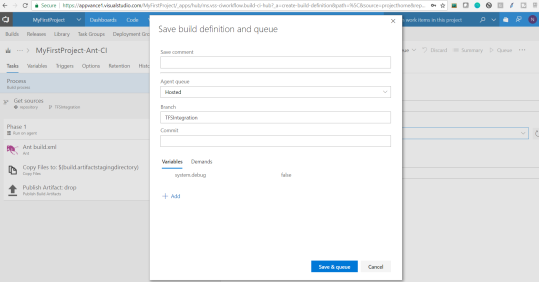
Once all the above are done, click the 'Save & queue' option, you will get a 'Save build definition and queue' dialog, and click the 'Save & queue' button again
-
The project gets created and you will notice the status in the build definitions

-
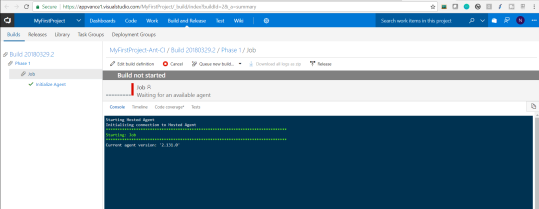
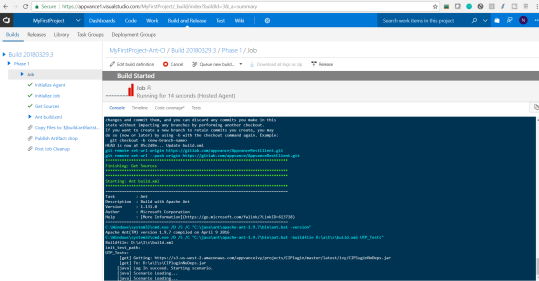
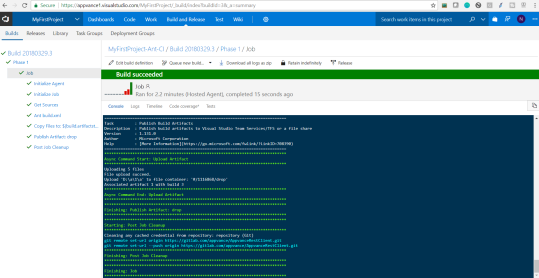
Clicking the job will show you details about the build, the build is started, the progress, and the success or failure status of the build
-
If failed, the logs shall show the reason for the failures for debugging purposes
-
-
-
-
Now once those jobs are run successfully, you could log in to your server and check the results from Analyze page.