Appium Scenario runs in Appvance IQ
A sample project was created using Netbeans (Any other IDE could be used for this purpose).
The source code can be downloaded from here.
All this does is open the emulator that we created "Nexus_5X_API_23" open the Google Chrome browser and open a website and perform some actions, change the mode to port-trait and close the test.
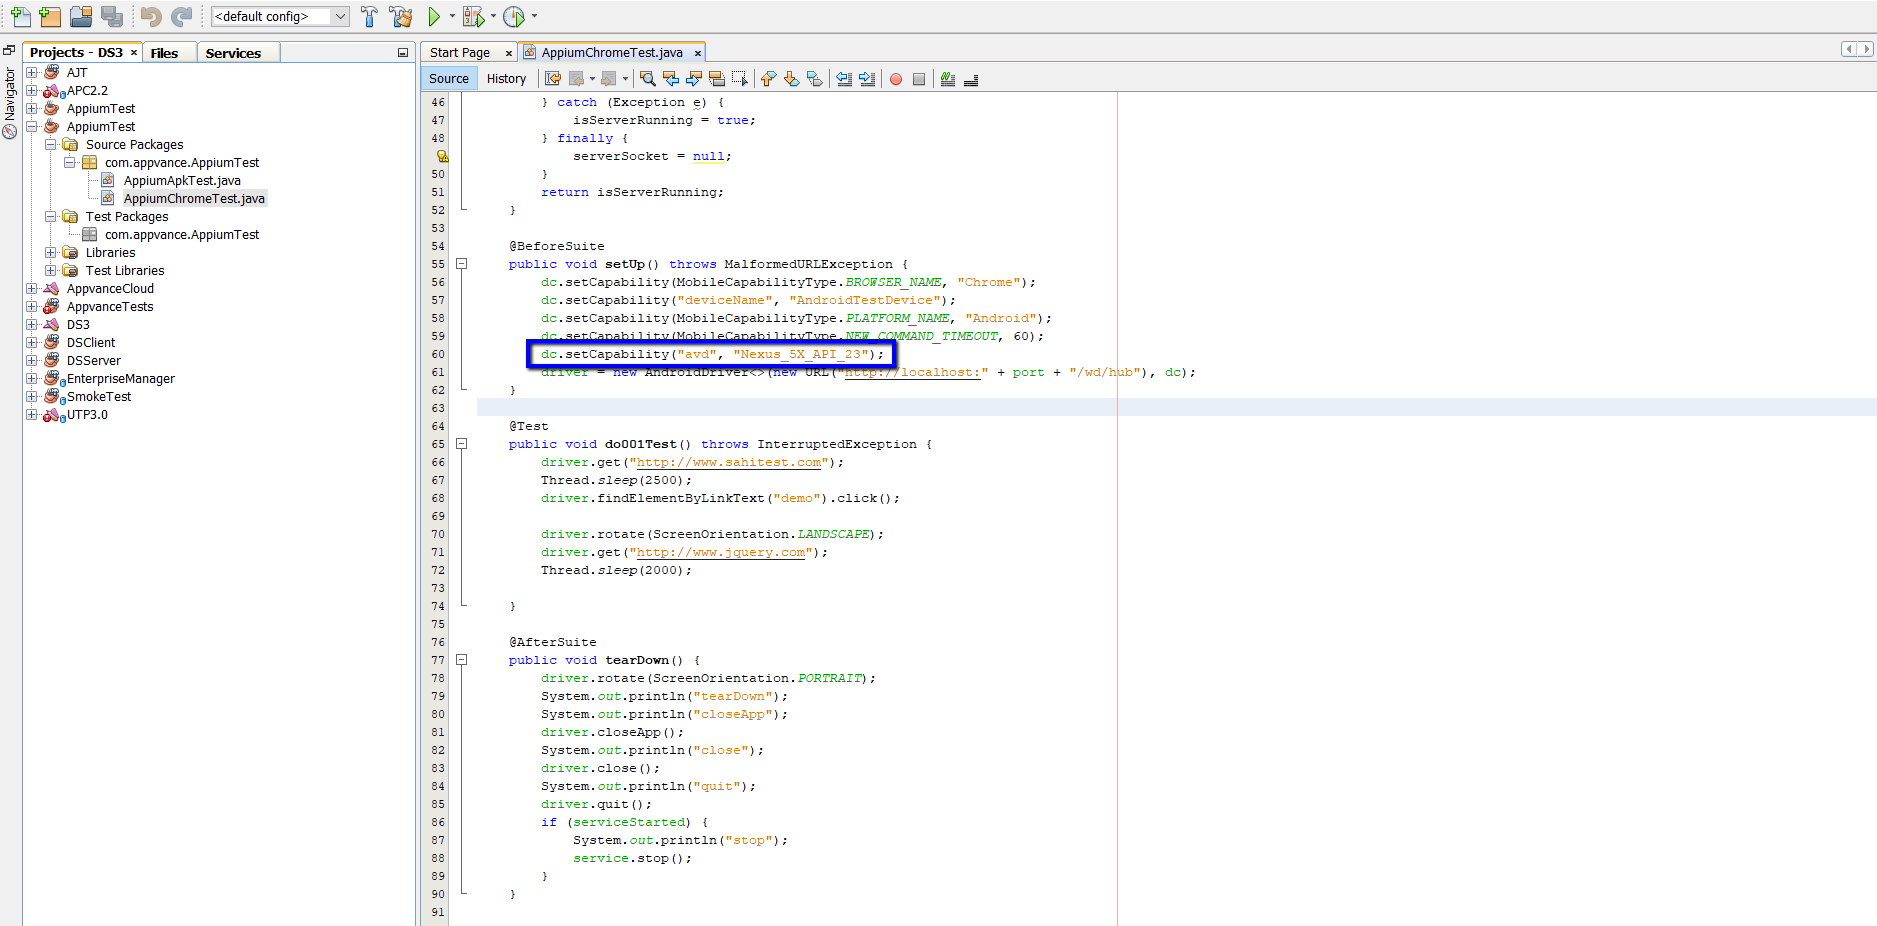
The important step here is at line 60, where it mentions the device name, that device name should match the device name that we created in the installation steps.
Once you have the script ready, create a jar by right-clicking the project and doing 'Clean and Build'
Make sure there are no compile or run time errors.
Once we have these ready, it is time for us to create the scenario in Appvance Scenario Builder.
-
Login to Appvance IQ
-
Go to Scenario Editor
-
Click File > New and Select Functional Test as the Scenario Test Type
-
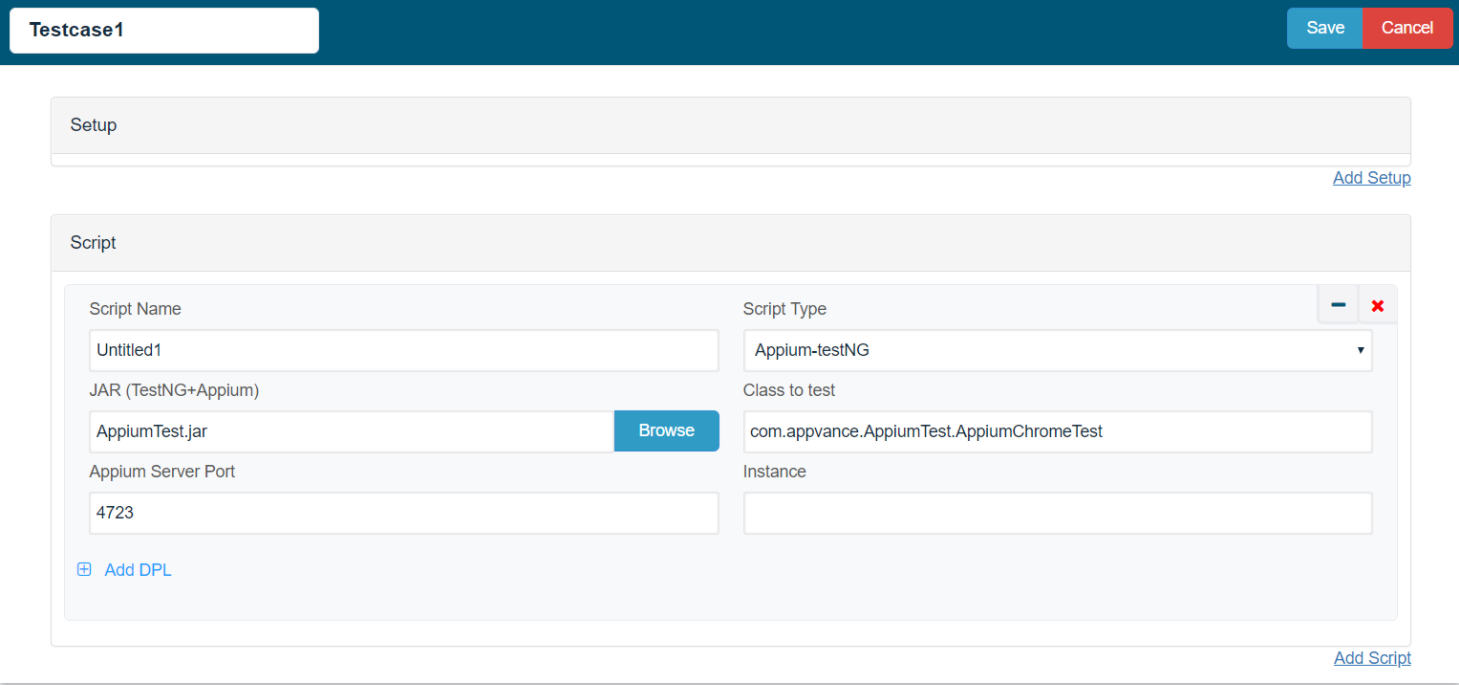
Go to the test case panel and click add test case
-
Provide script name, choose script type to be 'Appium-testNG'
-
Browse the jar file that was created from NetBeans.
-
Mention the class to test which will be package.classname (com.appvance.AppiumTest.AppiumChromeTest) in this provided example project.
-
Appium server port to be 4723
-
Go to Resources and make sure the Appium bundle is selected by default
-
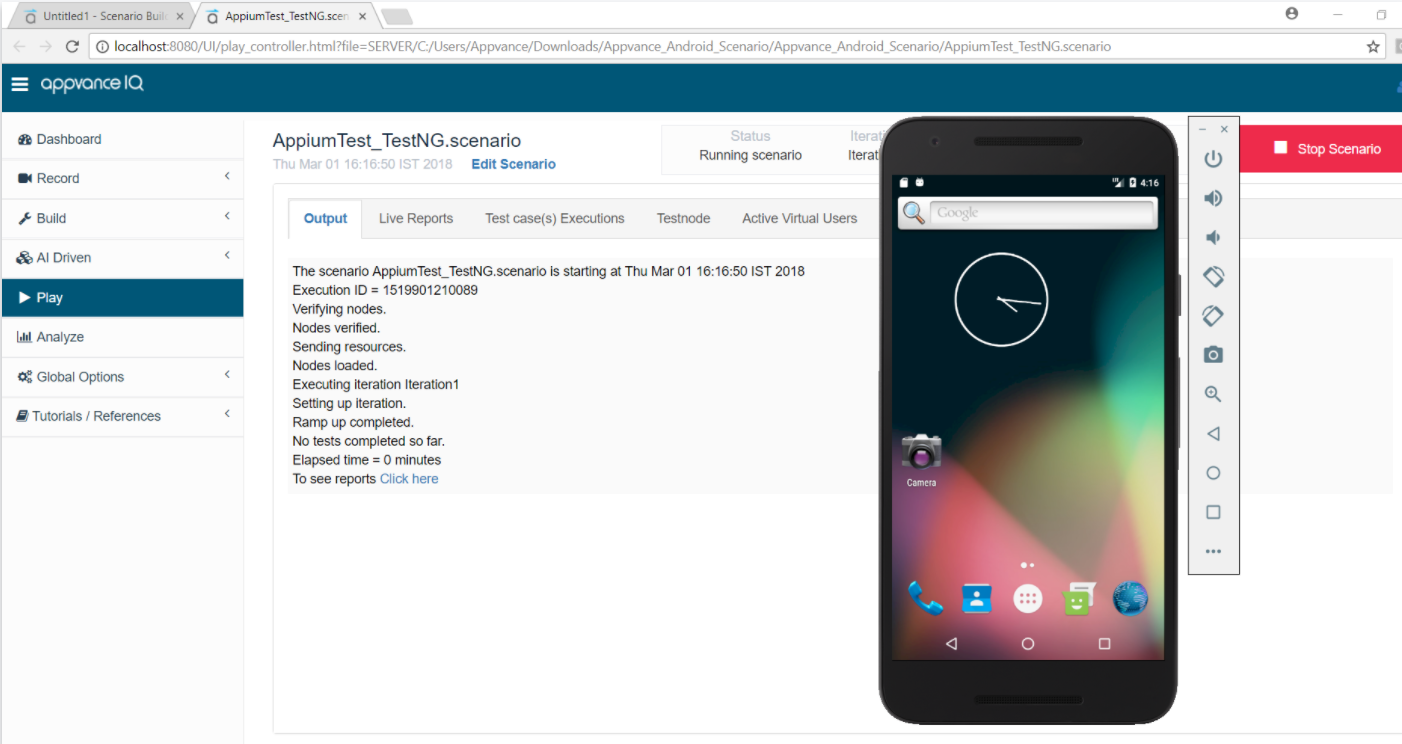
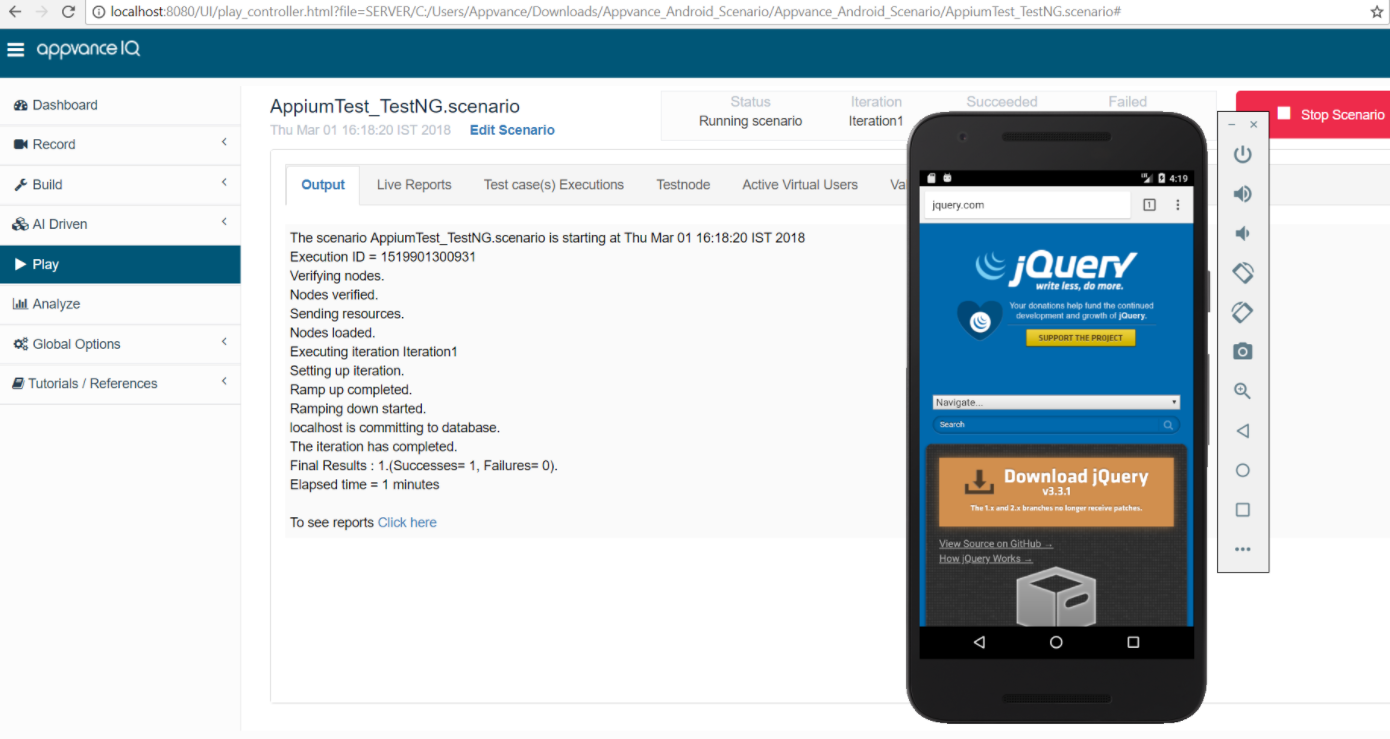
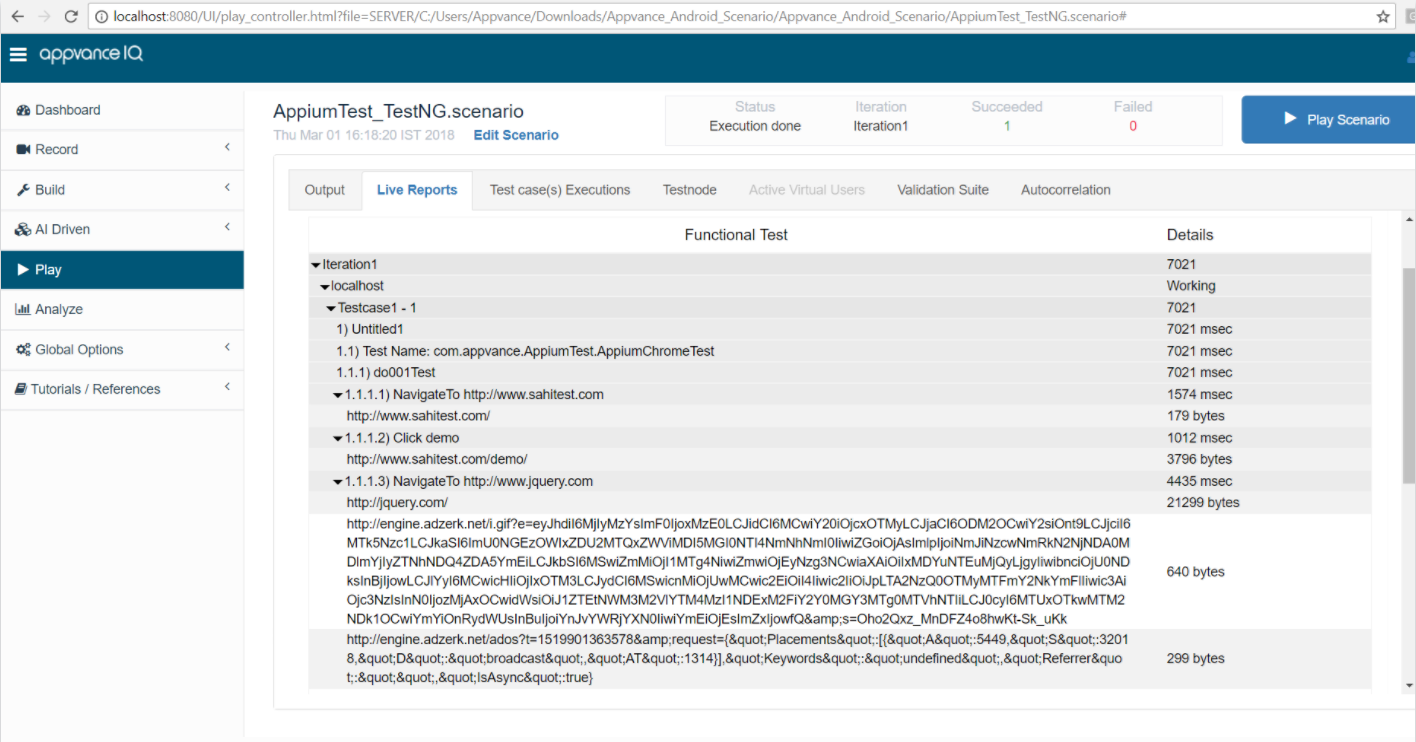
Save the scenario and click play scenario
-
The emulator if not already started, should start and perform the test
-
The emulator if already started, will perform the test mentioned and shall not close
You can download a copy of the Appvance IQ Test scenario and the associated jar file from this link.