Appium Andriod and Appium IOS can be used to test your mobile applications.
You might have had a question, how could we make use of this to generate some traffic so we could also run performance/load tests on your mobile applications using the browser or the native mobile applications.
This article would provide you with the steps to generate the traffic from Traffic and then create a test scenario to run as performance tests. This article applies to both Appium IOS and Appium Android and there would be some changes that will be discussed in the below steps.
-
We need to have a working script from Appium Android/Appium IOS that either opens the browser and performs your steps or the script could be working on a native application as well. You can refer few sections from 'Mobile testing in Appvance IQ' to create these scripts.
-
If you are working with HTTPS, it is required to install the Appvance certificate on the emulator
-
Appvance certificate can be found in the location: \aiq_distribution\sahi\
File: appvance.cer
-
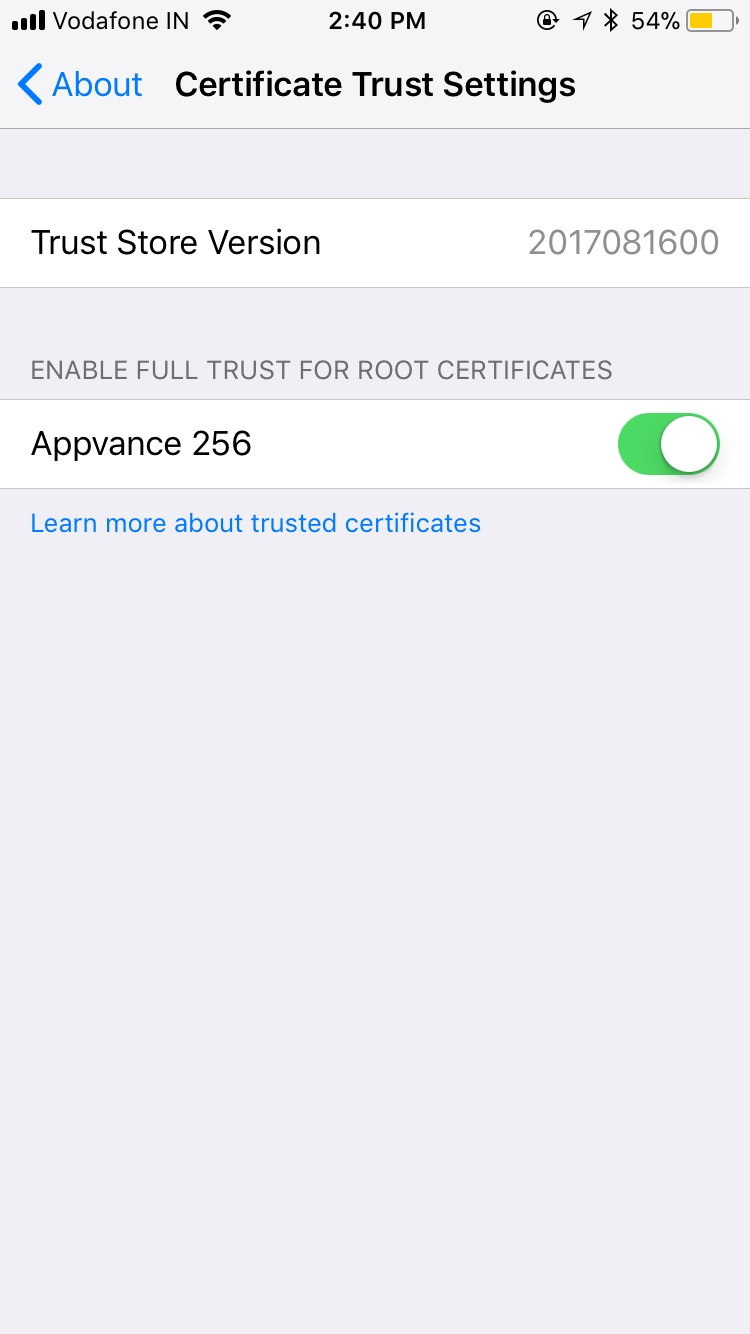
On IOS Emulator: You just need to open your emulator and drag and drop the file on the emulator. Once done, Go to Settings > General > Certificate Trust Settings and enable Appvance 256 as seen in the below image.
-
On your Andriod Emulator, again drag and drop the appvance certificate
-
Then go to Settings > Security > Install from SD Card > You will find the appvance.cer file located there, double click the file
-
It asks for a security pattern where you can give any pattern
-
It will ask for the certificate name, you can name it as 'appvance'. Click OK. Provide the same pattern that you provided to install the certificate
-
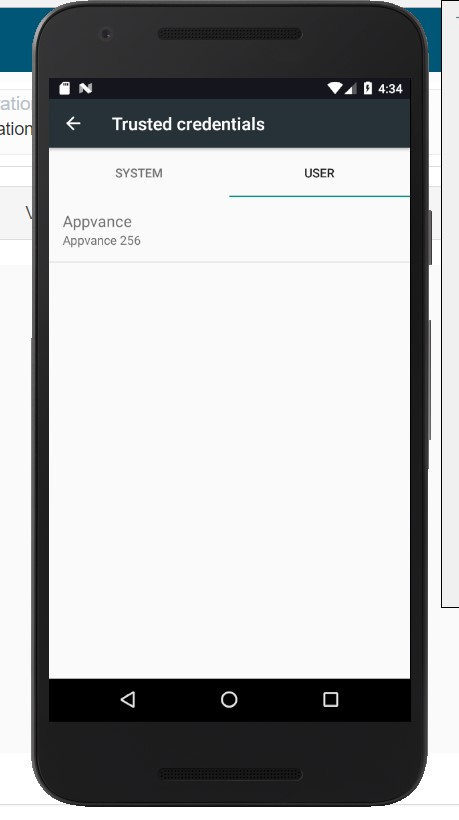
You will notice the certificate installed under 'Trusted credentials'
-
-
Make sure your script is running fine standalone, either in Net-beans or Eclipse and the results are successful
-
Create a functional test scenario with AIQ, Run the scenario to see the successful results. Refer to Appium Scenario run in Appvance IQ for detailed steps on how to create an Appvance AIQ test scenario.
Now it's time to generate some HTTP traffic using AIQ's HTTP Proxy and the scenario we just ran above.
-
Setting up proxy for the emulator.
Open your Emulator > go to settings > Click wi-fi > There shall be a default network called AndriodWifi, hold on that > Click Modify network > Click Advanced search drop-down > Select Manual as the Proxy.
Provide Proxy to be the IP address of the machine where the Appium is installed and provide port to be 9095.
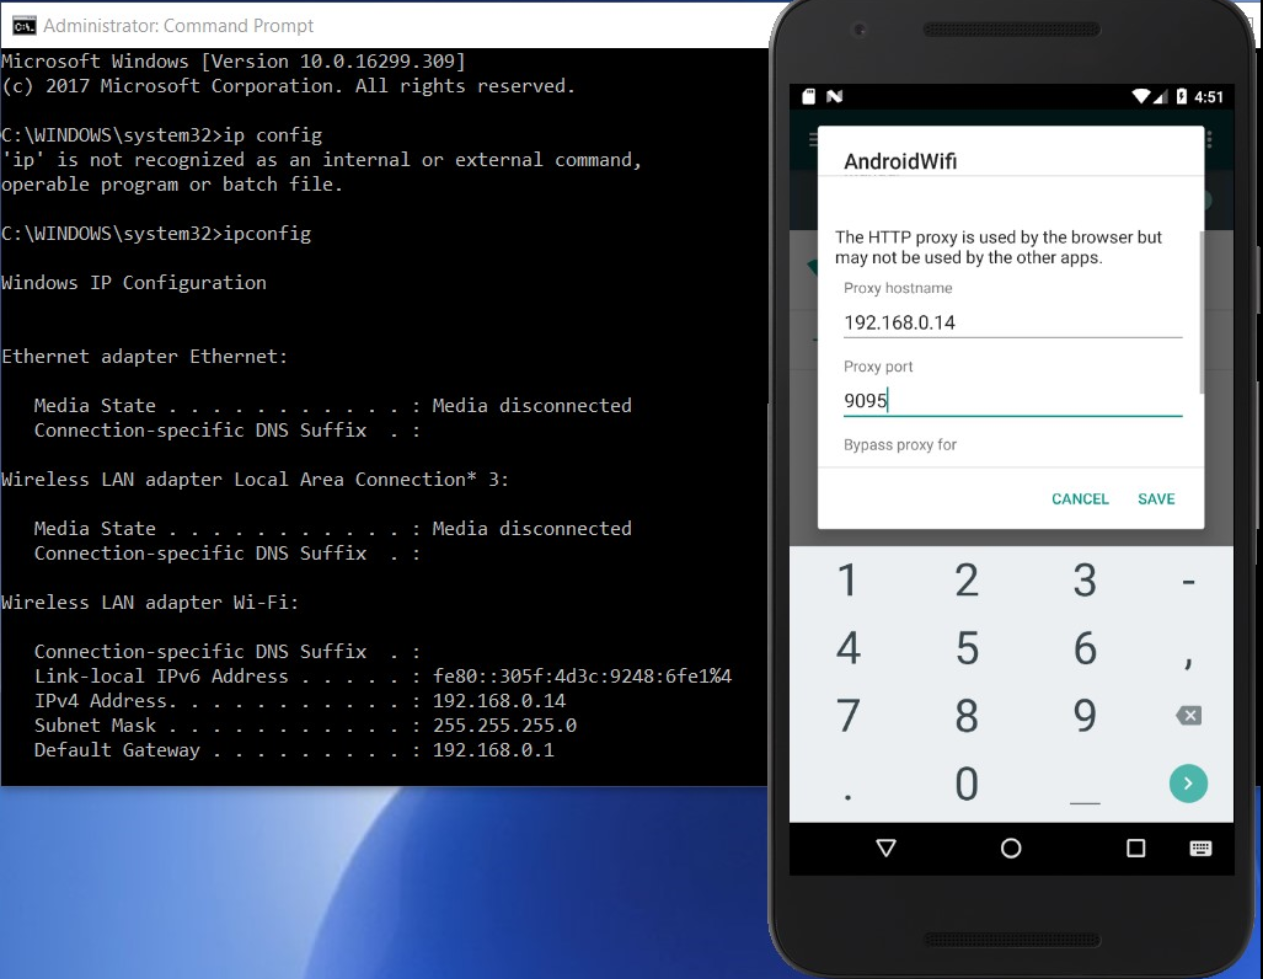
Click Save.
-
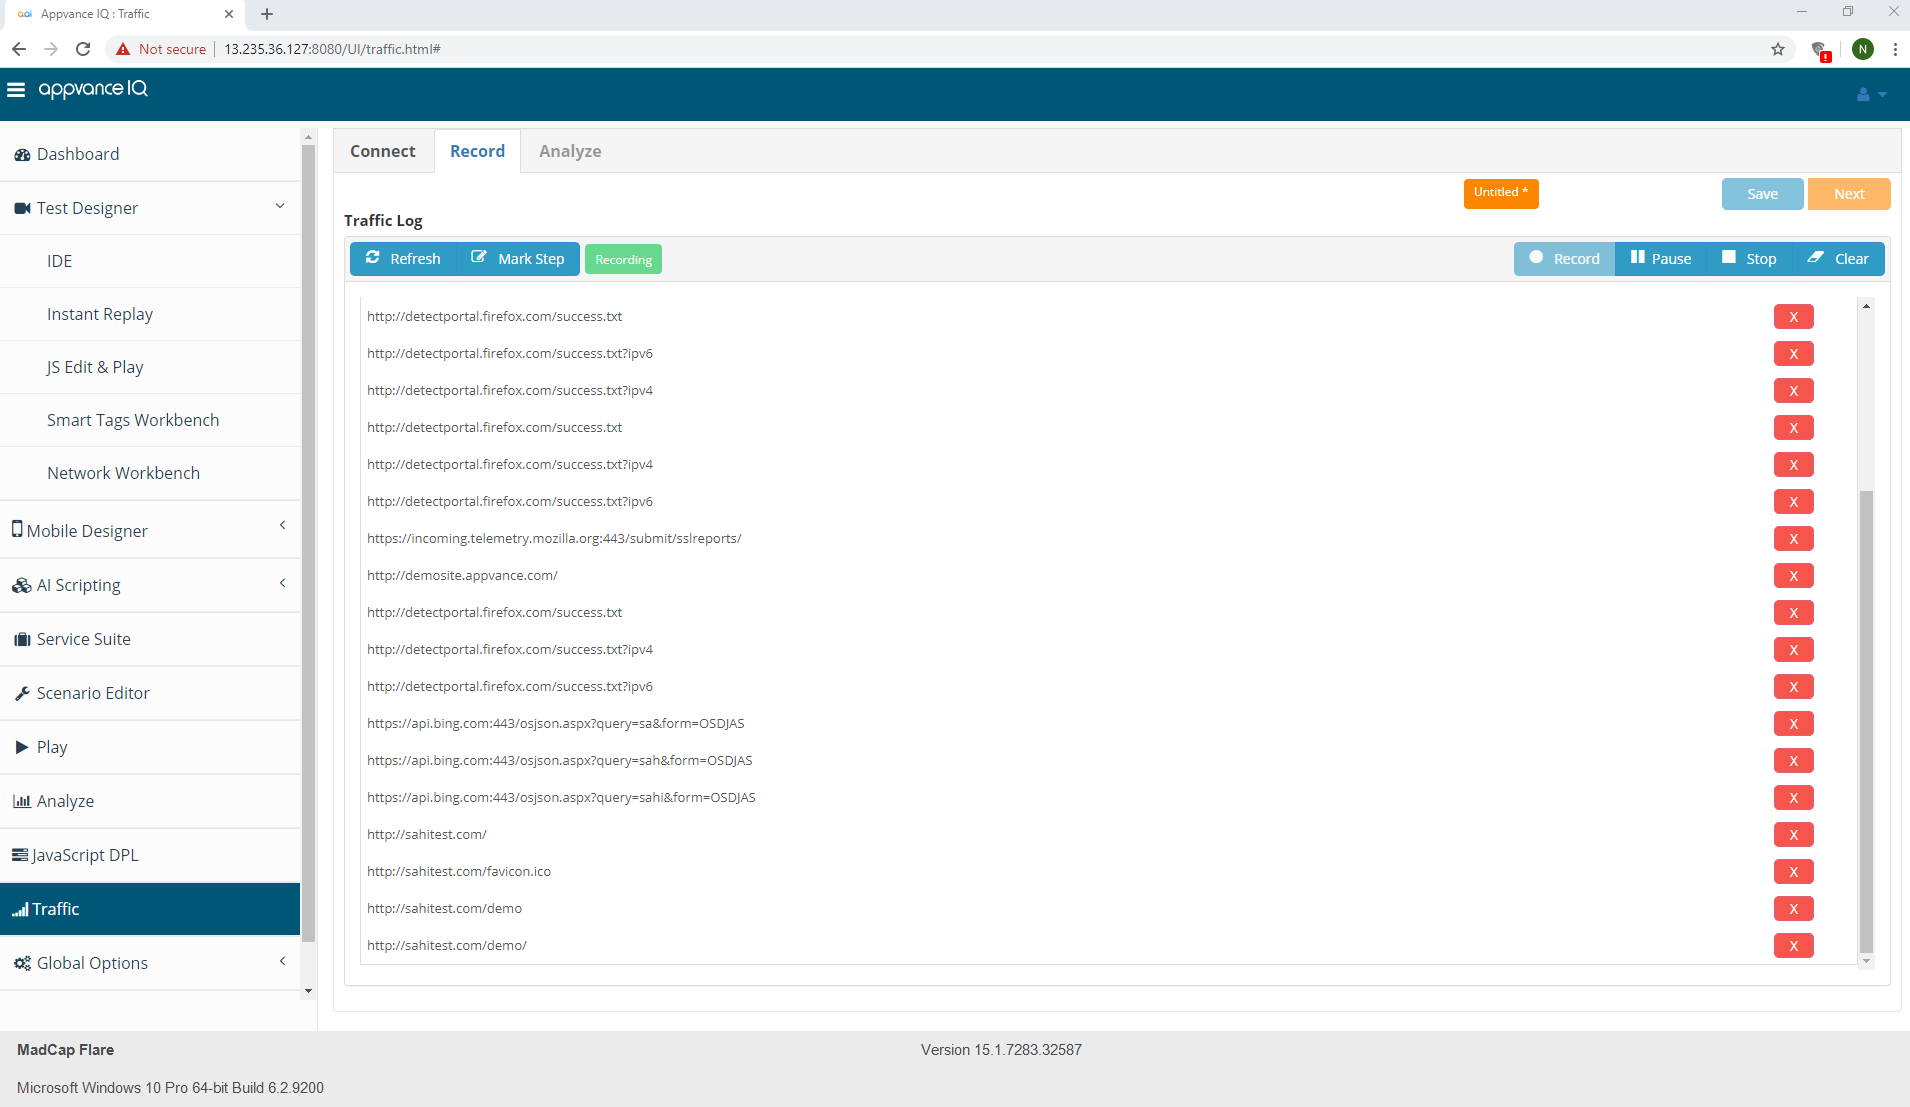
Setting up Traffic: From AIQ, go to Record > Traffic, Provide the step name, Provide the port to be '9095', the same port we set it up on the emulator. Click Start Proxy and you will notice Proxy status as 'Running'
-
Now we have done all the required setups, it is required to re-run the functional test scenario that we created in step 4. By simply re-running the functional test scenario, AIQ will run the test scenario and since the emulator and Traffic are configured to use the proxy and the port, Traffic will start to capture all the traffic.
Open the functional test scenario that you already have and simply click play.
Go back to Traffic UI and click Refresh to see all the traffic that is captured.
-
Once the scenario is played back successfully, come back to Traffic UI under Record and click the Save button to save the HAR script that Traffic captured.
-
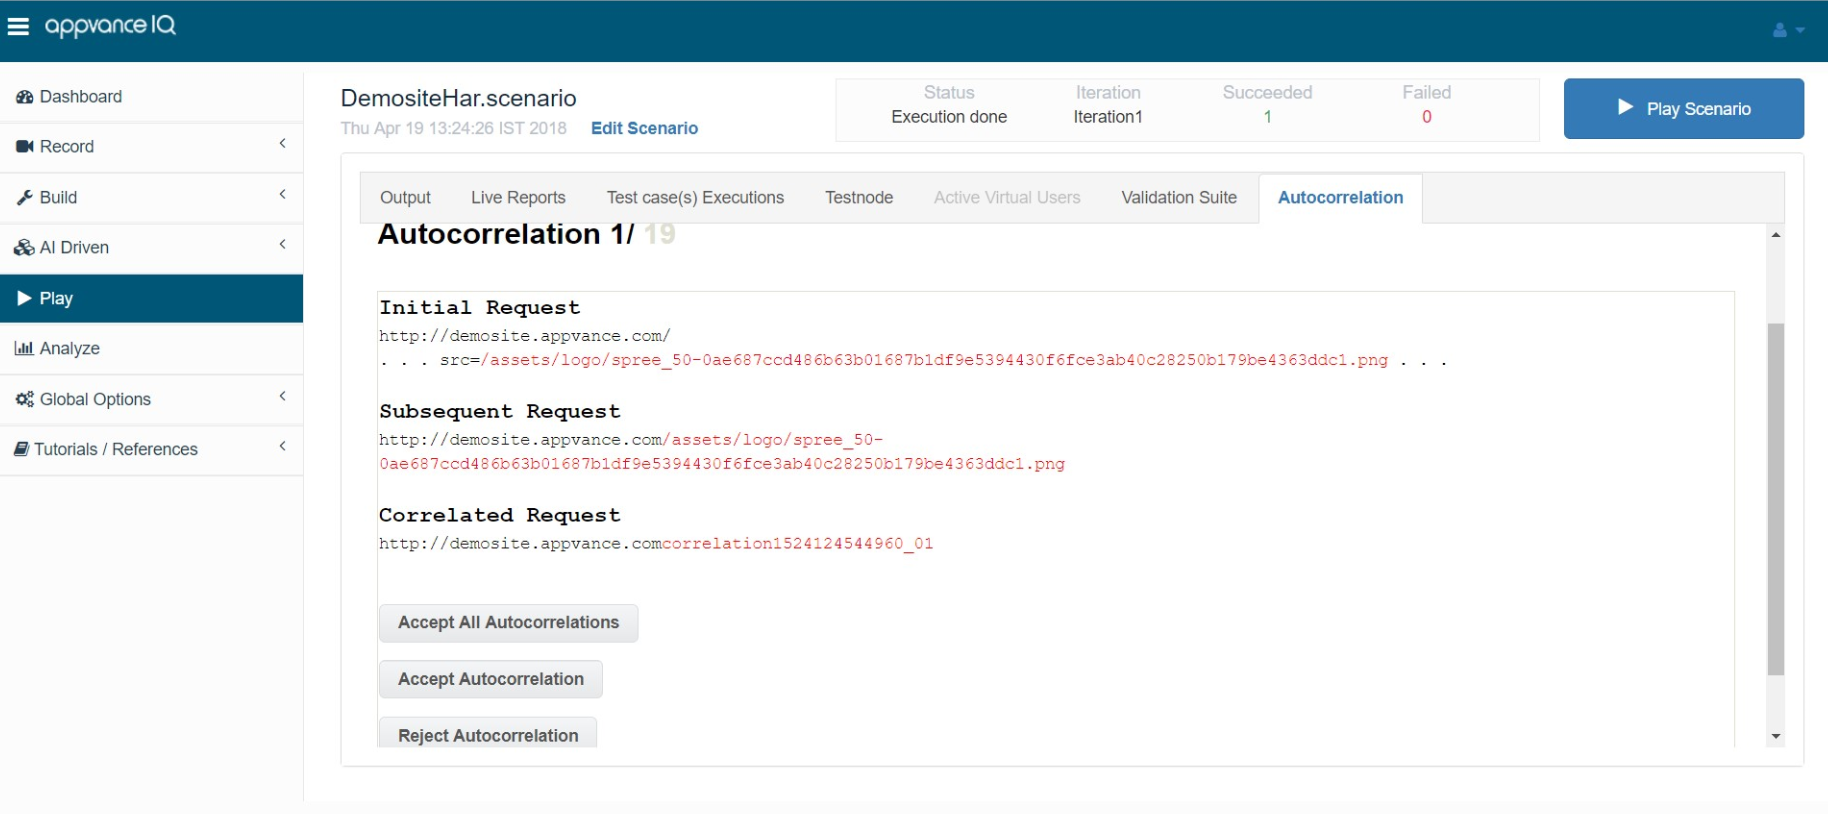
It is now time to auto-correlate the script that we created.
Create a functional test scenario, go to the test-case panel, browse the HAR script that we just generated. Save and play the scenario.
Once the playback is complete on the controller window > Go to the Autocorrelation tab > Click the 'Start Autocorrelation' button. Autocorrelation could take a while and AIQ will list out all the possible autocorrelation, you can Accept all the correlations and then provide the path to save the autocorrelated scenario.
-
Now we have an autocorrelated scenario that had captured all the traffic of the app under test, we could create a performance scenario with both the autocorrelated HAR script and the Android script
-
Open the autocorrelated scenario
-
Go to the Info tab and change the scenario type to be a performance test
-
Under test management, you could mention different iterations depending on the requirement
-
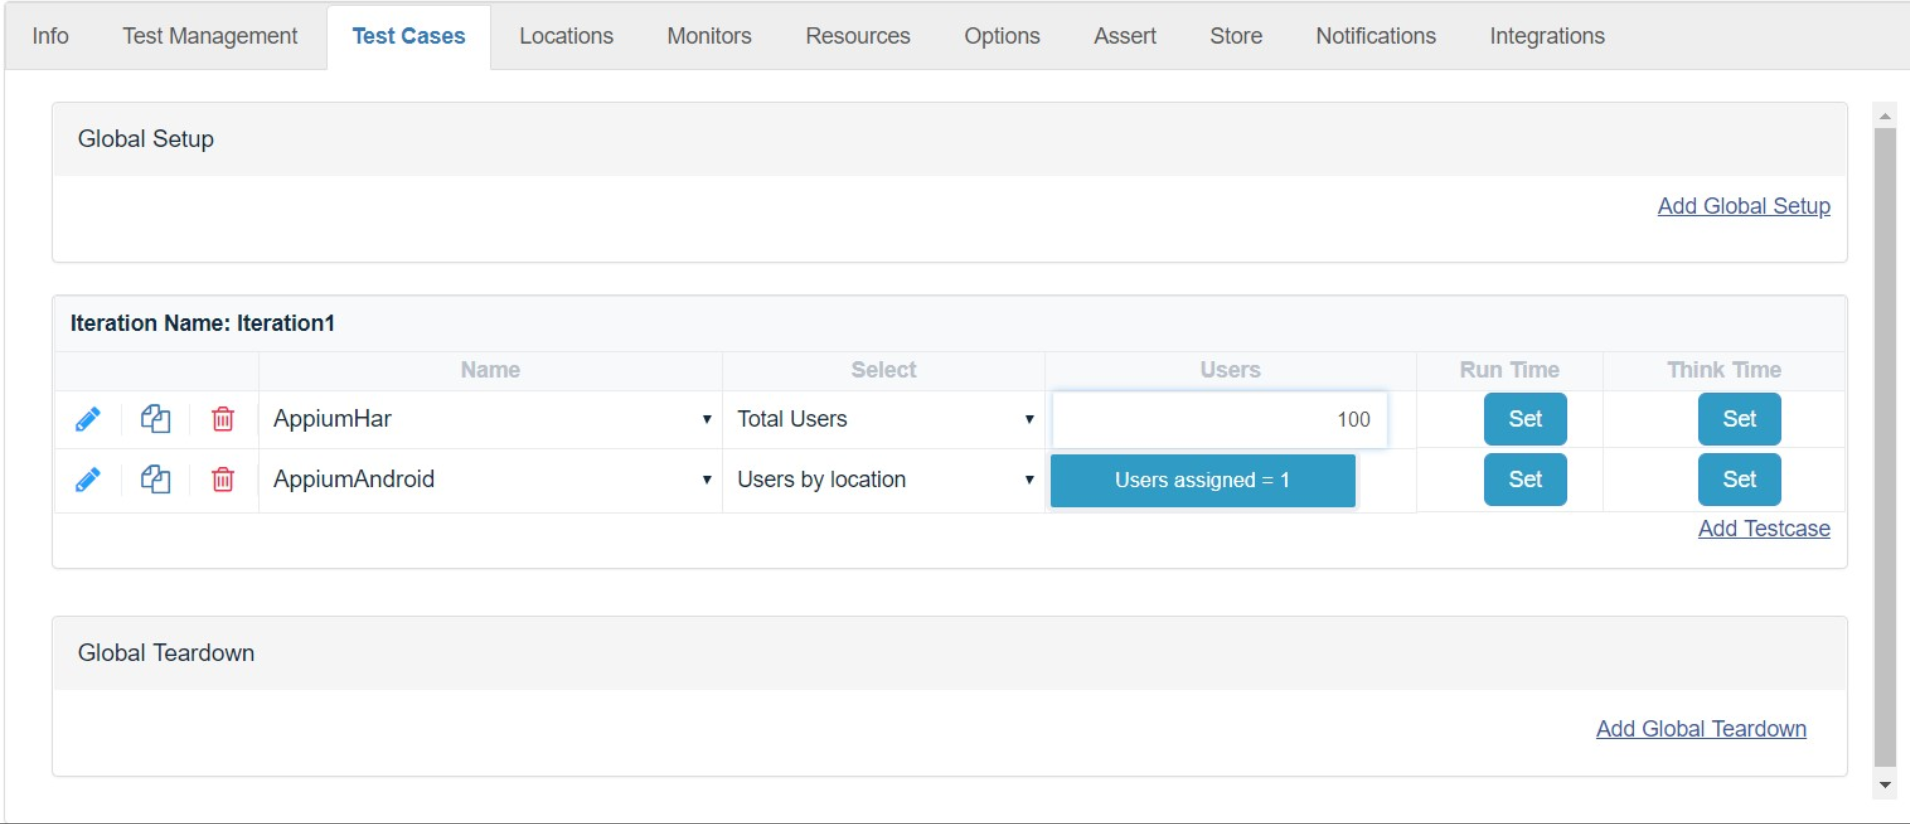
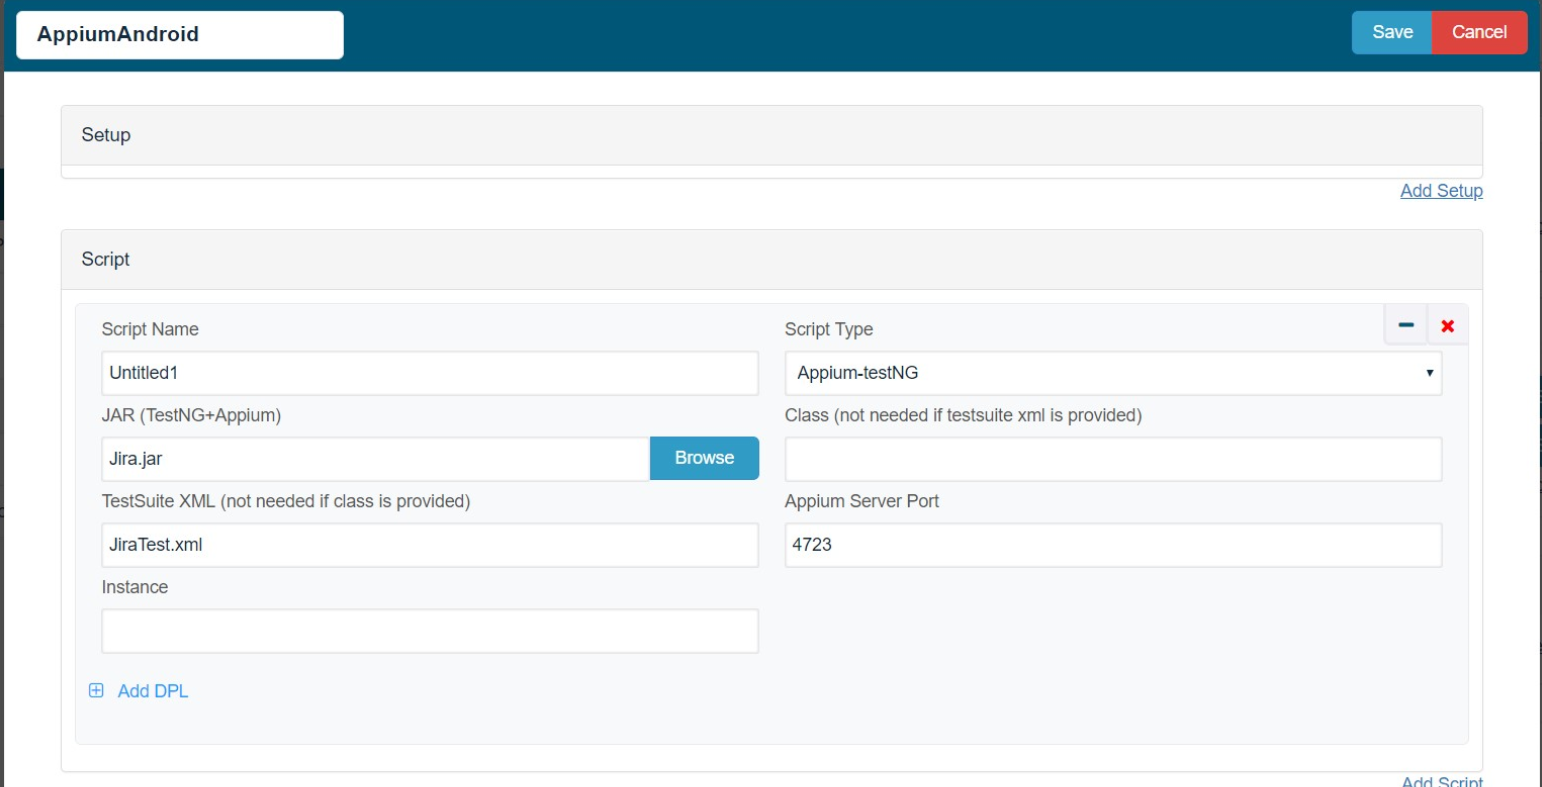
Go to the Test Case tab, there would be already an autocorrelated HAR test case, create another test case for the Appium, mention the XML/class as required
-
You could go to locations and define the test nodes where you want to distribute to run these tests
-
Come back to the Test Case panel, for the Appium android tests, you could choose to run 1 emulator in a location in parallel and along with that we have the HAR script that generates traffic of 100 users as seen in the above screen-shot in the test-case definition
-
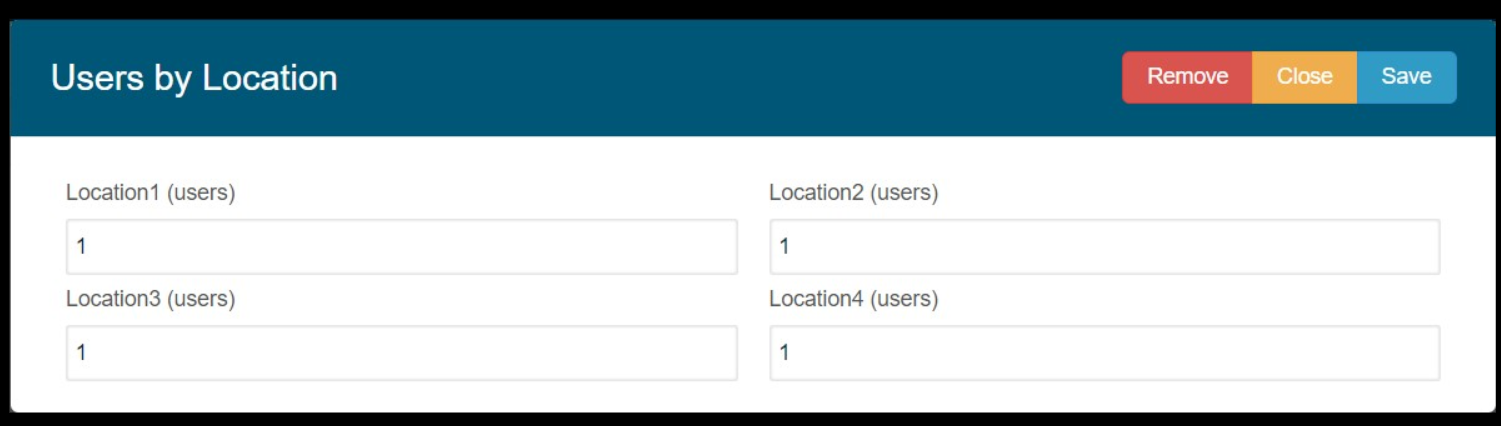
You can click the user assigned button and assign users to different locations
-
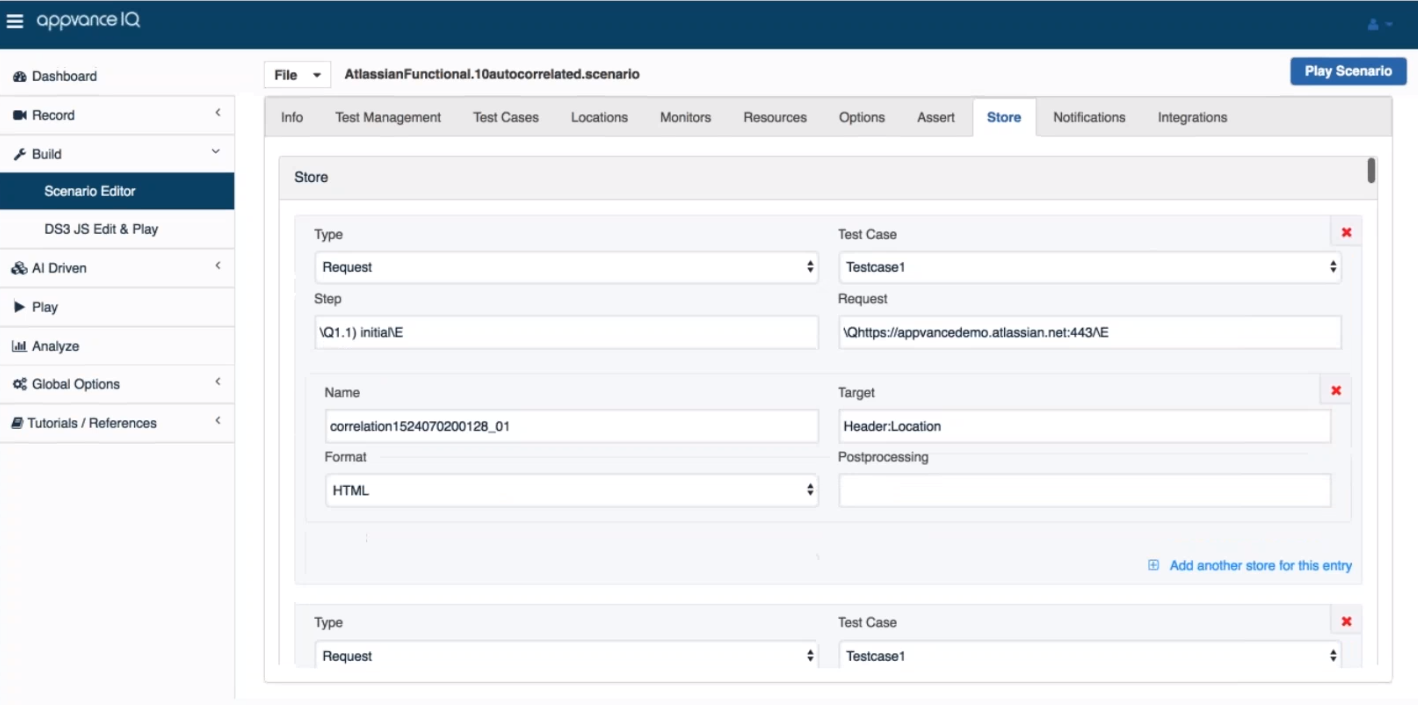
You can go to the store tab of Scenario Builder to see all the correlations added
-
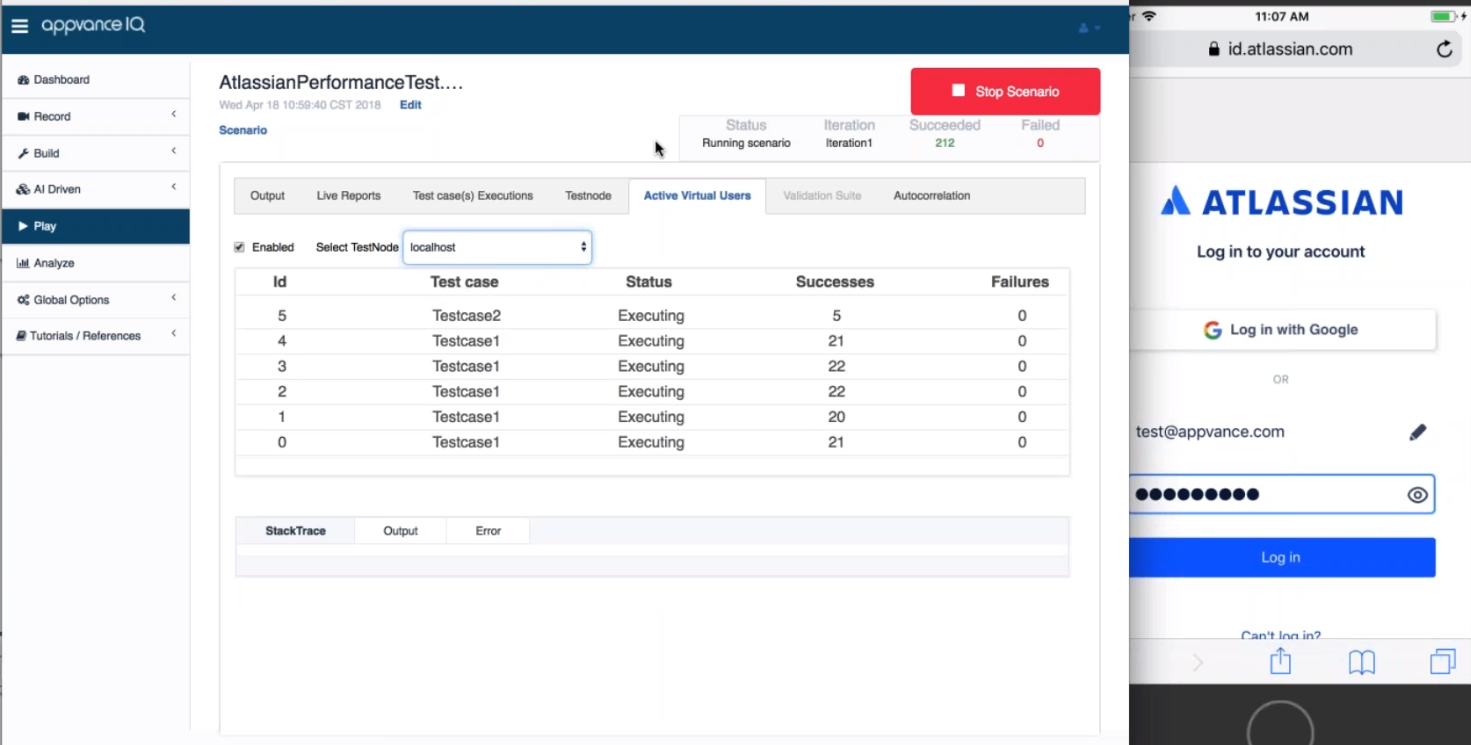
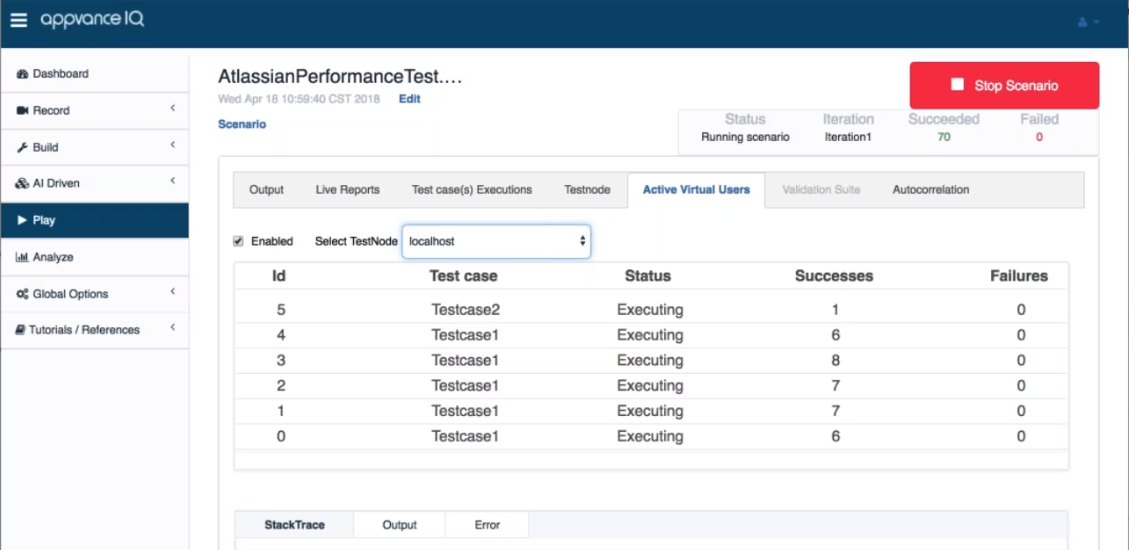
Click File > Save and save the scene as a performance test and click Play for the performance scenario to begin execution, check the controller and the results page to see the results of the test execution
-