Understanding the Image Matching Algorithm
The following section details how the image-matching algorithm determines if the target and source images are a match. There are also some recommendations and considerations for getting the best results when using the visual accessor functionality.
How the Algorithm Works
Naturally, different images will have different numbers of distinguishing features. An example of this is shown below.
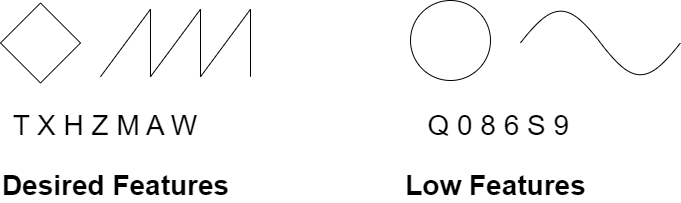
The images in the “Desired Features” set have a significant number of distinguishing features that set them apart from the other images in that set.
The images in the “Low Features” set have a smaller number of distinguishing features that set them apart from other images in that set.
Matching Process
-
The first thing the algorithm does is compute the distinguishing feature points for each image (target and source).
-
Next, the algorithm applies a matcher to find similar features in both images. For the matcher, a possible set of different algorithms can be applied. In this case, it is a matcher that rejects outlier points that are chosen to reduce the probability of getting an incorrect match.

-
Using the set of matched points, the algorithm constructs a region with the same dimensions as the target rectangle bounding.
-
The similarity between the target and sub-region source is calculated with several parameters to determine if both are similar. If they are found to be similar, then the bounding box is returned.
Recommendations and Considerations
Here are some recommendations and considerations for getting the best results when using the visual accessor functionality.
-
-
Use images with less compression and better quality. The preferred image format is PNG, but formats such as JPG/JPEG will give good results. PNG is preferred because there is less information loss due to compression. Images with more detail will have a greater number of distinguishing features.
-
Test your targets and possible sources. Before creating a full test run, test the set of targets and sources to validate if the correct targets are chosen. You can write a script to perform that task.
-
Add context to images to help differentiate them from other possible matches. This can happen if the cropping area is too limited and the number of distinguishing features is limited.
For example, an image with the word “ear” could have multiple matches depending on how the image is cropped. If the image is cropped exactly covering the word, the algorithm will also add “bear”, “spear”, “tear”, “boar” and more as matches. Even “ear” could have “oar” or “eor” as possible matches. So, when possible include some additional context in your image to help with exact matching.