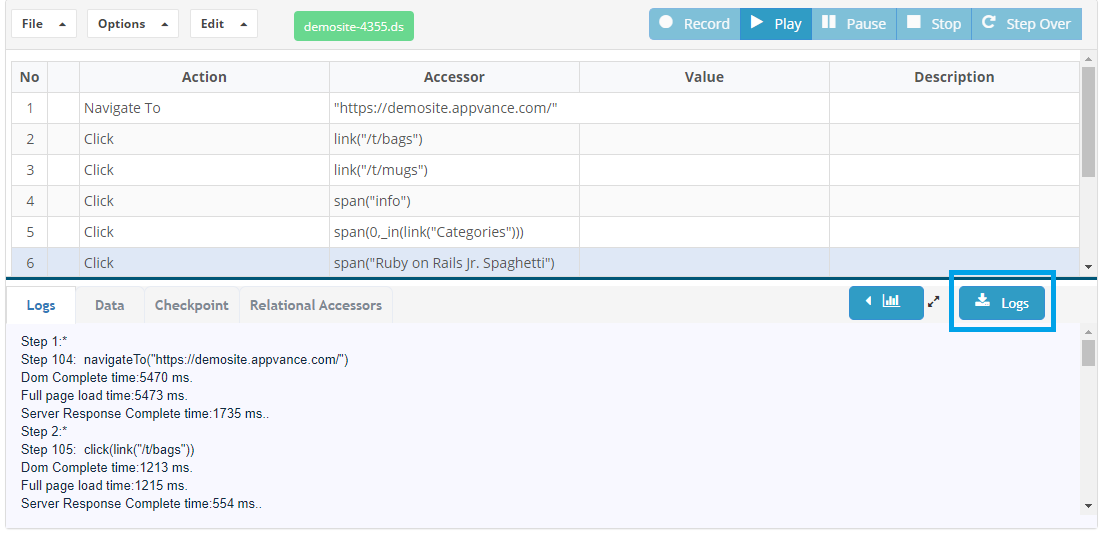
Logs
The logs tab gets enabled after a script execution begins and shows the logs of the script replay live with the time stamp.
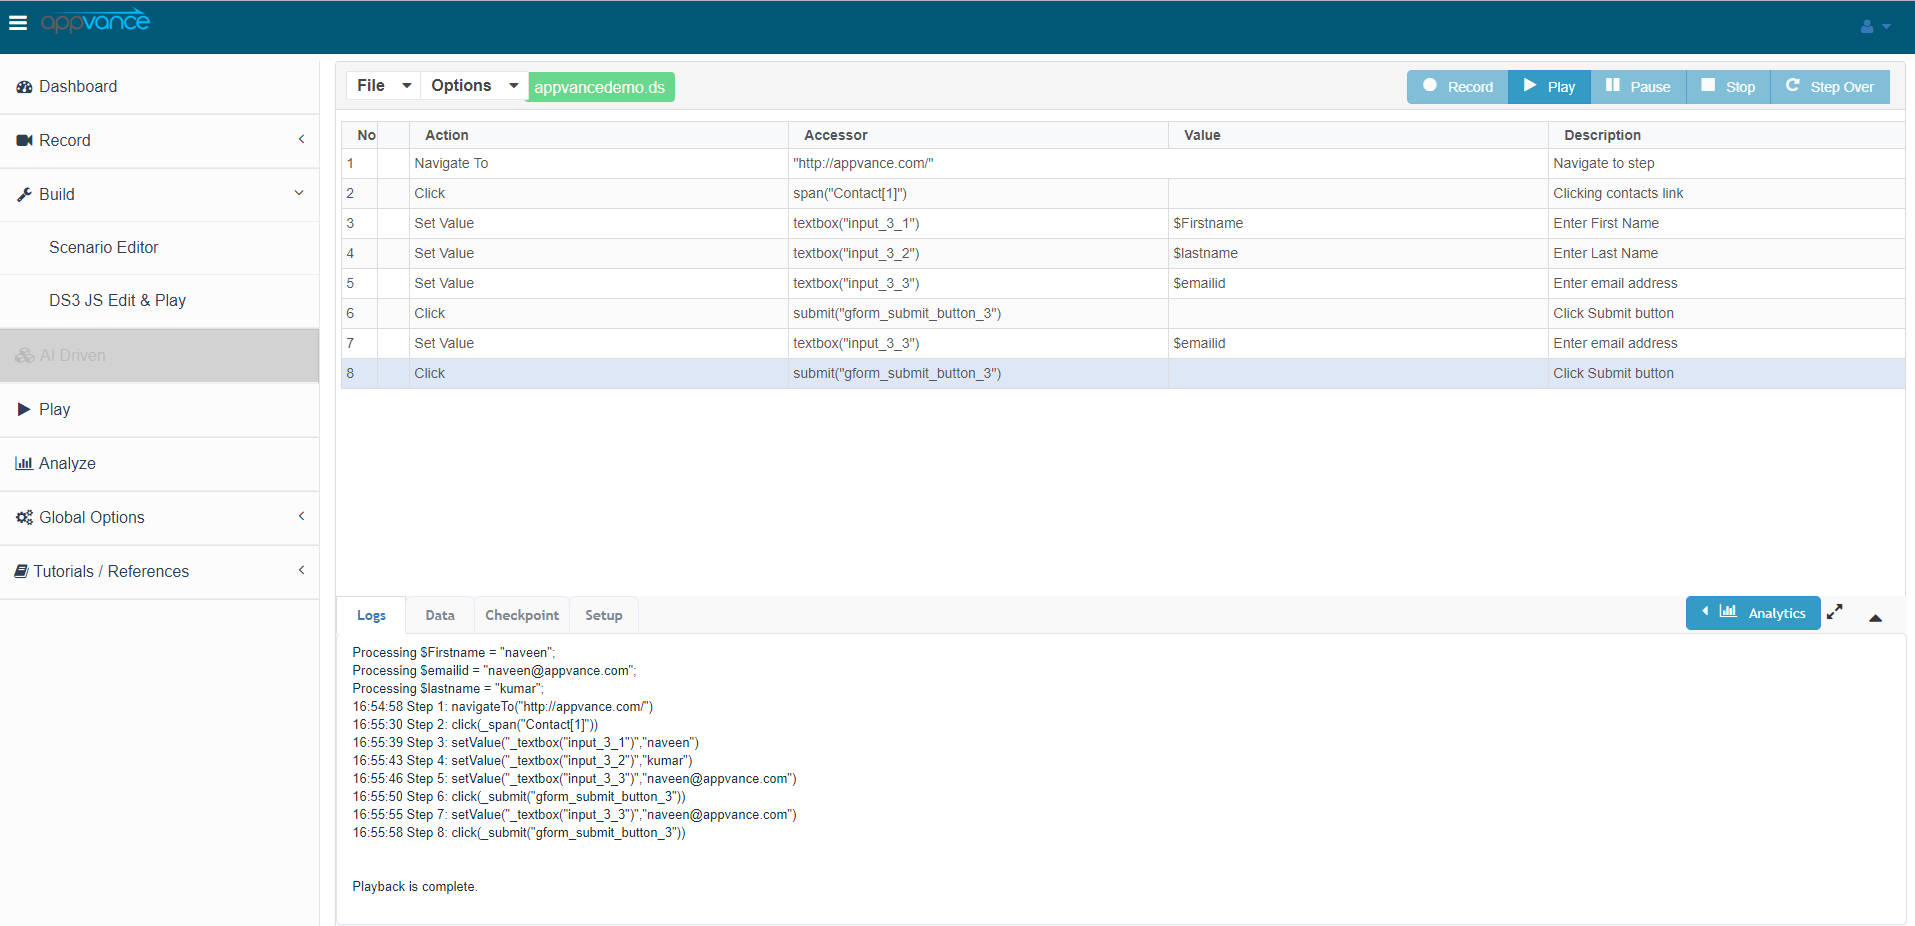
When the script is data enabled, it shall show the values that it picked for running the script.
Also when the script fails, logs can be used to see the reason behind the failure.
Example: Element not found _submit("Gform_submit_buFaiktton_3")
Data
The data tab is used to browse the CSV file for data enabling scripts.

Browse - is used to browse the .csv file, only .csv files are supported to browse and open.
The text area next to the browse button shows the file path, the file path can be changed to absolute or relative using the Make Relative and Make Absolute buttons.
Make Relative/Absolute - to make the CSV file browsed absolute or relative to the test designer script.
Remove - Simply removes the file.
Edit button opens a DPL Manager window to edit the CSV file and save the changes.
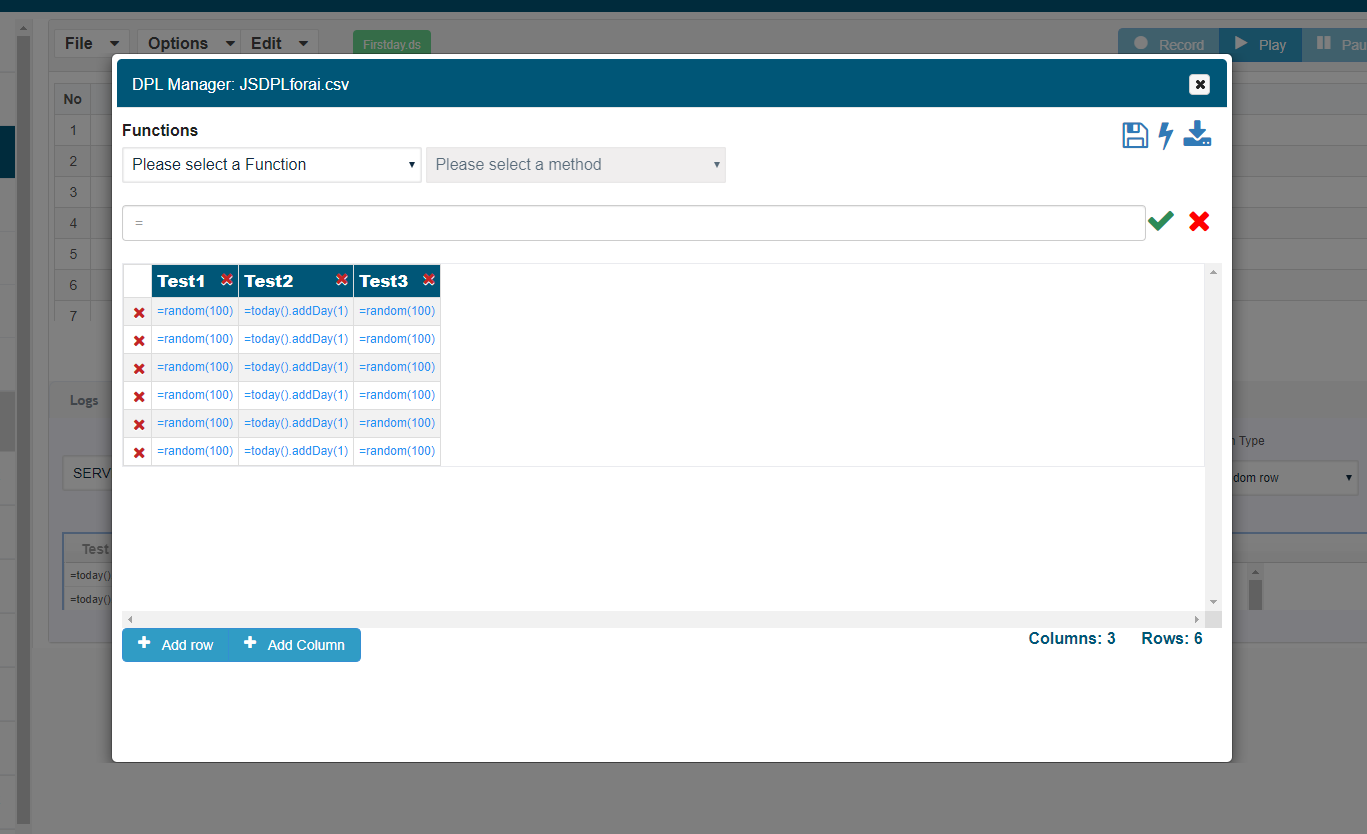
You can add rows, columns, make changes inside rows and columns and save the CSV file.
Clicking the Refresh button will refresh the contents of the file.
Search:
When the file is huge, the search returns all the rows with the search term (It shows the complete row with the search term)
Automatic ordering of columns alphabetically:
Also data tab orders all the columns alphabetically for ease of use in finding columns for data driving the scripts.
Type:
You will also have an option to choose between 2 Types:
-
Hash DPL
-
JavaScript DPL
-
Encrypt/Decrypt DPL
If the CSV file is a normal CSV without any functions or methods, Hash DPL is to be used.
If the CSV was created using JS DPL with all the methods and functions, JavaScript DPL should be used and Test Designer will evaluate the methods and functions on the go.
If the CSV is encrypted using Encrypt/Decrypt functionality, Encrypt Decrypt CSV Hash DPL is to be used.
Execution Type:
Choose one of the available types. This controls how Appvance Designer uses the data from the file in your test.
Get a random row will choose a random row each time you've run the test.
Get the next row uses the row after the last one used.
Get row # allows you to type a specific row number.
Note: You will not be able to browse the following files.
-
DPL column name that has spaces
-
DPL column name that starts with a number
-
DPL column name that has special characters
Values can contain anything and there are no restrictions for browsing a DPL file with values containing any of the above.
Note: DPL also supports newline characters and also empty spaces in the CSV to be browsed and used.
Encrypted Hash CSV DPL
Encrypted DPLs can be used in Test Designer IDE.
More about how to encrypt a DPL can be learned from Encrypt/Decrypt DPL chapter.
Make sure the CSV file is encrypted using the encrypt/decrypt DPL feature and also you remember the password to decrypt the file.
-
Open the designer script that needs to be data-driven
-
Open the Data tab
-
Choose Encrypted Hash DPL from the Type drop-down
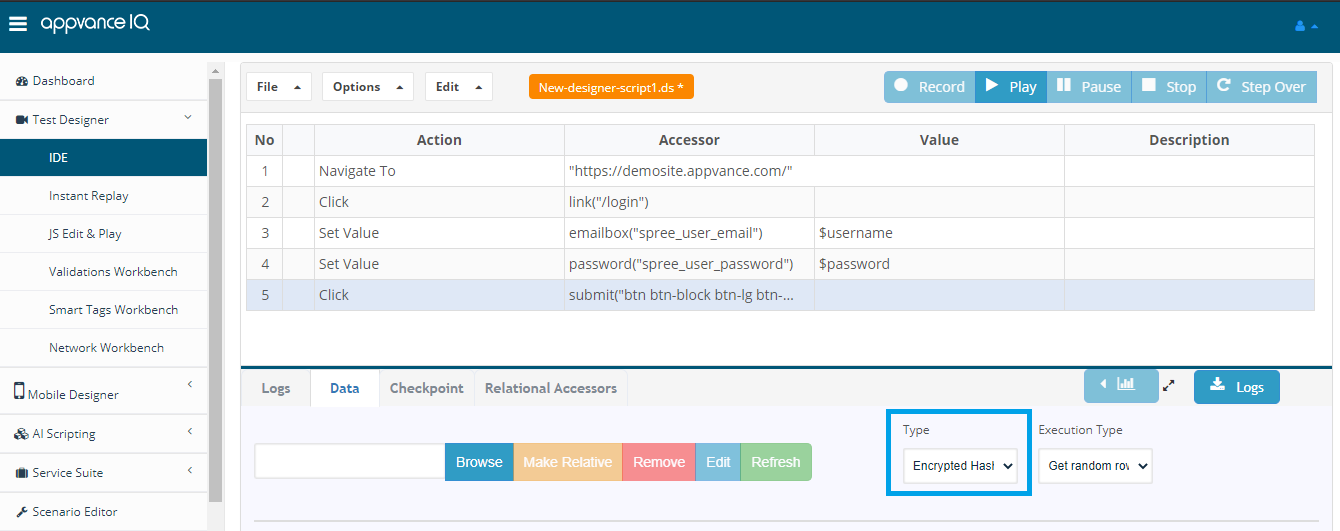
-
Click Browse
-
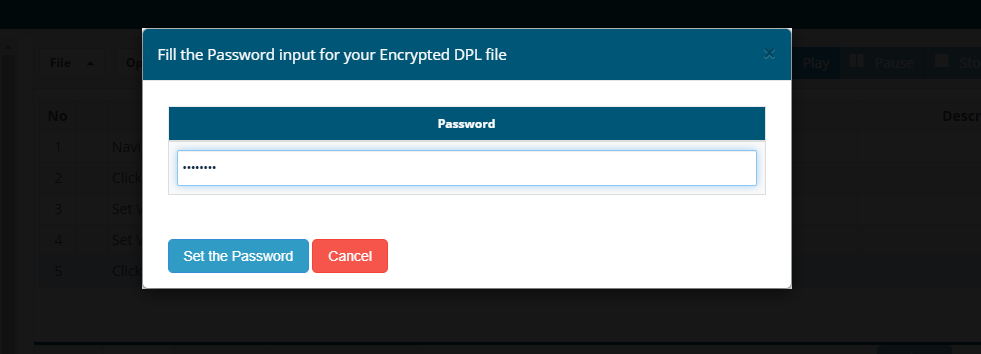
Fill in the Password input for your Encrypted DPL file pop up would be shown
-
Provide valid password
-
Providing incorrect passwords will not decrypt the file for the chosen DPL

-
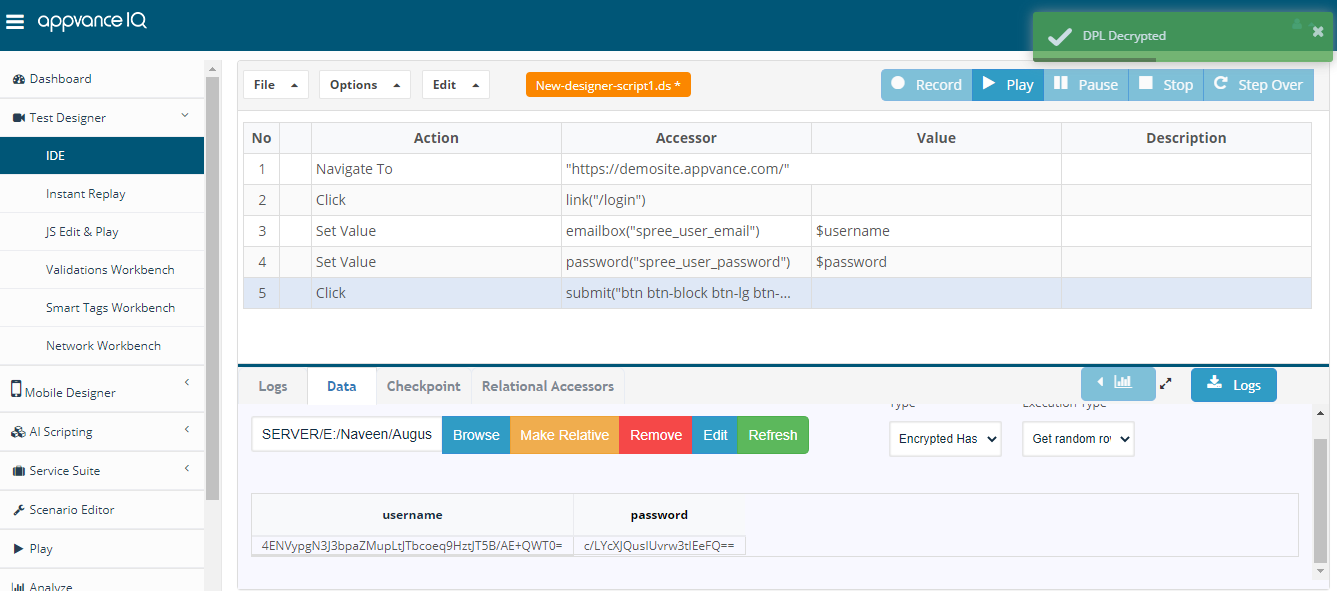
After providing the right password for the encrypted file, choose the DPL file
-
Drag and drop the values to the respective values in the IDE for the step to be data-driven
-
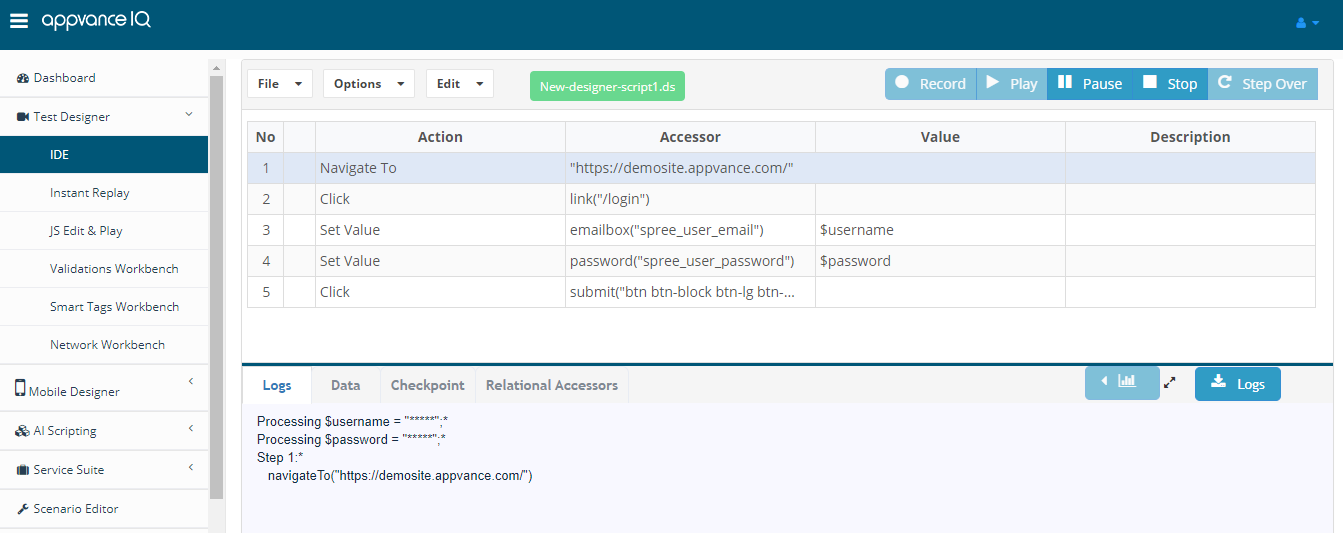
Playback the script
-
The values would be decrypted and played back
Checkpoint
The checkpoint tab is where we add assertions, Assertions compare run-time behavior against expected behavior, mainly used for verification of certain things on the web page. Assertions are always an integral part of any Test Designer script.
While recording, you have to press the control key from the keyboard and hover mouse hover on any element on the web page and those shall be identified, you shall notice that in the accessor drop-down of the checkpoint tab.
Once the element has been identified, Several assertions can be added to your script.
Different Assertions supported:
-
Assert True
-
Assert False
-
Assert Null
-
Assert Not Null
-
Assert Exists
-
Assert Not Exists
-
Assert Equal
-
Assert Not Equal
-
Assert Contains Text
You can choose anyone from this list and click Add button, which will add the assertion to your script.
DS3.0 Action API's Chapter discusses each of the assertions in detail.
Relational Accessors
Parent-Child Accessor
Parent-child Accessor is another accessor identifying mechanism in Designer 3.0.
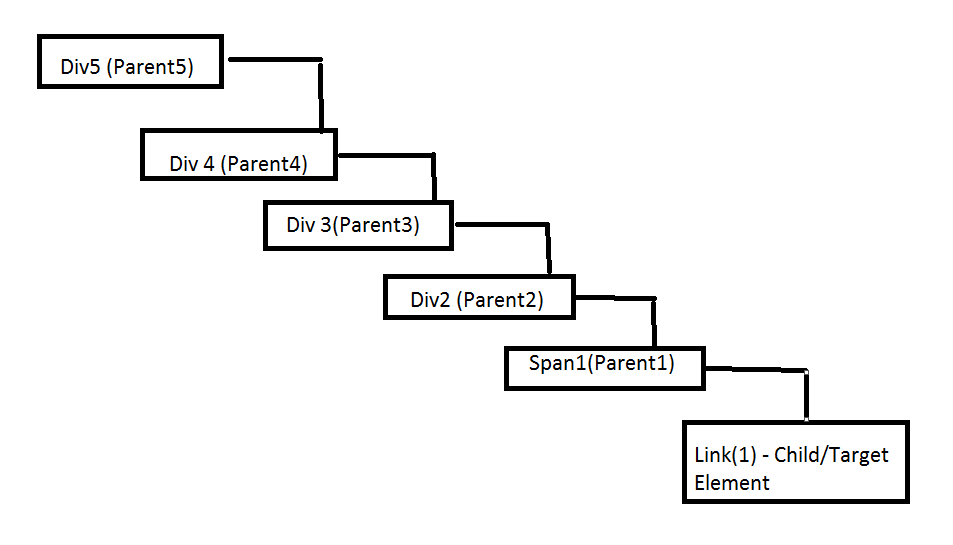
As a Relational accessor, Appvance Designer relates one element to another, Parent-child Accessor traverses back until 5 parents (if available) after a target child is picked/selected and returns the result in a JQuery format.
DOM traversing using JQuery is used to "find" (or select) HTML elements based on their relation to other elements. Appvance Designer's Parent-child accessor starts with one selection (Child element) and traverses back the HTML tree and frames the Jquery as
Parent 5 > Parent 4 > Parent 3 > Parent 2 > Parent 1 > Child Element
The image below illustrates a family tree. With DOM traversing using JQuery, you can easily move up the family tree, starting from the selected (current) element. This movement is called traversing the DOM.
In case there are only 2 or 3 parents, the jquery will be framed with only those 2 or 3 parents.
Suppose there are multiple children for the same set of parents, as shown in the below screenshot.
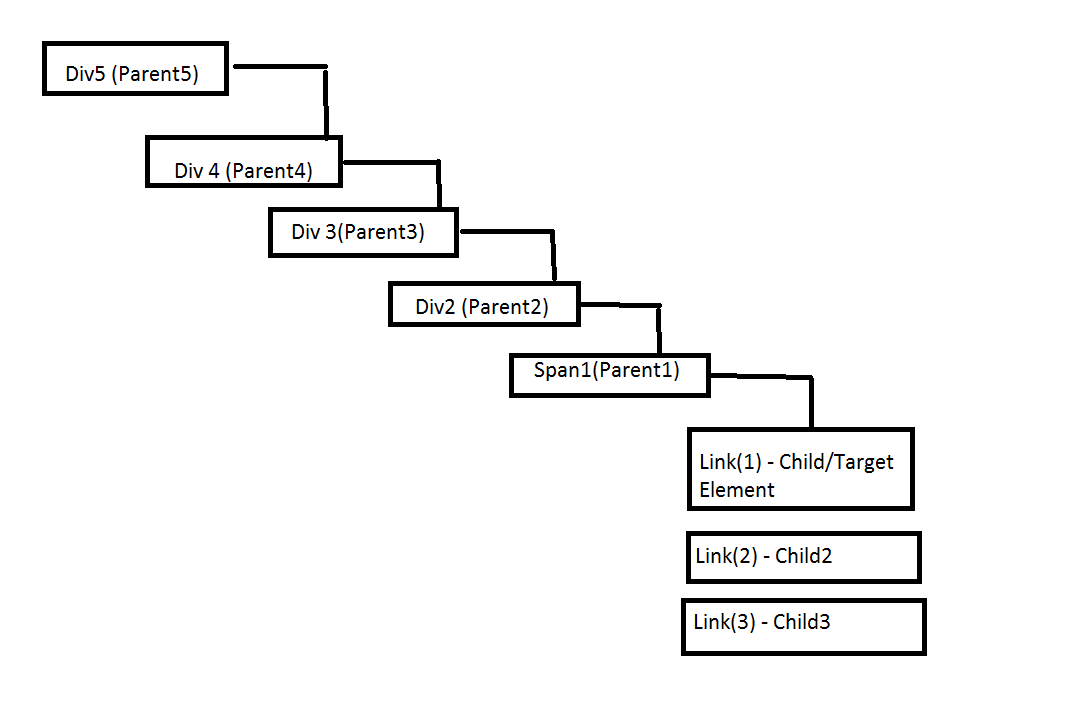
Even after traversing 5 parents, the return value would return 3 different child elements and the unique match would not be returned in this case, in this case, the Test Designer will choose the first element of the page (So this is not an ideal selection).
In the above case, a Parent-child accessor is not the right choice to target that particular element, instead Relational Accessor should be used or any other.
There are 4 different JQuery that parent-child finds.
-
With ID/Class combination: JQuery will be formed in combination of both ID/Class if the child element itself has an ID, it will stop there to create the query, this will traverse to find the ID of the parent and traverses till that point to frame the JQuery, so it could be from 1 to 5 level traversing depending on the attributes of the child and or parent
-
With Class combination alone: This will always traverse 5 levels, only the class will be chosen for both child/parent
-
With Href/Src combination: This will always traverse 5 levels, with href/src combinations of both child/parent
-
With name/text/value/title combination: This will always traverse levels, with name/text/value/title attribute combinations
Working Example from Appvance Designer:
While in recording mode, go to the Relational Accessors tab and select Parent-child Accessor from the drop-down list.
When the target element is chosen on the application, press the CTRL key and hover the mouse over the element (Child Accessor), Jquery will be automatically framed and displayed next to the Child Accessor with the 'Add to accessor dropdown' button enabled.
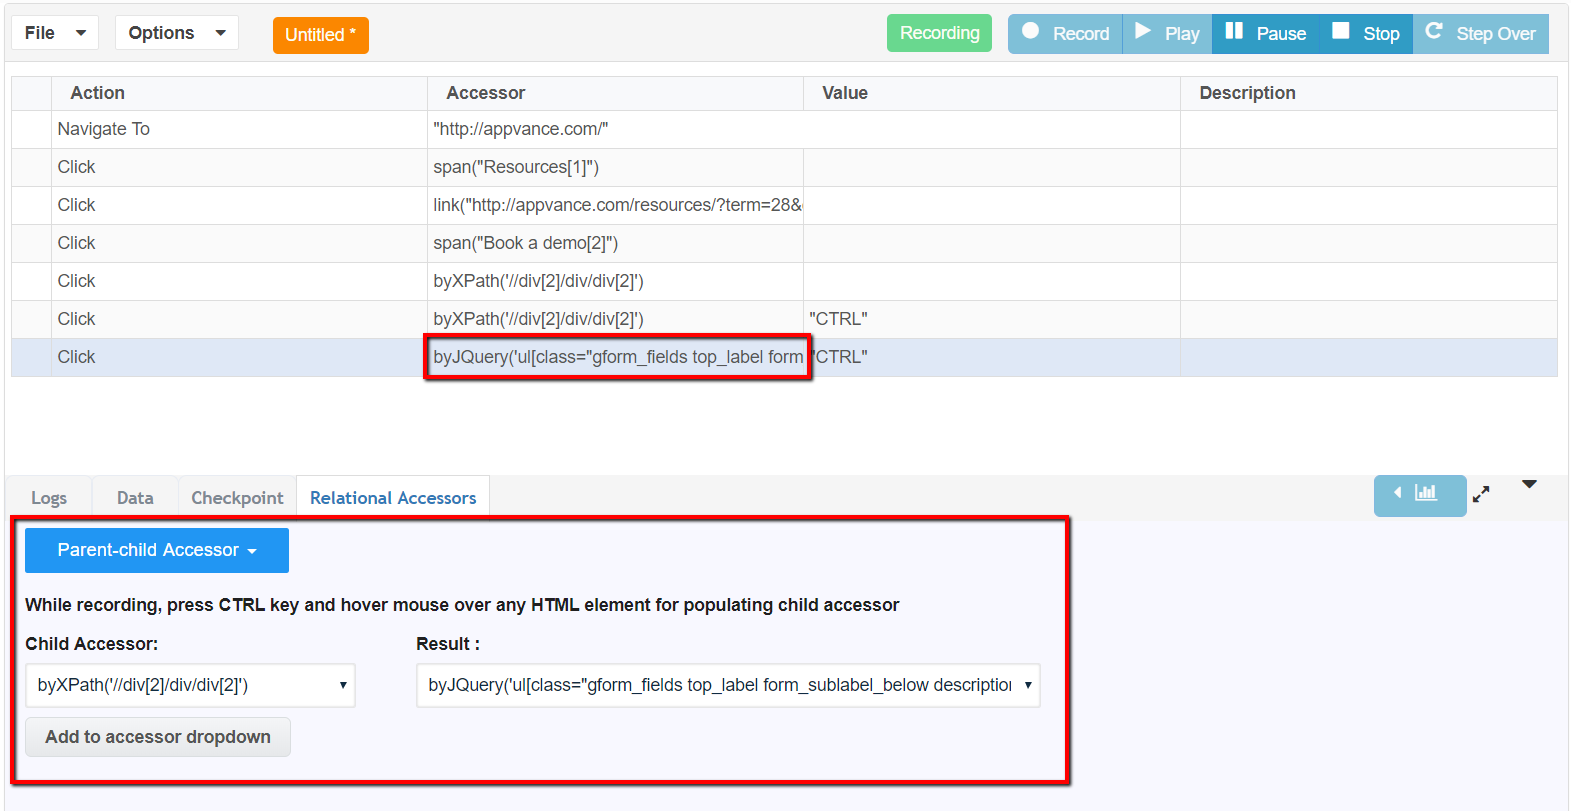
Users can either add the accessor to the drop-down by clicking the 'Add to accessor drop-down' button or can move forward with other steps.
Logs Download
The logs after the script are played back in Test Designer can be downloaded as an HTML report for sharing the report.
