Mac OS X Installation Guide for AIQ (GraalVM 11 Based)
A step-by-step guide for installing and configuring Appvance IQ on Mac OS X.
- Download AIQ for macOS
- Install Java GraalVM11
- Configure Java for AIQ
- MacOS Required Configurations for AIQ
- MySQL Install & Setup
- Install Appvance IQ Database Schema
- Update MySQL Max Packet and Case Settings
Download AIQ for macOS
- Download AIQ.
If you do not have an Appvance IQ download link, please reach out to your Appvance contact, or email support@appvance.ai.
- Extract Appvance IQ to the desired install location.
For example:/Users/<username>/AIQ
Next step: Install Java GraalVM11
Last updated: July 31, 2024
If you have any feedback on this topic, please contact us at documentation@appvance.ai
Install Java GraalVM11
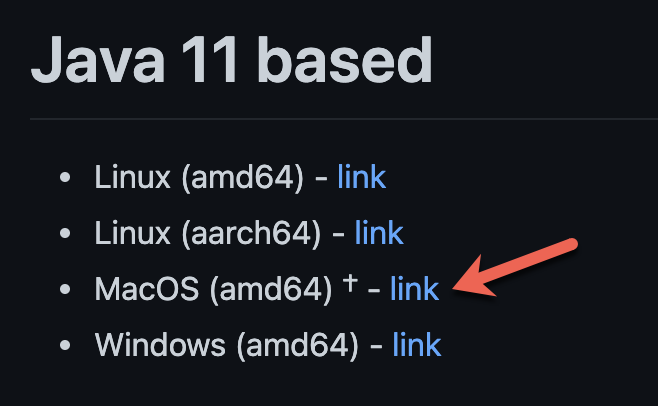
- Navigate to https://github.com/graalvm/graalvm-ce-builds/releases/tag/vm-21.3.0
- Locate MacOS (amd64) and click link/
- Open Terminal and change directory to Downloads.
Syntax:cd $HOME/Downloads - Unzip the archive. Note that
<version>represents the graalvm version (ex: 21.3.0).
Syntax:tar -xzf graalvm-ce-java11-darwin-amd64-<version>.tar.gz
Example:tar -xzf graalvm-ce-java11-darwin-amd64-21.3.0.tar.gz - Remove the quarantine attribute. Enter password when you are prompted.
Syntax:sudo xattr -r -d com.apple.quarantine graalvm-ce-java11-<version>/
Example:sudo xattr -r -d com.apple.quarantine graalvm-ce-java11-21.3.0/ - Move the directory package to
JavaVirtualMachines.
Syntax:sudo mv graalvm-ce-java11-<version>/ /Library/Java/JavaVirtualMachines
Example:sudo mv graalvm-ce-java11-21.3.0/ /Library/Java/JavaVirtualMachines - Verify the move was successful. You may now have more than one version listed.
Syntax:/usr/libexec/java_home -V
Next step: Configure Java
Last updated: July 31, 2024
If you have any feedback on this topic, please contact us at documentation@appvance.ai
Configure Java for AIQ
- Update your PATH environment variable to the GraalVM bin directory. (where <version> represents the graalvm version, ex: 21.3.0)
Syntax:export PATH=/Library/Java/JavaVirtualMachines/graalvm-ce-java11-<version>/Contents/Home/bin:$PATH
Example:export PATH=/Library/Java/JavaVirtualMachines/graalvm-ce-java11-21.3.0/Contents/Home/bin:$PATH - Update your JAVA_HOME environment variable to resolve to the GraalVM installation directory (where <version> represents the graalvm version, ex: 21.3.0)
Syntax:export JAVA_HOME=/Library/Java/JavaVirtualMachines/graalvm-ce-java11-<version>/Contents/Home/
Example:export JAVA_HOME=/Library/Java/JavaVirtualMachines/graalvm-ce-java11-21.3.0/Contents/Home/ - Verify your install was successful.
Syntax:java -version
Sample Output:openjdk version "11.0.13" 2021-10-19OpenJDK Runtime Environment GraalVM CE 21.3.0 (build 11.0.13+7-jvmci-21.3-b05)OpenJDK 64-Bit Server VM GraalVM CE 21.3.0 (build 11.0.13+7-jvmci-21.3-b05, mixed mode, sharing)
Next step: MacOS Required Configurations for AIQ
Last updated: July 31, 2024
If you have any feedback on this topic, please contact us at documentation@appvance.ai
MacOS Required Configurations for AIQ
The following steps are necessary to improve AIQ compatibility with macOS systems.
Java 8 Related Configuration
This configuration addresses a known issue that causes slowing in Java 8 applications with macOS Sierra or newer.
See StackOverflow for more information.
This configuration is required for macOS Sierra (10.12), High Sierra (10.13) Mojave (10.14), and earlier versions of Catalina (10.15.1 through 10.15.4).
- Type "hostname" in a terminal window to get your system's canonical name. This <system canonical name> should look similar to
Joe-MacBook-Pro.local. - Enter the hostname obtained in the first step into your
/etc/hoststext file.- Open the nano text editor to edit the
/etc/hostsfile by typing in a terminal:sudo nano /etc/hosts - Assuming your hostname is "
Joe-MacBook-Pro.local", then you should add two lines similar to this ones to the/etc/hostsfile.127.0.0.1 Joe-MacBook-Pro.local::1 Joe-MacBook-Pro.local - Press Ctrl+O to write changes to the hosts file, and Ctrl-X to exit the nano text editor. Make sure to replace
Joe-MacBook-Pro.localwith your actual hostname returned by the command in the first step. Save your file, and retry executing your script in test designer.
This change is NOT needed for recent Catalina OS releases (10.15.5+).
- Open the nano text editor to edit the
System Preferences
This configuration is necessary to be able to record and playback using Test Designer IDE using a Safari browser.
- In the Security & Privacy preference, select the Privacy section, for Accessibility and Full Disk Access: add the Java app to the list of apps that are allowed to control your computer. (Mojave requires the Accessibility permissions to control your computer to the Terminal App instead of the Java App)
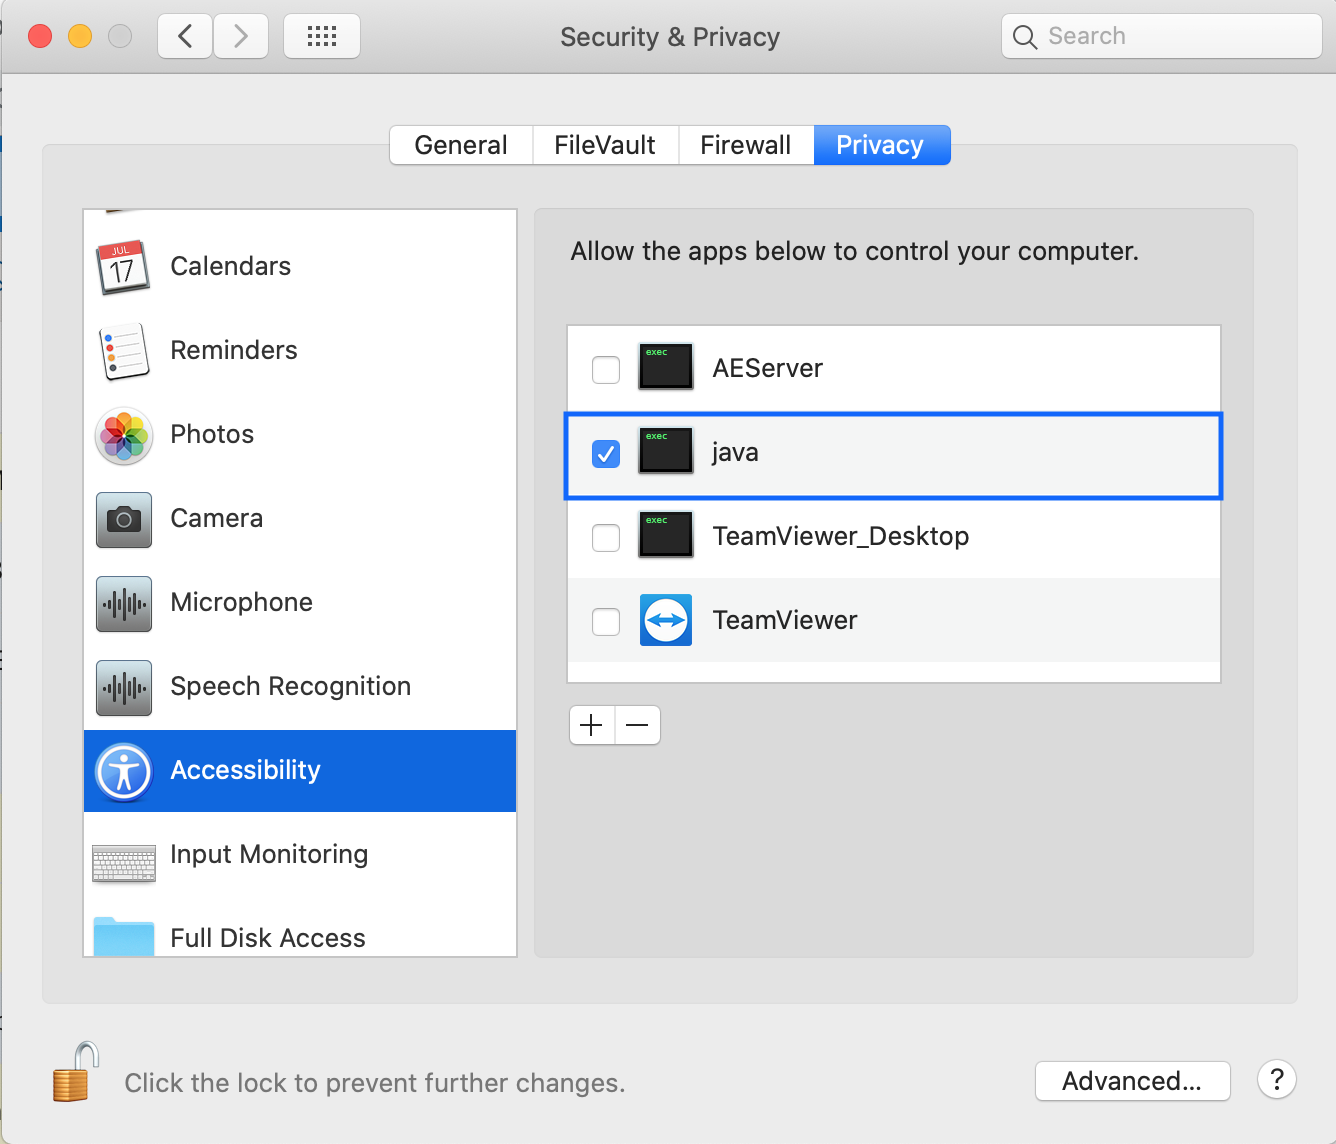
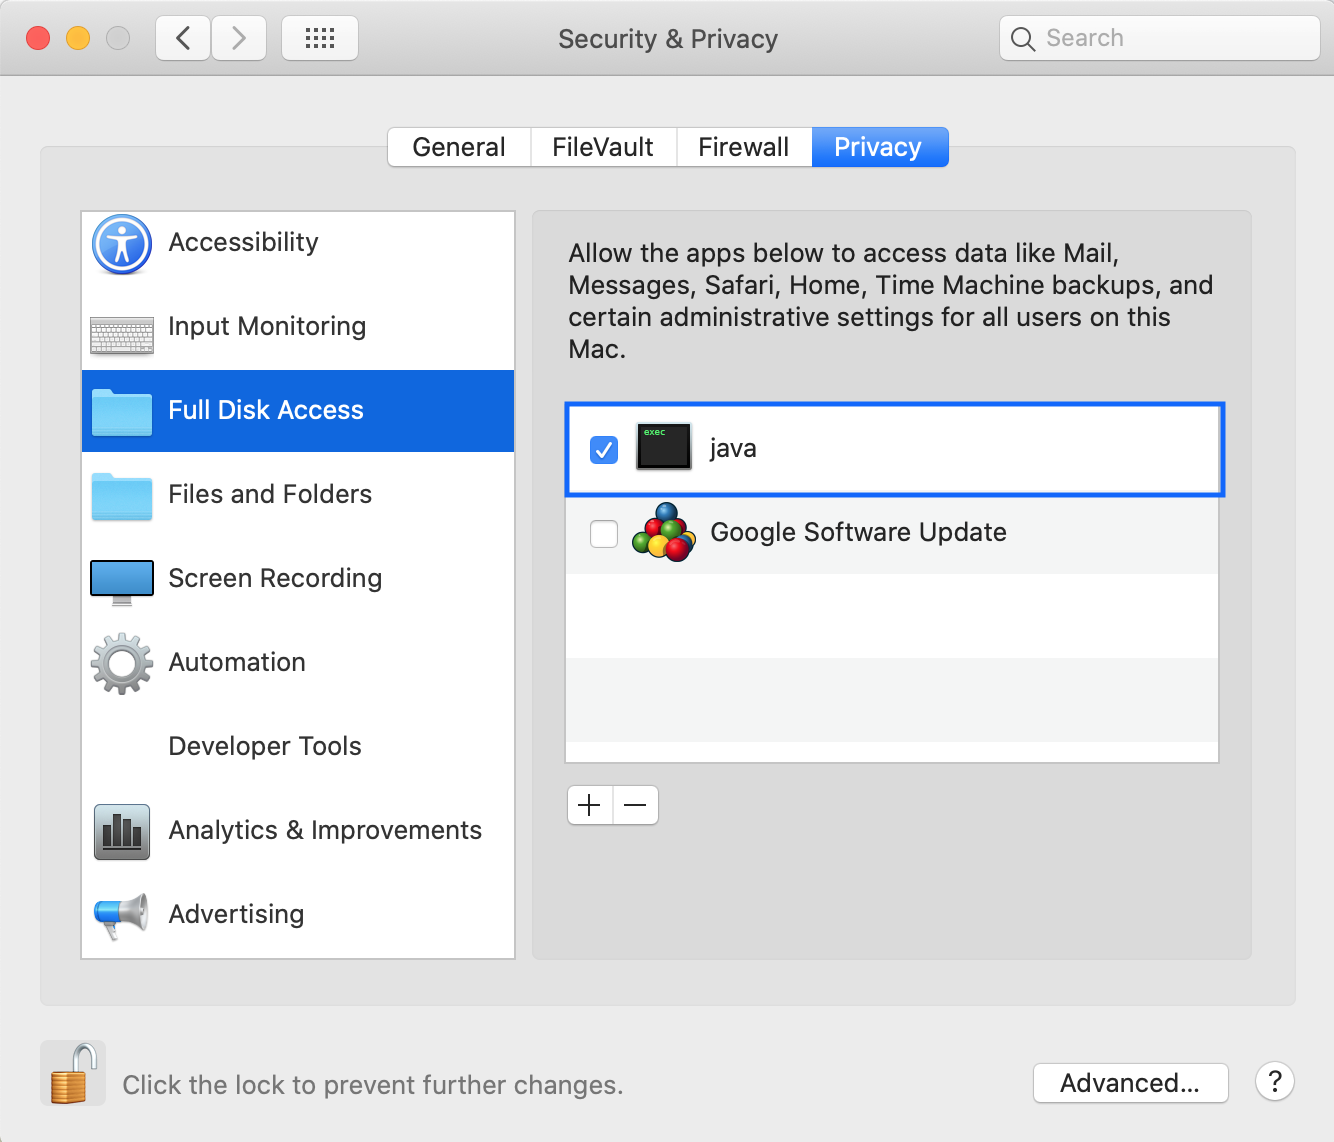
- If you want to record/playback Test Designer script with Safari, make sure you select Safari as your default system browser in the Preferences General tab

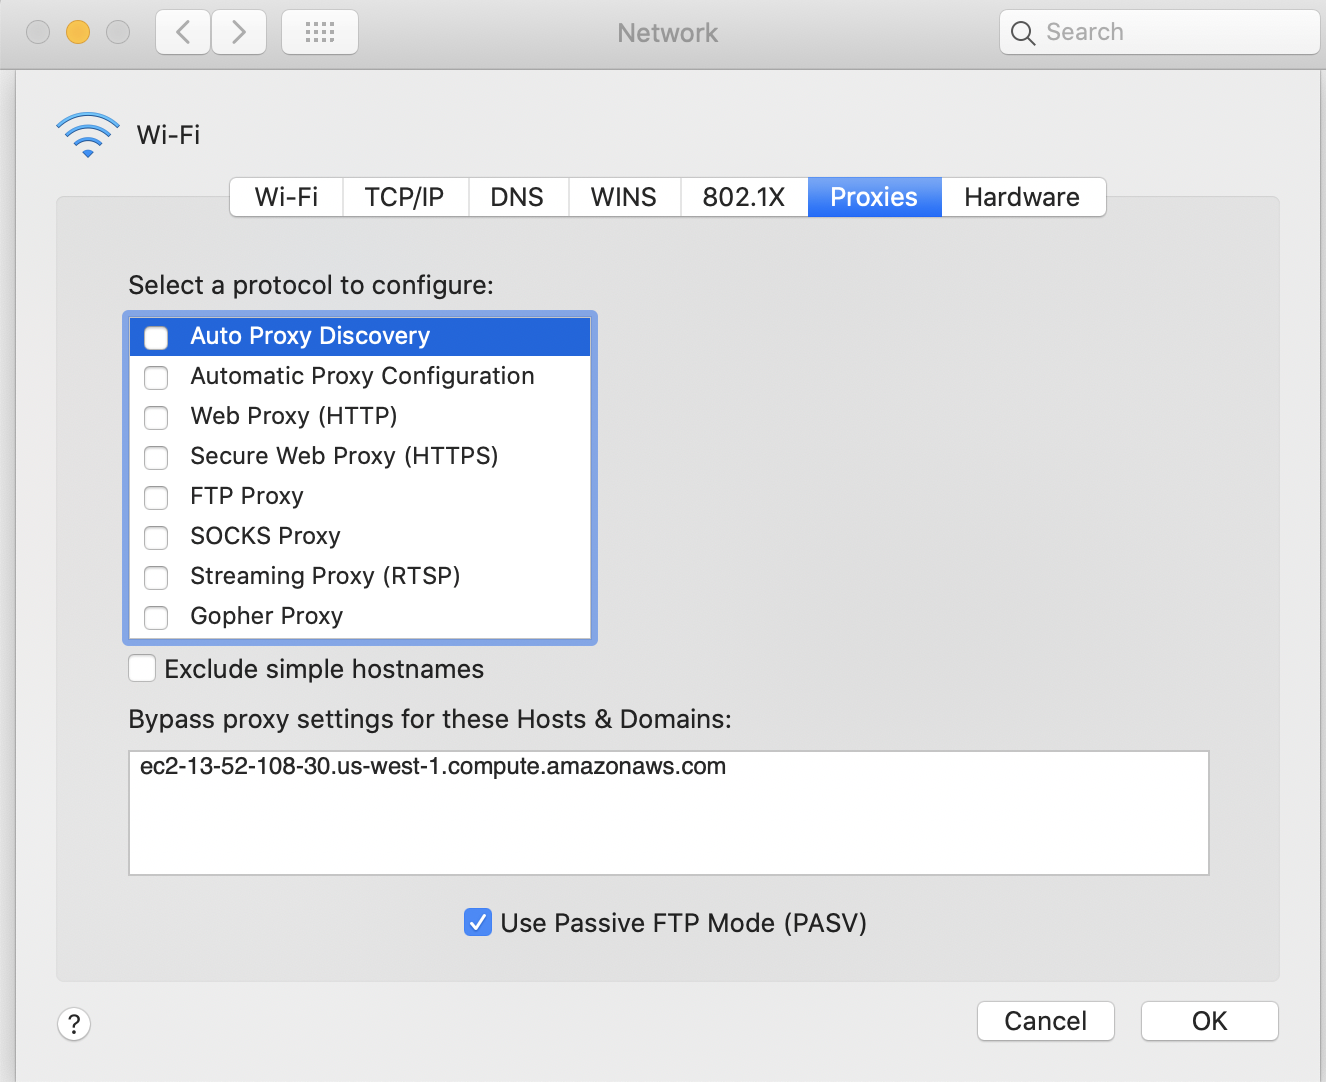
- In the Network preferences, Proxies settings: set the Bypass proxy settings to your AIQ server DNS
Safari Preferences
This configuration is necessary to be able to record and playback using Test Designer IDE using a Safari browser.
Safari opens with: A new private window. New window open with Empty PageNew tabs open with Empty Page
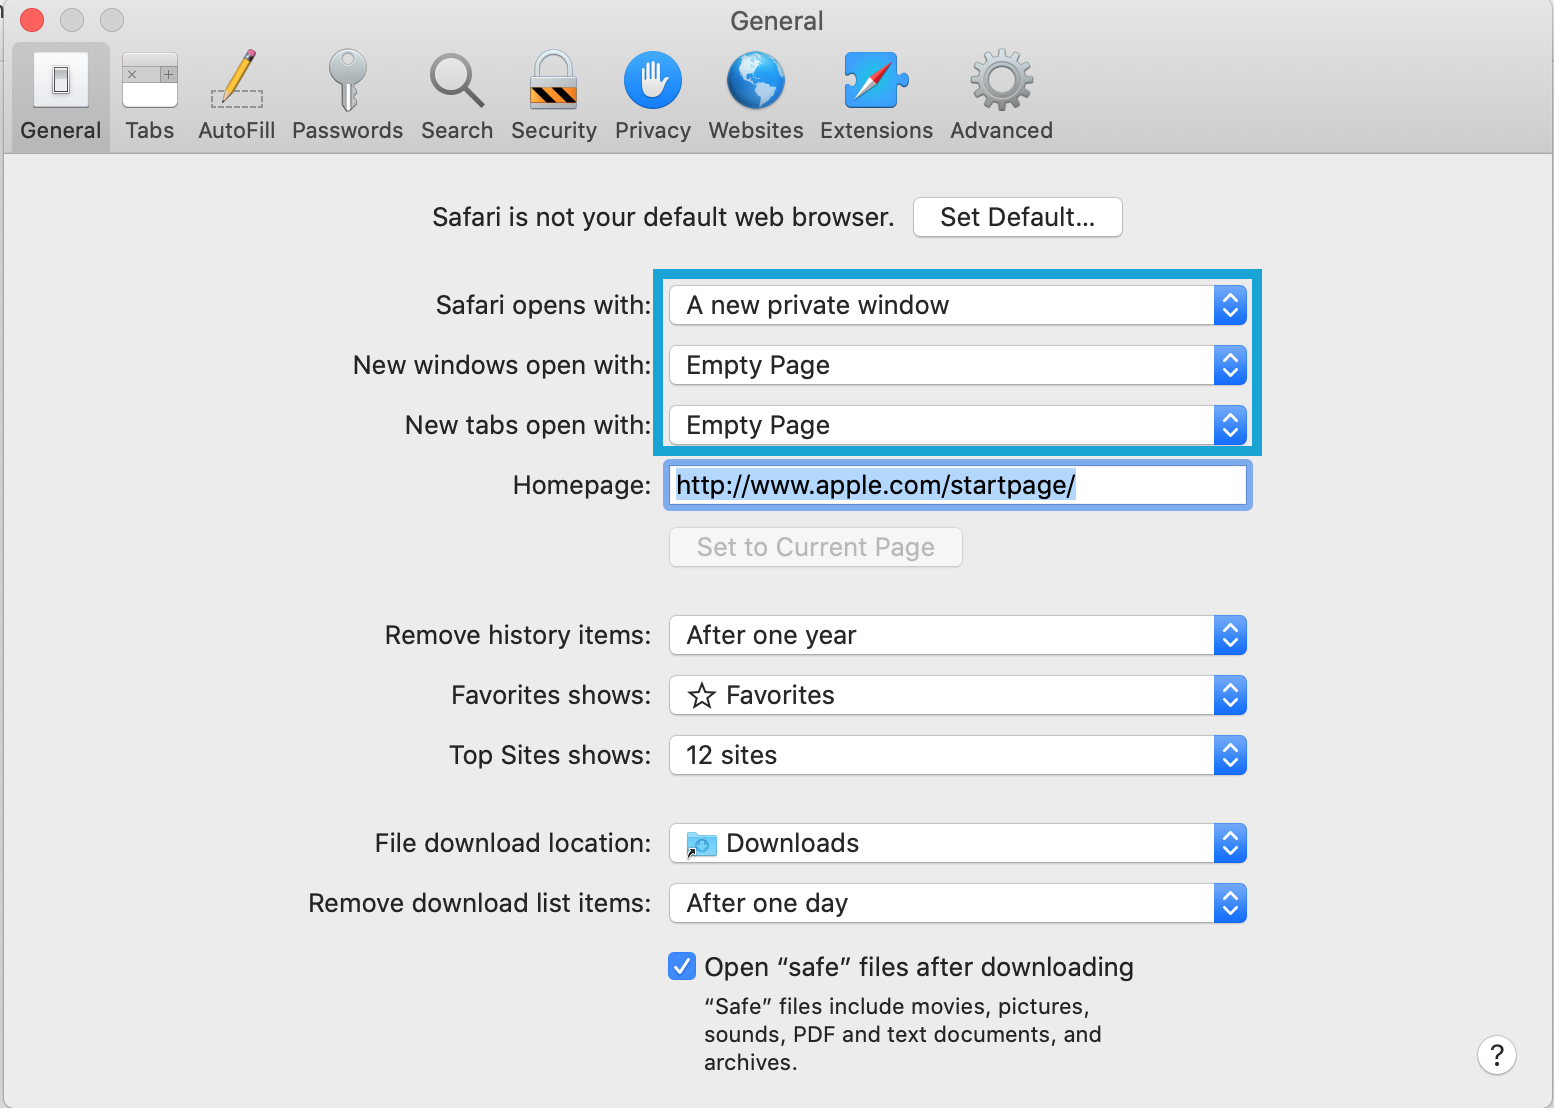
Select "When a new tab or window opens, make it active" in Tabs section
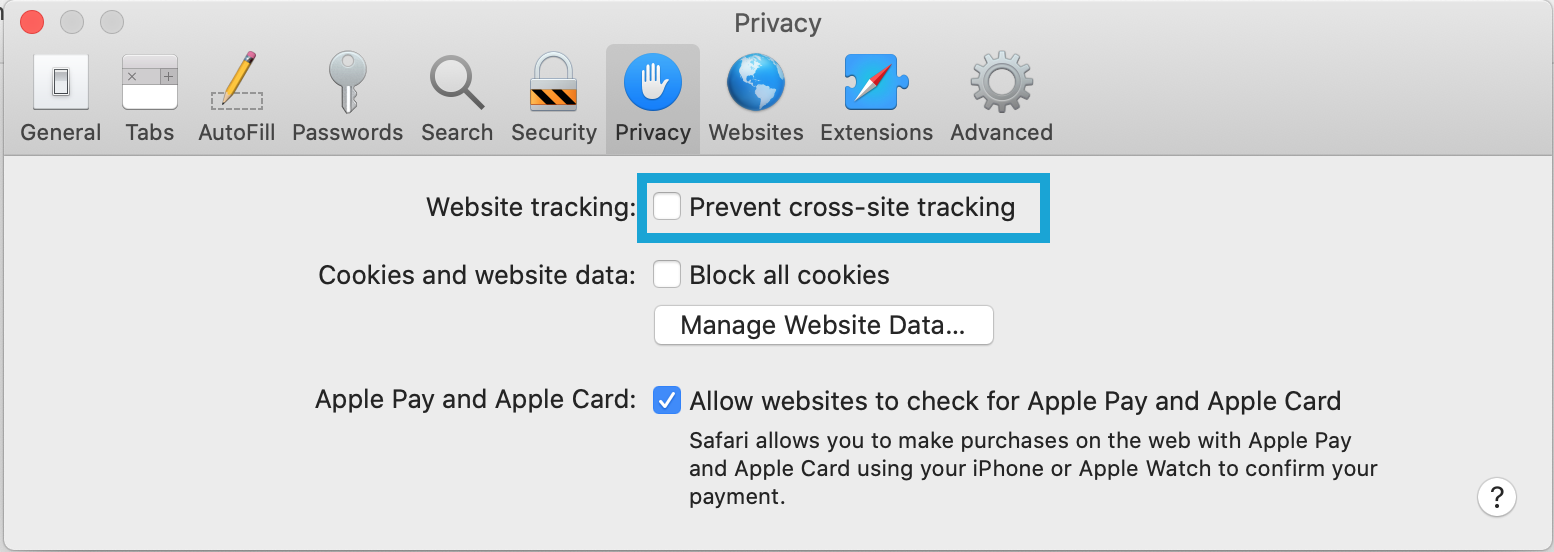
Other optional settings in Safari Advanced tab:

Apvance Certificate
Check if the Appvance Certificate is present (only needed if after the above steps you have Test Designer IDE recording problems)
The client installer for Test Designer scripts should automatically install Appvance 2020 SSL certificate in MacOS and in Mozilla Firefox (if present). But if you have problems recording on HTTPS sites, do validate if the certificate "Appvance 2020" is installed in the MacOS and/or Firefox.
Verifying the Appvance certificate is installed in MacOS
To check the MacOS certificates open the Keychain Access application and click over the tab. You should be able to find the "Appvance 2020" certificate with a blue dot (meaning it is trusted) as in this image:

Catalina updates (May 2019) requires that the Appvance2020 certificate needs to be installed both in System and login keychains.
Installing the Appvance certificate in MacOS
If the certificate is not installed in Mozilla Firefox, you can download it from this link:https://aiq-client-installer.s3-us-west-2.amazonaws.com/appvance2020.cerThen click the "Import" button in the Firefox Certificate Manager and select the downloaded "appvance2020.cer" file.
Double-click the appvance2020.cer file and it will be added to the Keychain Access application. Locate the Appvance 2020 in the System Keychain and doble click over it to see its details. Expand the Trust option and select Always Trust in the first select box. The OS will ask for your password to trust this certificate and the screen should look like this
Verifying the Appvance certificate is installed in Firefox
To check if the certificate is installed on Mozilla Firefox, open Firefox and open the Preferences, then type "Certificates" in the search input box. Click the View Certificates button to open the Certificates Manager:

In the Certificate Manager, click the "Authorities" tab and scroll down until you find the Appvance 2020 certificate

Installing the Appvance certificate in Firefox
If the certificate is not installed in Mozilla Firefox, you can download it from this link:https://aiq-client-installer.s3-us-west-2.amazonaws.com/appvance2020.cer
Then click the "Import" button in the Firefox Certificate Manager and select the downloaded "appvance2020.cer" file. Then click both trust checkboxes as in this image, and click Ok.

Next step: MySQL Install & Setup
Last updated: July 31, 2024
If you have any feedback on this topic, please contact us at documentation@appvance.ai
MySQL Install & Setup
Install MySQL Server
- Go to https://downloads.mysql.com/archives/community/
- Click Product Version and select 5.7.31
- Click Operating System and select Mac OS X
- Locate macOS 10.14 (x86, 64-bit), DMG Archive and click Download
- Open the downloaded package
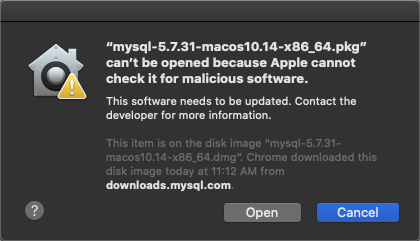
- A warning may appear, with a legend similar to “can’t be opened because Apple cannot check it…” click OK
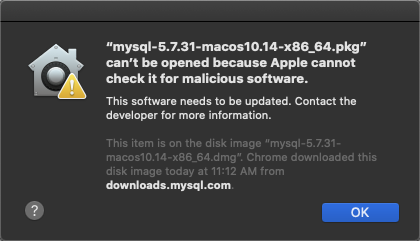
- Select Apple Menu and click System Preferences
- Click Privacy & Security
- Click the General tab and select Open Anyway
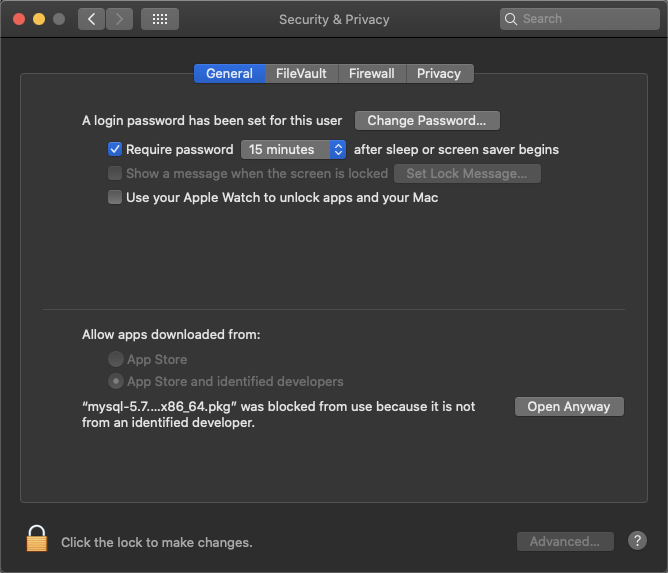
- Another warning may appear, click Open
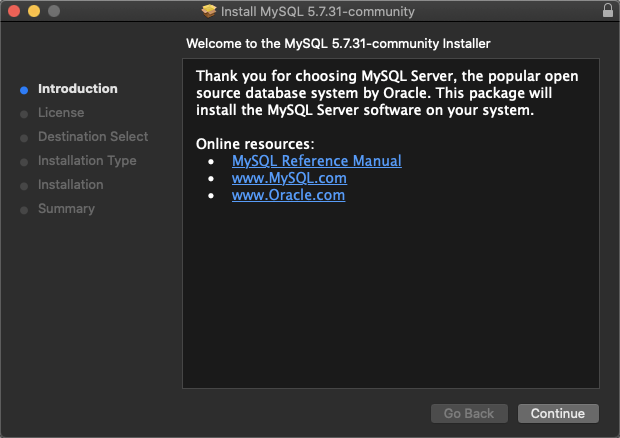
- When the Install MySQL installer appears, click Continue
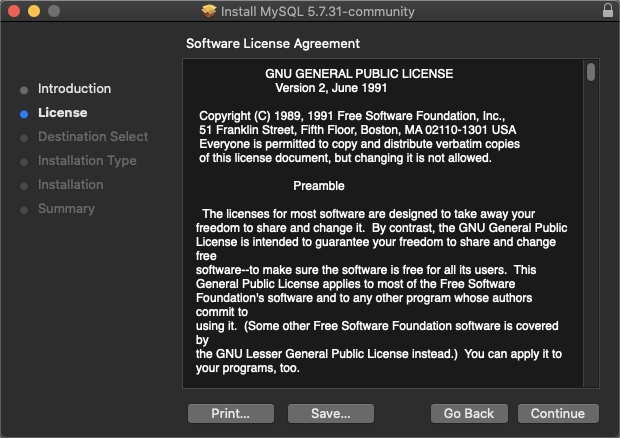
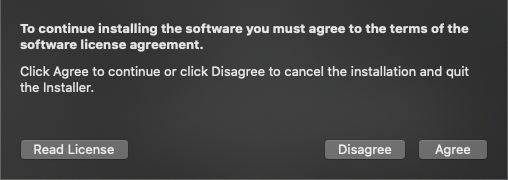
- Review the Software License Agreement, click Continue, then click Agree
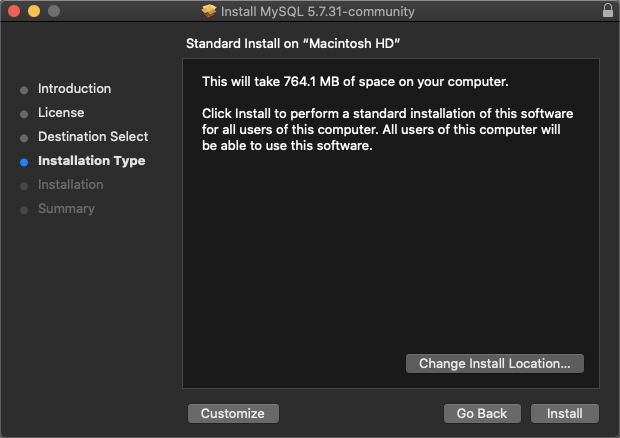
- When the Installation Type window appears, click Customize
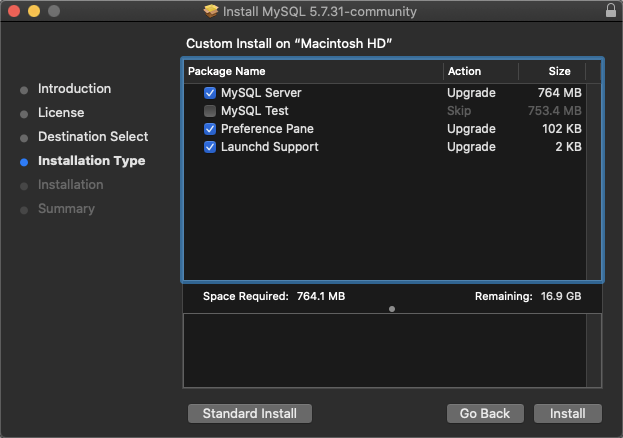
- Ensure MySQL Server, Preference Pane and Launchd Support are selected, and click Install
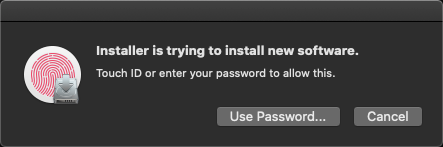
- Enter password when prompted
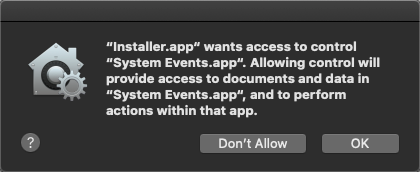
- If the System Events.app warning appears, click OK
- IMPORTANT When MySQL Installer provides the temporary password, note this password, it cannot be recovered!
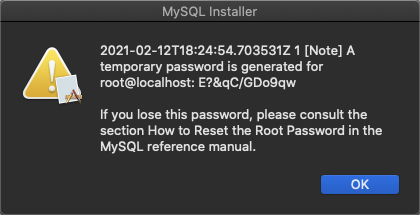
- When the Summary window appears, click Close
If prompted you may move the installer to trash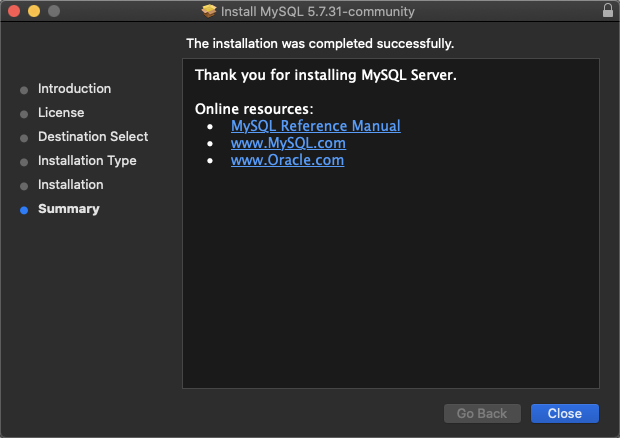
- Select Apple Menu and click System Preferences
- Click MySQL
- If MySQL is running, click Stop MySQL Server
- Click Start MySQL Server
Install MySQL Workbench
- Go to https://dev.mysql.com/downloads/workbench/ and download MySQL Workbench
- Open the installer
- When prompted, drag and drop MySQLWorkbench.app to Applications
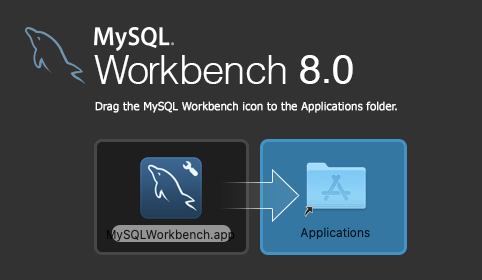
Next step: Install Appvance IQ Database Schema
Last updated: July 31, 2024
If you have any feedback on this topic, please contact us at documentation@appvance.ai
Install Appvance IQ Database Schema
- Open MySQLWorkbench
- If warning appears, click OK
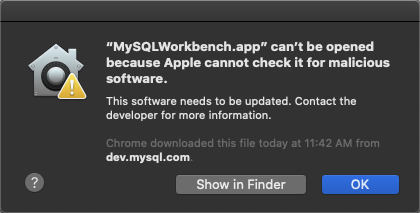
- Select Apple Menu and click System Preferences
- Click Privacy & Security
- Click the General tab and select Open Anyway, and then Open
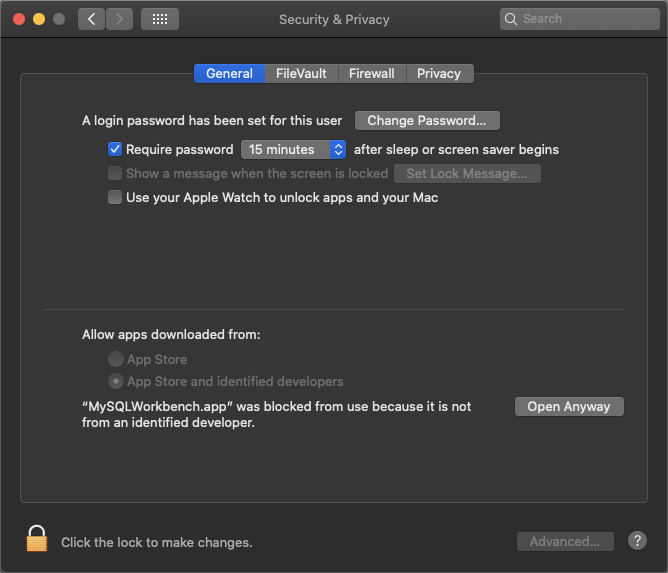
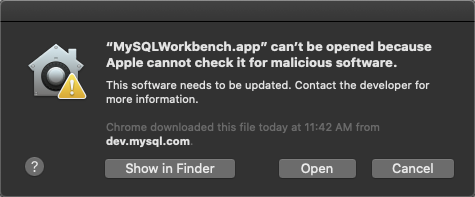
- If version compatibility issues occur, please try alternate download from https://downloads.mysql.com/archives/workbench/
- When MySQL Workbench appears, assuming a database connection does not already exist, click MySQL Connections + (add) button

- Enter a name for the connection in the Connection Name box
Enter the hostname, port and credentials (if needed) and click OK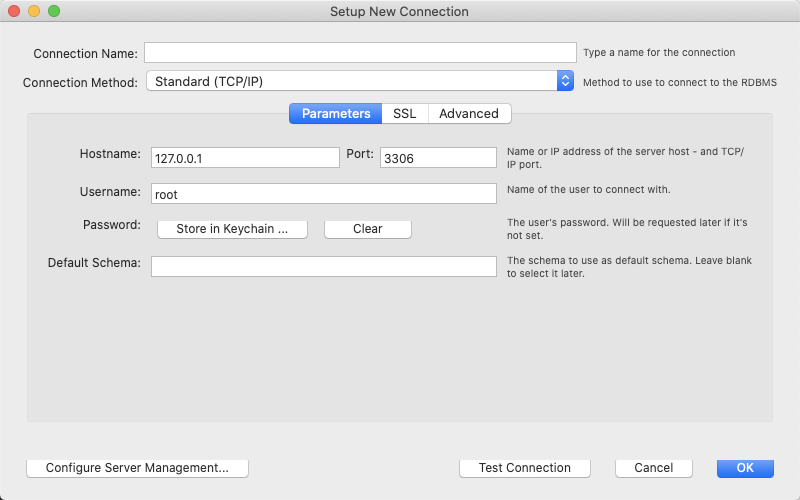
- Follow any prompts for updating the password
- Click the newly created connection, for example AIQ as illustrated below
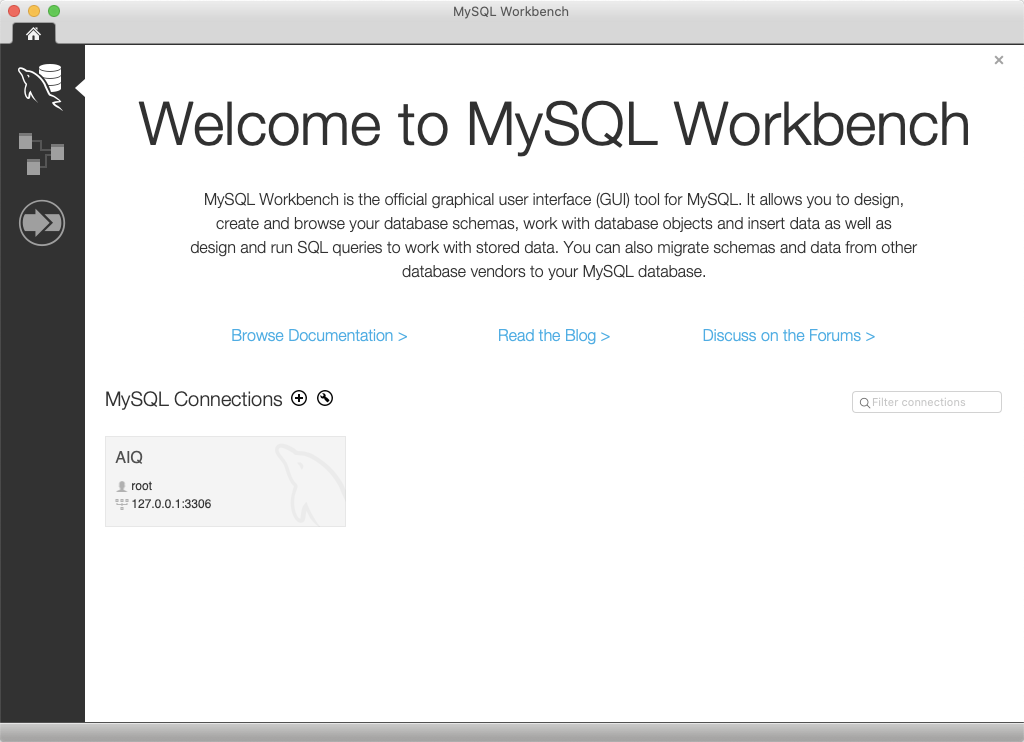
- Select File and click Open SQL Query Script...
- Browse to <AIQ>\TestNode\webapps\AppvanceServer\WEB-INF\classes\database
- Select MySQLInitial.sql and click Open
- Select Query and click Execute (All or Selection)
- Select File and click Open SQL Script...
- From the same location, select MySQLAppvance.sql and click Open
- Select Query and click Execute (All or Selection)
Troubleshooting
Error Code: 1419. You do not have the SUPER privilege and binary logging is enabled
If you get the above error while running the MySQLAppvance.sql script on AWS RDS, make sure that the RDS parameter group has the value 1 (ON) for the log_bin_trust_function_creators parameter. The RDS database MUST be rebooted for parameter changes to take effect.
Next step: Update MySQL Max Packet and Case Settings
Last updated: September 18, 2024
If you have any feedback on this topic, please contact us at documentation@appvance.ai
Update MySQL Max Packet and Case Settings
- Open MySQLWorkbench
- Select Server and click Status and System Variables
The Server Variables window appears - Click the System Variables tab
- Enter max_allowed in the search box
- Update the max_allowed_packet value to 102400000 and press Enter
- Enter lower in the search box
- Update the lower_case_table_names value to 2 and press Enter
You may now close MySQLWorkbench
Next step: Anti-Virus Settings
Last updated: July 31, 2024
If you have any feedback on this topic, please contact us at documentation@appvance.ai