# Cloud Config
# Cloud Config
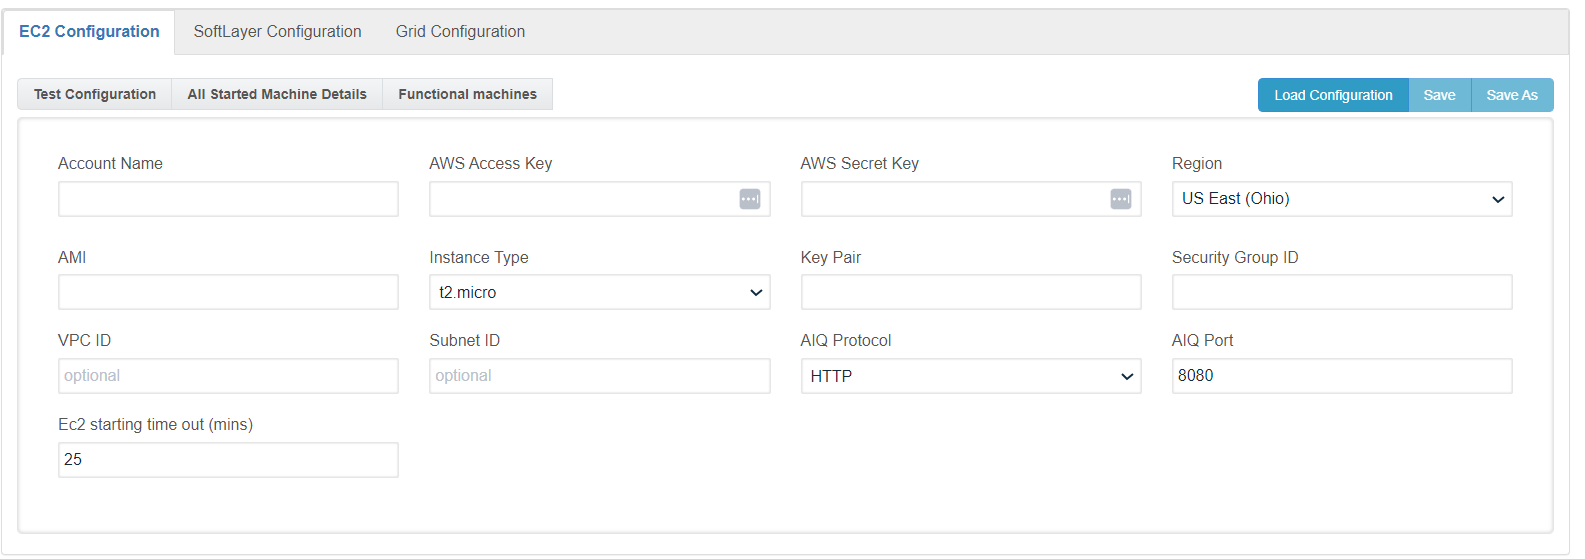
Use the Cloud Config page to configure and maintain:
- [onnEC2 Configuration ](https://docs.appvance.net/Content/AIQ/Global_Options/CloudConfig/Amazon_EC2_Configurator.htm)
- [Softlayer Configuration ](https://docs.appvance.net/Content/AIQ/Global_Options/CloudConfig/SoftLaye_Config.htm)
- [Grid Configuration ](https://docs.appvance.net/Content/AIQ/Global_Options/CloudConfig/Grid_Testing.htm)
---
Last updated: July 17, 2023
If you have any feedback on this topic, please contact us at
# Amazon EC2 Configuration for AIQ
# Amazon EC2 Configuration for AIQ
Use this article when configuring Amazon EC2 resources for AIQ environments. Align instance sizing, networking, storage, security groups, and IAM access with the expected execution workload.
## Configuration checklist
- Select instance types based on Controller, Test Node, database, or supporting-service responsibilities.
- Configure VPC, subnet, security groups, DNS, and routing so AIQ components can communicate securely.
- Use encrypted volumes and plan disk size for logs, execution artifacts, browser caches, and database growth.
- Attach IAM roles instead of static access keys whenever possible.
- Tag resources with environment, owner, cost center, and lifecycle information.
## Validation workflow
1. Confirm required ports and hostnames from the Controller and Test Nodes.
2. Run AIQ login and small execution smoke tests.
3. Monitor CPU, memory, disk, and network metrics during the validation run.
4. Document AMI, instance type, storage, security group, and IAM role details.
*Last updated: October 8, 2026*
# Softlayer Configuration
Use the Softlayer Cloud Configuration utility to deploy your test to an IBM Softlayer Cloud. Access the utility in the AIQ by clicking on the Options link from the Start Screen and navigating to Cloud Configuration tab
Also, there are options to Test the Configuration in the Softlayer Configuration service, including options to view a list of running instances, start and stop instances, and reboot instances.
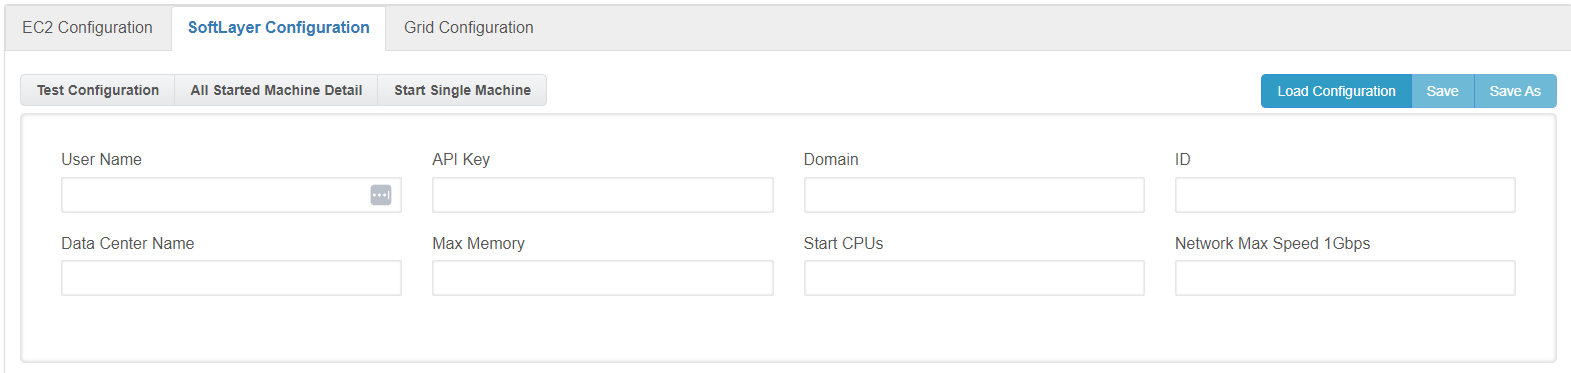
The user has to provide the valid user name and API Key and click the button available, This will pull all the data centers available for the account provided. This is done by making a REST call to Softlayer and requesting all data centers, then populating the drop-down dynamically. So it’s always up to date.
AIQ provides the following options to run tests in a Cloud Testing environment.
- **User Name** The “User Name” field corresponds to the id used to log in to Softlayer Account from the web page
- **API Key** is a unique key the user has in order to execute REST calls through Softlayer’s REST API, if the user doesn’t know which its API Key is, it can ask for support on Softlayer’s portal page in order to obtain it
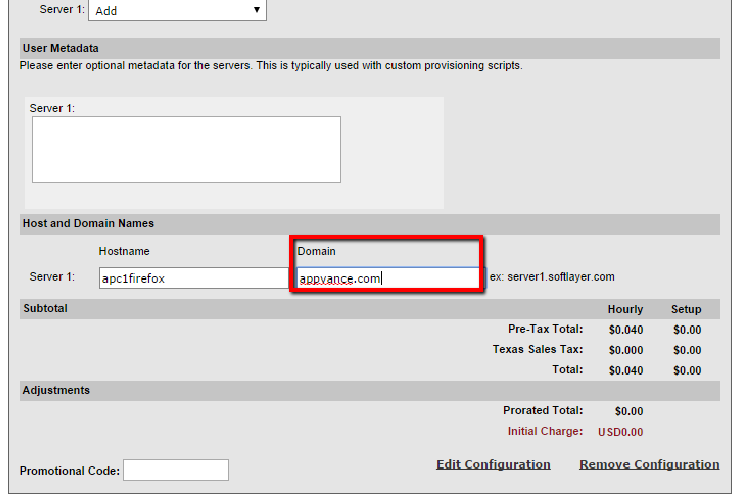
- **Domain** The “Domain” field is a required field that identifies the respective machine’s domain. We can get this info while creating a new CCI (Cloud Computing instance)
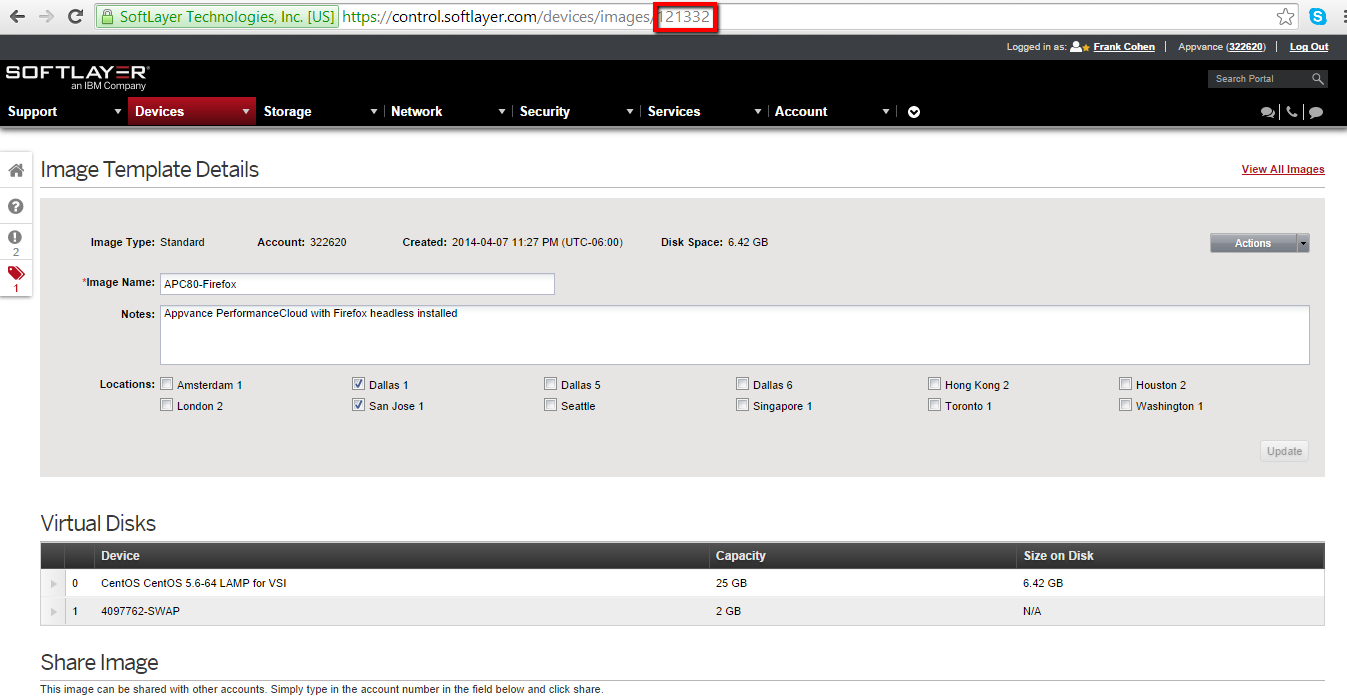
- **The ID** field is the image disk id taken for the machines creation process and also it’s used for searching functional machines. The ID can be optioned by navigating to Image, Under Devices > Manage > Images - Click the image disk, and the URL will display the ID. Ex:[https://control.softlayer.com/devices/images/121332](https://control.softlayer.com/devices/images/121332) , In this case, 121332 is the image ID.
- **DataCenter Name** is a very important field, this field is the code used in Softlayer for identifying a respective datacenter, e.g.: “San Jose 1” datacenter’s name is “sjc01”. Click the created Device, and look for VLAN on the page: The example would look like VLAN:sjc01.fcr02a.1976, in this case, sjc01 is the DataCenter Name.
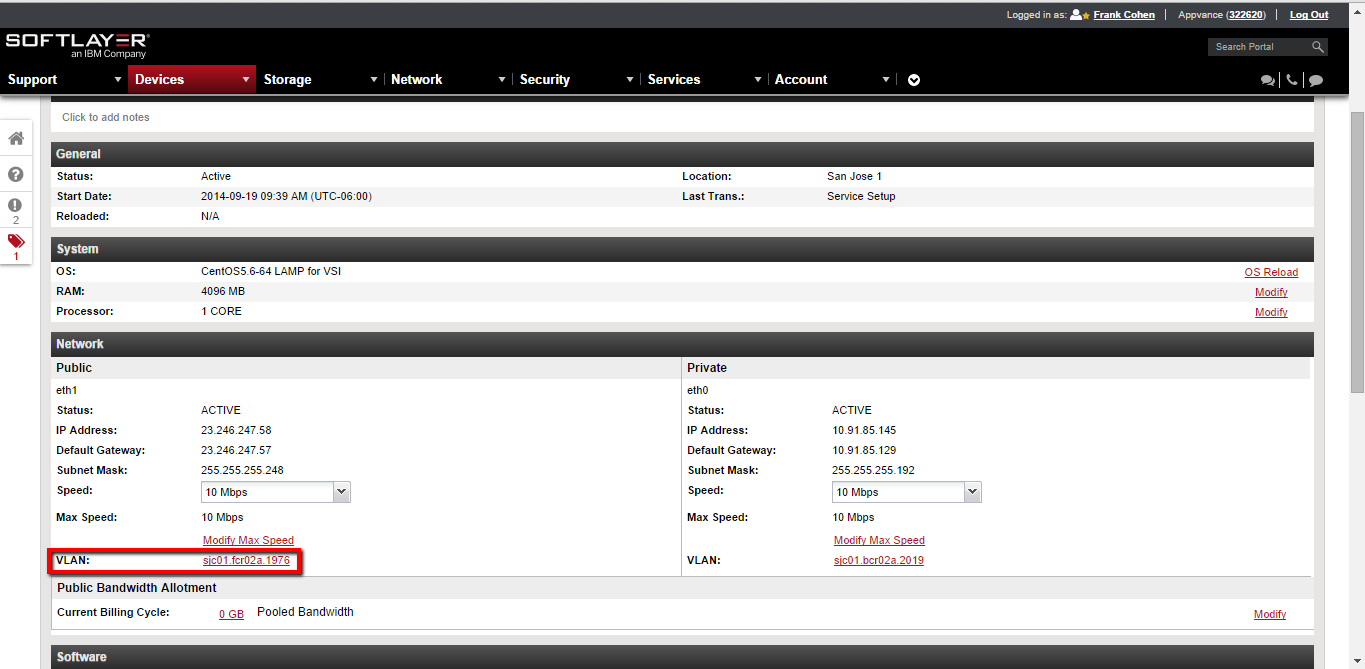
- **Max Memory** field represents the amount of memory the machine will use (in Megabytes), e.g: 4096.
- Start CPU’s field which represents the amount of CPUs the machine will use.
**Tools Section**
This section has some functions related to the information provided in the configuration section previously mentioned.
The “Test Configuration” tool function is checking if the configuration provides is valid.
Then the “Functional Machines” tool opens a list of the machines that match the configuration.
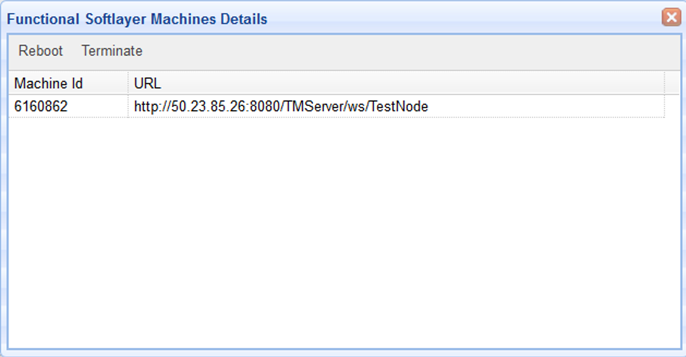
In this screen-shot shown the extension offers a couple of options, one is “Reboot”, which will execute a reboot call at an operating system level, usually this process takes a few minutes after selecting the option.
The other option is “Terminate” which deletes the selected machine, as the reboot process, takes some minutes and it is important for the user to take into consideration that all the information stored in the respective machine will be deleted.
Finally, the “Start Single Machine” tool is in charge of the machine creation process, the parameters for the new machine will be taken from the configuration specified by the user. As the “reboot” and “terminate” process, “start a machine” will take some time, usually minutes and hours sometimes.
Appvance provides the above values to customers using the Appvance OnDemand service. Contact [info@appvance.com](mailto:info@appvance.ai) for details.
---
Last updated: July 17, 2023
If you have any feedback on this topic, please contact us at
# Grid Configuration
AIQ Grid technology deploys tests to a grid of TestNodes. These may be TestNodes installed in a rack of computers in your QA lab, in a partner's data center, and in the unused desktop computers of your office after hours.
AIQ Grid technology is ideal for automating test operations from a Continuous Integration environment. The CI platform starts an IQ test and IQ automatically provisions and deploys tests to the available TestNodes in your own Grid or in a Cloud Testing environment.
AIQ Grid works well in team development organizations. With Grid technology-enabled multiple AIQ users to run their test on the first available TestNodes.
Use the Options link from the Start Screen and Navigate to Cloud Configuration. Provide the details of all the required fields like the Grid Machine Name
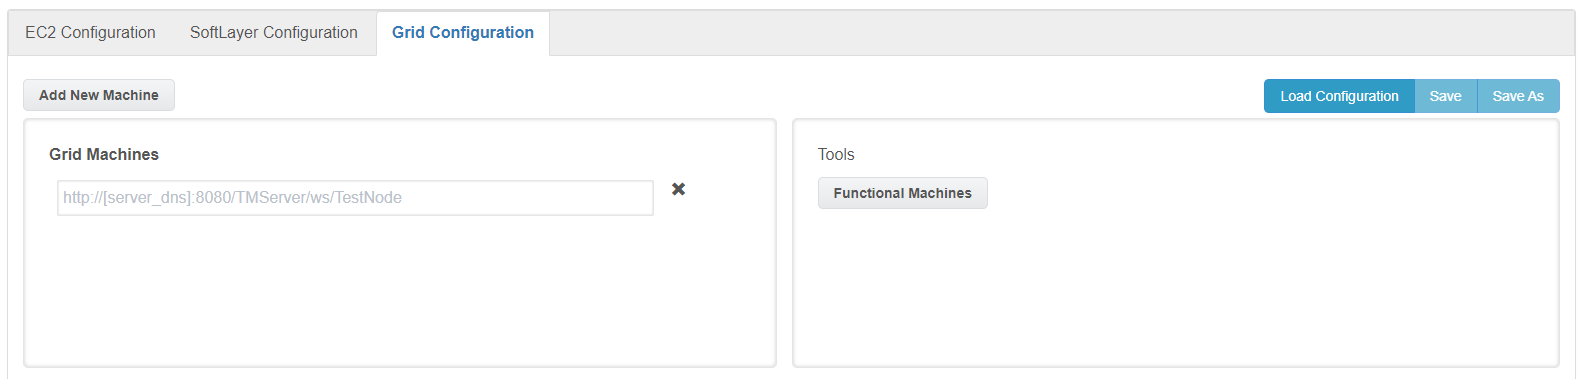
**Grid Machines:** Provide the URL of the TestNodes of the grid machines where AIQ is installed. TestNode URL will be like "http://localhost:8080/TMServer/ws/TestNode", In place of localhost, provide the hostname of the grid machine.
**Add New Machine Button:** Use this button to add as many machines as required to create the Grid Configuration file.
**Functional Machines:** Will display the list of functional machines from the configuration file.
**Save and Save As:** Button can be used to save the configuration file. Files will be saved with .cloud extension.
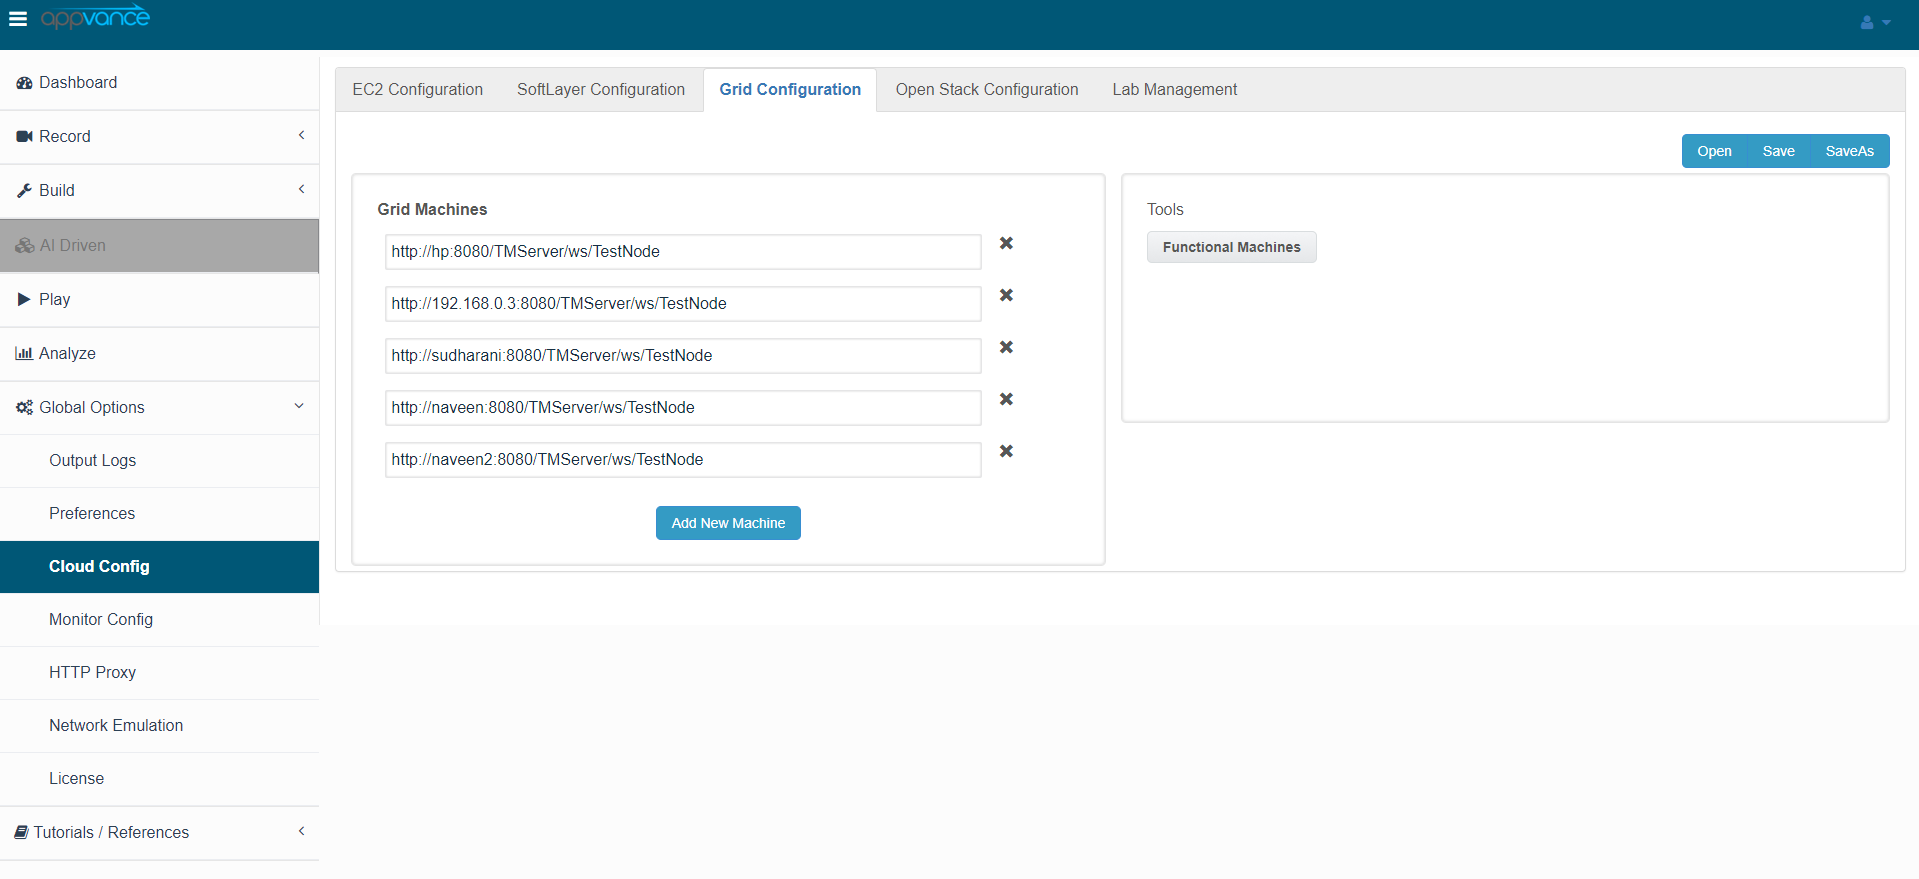 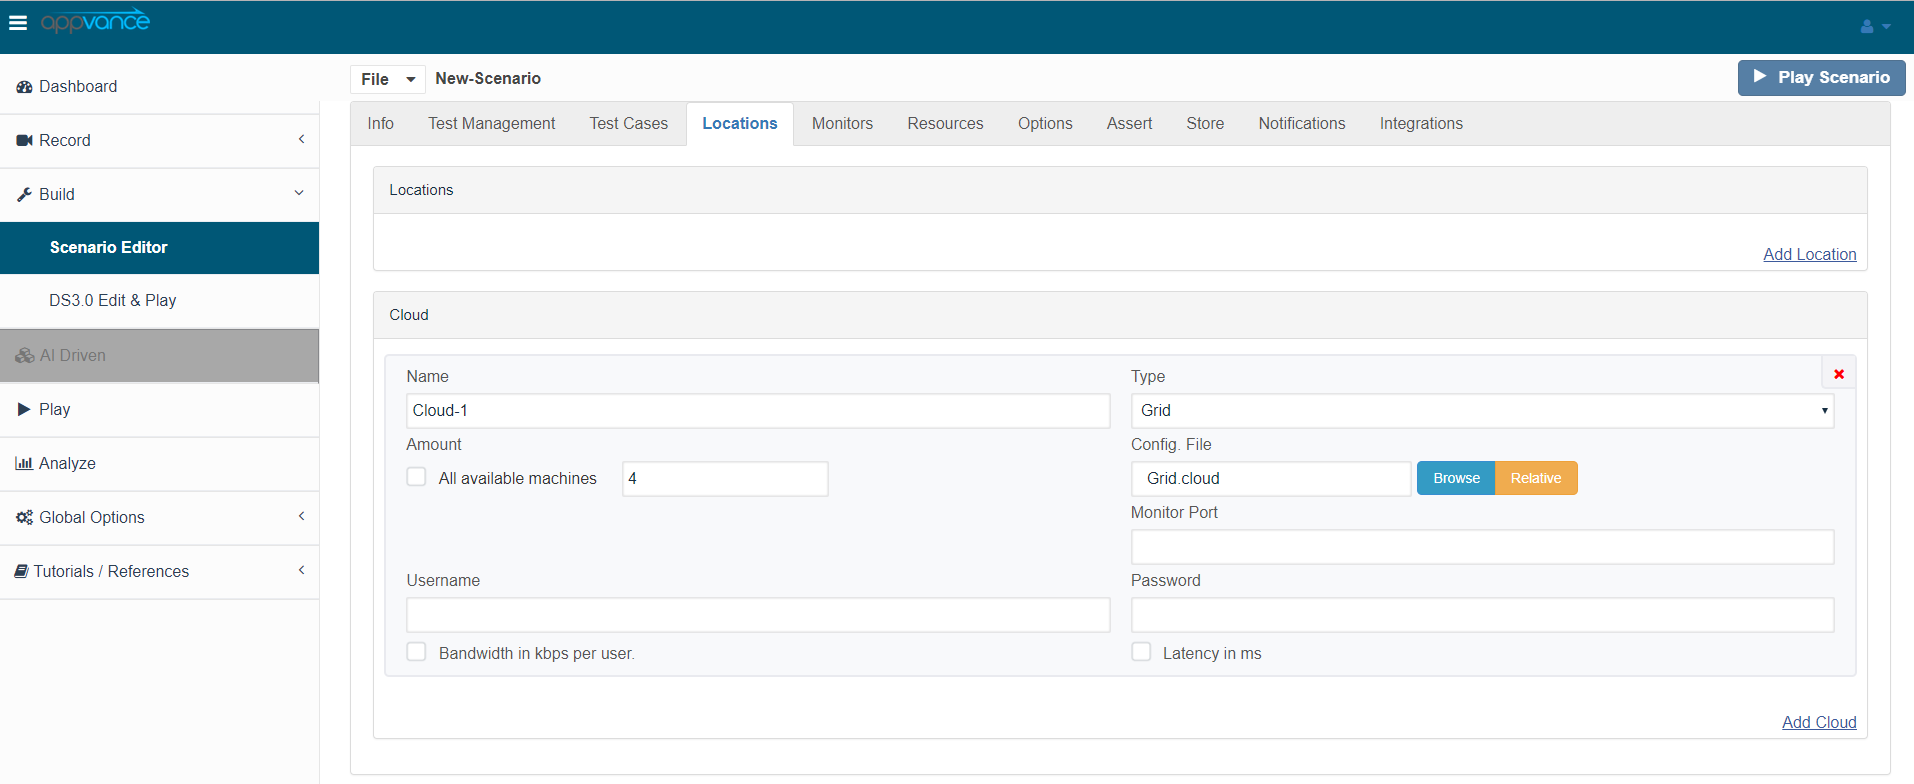Use the Appvance Scenario Builder to identify the grid to deploy your test. In the TestNodes tab use the Add Cloud command. Choose Grid in the Type pop-up menu. Choose the quantity of TestNodes in the quantity field. Choose the Grid configuration file using the Browse button. AIQ automatically uses the available TestNodes from the Grid configuration file to deploy and operate your test.
AIQ displays the status of the TestNodes in a controller window for the selected TestScenario as it operates the test. The Grid Configuration utility shows TestNode status as AIQ operates the test.
The Grid Configuration utility automatically updates the TestNode status every 30 seconds with Auto-Update selected. Use the Tools drop-down menu, to manually update the status.
### Cloud and Grid Environment Client Utilities
AIQ provides a Cloud Test client to identify cloud provider-specific security tokens, names, and parameters. AIQ provides integrated clients for Amazon EC2 and IBM Softlayer Cloud Testing environments.
---
Last updated: July 17, 2023
If you have any feedback on this topic, please contact us at