# HAR
# HAR
Contents:
- [Creating a HAR Script and Running it](/books/integrations/page/creating-a-har-script-and-running-it)
- [Data Enabling HAR Script](/books/integrations/page/data-enabling-har-script)
- [HAR Options](/books/integrations/page/har-options)
- [HAR - Adding Descriptions](/books/integrations/page/har-adding-descriptions)
# Creating a HAR Script and Running it
About HAR
HAR, which stands for HTTP Archive Format, is an archive file derived through interactions within a web browser. The file contains protocol-level GET and POST request logging, as well as performance information and web page load times.
Why HAR
HAR files are quick and simple to produce. When used with Appvance IQ, HAR files provide detailed performance data and load testing capabilities.
Steps to be followed to create HAR script:
1. Open Google Chrome Browser.
2. Navigate to the web application that you wish to record.
3. Press F12 or right-click the page and click the Network tab.
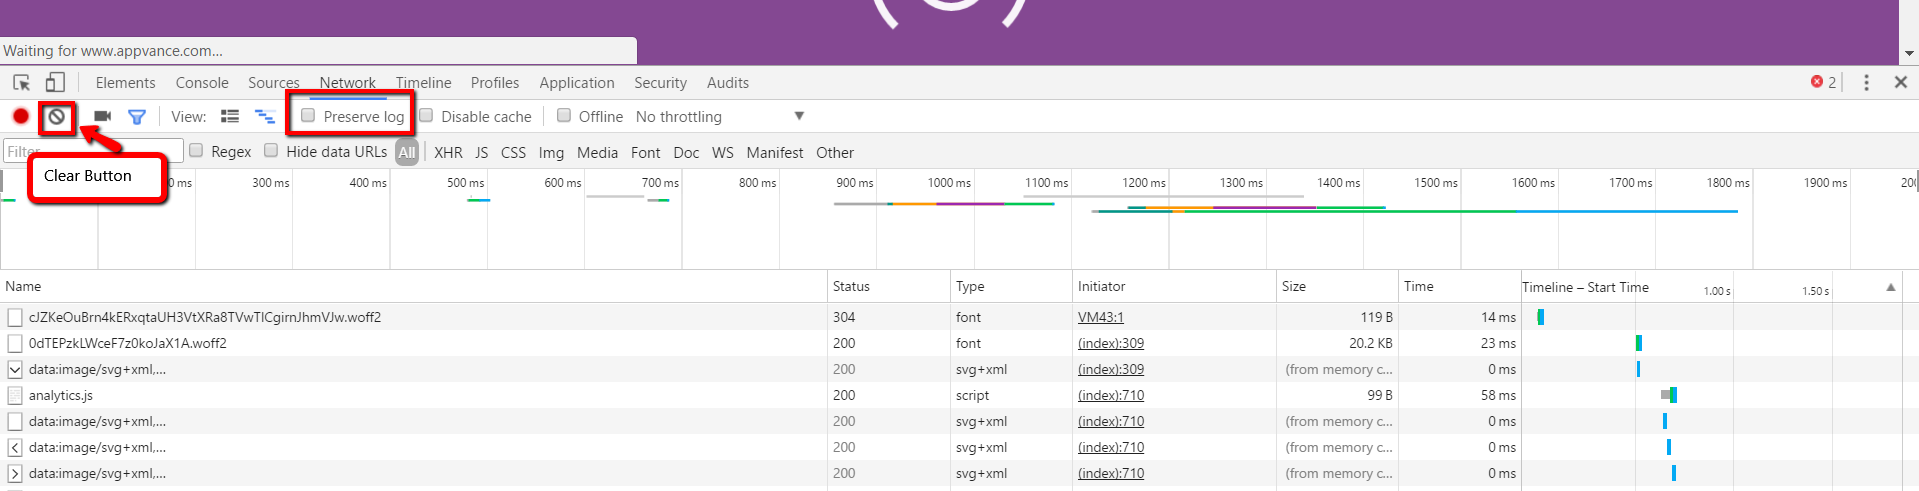
4. Click the clear button, Refresh the page and click the Preserve Log check box.
5. Perform the desired actions of the web application
6. The network tab records all the protocol level GET and POST request logging
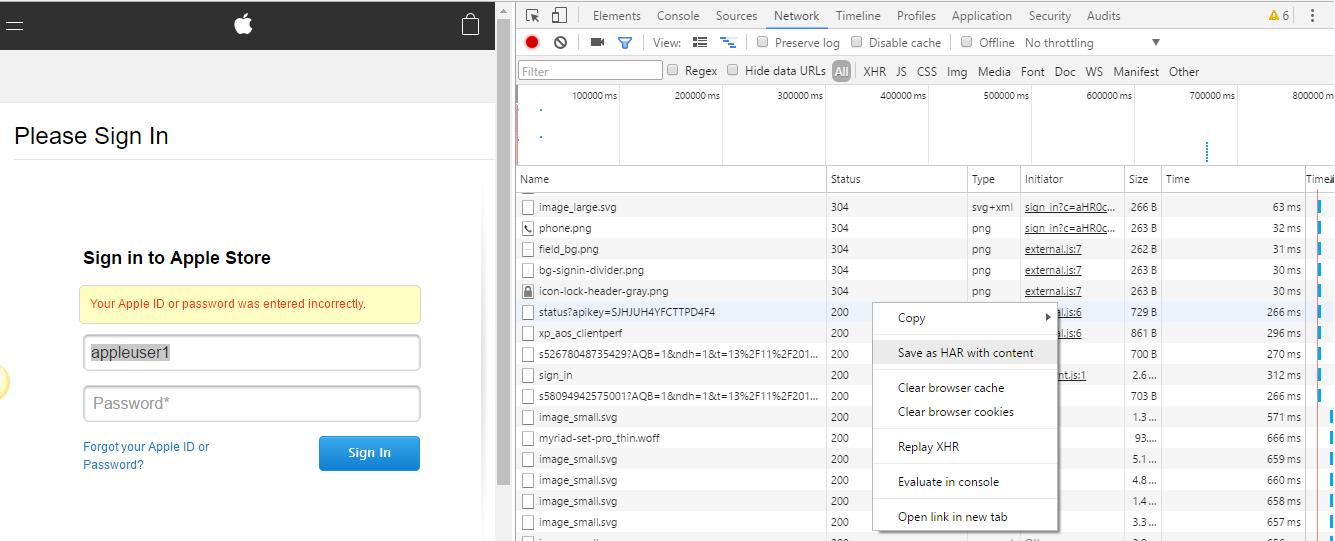
7. Once complete with the actions, right-click the requests and select 'Save as HAR with content'
8. Save the file to your machine with a .har extension
Run the HAR script in Appvance Scenario Builder:
1. Login to Appvance IQ.
2. Click in Build
3. Click File→New
4. Chose any Test Type(Ex: Functional)
5. Click the Test Case tab and click Add Test cases for Test Execution
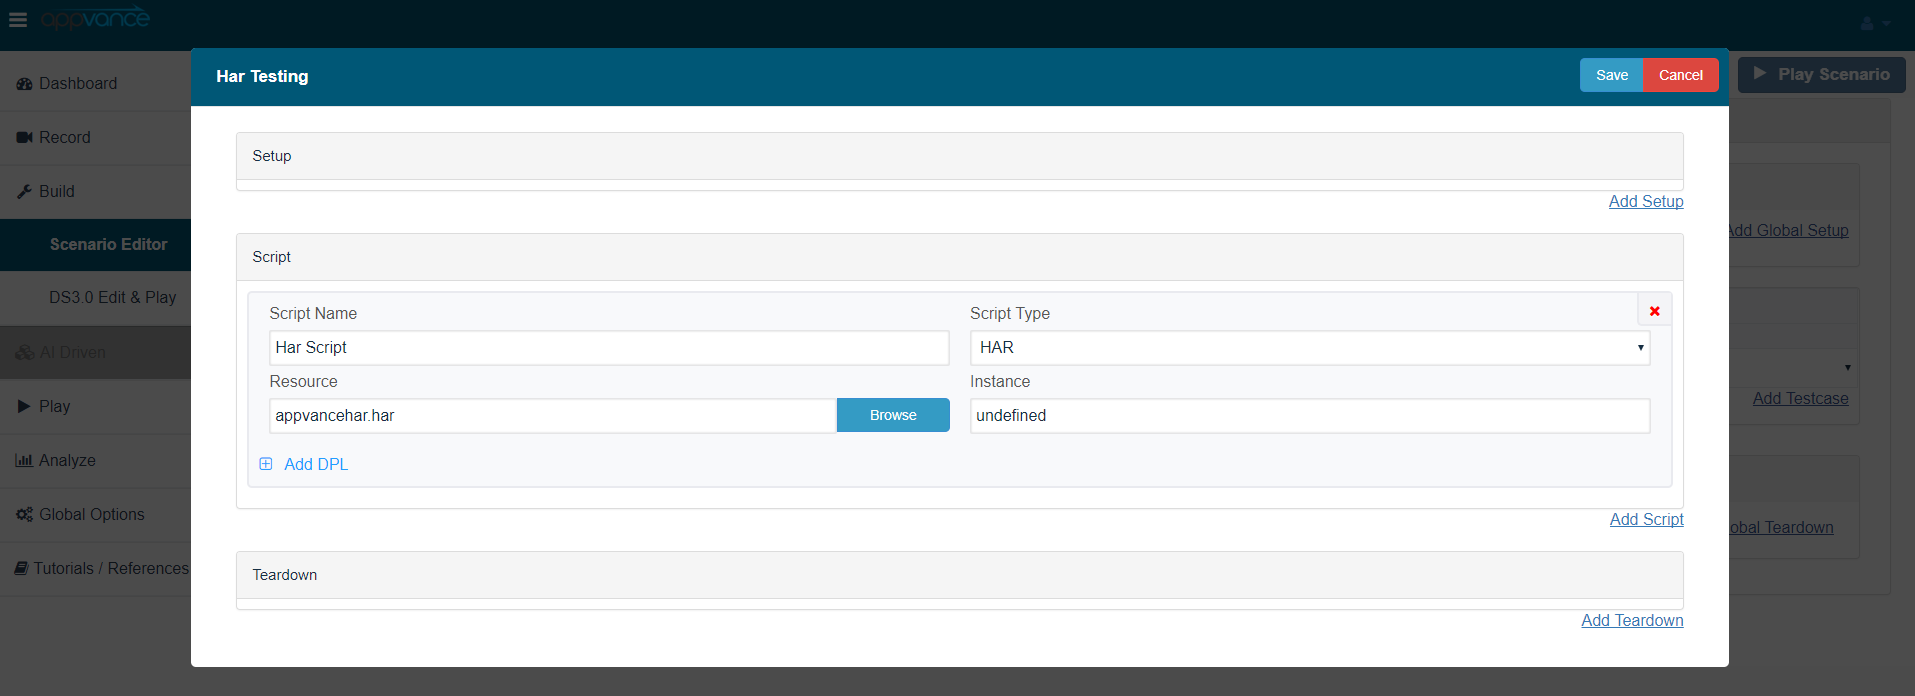
6. Select Script type as HAR and Browse the HAR Script.
7. Save the scenario and Play the scenario to see the results in the controller window.
It's that simple!
---
Last updated: June 26, 2023
If you have any feedback on this topic, please contact us at
# Data Enabling HAR Script
Data enabling HAR scripts for Web applications:
Appvance IQ implements a Data Production Library (DPL) as an extensible framework to provide operational test data to test script runners at test runtime. The DPL framework is general in that data may be input from a variety of sources, including a relational database, comma-separated-value file, and data generating objects. A DPL also provides a safe way to store data between test steps. Appvance IQ comes with pre-built DPLs and makes it easy for software developers to add their own custom DPLs.
In our case, we will be using the "CSV" datasheet to data enable the HAR script.
The steps that need to be followed while data enabling HAR scripts are as below:
1. Record the script with username and password on the Chrome Browser and save the script
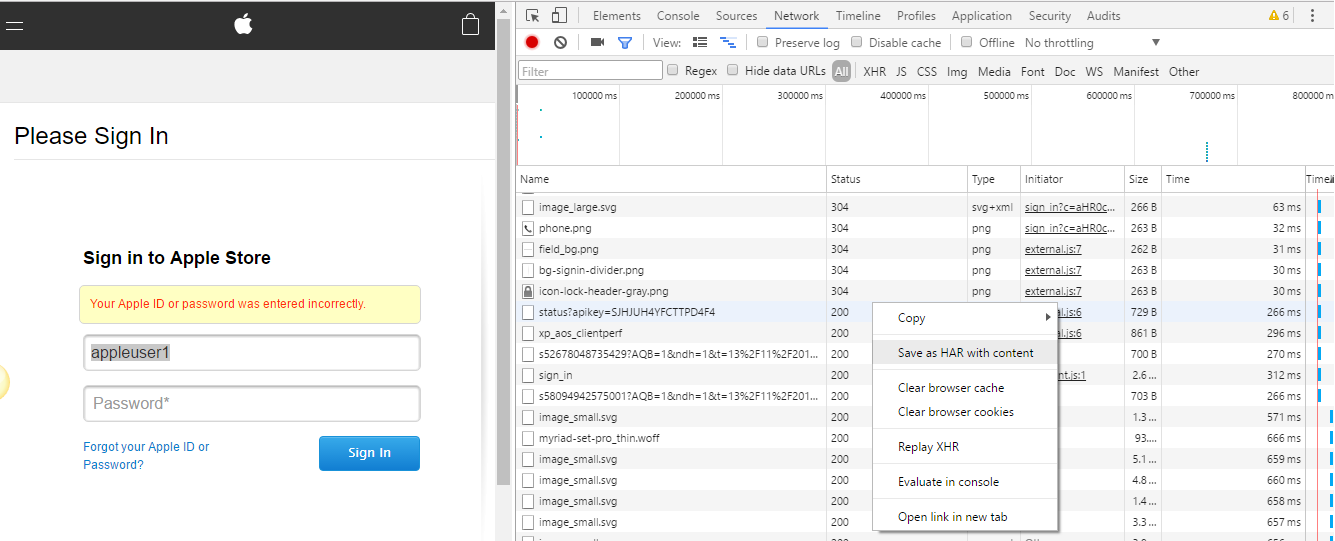
2. Open the saved script and search for the username/password you have entered in the URL and create a .CSV sheet with the entered username and password as a header in the CSV sheet and give the desired number of usernames and passwords below the headers.
For example:
If the user has used appleuser1 as the Username and appleuser@123 as the password. Then the user needs to replace 'appleuser1' and 'appleuser%40123' (please see the below instruction for any special character used in the password) in the HAR script which will be used as a Header in the CSV sheet.
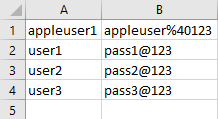Also, make sure if there are any special characters in the password we need to replace it with the corresponding value with respect to the HAR script
For example:
1. ! = %21
1. @= %40
NOTE: If the Password is appleuser@123 the entry in the csv sheet should be appleuser%40123
For more information on the special characters and the corresponding value to be used in the script refer to [Special Character value to be replaced in HAR script.](/books/appvance-har/page/special-character-value-to-be-replaced-in-har-script)
3. User can now upload the .HAR script and .csv sheet in Appvance Scenario Builder.
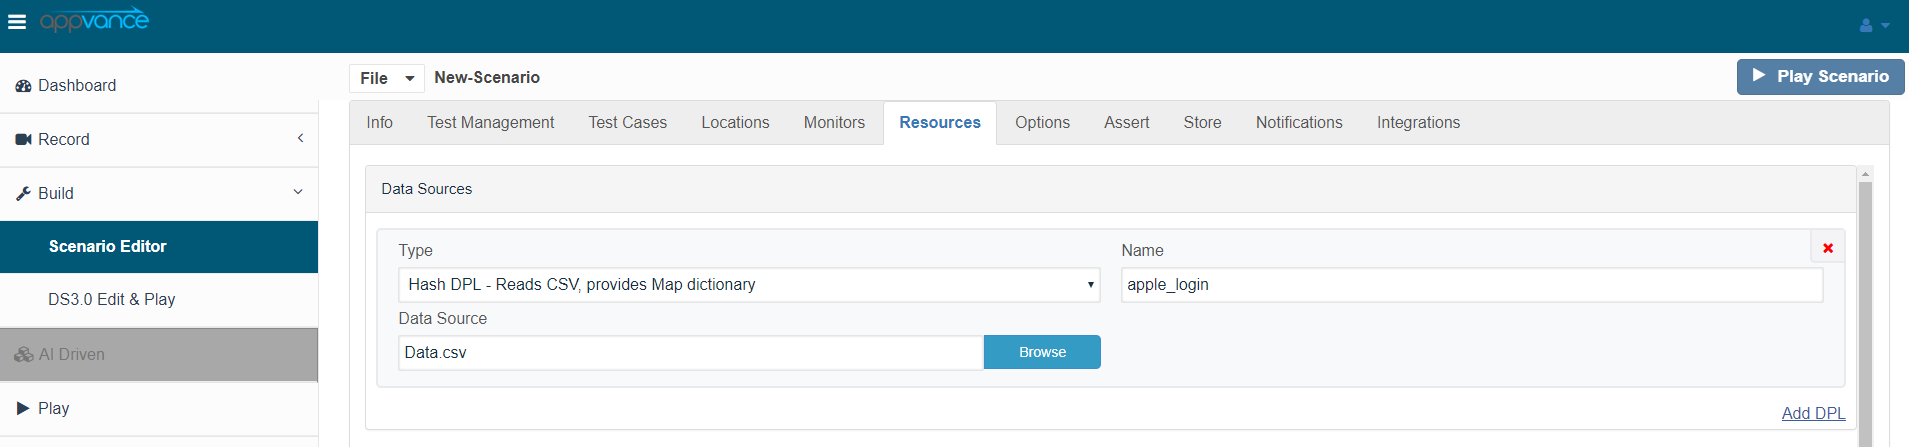 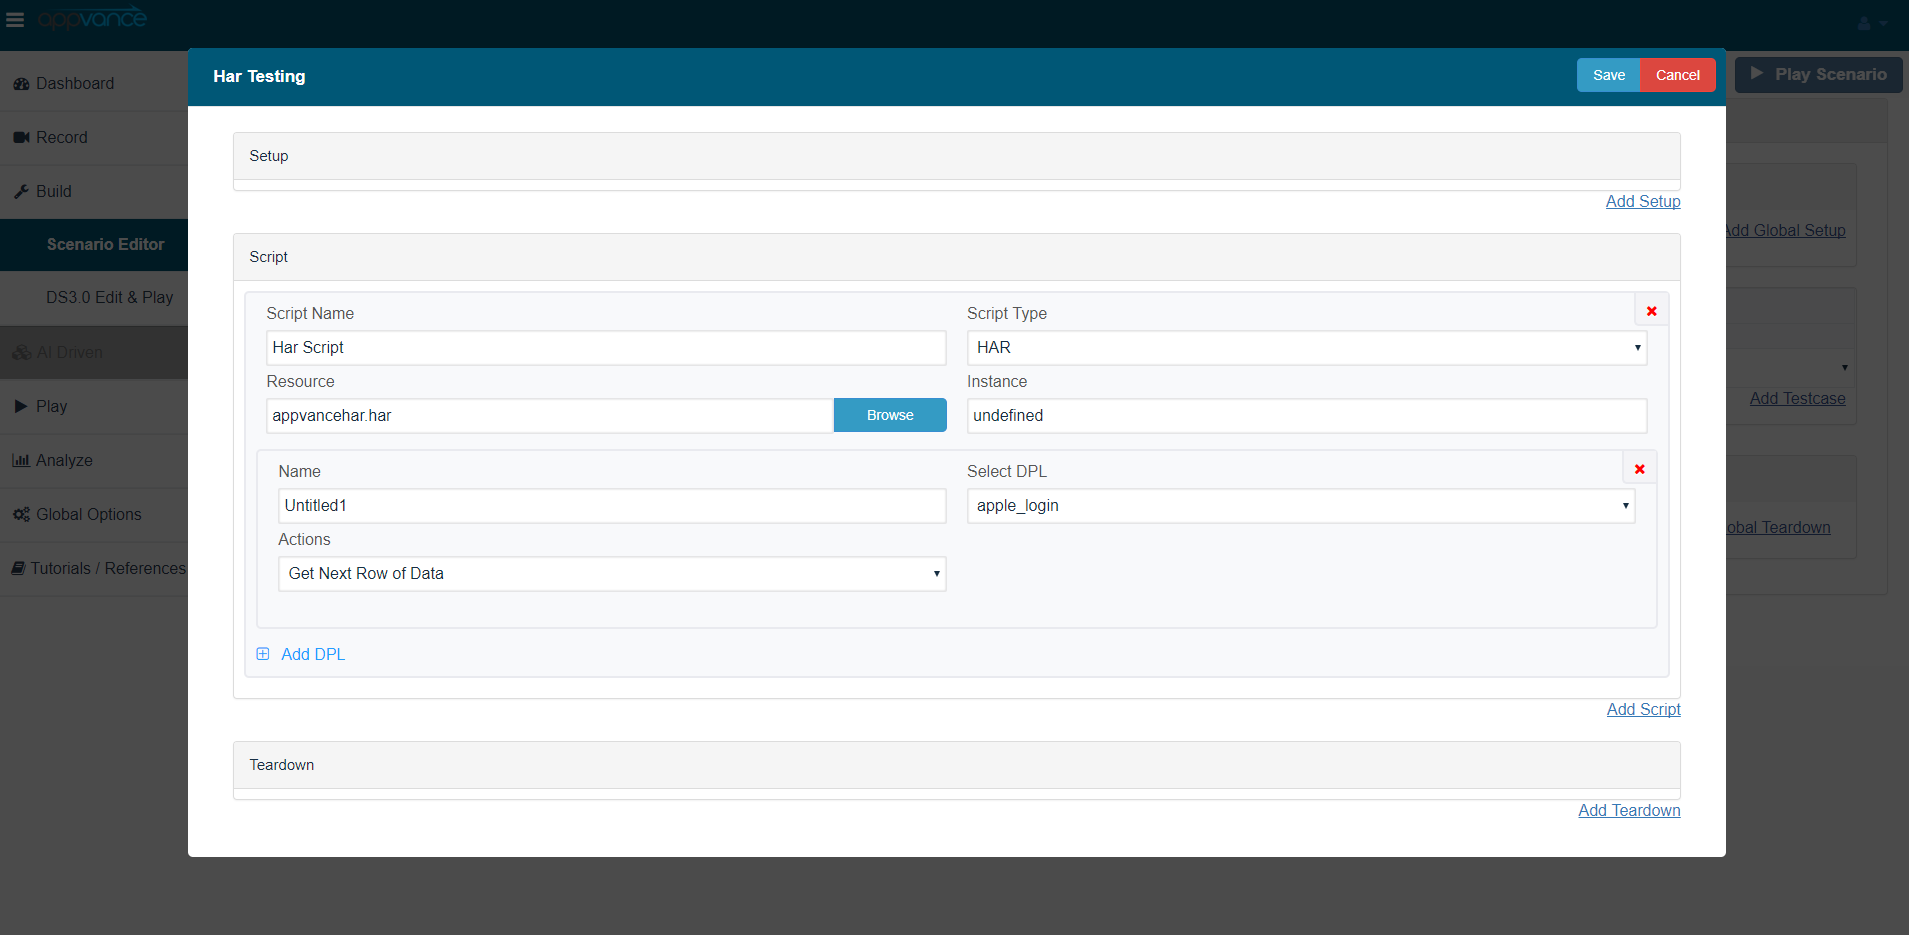Choose the Script type as HAR and name the test
Choose the HAR script and select
Upload the CSV sheet in Resources Tab and choose the Action as "Next row of Data" by clicking Add DPL in Test Cases tab
Save and play the scenario
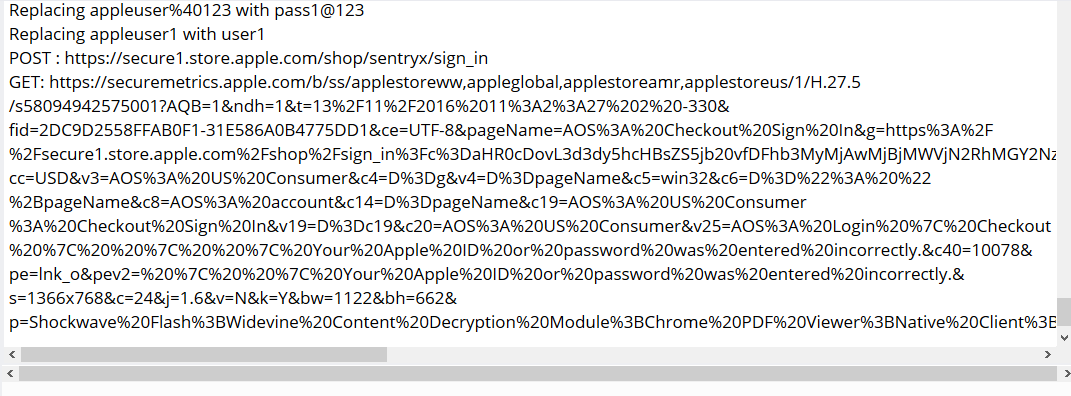
4. Check the script execution in the AIQ controller
you can also monitor if the script is replacing the appropriate values through the Appvance IQ controller by Clicking on Test case(s) Executions and selecting the result and clicking on Output.
---
Last updated: June 26, 2023
If you have any feedback on this topic, please contact us at
# HAR Options
Scenario Builder – HAR Options Usage
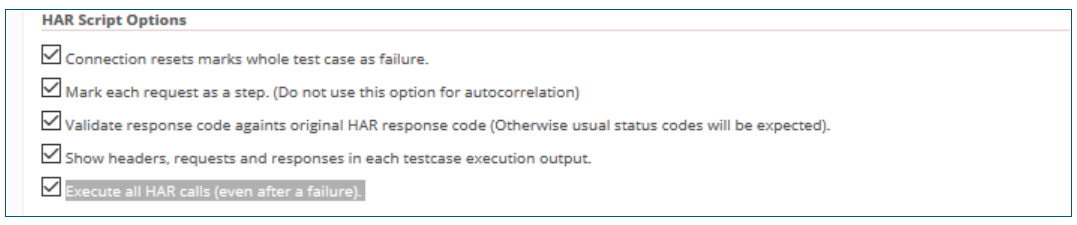
Appvance Scenario Builder provides some options which can be used in order to get different data or results when the user executes a HAR test scenario. These settings can be set and located in the "Options" panel of the Appvance Scenario Builder.
Below are the different options:
- Connection resets marks the whole Test Case as a failure.
- Mark each request as a step.
- Validate response code against original HAR response code (Otherwise usual status codes will be expected).
- Show headers, requests, and responses in each Test Case execution output.
- Execute all HAR calls (even after a failure).
These options will allow you to establish some parameters settings different from standard Test Cases executing a HAR script. Users may find these options useful depending on what kind of test is being executed. i.e. If the user is testing a website, the user may want to have the default settings (unmarked options) for a HAR test, on the other hand, for a web service the user may find it useful to mark every single request as a step or validate the response code against the original HAR script.
Connection resets marks the whole Test Case as a failure
This option has to be used carefully depending on the desired results. The name of this option it's self-explanatory, it's used to mark the whole Test Case that's being executed as a failure when the connection resets.
Mark each request as a step
When this option is enabled, every single request retrieved from the HAR test is is being marked as a step–request key set instead of marking every request as a single request.
Also please make sure that this option is not used along with Autocorrelation.
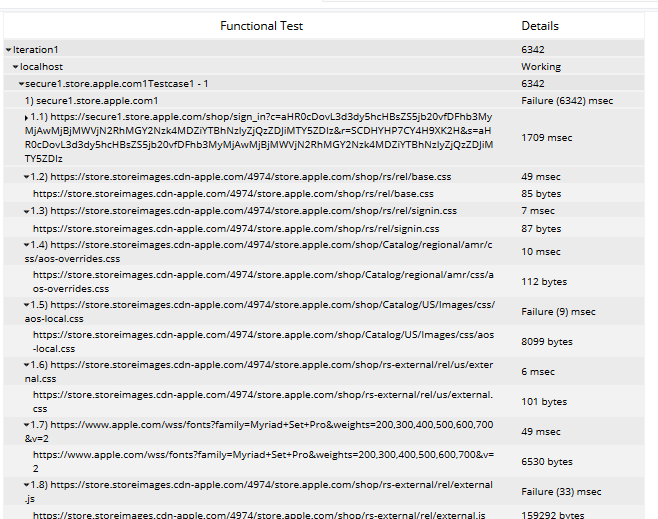Validate response code against original HAR response code
When enabled, the response codes received from the text case execution are going to be validated against the original HAR script response codes, otherwise, the usual response code for a request is passed as valid. Appvance Scenario Builder shows the response code for every request at the Test Case Execution tab in the results displays window as follows:
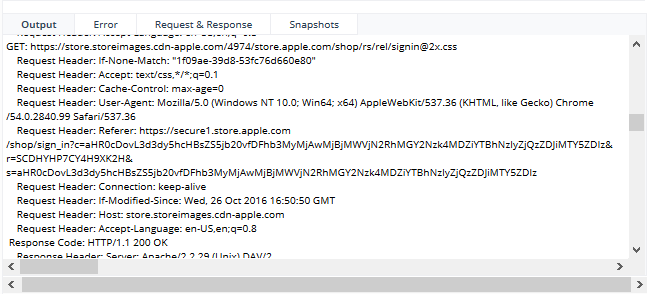Show headers, requests, and responses in each Test Case execution output.
Meaning that for every request, exists a "parent" step with the same name of the request contained in that step. In the results display you may see these changes, the step has the timing for the request and the step request has the request size.
Execute all HAR calls (even after a failure).
Checking this option will let the HAR script run even if it encounters an error in any step.
---
Last updated: June 26, 2023
If you have any feedback on this topic, please contact us at
# HAR - Adding Descriptions
Please follow the below steps for adding step names/descriptions for each transaction in the HAR script
1. Open the recorded script and search for "Pages" entry in the script.
**"pages":** \[{"startedDateTime": "2016-12-13T07:55:39.815Z","id": "page\_1",**"title": "**[http://sahitest.com/demo/training/books.htm](http://sahitest.com/demo/training/books.htm)**"**,"pageTimings": {"onContentLoad": 859.9610000001121,"onLoad": 875.251000001299}},{"startedDateTime": "2016-12-13T07:56:42.819Z","id": "page\_2",
**"title": "**[http://sahitest.com/demo/training/login.htm](http://sahitest.com/demo/training/login.htm)**"**,"pageTimings": {"onContentLoad": 29.318000000785105,"onLoad": 27.689000000464148}}\]
and replace the value for "title" with the desired name for ex:- here replacing with the step1,step2
"pages": \[{"startedDateTime": "2016-12-13T07:55:39.815Z","id": "page\_1",**"title": "step1"**,"pageTimings": {"onContentLoad": 859.9610000001121,"onLoad": 875.251000001299}},{"startedDateTime": "2016-12-13T07:56:42.819Z","id": "page\_2",**"title": "step2"**,"pageTimings": {"onContentLoad": 29.318000000785105,
"onLoad": 27.689000000464148}}\]
After making changes save the updated script.
Now we can go ahead and create a scenario under Appvance Scenario Builder by attaching the updated script and running it.
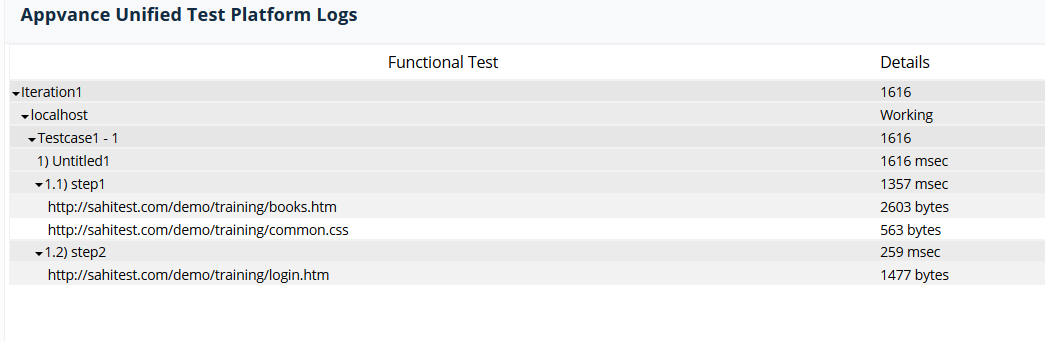
2. The added step name should be reflected in the Appvance IQ controller window when the script completes.
Before adding description:
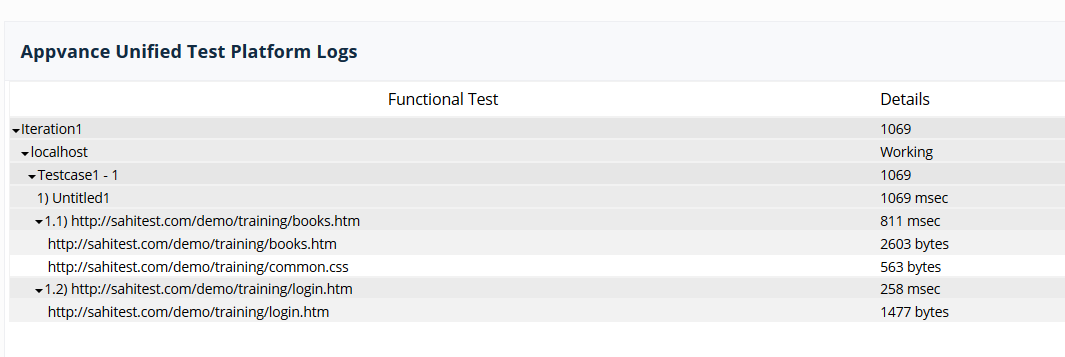
After adding description:
---
Last updated: June 26, 2023
If you have any feedback on this topic, please contact us at