# Jenkins
# Jenkins
This section details how to configure and run scenarios from Jenkins. This is applicable for both Jenkins installed locally as well as in the cloud, such as using Cloudbees-Jenkins.
- [](https://docs.appvance.net/Content/AIQ/Integrations/ContinousIntegration/Jenkins/Jenkins_Configuration.htm)[Jenkins Configuration ](https://docs.appvance.net/Content/AIQ/Integrations/ContinousIntegration/Jenkins/Jenkins_Configuration.htm)
- [About the Jenkins Files ](https://docs.appvance.net/Content/AIQ/Integrations/ContinousIntegration/Jenkins/Jenkins_AboutFiles.htm)
- [Required File Changes ](https://docs.appvance.net/Content/AIQ/Integrations/ContinousIntegration/Jenkins/Jenkins_RequiredFileChanges.htm)
- [Creating First Jenkins Project ](https://docs.appvance.net/Content/AIQ/Integrations/ContinousIntegration/Jenkins/Jenkins_FirstProject.htm)
- [Configure ant to run Scenarios from Jenkins ](https://docs.appvance.net/Content/AIQ/Integrations/ContinousIntegration/Jenkins/Jenkins_ConfigureScenarios.htm)
- [Configure ant to run Blueprints from Jenkins ](https://docs.appvance.net/Content/AIQ/Integrations/ContinousIntegration/Jenkins/Jenkins_ConfigureBlueprints.htm)
- [Parametrized Jenkins Project ](https://docs.appvance.net/Content/AIQ/Integrations/ContinousIntegration/Jenkins/Jenkins_ParamProject.htm)
- [Scheduling Jobs in Jenkins ](https://docs.appvance.net/Content/AIQ/Integrations/ContinousIntegration/Jenkins/Jenkins_ScheduleJobs.htm)
- [Changing Time Zones in Jenkins ](https://docs.appvance.net/Content/AIQ/Integrations/ContinousIntegration/Jenkins/Jenkins_ChangeTimeZone.htm)
---
Last updated: June 01, 2023
If you have any feedback on this topic, please contact us at
# Jenkins Configuration
Setup a build in Jenkins: Configuration and pre-requisite:
1. Download Links for the following are available at “[>*CI Jenkins*](http://jenkins-ci.org/)”
2. After installation, Jenkins automatically launches using port 8080. To change the port number, locate Jenkins/jenkins.xml and modify the --httpPort argument.
For example: -Xrs -Xmx256m -Dhudson.lifecycle=hudson.lifecycle.WindowsServiceLifecycle -jar "%BASE%\\jenkins.war" --httpPort=8081
3. Install ANT using [>http://ant.apache.org/bindownload.cgi](http://ant.apache.org/bindownload.cgi)
4. Download and install the appropriate file on your machine depending on the operating system used
5. Click Manage Jenkins
6. Click Configure System
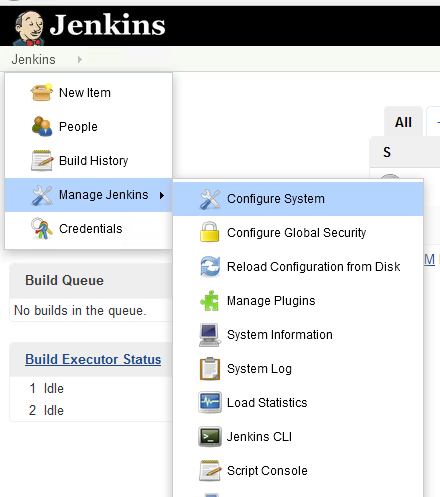
7. Scroll to Global Properties
8. Check Environment variables
9. Enter PATH in the Name box
10. Enter the Java and Ant paths in the Value box as illustrated below
11. Click Save (Changes)
12. Configure Project to Point to Plugin

13. Please make sure to install GIT on the machine where Jenkins is installed, once installed please restart the Jenkins service.
Download git from [>https://git-scm.com/downloads](https://git-scm.com/downloads) based on your operating system.
---
Last updated: April 28, 2023
If you have any feedback on this topic, please contact us at
# Jenkins File Reference for AIQ Integrations
**Last reviewed:** September 24, 2026
Use this page to explain what the Jenkins files are for when AIQ test execution is triggered or coordinated from a CI pipeline.
## What changed in this article
- Clarify which files define build parameters, which call AIQ, and which publish or collect results.
- Keep customer-specific job names, tokens, and workspace paths out of the shared documentation.
- Point users to the Jenkins job configuration article when they need step-by-step pipeline setup.
## Validation workflow
1. Identify the Jenkinsfile or helper script used by the project.
2. Confirm required parameters such as AIQ project, scenario, environment, and result handling.
3. Run the job in a non-production folder before adopting it for scheduled execution.
**Review note:** Made the article a file-purpose reference instead of a loose Jenkins note, so it fits with the Jenkins integration pages.
---
Last updated: September 24, 2026
If you have feedback on this topic, contact .
# Required File Changes for AIQ Integrations
Required File Changes for AIQ Integrations
Track required integration file changes carefully and keep environment-specific values out of source files.
Last updated: September 8, 2026
# Creating First Jenkins Project
Creating your first project and configuring GIT Repo:
1. Once downloaded and installed launch *http://localhost:8080* (or with the changed port number) in your browser or log in to your Jenkins cloud
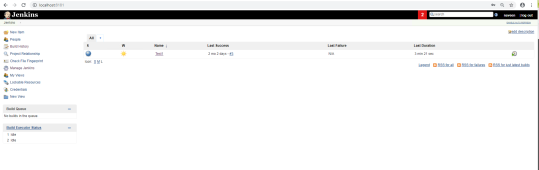
2. Click on New Item from the left navigation
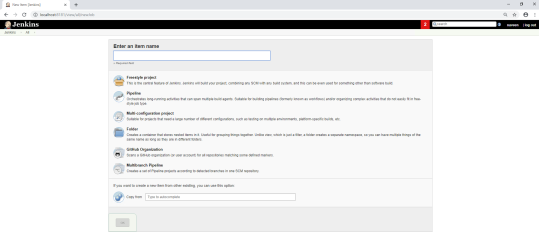
3. Provide a valid Job name
4. Select “Build a free-style software project”
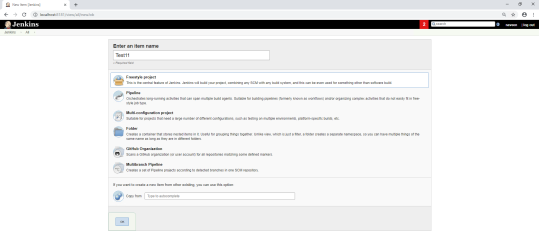
5. Click on the OK button
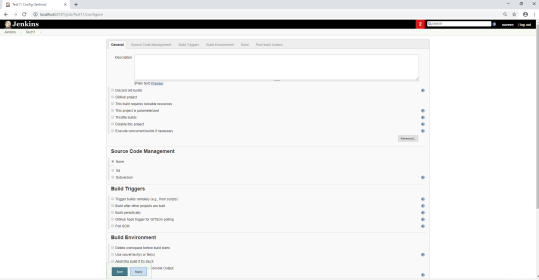
6. Provide a description of the project

7. Locate Source Code Management and choose Git, Provide the Repository URL with the credential details where all the above files reside and changes made
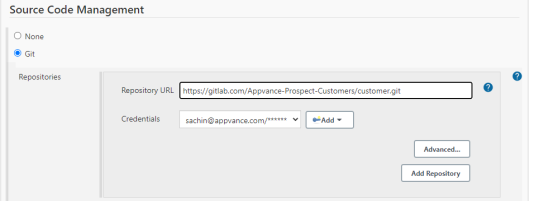
8. Mention the branch details from the files that reside

9. Build Environment - Check "Delete workspace before build starts", this will ensure the latest assets are uploading when running the Jenkins job
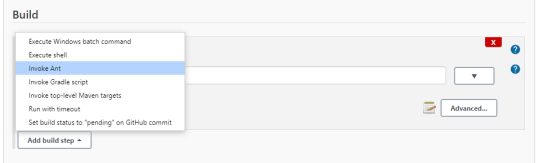
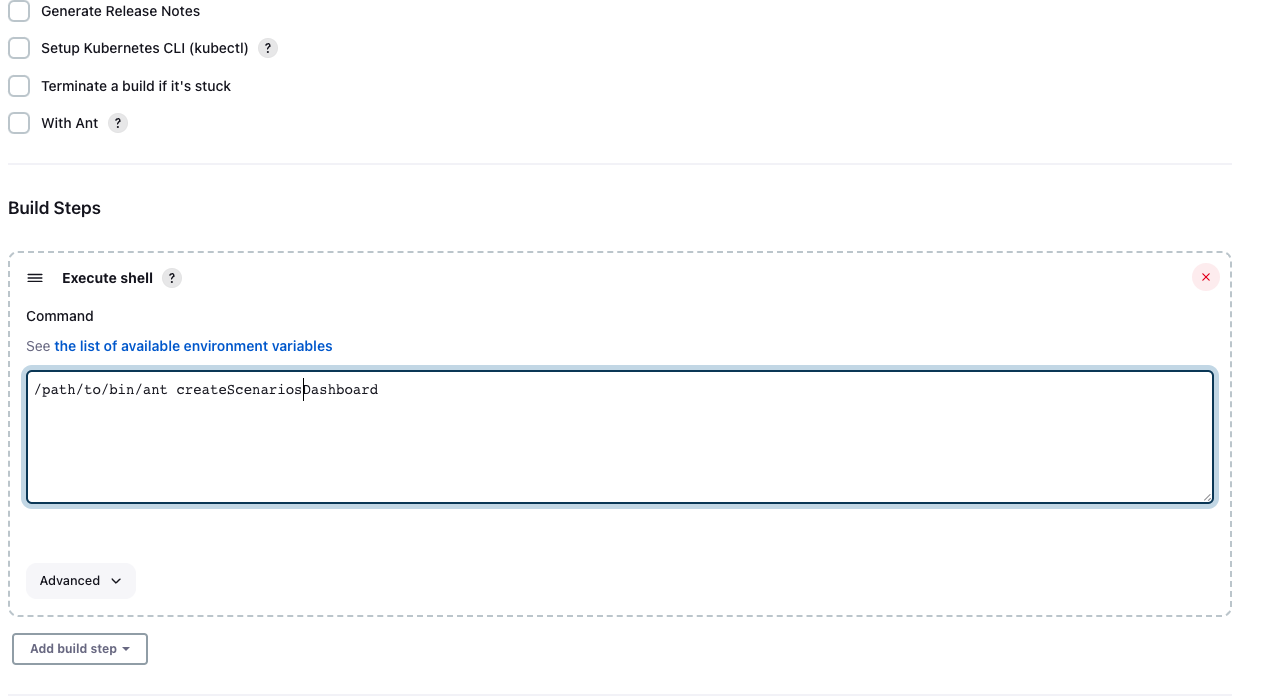
10. Build - Add Build step > Invoke Ant and add the Ant Call as mentioned below
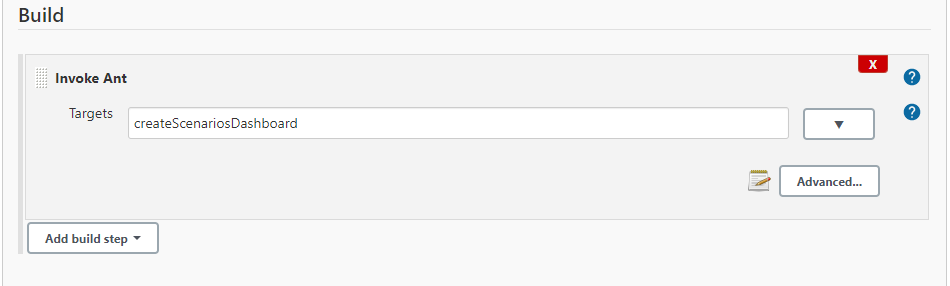
\*\* If Ant is not configured in Jenkins but its installed on the Jenkins agent, the job still can be executed with the following command:
---
Last updated: June 02, 2023
If you have any feedback on this topic, please contact us at
# Run AIQ Scenarios from Jenkins with Ant
## Recommended guidance
Use Jenkins and Ant only when the project still requires an Ant-based automation pipeline. For new pipelines, confirm whether a newer CI/CD approach is available before extending legacy Ant jobs.
## Before configuring the job
- Confirm the AIQ environment, project, scenario, and execution target.
- Use service accounts or CI credentials stored in Jenkins credentials management.
- Do not hard-code AIQ usernames, passwords, tokens, or environment secrets in build files.
- Confirm the agent machine can reach AIQ, repositories, browsers, Test Nodes, and required application URLs.
- Keep build files, scripts, and configuration under version control.
## Pipeline checks
1. Run the Ant target locally or on a controlled Jenkins agent before scheduling it.
2. Capture AIQ execution IDs, Jenkins build numbers, logs, and artifacts.
3. Fail the Jenkins job when the AIQ result fails, times out, or cannot be retrieved.
4. Archive only the evidence required for troubleshooting and compliance.
5. Review old Ant jobs periodically and retire duplicate or unused jobs.
**Terminology note:** Use Scenario Editor when referring to current AIQ scenarios. Keep legacy terms only when describing old job names, file names, or historical assets.
*Last updated: October 5, 2026*
# Configure ant to run Blueprints from Jenkins
Similarly, projects can also be created to run AISG based on templates.
*blueprintDashboard* would be the ant target that would be used to create a dashboard for the AISG which internally will call targets like report upload, AISG creation, etc.
Once the initial AISG is created, the Blueprint template exported from file menu options would be the input that would be used for the re-creation of the AISG in everyone runs or as scheduled.
---
Last updated: April 28, 2023
If you have any feedback on this topic, please contact us at
# Configure a Parameterized Jenkins Project for AIQ
# Configure a Parameterized Jenkins Project for AIQ
Use a parameterized Jenkins project when an AIQ-related automation job needs controlled runtime values such as environment, suite, branch, browser, or execution profile. Keep Jenkins as the orchestration layer and keep AIQ configuration, credentials, and test data in approved locations.
## Recommended parameters
- Target environment or base URL.
- Suite, project, or execution profile name.
- Browser, device, or Test Node group when applicable.
- Build, branch, or release identifier for traceability.
## Good practices
1. Use clear parameter names and defaults that are safe for non-production execution.
2. Validate required parameters before starting the job.
3. Do not store secrets directly in job descriptions, scripts, or documentation.
4. Record the Jenkins build URL with the related AIQ execution or report.
**Last updated:** September 8, 2026
# Scheduling Jobs in Jenkins
By setting the schedule period to 15 13 \* \* \* you tell Jenkins to schedule the build every day of every month of every year at the 15th minute of the 13th hour of the day.
Jenkins uses a [>*cron expression*](https://en.wikipedia.org/wiki/Cron#CRON_expression), and the different fields are:
MINUTES Minutes in one hour (0-59)
HOURS Hours in one day (0-23)
DAYMONTH Day in a month (1-31)
MONTH Month in a year (1-12)
DAYWEEK Day of the week (0-7) where 0 and 7 are Sunday
If you want to schedule your build every 5 minutes, this will do the job : \*/5 \* \* \* \*
If you want to schedule your build every day at 8h00, this will do the job : 0 8 \* \* \*
For the past few versions (2014), Jenkins has a new parameter, H (extract from the [>*Jenkins code documentation*](https://github.com/jenkinsci/jenkins/blob/master/core/src/main/resources/hudson/triggers/TimerTrigger/help-spec.jelly)):
To allow periodically scheduled tasks to produce an even load on the system, the symbol H (for “hash”) should be used wherever possible.
For example, using 0 0 \* \* \* for a dozen daily jobs will cause a large spike at midnight. In contrast, using H H \* \* \* would still execute each job once a day, but not all at the same time, better using limited resources.
Note also that:
The H symbol can be thought of as a random value over a range, but it actually is a hash of the job name, not a random function, so that the value remains stable for any given project.
---
Last updated: June 01, 2023
If you have any feedback on this topic, please contact us at
# Changing Time Zones in Jenkins
By default, the timezone is in UTC.
If you want to change the timezone to a different one:
1. Navigate to **Build Triggers**.
2. Check the **Build Periodically** option.
3. Define the **Schedule** as:
`TZ=EST5EDT`
`0 16 * * 1-5`
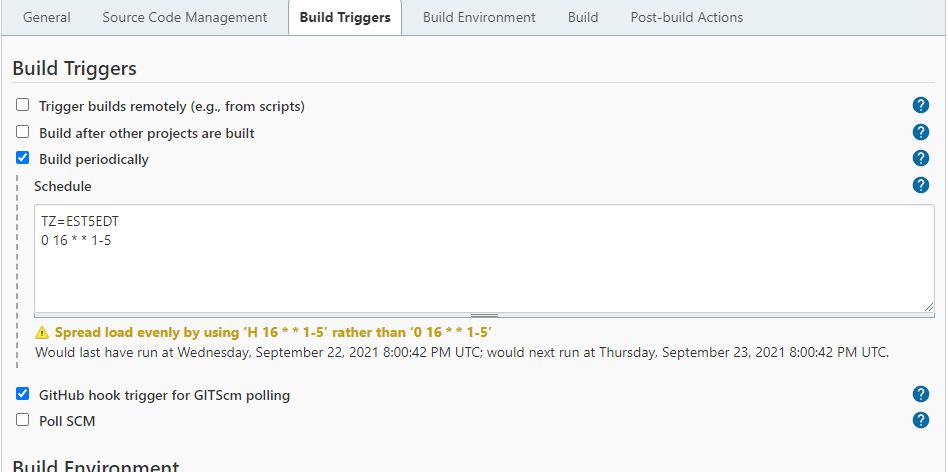
4. This means we are setting the timezone to be EST and setting the run time at 16:00 PM from Monday to Friday.
For more timezone codes, please refer to[>Time Zones information at Java Locale for “English (United States)” (en-US) at LocalePlanet](https://www.localeplanet.com/java/en-US/index.html).
---
Last updated: April 28, 2023
If you have any feedback on this topic, please contact us at
# Jenkins Email Notification
1. Login to Jenkins.
2. Navigate to Manage Jenkins.
3. Navigate to “Go to plugin manager”
4. Search for “Email Extension” under filter section in plugin manager
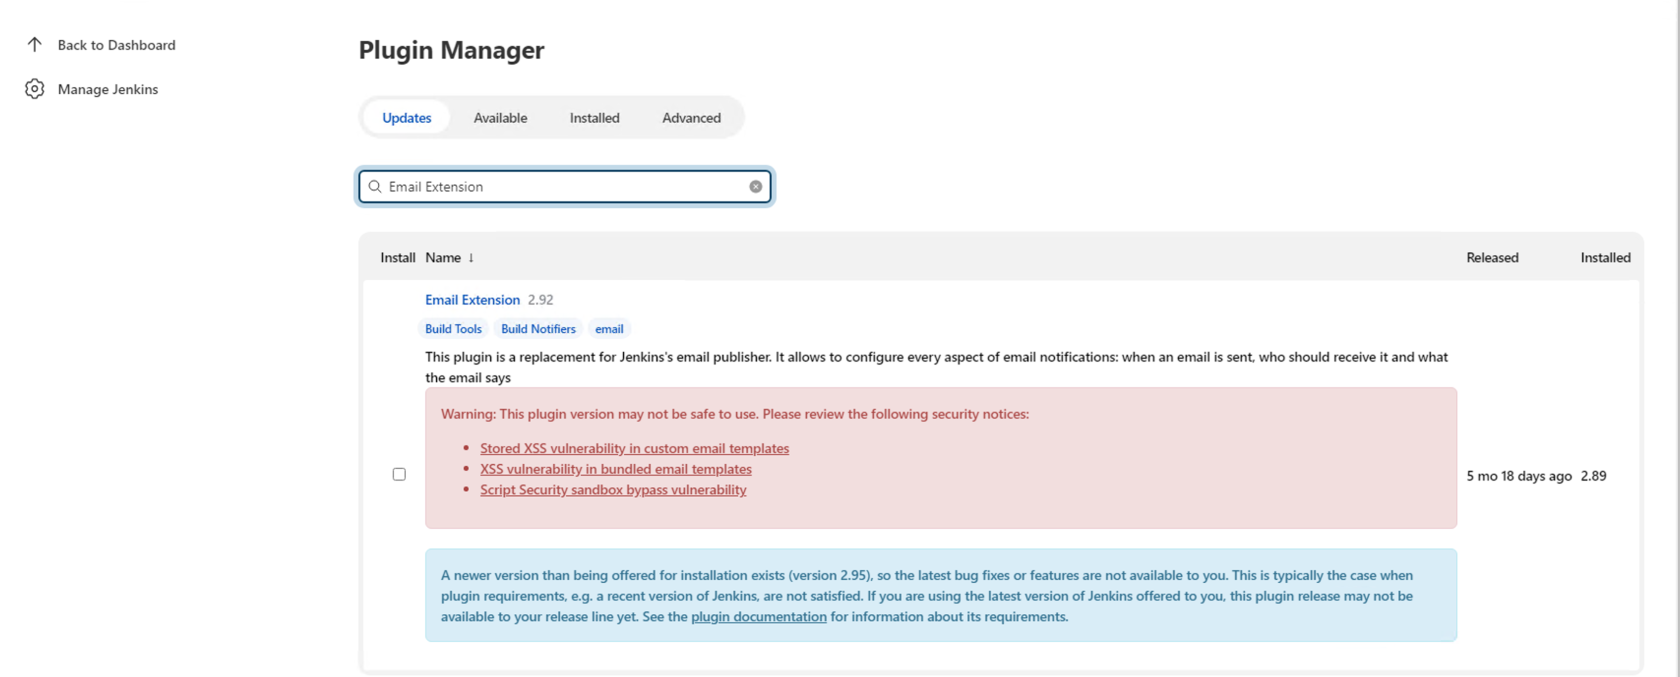
5. Download and Install the Email Extension
6. Create APP Password for GMAIL account - Follow below steps to create App Password
7. If you configure Jenkins e-mail please you should follow the below steps:
1. first enable two step verification for reference click here
2. generate an app password
3. add the app password instead of your password
8. After successfully creation of APP Password for GMAIL
9. Go to Configure System in Manage Jenkins.
10. Under Configure system go to “Extended Email Notification and add
1. SMTP Server field - smtp.gmail.com
2. SMTP Port - 465
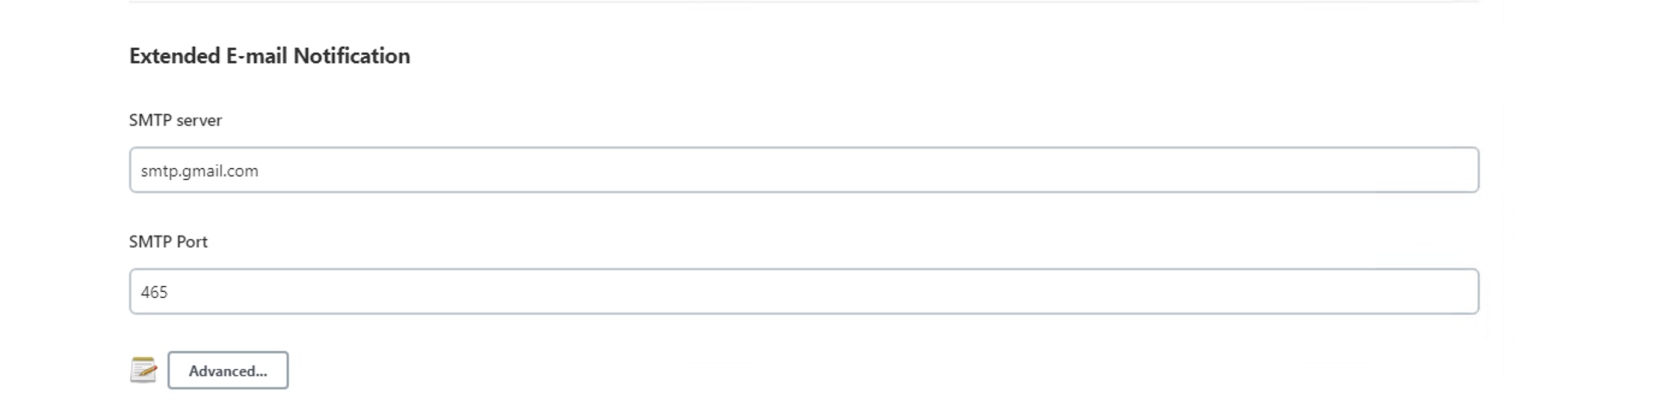
11. Click Advanced button below SMTP Port
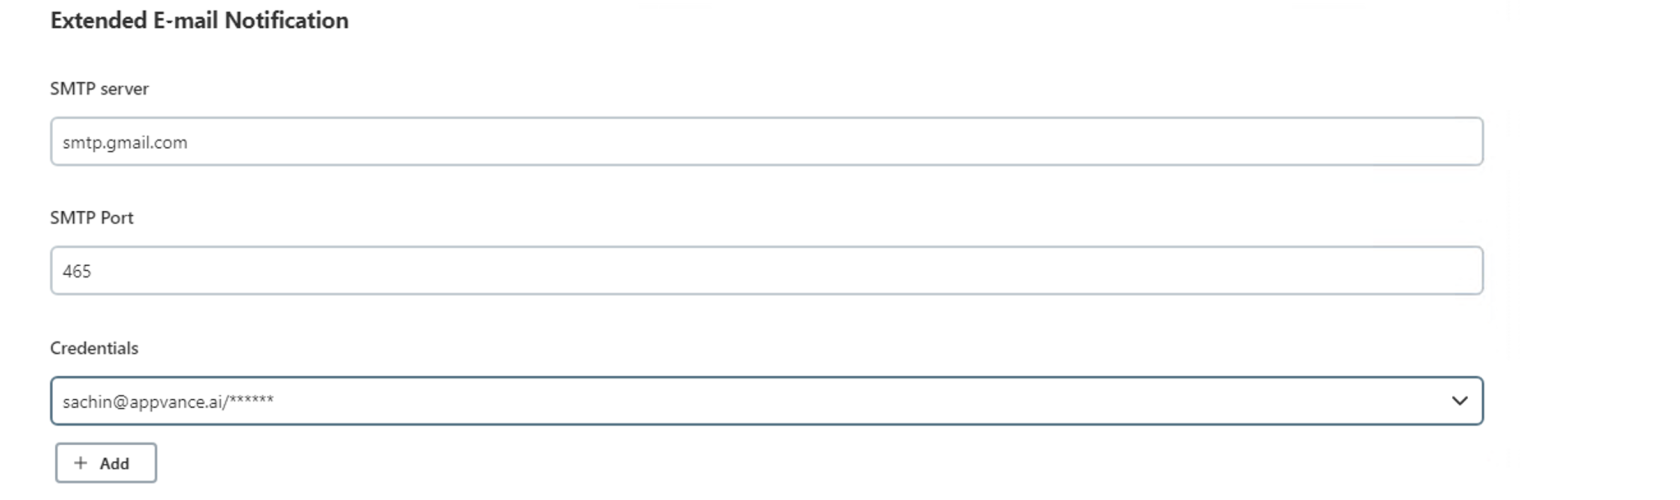
12. Click Add button
13. Go to Jenkins credentials provider and add the Username and APP Password ( Which was created on Step 6) and click Add button.
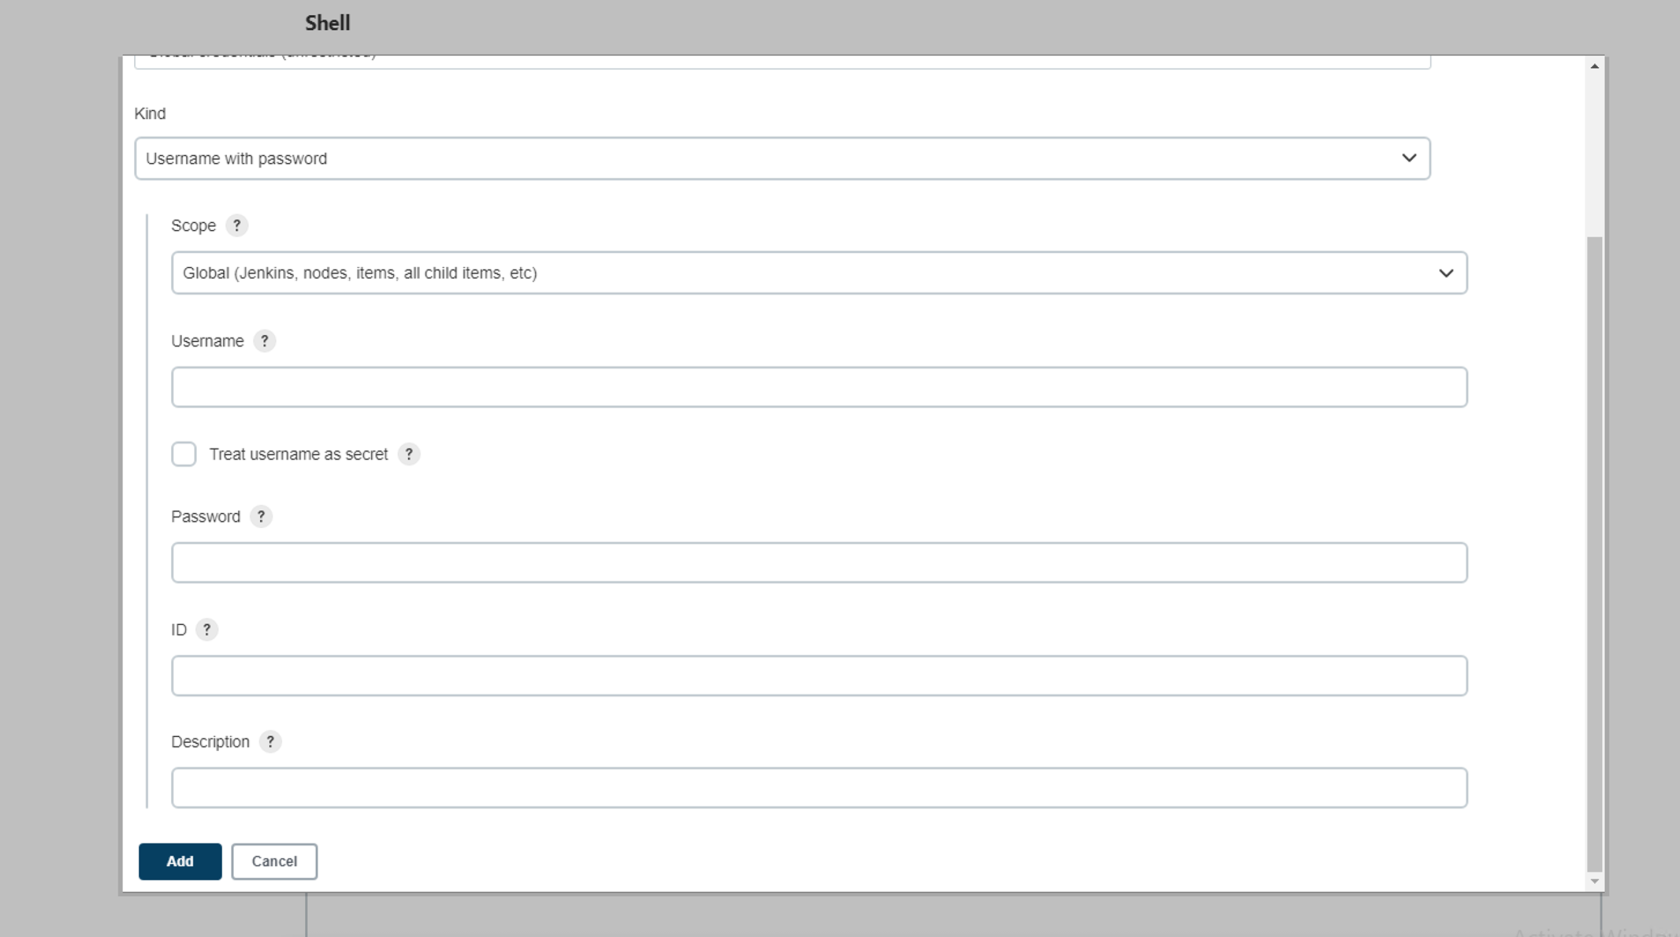
14. Click save button in Configure system
15. Go to the project and click configure
16. Under post-build Actions Choose Editable Email notification under Build

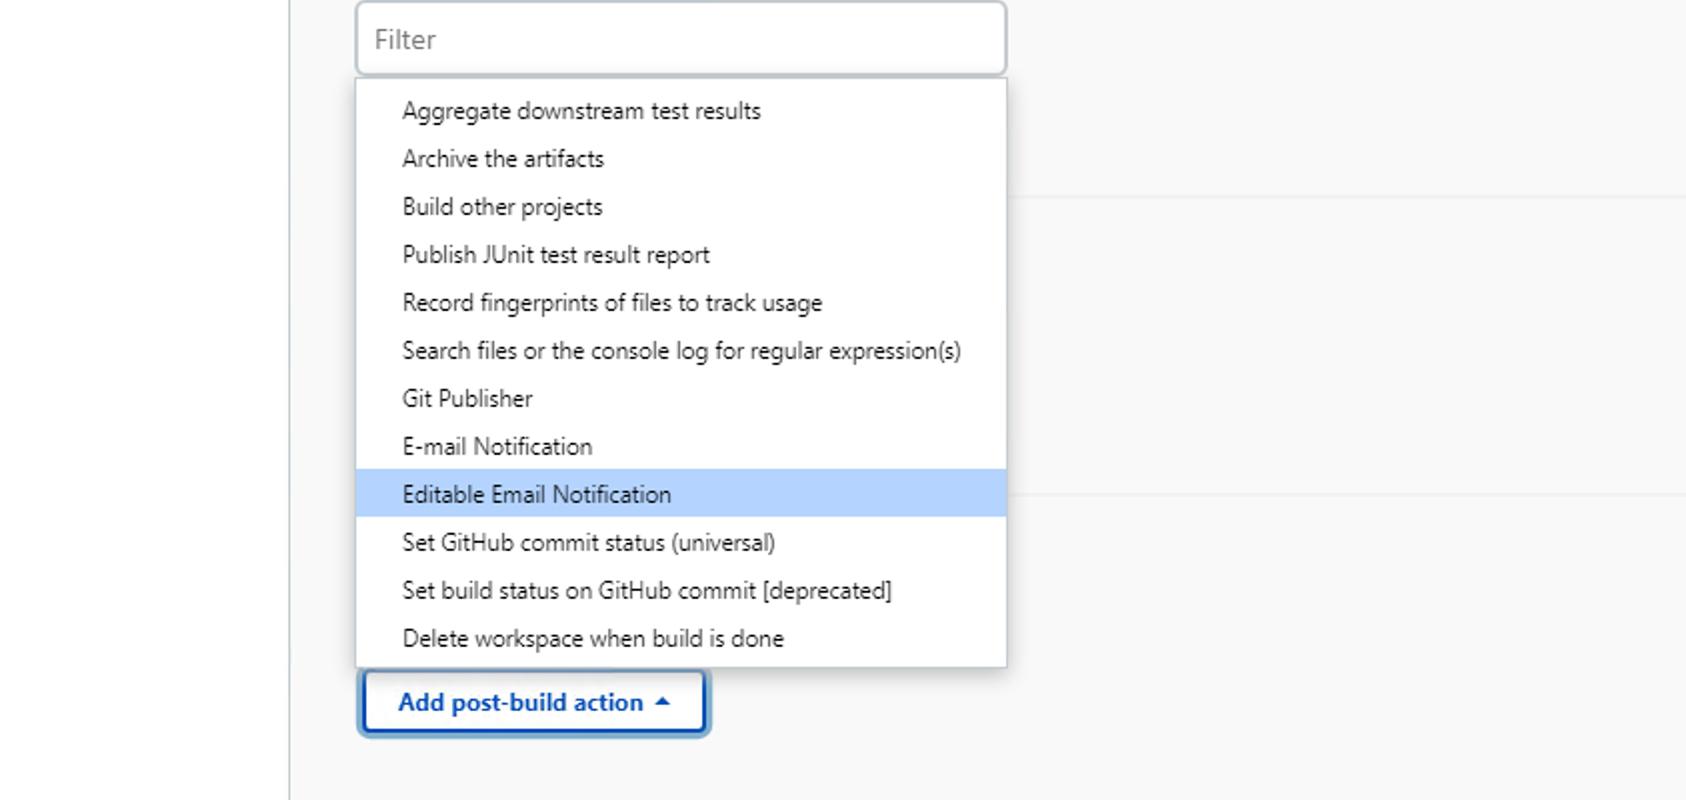
17. Under Editable Email notification add
18. “Email id” under Project From
19. Other field are by-default filled
20. Click Advance settings
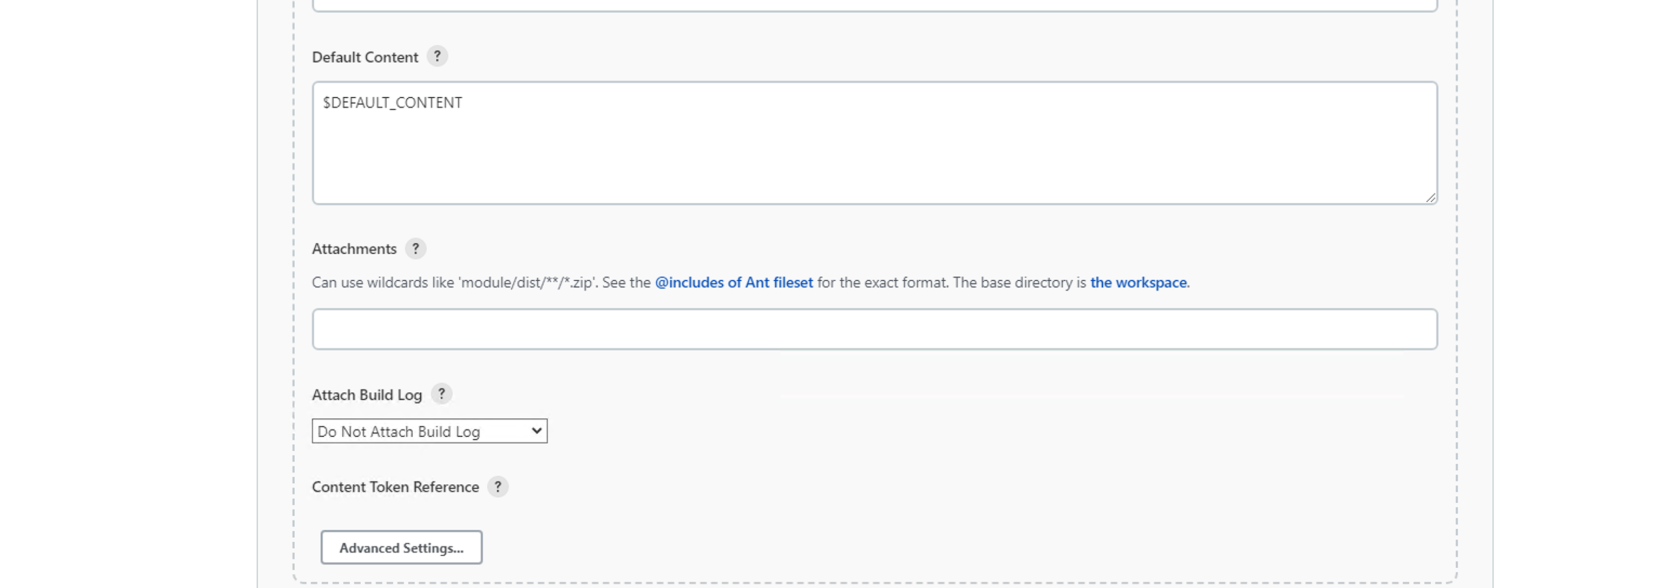
21. All the field are are by-default filled
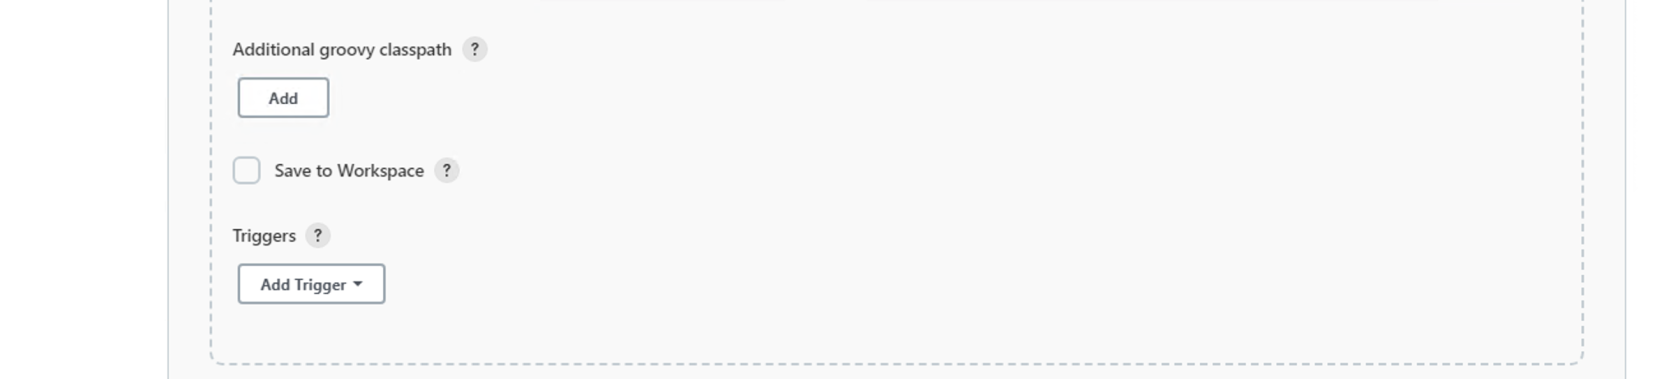
22. Click Add trigger under Triggers
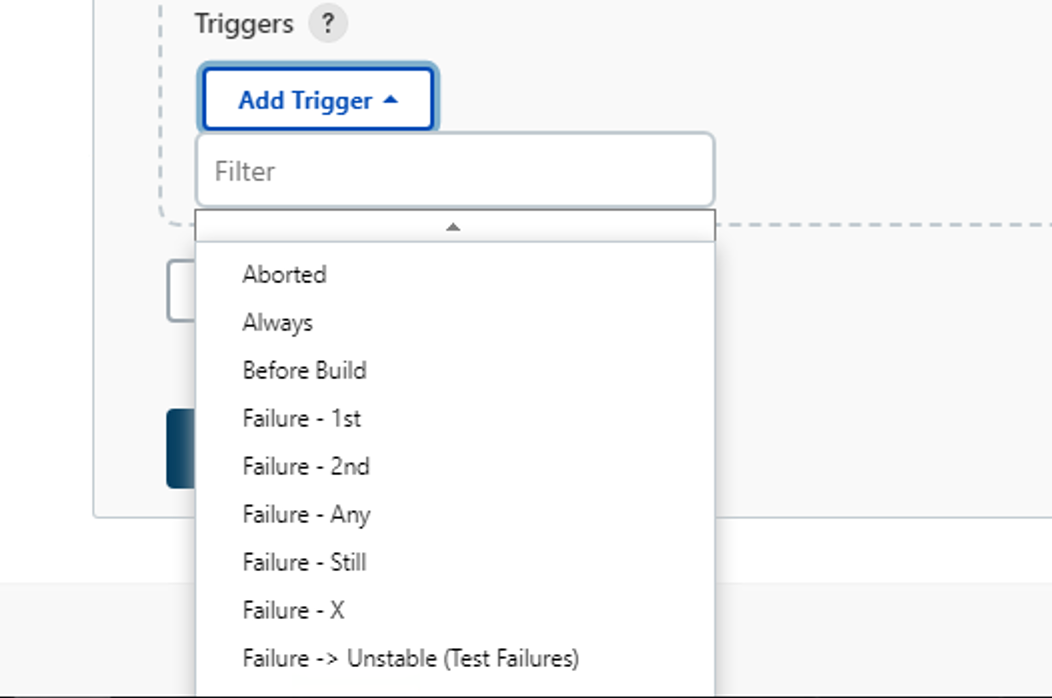
23. Select Always (User can change as per requirement)
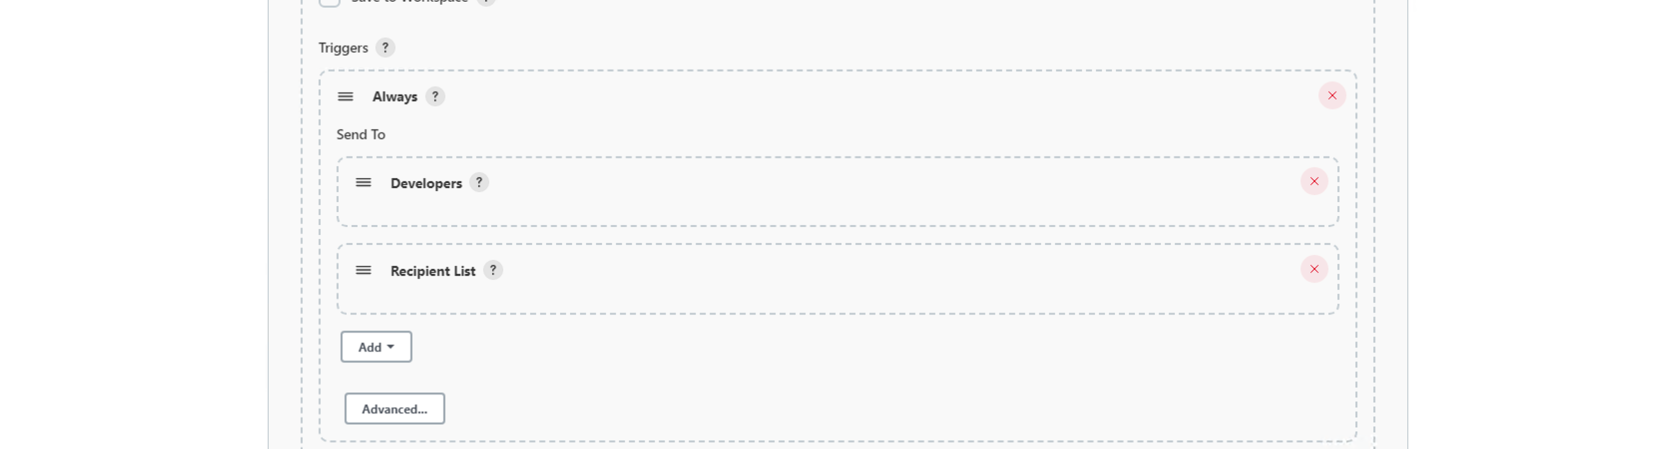
24. Click Advanced under Triggers
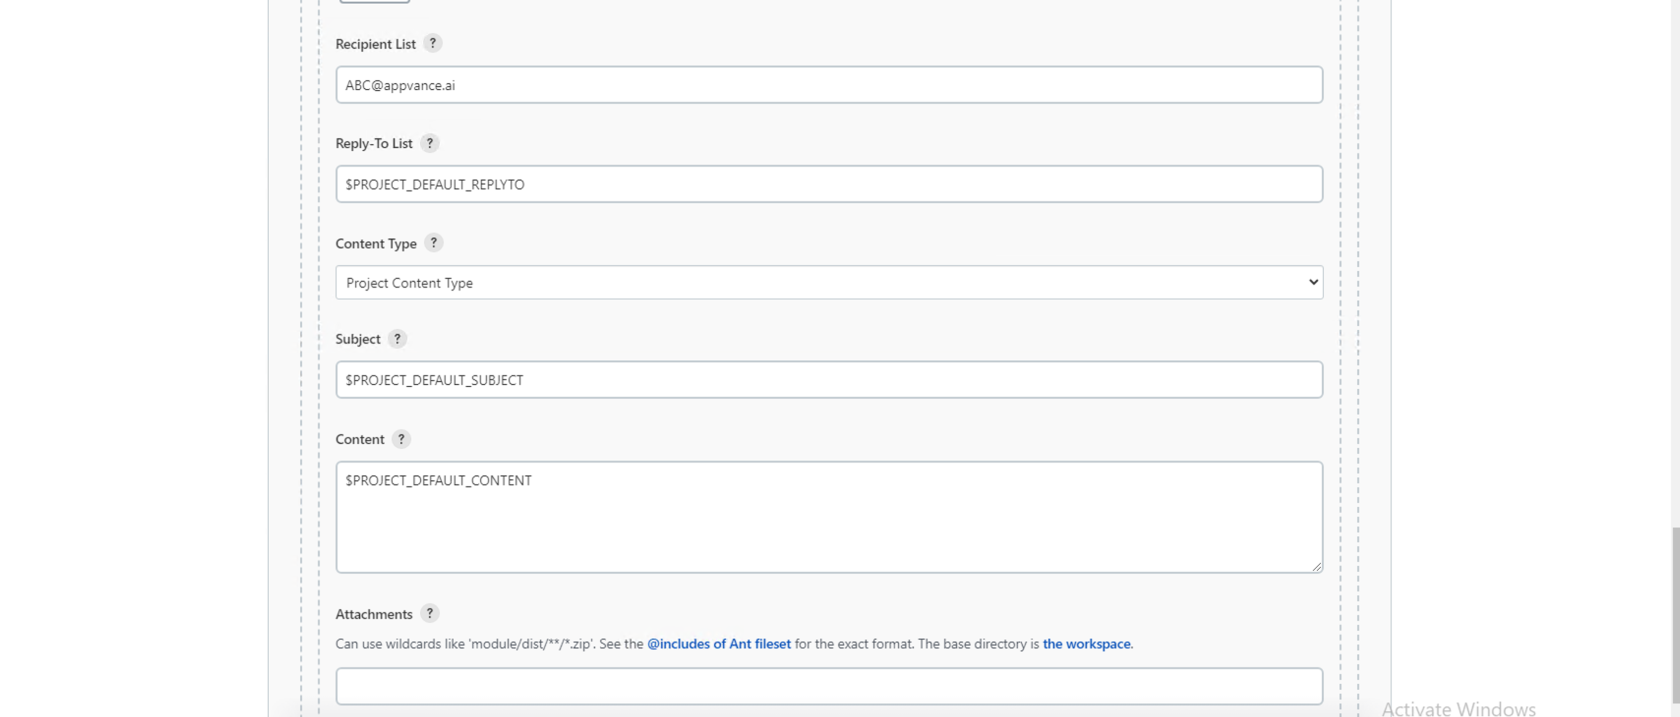
25. Add Recipient Mail id under Recipient List
26. Click Save and Apply
27. Recipient user will start getting Email Notifications
---
Last updated: June 02, 2023
If you have any feedback on this topic, please contact us at