7.1 - Integrations
Integrations — 07 - Integrations documentation.
- Azure DevOps Integration for AIQ
- Azure Monitor Integration for AIQ
- Azure Active Directory Authentication for AIQ
- Configure Bitbucket Repository Integration in AIQ
- CircleCI
- Elasticsearch and OpenSearch Integration
- Amazon AWS
- Amazon AWS
- Access a Windows EC2 Machine Through Windows Firewall
- Amazon EC2 Instance has no public DNS assigned to it
- Attaching an Amazon EBS Volume to an Windows Instance
- Best Practices: Running Appvance IQ testing using EC2 cloud file
- Creating EC2 instances
- Use AWS Reserved Instances for AIQ Infrastructure
- Supported AWS Instance Types for AIQ
- Changing your IP in the security group with aws cli.
- AWS WorkSpace and Google Chrome
- Create an AWS IAM Access Key for AIQ Integrations
- Set Up IAM Role Permissions for an AWS EC2 AIQ Controller
- Amazon S3 Cross-Account Repository
- Atlassian Jira
- Atlassian Jira
- Configure AIQ Jira Cloud Integration
- Configure AIQ Jira Server Integration
- Jira Integration API Notes
- Bamboo
- Governing Services
- Governing Services
- A Practical Example
- Governing Services Using Registry/Repository and Test Automation
- Legacy SoftwareAG X-Registry Integration Reference
- The PAAS Interface
- GitHub
- Glass Box
- Glass Box
- Architecture
- Glassbox Features and Benefits
- Legacy Glassbox Installation Reference
- Install Glassbox on an AIQ Test Node
- Resources
- HAR
- HAR
- Creating a HAR Script and Running it
- Data Enabling HAR Script
- HAR Options
- HAR - Adding Descriptions
- Jenkins
- Jenkins
- Jenkins Configuration
- Jenkins File Reference for AIQ Integrations
- Required File Changes for AIQ Integrations
- Creating First Jenkins Project
- Run AIQ Scenarios from Jenkins with Ant
- Configure ant to run Blueprints from Jenkins
- Configure a Parameterized Jenkins Project for AIQ
- Scheduling Jobs in Jenkins
- Changing Time Zones in Jenkins
- Jenkins Email Notification
- JMeter Integration and Testing
- JMeter Integration and Testing
- Run JMeter Scripts in AIQ
- Correlation in JMeter for AIQ Tests
- Data Enabling in JMeter
- JMeter FAQ
- Selenium
- Selenium Integration Reference for AIQ
- Features and Benefits of Selenium
- Repurposing Methodology and Architecture for AIQ Integrations
- Test Workshop Tutorial
- Data-Driven Test Development in AIQ
- Legacy Selenium IDE Import Reference
- Review Selenium Commands and Results in AIQ
- Maintain TestNG Framework Scripts in AIQ
- Selenium Integration FAQ for AIQ
- Continous Integration
- Continous Integration
- Legacy Hudson Integration Reference
- Legacy Team Foundation Server Integration Reference
- Run AIQ Tests from the Command Line
- CICD - TeamCity Integration
- CICD - Repository Alone
- CICD- AntTags
- CICD - Dashboards
- CI/CD: Optimize Disk Space on AIQ Controller and Test Nodes
- CI/CD FAQ for AIQ Integrations
- SoapUI Integration
- SoapUI Integration with AIQ
- Run SoapUI as a Functional Test in AIQ
- Run SoapUI as a Performance Test in AIQ
- Run Data-Enabled SoapUI Tests in AIQ
- How to query and validate Splunk logs in Service Suite
- Integration with Datadog (APM)
Azure DevOps Integration for AIQ
Use this article when integrating AIQ with Azure DevOps repositories, pipelines, work items, or release workflows.
What changed in this article
- Corrected capitalization from “Azure Devops” to “Azure DevOps.”
- Added integration checks for organization/project URL, repository or pipeline scope, token permissions, branch/path mapping, artifacts, work item references, and auditability.
- Added guidance to use token-based access and avoid storing passwords in integration settings.
Validation workflow
- Confirm the Azure DevOps organization, project, repository or pipeline, and integration owner.
- Validate token scope, branch/path settings, artifact access, and pipeline/work item behavior with a controlled test.
- Document the integration owner and rotation process for credentials or tokens.
Review note: This page now distinguishes current Azure DevOps guidance from the legacy TFS reference.
Last updated: October 5, 2026
If you have feedback on this topic, contact documentation@appvance.ai.
Azure Monitor Integration for AIQ
Use this article when connecting AIQ workflows or performance tests with Azure Monitor metrics, logs, or alerts.
What changed in this article
- Scoped the Azure Monitor page to AIQ integration and observability use cases.
- Added checks for workspace/resource ownership, metric/log source, authentication, permissions, time range alignment, tags, dashboards, and alert usage.
- Added guidance to correlate Azure Monitor data with AIQ execution windows before making performance conclusions.
Validation workflow
- Identify the Azure resources, metrics, logs, and time windows that should be correlated with AIQ runs.
- Validate authentication, permissions, workspace access, and query results with a small execution.
- Review AIQ results and Azure Monitor data together before diagnosing bottlenecks.
Review note: This page now supports observability correlation instead of a generic Azure Monitor mention.
Last updated: October 5, 2026
If you have feedback on this topic, contact documentation@appvance.ai.
Azure Active Directory Authentication for AIQ
Azure Active Directory Authentication for AIQ
Use this article when integrating AIQ authentication with Azure Active Directory, now Microsoft Entra ID. Confirm tenant, application registration, redirect URL, claims, and user/group assignments before enabling the integration for users.
Configuration checklist
- Create or confirm the Entra ID application registration for AIQ.
- Set the redirect URI to the exact AIQ URL users will access.
- Configure required claims, scopes, and group assignments according to the customer's access model.
- Store client secrets or certificates securely and track expiration dates.
- Test with a limited pilot group before enabling broad access.
Validation workflow
- Confirm login redirects from AIQ to the expected tenant.
- Validate successful login, failed-login behavior, and role/group mapping.
- Check that logout and session timeout behavior match policy.
- Document tenant ID, app registration owner, secret expiration, and support contact.
Last updated: October 8, 2026
Configure Bitbucket Repository Integration in AIQ
Last reviewed: September 29, 2026
Use this article when AIQ needs to connect to a Bitbucket repository for source-controlled test assets.
What changed in this article
- Expanded the one-word title into a specific Bitbucket repository integration task.
- Added checks for Bitbucket Cloud vs Server/Data Center, repository URL, branch, credentials/app password, SSH/HTTPS access, and webhook/pipeline expectations.
- Added secret-handling guidance for tokens, app passwords, and SSH keys.
Validation workflow
- Identify whether the repository is hosted in Bitbucket Cloud or Bitbucket Server/Data Center.
- Validate repository URL, branch, authentication method, and network access from AIQ.
- Run a small repository sync or checkout and verify the expected AIQ assets are available.
Review note: The page now describes Bitbucket repository setup instead of acting like a placeholder page.
Last updated: September 29, 2026
If you have feedback on this topic, contact documentation@appvance.ai.
CircleCI
Operate an Appvance Test Scenario from CircleCI using the Appvance IQ Plugin.
Appvance IQ Test scenarios can be run from CircleCI integration using a CIPlugin that Appvance provides. CIPlugin enabled you to start test scenarios from the YAML tag (CI Tools).
Prerequisites
-
Appvance CI Plugin
-
Java 1.8
-
Scripts and Appvance Test scenario created and available
-
Active GitHub account
-
Circle CI that is tied to the GitHub account
Running the test scenario
-
Create a project in your GitHub account.
-
Create a folder called CircleCI with the file called config.yml.

-
Config.yml should have the minimum following details in it:
# Python CircleCI 2.0 configuration file
#
# Check https://circleci.com/docs/2.0/language-python/ for more details
#
jobs:
build:
docker:
- image: circleci/java:8-jdk
working_directory: ~/repo
steps:
- checkout
- run:
name: Install ant
command: |
sudo apt-get install -y ant
echo 'ant installed.'
cd /home/circleci/repo/appvance/scenario1
ant -buildfile build.xml -DbuildNumber=$CIRCLE_WORKFLOW_ID executeScenario
cd /home/circleci/repo/appvance/scenario2
ant -buildfile build.xml -DbuildNumber=$CIRCLE_WORKFLOW_ID executeScenario
no_output_timeout: 2h
- save_cache:
key: deps1_{{ .Revision }}
paths:
- ~/repo
workflows:
version: 2
build_and_test:
jobs:
- build
- dev:
requires:
- build
filters:
branches:
only:
- /feature-.*/ -
This is going to install JDK 8, Install ant that is required to build AppvanceRestClientWithDeps.jar, and call the build.xml which internally runs the scenarios that are mentioned
-
Create a folder called appvance and inside have build.xml file and localhost.json files per scenario for better organizing


build.xml would have the following details.
<project name="Lead Genius CI" default="addDeps" basedir=".">
<description>Lead Genius Blueprint Circle CI</description>
<property name="aiqCreds" value="localhost.json" />
<property name="scenarioName" value="ScenarioFiles/Scenario1.scenario"/>
<property name="resourcesDir" value="."/>
<target name="init">
<path id="IvyPath">
<pathelement location="AppvanceRestClientWithDeps.jar"/>
</path>
</target>
<target name="setup" depends="init">
<get src="https://s3-us-west-2.amazonaws.com/appvanceivy/projects/AppvanceRestClientWithDeps/master/latest/ivy" dest="AppvanceRestClientWithDeps.jar"/>
<taskdef name="blueprintEcho" classname="com.appvance.blueprint.BlueprintEcho" >
<classpath refid="IvyPath"/>
</taskdef>
<blueprintEcho message="Setting up blueprint ant tasks ..." />
</target>
<target name="executeScenario" depends="setup">
<taskdef name="runScenario" classname="com.appvance.ci.ExecuteScenario" >
<classpath refid="IvyPath"/>
</taskdef>
<runScenario scenario="${scenarioName}"
aiqCreds="${aiqCreds}"
dir="${resourcesDir}"/>
</target>
</project>
The file is self-explanatory and the scenario name is something that needs to be changed along with the path.
localhost.json would have the following details
{
"controller":{
"url":"http://ec2-x-x-x-x.us-west-2.compute.amazonaws.com:8080",
"username":"appvance",
"password":"appvance",
"workFolder":"/MyWorkdirectory/"
}
}URL of the controller has to be changed and also the workFolder of the scenarios to be changed.
Any changes done to the files will initiate a build-in CircleCI.
You can go to your CircleCI Account after all these configurations are done in Github and the jobs can be run from CircleCI.

After the successful execution, go to the Install Ant section which will display all the logs and the link to navigate to Reports of the test run.
You can copy-paste the link in your favorite browser to check the results in details

Last updated: June 02, 2023
If you have any feedback on this topic, please contact us at documentation@appvance.ai
Elasticsearch and OpenSearch Integration
Use this article when configuring or maintaining AIQ integrations that send, read, or validate data through Elasticsearch or OpenSearch.
What changed in this article
- Normalized the title spacing and clarified that both Elasticsearch and OpenSearch may be in scope.
- Added checks for endpoint ownership, version compatibility, authentication, index naming, retention, TLS, network access, and query validation.
- Added guidance to avoid logging credentials or sensitive indexed data in AIQ outputs.
Validation workflow
- Confirm whether the environment uses Elasticsearch, OpenSearch, or a compatible managed service.
- Validate endpoint URL, TLS, authentication, index pattern, permissions, and network reachability.
- Run a controlled query or write test and verify results without exposing sensitive data.
Review note: This page now focuses on safe integration maintenance rather than a bare product-name reference.
Last updated: October 2, 2026
If you have feedback on this topic, contact documentation@appvance.ai.
Amazon AWS
Amazon AWS
Contents:
- Access windows EC2 machine which has windows firewall on from Local machine
- Amazon EC2 Instance has no public DNS assigned to it
- Attaching an Amazon EBS Volume to an Windows Instance
- Best Practices: Running Appvance IQ testing using EC2 cloud file
- Creating EC2 instances
- Reserving and using an AWS Reserved Instance
- Supported Instance Types
- Changing your IP in the security group with aws cli.
- AWS WorkSpace and Google Chrome
- How to Create an Access Key to your IAM User
- Setup IAM Role Permissions for the AWS EC2 Controller
Access a Windows EC2 Machine Through Windows Firewall
Last reviewed: September 25, 2026
Use this article when a local machine needs to reach a Windows EC2 instance that has Windows Firewall enabled.
What changed in this article
- Corrected the title grammar and made the scope specific to Windows EC2 connectivity.
- Added checks for AWS security groups, Windows Firewall inbound rules, RDP/WinRM ports, and source IP restrictions.
- Added caution to avoid opening broad public access just to make a troubleshooting step pass.
Validation workflow
- Confirm the EC2 security group allows the required port from the local source IP.
- Confirm Windows Firewall allows the same service inside the instance.
- Test connectivity with the approved access method and then narrow any temporary rule changes.
Review note: Kept the article as operational guidance but added security guardrails around firewall changes.
Last updated: September 25, 2026
If you have feedback on this topic, contact documentation@appvance.ai.
Amazon EC2 Instance has no public DNS assigned to it
Please follow the below steps to add dns hostnames to your EC2 Instances.
- Add Column VPC Id and check the VPC Id that your instance is assigned to.
- Go to console.aws.amazon.com
- Go To Services -> VPC
- Open Your VPCs
- select your VPC connected to your EC2 and
- Edit Summary---> Change DNS hostnames: to YES
Hope this helps.
Last updated: June 02, 2023
If you have any feedback on this topic, please contact us at documentation@appvance.ai
Attaching an Amazon EBS Volume to an Windows Instance
Attaching an Amazon EBS Volume to an Windows Instance.
You can attach an EBS volume to one of your instances that is in the same Availability Zone as the volume.
Prerequisites
- Determine the device names that you'll use.
- Determine how many volumes you can attach to your instance.
- If a volume is encrypted, it can only be attached to an instance that supports Amazon EBS encryption.
- If a volume has an AWS Marketplace product code:
- The volume can only be attached to a stopped instance.
- You must be subscribed to the AWS Marketplace code that is on the volume.
- The configuration (instance type, operating system) of the instance must support that specific AWS Marketplace code. For example, you cannot take a volume from a Windows instance and attach it to a Linux instance.
- AWS Marketplace product codes are copied from the volume to the instance.
To attach an EBS volume to an instance using the console
1. Open the Amazon EC2 console.
2. Click Volumes in the navigation pane.
3. Select a volume and then click Attach Volume.
4. In the Attach Volume dialog box, start typing the name or ID of the instance to attach the volume to in the Instance box, and select it from the list of suggestion options (only instances that are in the same Availability Zone as the volume are displayed).
5. You can keep the suggested device name, or enter a different supported device name.
Important The block device driver for the instance assigns the actual volume name when mounting the volume, and the name assigned can be different from the name that Amazon EC2 recommends.
6. Click Attach.
7. Connect to your instance and make the volume available.
Making an Amazon EBS Volume Available for Use
After you attach an Amazon EBS volume to your instance, it is exposed as a block device. You can format the volume with any file system and then mount it. After you make the EBS volume available for use, you can access it in the same ways that you access any other volume. Any data written to this file system is written to the EBS volume and is transparent to applications using the device.
Note that you can take snapshots of your EBS volume for backup purposes or to use as a baseline when you create another volume.
Making the Volume Available on Windows
Use the following procedure to make the volume available.
1.Log in to your Windows instance using Remote Desktop.
2. Start the Disk Management utility. On Windows Server 2012, on the taskbar, right-click the Windows logo, and then select Disk Management. On Windows Server 2003/2008, click Start, point to Administrative Tools, select Computer Management, and then select Disk Management.
3. Select the disk that represents the new EBS volume.

4. On the Disk Management menu, select Action - All Tasks - Online.

5. A new disk needs to be initialized before it can be used.
Caution:
If you're mounting a volume that already has data on it (for example, a public data set), make sure that you don't reformat the volume and delete the existing data.
To initialize a new disk:
a. In the Disk Management utility, select the new EBS volume disk.
b. On the Disk Management menu, select Action - All Tasks - Initialize Disk. Attaching Volume to the instance Page 4
c. In the Initialize Disk dialog, select the disk to initialize, select the desired partition style, and press OK.
Restart your Amazon Instance.
Last updated: June 26, 2023
If you have any feedback on this topic, please contact us at documentation@appvance.ai
Best Practices: Running Appvance IQ testing using EC2 cloud file
The Best Practices that needs to be followed are below:
- Please make sure that Appvance IQ installed on the machine is using the License file that you have been provided with so that the new machines does not run into license issues while executing tests.
- Add Appvance IQ under Start up services so that once the machine starts, IQ is started automatically.
- Make sure the browsers are installed and are configured to have the correct paths.
- Once all the above changes are done create a new image and use this image to create machines while running tests.
-
Do not run the test on Local machine instead EC2 machines to run these kind of tests which involves cloud file.
-
Always click "Test Configuration" under cloud management to verify if the credentials entered are valid
-
The Database URL should be changed from localhost URL to the name of the EC2 machine or use an RDS instance in Scenario Builder.
- Make sure to set "Terminate" as All and "Reboot" as Never under Locations in Scenario Builder or use these options depending on the needs.
Last updated: June 02, 2023
If you have any feedback on this topic, please contact us at documentation@appvance.ai
Creating EC2 instances
via Scenario Builder and running the tests, the first run's response times are on a higher side compared to consecutive runs by using the instances that are already running
Creating EC2 instances via Scenario Builder and running the tests, the first run's (where Appvance IQ creates requested instances from the Scenario builder using an AMI) response times are on a higher side compared to consecutive runs by using the instances that are already running.
AWS has a lazy start up, only required part of the hard disk is copied from the AMI to the run time hard disk.
Because of this, the machine starts up very fast, but accessing some parts of the hard disk could be very slow.
This affects Appvance IQ during the first scenario execution. The response times reported could be on the higher side.
Amazon provides a workaround which is reading the hard disk, in order to avoid this slowness during production.
Nevertheless the proposed solution is for Linux platform only.
Amazon documentation is located here.
http://docs.aws.amazon.com/AWSEC2/latest/UserGuide/ebs-initialize.html
Appvance IQ now has the capability to read the hard disk the first time the machine is created (This is for windows platforms)
This will be done just the first time the AMI is created.
Note: Still there could be little difference in the response times when the test is started for the first time to create instance and run the scenario than compared to the subsequent scenario runs using the same started instance.
Last updated: June 02, 2023
If you have any feedback on this topic, please contact us at documentation@appvance.ai
Use AWS Reserved Instances for AIQ Infrastructure
Recommended guidance
AWS Reserved Instances can reduce infrastructure cost for stable AIQ workloads, but they should be planned with finance, cloud operations, and environment owners. Do not reserve capacity without confirming usage, region, instance family, term, and ownership.
Before reserving
- Confirm whether the AIQ workload is steady enough to justify a reservation.
- Review region, instance type, operating system, term, payment option, and expected utilization.
- Coordinate with cloud governance and budgeting owners.
- Compare Reserved Instances with Savings Plans or current cloud purchasing standards.
Operational guidance
- Track which AIQ environments are intended to consume the reservation.
- Review utilization regularly to avoid unused commitment.
- Document renewal dates and ownership.
- Re-evaluate reservations before AIQ upgrades, scaling changes, or cloud architecture changes.
Last updated: October 6, 2026
Supported AWS Instance Types for AIQ
Recommended guidance
Choose AWS instance types for AIQ based on the role of the host, expected workload, browser or API execution volume, storage needs, and monitoring results. Instance-type guidance can become outdated as AWS offerings and AIQ requirements change.
Selection factors
- AIQ application server, database, Test Node, reporting, or utility role.
- CPU, memory, disk throughput, network throughput, and browser concurrency.
- Operating system and dependency compatibility.
- Cloud region availability, cost model, and scaling policy.
- Performance test load profile and evidence retention needs.
Validation workflow
- Start from the current AIQ system requirements and cloud architecture guidance.
- Run representative smoke and load tests on the chosen instance family.
- Monitor CPU, memory, disk, network, and browser stability.
- Resize based on evidence instead of copying old environment sizes blindly.
Last updated: October 6, 2026
Changing your IP in the security group with aws cli.
First of all take install aws cli from this link:
https://docs.aws.amazon.com/cli/latest/userguide/getting-started-install.html
Secondly, open the terminal and setup the default profile:
aws configure
insert AWS access Key ID:
insert AWS Secret Access Key:
Default region name:
Default output format: type <json>
After having to make the profile in config and credentials.
Instructions are here:
https://docs.aws.amazon.com/cli/latest/userguide/cli-configure-profiles.html
Download the script from the repository:
https://gitlab.appvance.net/Appvance/devops/patch-rules-on-aws
https://gitlab.appvance.net/Appvance/devops/patch-rules-on-aws/-/blob/master/patch_my_ruls.sh - for Unix machine.
https://gitlab.appvance.net/Appvance/devops/patch-rules-on-aws/-/blob/master/patch_my_ruls.ps1 - for Windows machine.
Go to the AWS console where your EC2 instance:
Open preferred security group:


Check marked values:

Open the file under your OS in your favorite redactor and change the value:

From now, when the IP is changed, and breaks ties with EC2 instance. Launch script it changes IP fast.
https://gitlab.appvance.net/Appvance/devops/patch-rules-on-aws/-/blob/master/patch_my_ruls.sh - for Unix.
https://gitlab.appvance.net/Appvance/devops/patch-rules-on-aws/-/blob/master/patch_my_ruls.ps1 - for Windows.
Last updated: June 26, 2023
If you have any feedback on this topic, please contact us at documentation@appvance.ai
AWS WorkSpace and Google Chrome
AWS WorkSpace is a cloud-based virtual desktop infrastructure (VDI) solution that allows users to access their desktop applications and data from any device with internet access.
There are considerations for third-party cookies and policy settings when using Amazon WorkSpace and AIQ.
Enabling Third-party Cookies
AIQ requires third-party cookies are enabled in the web browser being used for testing. Enabling third-party cookies is vital for AIQ tests because it allows the web browser to store and retrieve cookies from domains other than the one being visited. This is important because many websites rely on third-party cookies for tracking, advertising, and authentication purposes. Without the ability to access these cookies, AIQ tests may not be able to accurately simulate user behavior on the website being tested.
For example, suppose you are testing a website that uses a third-party authentication provider to log users in. If third-party cookies are not enabled, the browser will not be able to store the authentication cookie from the provider, and the login process may fail. Similarly, if a website relies on third-party tracking cookies to track user behavior, a test that does not enable third-party cookies may not accurately simulate user behavior and may produce incorrect results.
Here are some specific details why third-party cookies need to be enabled on the browsers that are used to record test scenarios for AIQ:
-
Simulate user behavior: Cookies are used to store user-specific information, such as login credentials or session IDs.
-
Preserve the session state: which means that users can return to the application later and continue where they left off. By allowing cookies, we can simulate this behavior and ensure that the application behaves correctly during test execution.
-
Testing different user scenarios: Cookies can be used to simulate different user scenarios, such as testing the application as a new user or a returning user. With the cookies enabled we can simulate different user scenarios and test different parts of the application under different conditions.
-
For performance: they can be used to speed up the test execution by avoiding the need to repeat certain steps, such as logging in, during each test run.
Chrome Policies
Using Amazon WorkSpaces supports the use of Google Chrome as a web browser, and there are several policies that can be enforced on Google Chrome.
Here are some of the policies that can be applied to Google Chrome in Amazon WorkSpaces:
-
Block access to the Chrome Web Store: This policy prevents users from accessing the Chrome Web Store, which contains extensions, themes, and other apps for Google Chrome. This can be useful in environments where IT administrators want to control what extensions and apps are installed on users' devices.
-
Disable auto-updates: This policy disables automatic updates for Google Chrome, which can be useful in environments where IT administrators want to control the version of Chrome that users are using.
-
Block pop-ups: This policy blocks pop-up windows in Google Chrome, which can be useful in environments where IT administrators want to prevent users from accessing certain websites or ads.
-
Block unsafe downloads: This policy prevents users from downloading files that Google Chrome has flagged as potentially unsafe. This can be useful in environments where IT administrators want to prevent users from downloading malware or other harmful files.
-
Enable Safe Browsing: This policy enables Google Chrome's Safe Browsing feature, which helps protect users from phishing attacks and malware.
For more information on Chrome polices and Amazon WorkSpace see the Amazon AWS documentation at: target="_blank">https://docs.aws.amazon.com/workspaces-web/latest/adminguide/browser-policies.html.
Inspecting Chrome Policies
If you want to verify the current policies applied to the browser installed on the workspace, there are two methods to export the polies so they can be shared or studied.
Exporting Chrome Polies to a Text File
-
Open a new tab in the Chrome browser.
-
In the address bar, type "chrome://policy" and press Enter.
-
You should now see a list of policies that are currently applied to the Chrome browser. These policies will include both user and system policies that have been configured by your IT administrator.
-
To copy the policies, you can simply select the text on the page and copy it to your clipboard using the Ctrl+C (Windows) or Command+C (Mac) keyboard shortcut.
-
Once you have copied the policies to your clipboard, you can paste them into a text editor or other application for further analysis or sharing with your IT administrator.
Exporting Chrome Policies to a JSON File
To save Chrome policies to a JSON file in Amazon WorkSpaces, you can follow these steps:
-
Log in to the AWS Management Console and navigate to the Amazon WorkSpaces console.
-
Select the WorkSpaces directory that has the Chrome policies you want to export.
-
Click the Group Policy tab, and then click the name of the group policy that contains the Chrome policies you want to export.
-
Click on Edit button next to the "Chrome Policies" section.
-
In the Chrome policies editor, click Download button at the top of the editor window.
-
Choose a location on your computer where you want to save the JSON file, and then click Save.
-
The Chrome policies will be saved to a JSON file that you can use to import the policies into another Amazon WorkSpaces directory or share with other IT administrators.
Last updated: April 19, 2023
If you have any feedback on this topic, please contact us at documentation@appvance.ai
Create an AWS IAM Access Key for AIQ Integrations
Create an AWS IAM Access Key for AIQ Integrations
Create an AWS IAM access key only when an AIQ integration requires programmatic AWS access and a role-based approach is not available. Follow the customer's cloud security policy and use the minimum permissions required.
Security checklist
- Prefer IAM roles, temporary credentials, or workload identity when supported.
- Create keys for a dedicated integration user, not a personal administrator account.
- Attach a least-privilege policy scoped to the required AWS service and resource.
- Store the access key and secret in an approved secret manager or secured AIQ configuration.
- Rotate keys on a defined schedule and remove unused keys immediately.
Validation workflow
- Test the integration with the minimum required permissions.
- Confirm logs do not print the access key or secret.
- Document key owner, purpose, creation date, rotation date, and AWS account.
- Disable the key if the integration is retired or replaced by a role-based method.
Last updated: October 8, 2026
Set Up IAM Role Permissions for an AWS EC2 AIQ Controller
Set Up IAM Role Permissions for an AWS EC2 AIQ Controller
Use an IAM role for an EC2-hosted AIQ Controller when the controller must access AWS services without long-lived access keys. Scope permissions to the exact services and resources required by the integration.
Security checklist
- Prefer an EC2 instance profile over static IAM user keys.
- Create a least-privilege policy for the required AWS services, actions, and resources.
- Attach the role only to the AIQ Controller instances that need the access.
- Use tags, account boundaries, and environment separation to avoid cross-environment access.
- Review CloudTrail or equivalent logs after the first validation run.
Validation workflow
- Attach the IAM role or instance profile to the EC2 Controller.
- Restart or refresh the integration if required by the workflow.
- Run a small AIQ operation that uses the AWS permission.
- Confirm access succeeds and no broader permissions are required.
- Document role name, policy owner, AWS account, and review date.
Last updated: October 8, 2026
Amazon S3 Cross-Account Repository
This document explains how a client sets up an Amazon S3 bucket in their own AWS account so that it can be used as an S3 repository by an AppvanceIQ (AIQ) Controller that is hosted in Appvance's AWS account, using AIQ's cross-account S3 mode.
Overview
In this setup:
- The AIQ Controller runs in the Appvance AWS account (
650030447088). - The S3 bucket used as the repository lives in the client's AWS account.
- The Controller reaches the client's bucket by assuming an IAM role in the client account via AWS STS (
sts:AssumeRole), rather than using long-lived access keys.
This is the recommended pattern because the client never has to share IAM access keys/secrets with Appvance, access is scoped to a single role with only the S3 permissions needed, and the client retains full control (revocable at any time by deleting/disabling the role or its trust policy).
High-level flow
- Client creates an S3 bucket in their account.
- Client creates an IAM role in their account with a trust policy allowing the Appvance Controller's specific IAM role to assume the role, and a permissions policy scoping access to just that bucket.
- Client shares the Role ARN (and, if used, the External ID) with Appvance.
- Appvance configures the AIQ Controller's S3 repository settings to use cross-account mode with that Role ARN.
- At runtime, the Controller's AWS integration layer calls
sts:AssumeRole, receives temporary credentials, and uses those for all S3 operations against the bucket.
Prerequisites
- Access to the client's AWS Console / CLI with permissions to create S3 buckets and IAM roles/policies.
- The Appvance AWS account ID: 650030447088, and the Appvance Controller's specific IAM role ARN for this engagement (e.g.
arn:aws:iam::650030447088:role/<clientname>-aiq-controller-role) — Appvance provisions one such role per customer, so confirm the exact ARN with the Appvance team before starting. - A name/tag convention for the bucket and role (e.g.
clientname-aiq-repo,clientname-aiq-crossaccount-role). - Decide whether to use an External ID for the trust policy (strongly recommended — see Security Recommendations below).
Step 1 — Create the S3 Bucket
- In the client AWS account, go to S3 → Create bucket.
- Choose a globally unique bucket name, e.g.
clientname-aiq-repo. - Select the AWS region (ideally the same or nearest region to the Appvance Controller for latency).
- Recommended settings:
- Block Public Access: Keep all four options enabled (bucket should never be public).
- Bucket Versioning: Enable (protects against accidental overwrite/delete of test artifacts).
- Default encryption: Enable SSE-S3 (AES256), or SSE-KMS — either the AWS-managed default key (
alias/aws/s3) or a customer-managed key — if the client prefers KMS-based encryption. - Object Ownership: Bucket owner enforced (ACLs disabled).
- Create the bucket.
Step 2 — Create the Cross-Account IAM Role
This role is what the AIQ Controller in the Appvance account will assume.
- Go to IAM → Roles → Create role.
- Choose Custom trust policy and enter a trust policy that allows the Appvance Controller's specific IAM role to assume this role. This is the default recommendation — Appvance provisions a dedicated controller role per customer (e.g.
arn:aws:iam::650030447088:role/clientname-aiq-controller-role), and scoping the trust policy to that exact role is tighter than trusting the whole Appvance account. Example (using an External ID, recommended):
{ "Version": "2012-10-17", "Statement": [ { "Effect": "Allow", "Principal": { "AWS": "arn:aws:iam::650030447088:role/clientname-aiq-controller-role" }, "Action": "sts:AssumeRole", "Condition": { "StringEquals": { "sts:ExternalId": "REPLACE_WITH_AGREED_EXTERNAL_ID" } } } ]}
Replace clientname-aiq-controller-role with the actual Controller role ARN Appvance provides for this customer. If Appvance instead indicates the integration should trust the account as a whole (less common), use arn:aws:iam::650030447088:root as the Principal instead. Confirm the exact principal with the Appvance team before finalizing.
- Skip attaching AWS managed permission policies at this step — a custom least-privilege policy will be attached next.
- Name the role, e.g.
clientname-aiq-crossaccount-role. - Create the role.
Step 3 — Attach a Least-Privilege S3 Permissions Policy
Create and attach a customer-managed policy scoped to only the bucket created in Step 1.
{ "Version": "2012-10-17", "Statement": [ { "Sid": "AllowListBucket", "Effect": "Allow", "Action": [ "s3:ListBucket", "s3:GetBucketLocation" ], "Resource": "arn:aws:s3:::clientname-aiq-repo" }, { "Sid": "AllowObjectReadWriteDelete", "Effect": "Allow", "Action": [ "s3:GetObject", "s3:PutObject", "s3:DeleteObject", "s3:GetObjectVersion", "s3:AbortMultipartUpload", "s3:ListMultipartUploadParts" ], "Resource": "arn:aws:s3:::clientname-aiq-repo/*" } ]}
Notes:
- Replace
clientname-aiq-repowith the actual bucket name in both Resource lines. - If the Controller writes into a specific prefix/folder only (e.g.
aiq/), further scope Resource toarn:aws:s3:::clientname-aiq-repo/aiq/*for tighter isolation. - If the bucket uses SSE-KMS with a customer-managed key, also attach
kms:Decrypt,kms:GenerateDataKey, andkms:DescribeKeypermissions scoped to that key's ARN, and add the role as a key user in the KMS key policy. - If the bucket uses SSE-KMS with the AWS-managed default key (
alias/aws/s3), the same three KMS actions (kms:Decrypt,kms:GenerateDataKey,kms:DescribeKey) are still required for cross-account access — a default key does not exempt a cross-account principal from needing explicit KMS permissions. IAM policies require the concrete key ARN rather than the alias, so resolve it first (e.g.aws kms describe-key --key-id alias/aws/s3) and use that ARN as the Resource. Also confirm the default key's key policy permits use by this role, since AWS-managed default keys have limited policy editability compared to customer-managed keys.
Attach this policy to the role created in Step 2.
Step 4 — (Optional but Recommended) Restrict the Bucket Policy
In addition to the IAM role's permissions policy, add a bucket policy on the S3 bucket itself that only allows access from the specific cross-account role. This provides defense-in-depth: even if the IAM policy were ever broadened by mistake, the bucket policy still limits who can touch it.
{ "Version": "2012-10-17", "Statement": [ { "Sid": "AllowAIQCrossAccountRoleOnly", "Effect": "Allow", "Principal": { "AWS": "arn:aws:iam::CLIENT_ACCOUNT_ID:role/clientname-aiq-crossaccount-role" }, "Action": [ "s3:ListBucket", "s3:GetBucketLocation", "s3:GetObject", "s3:PutObject", "s3:DeleteObject", "s3:GetObjectVersion" ], "Resource": [ "arn:aws:s3:::clientname-aiq-repo", "arn:aws:s3:::clientname-aiq-repo/*" ] } ]}
Replace CLIENT_ACCOUNT_ID with the client's own AWS account ID.
Step 5 — Share the Connection Details with Appvance
Once the bucket, role, and policies are created, share the following with the Appvance team so the AIQ Controller can be configured:
Item | Example | Notes |
|---|---|---|
Bucket name |
|
|
Bucket region |
| Must match what's configured in AIQ |
Role ARN |
| Used by the Controller for |
External ID |
| Only if used in the trust policy |
KMS Key ARN (if applicable) |
| Required if bucket uses SSE-KMS — either the resolved default key ARN or a customer-managed key ARN |
These details should be shared through a secure channel (not plaintext email), since the Role ARN plus External ID together control access to the bucket.
Step 6 — Configure the AIQ Controller (Appvance side)
On the AIQ Controller, the S3 repository is configured in cross-account mode, providing:
- Bucket name and region from the table above.
- Role ARN to assume in the client account.
- External ID, if the trust policy requires one.
Internally, AIQ's AWS integration layer performs an sts:AssumeRole call against the client's role, receives short-lived temporary credentials, and uses those credentials for all S3 operations (list, get, put, delete) against the bucket — no long-lived client credentials are ever stored in the Controller.
Step 7 — Validate the Setup
- From the Controller, trigger a test scenario/run that writes to the S3 repo.
- Confirm the object appears in the client's bucket (via S3 Console or CLI:
aws s3 ls s3://clientname-aiq-repo/). - Confirm the Controller can list and read back existing objects from the bucket.
- Check CloudTrail in the client account for
AssumeRoleands3:*events from the Controller to confirm access is going through the intended role.
Security Recommendations
- Always use an External ID in the trust policy — mitigates the "confused deputy" problem and is an AWS-recommended best practice for third-party role assumption.
- Scope the trust policy Principal to the Appvance Controller's specific IAM role rather than the whole Appvance account root, where possible.
- Scope the IAM policy to the specific bucket (and prefix, if applicable) — never grant
s3:*onResource: "*". - Keep Block Public Access enabled on the bucket at all times.
- Enable bucket versioning so accidental deletes/overwrites can be recovered.
- Enable server-side encryption (SSE-S3 minimum, SSE-KMS if stricter compliance is required) — remember that SSE-KMS, even on the AWS-managed default key, requires explicit KMS permissions on the cross-account role.
- Enable S3 server access logging or CloudTrail data events on the bucket for auditability.
- Rotate the External ID and update the trust policy if the relationship with Appvance ever needs to be re-scoped or revoked.
- Revocation: access can be fully revoked at any time by deleting the IAM role, removing the trust policy statement, or removing the bucket policy statement — no coordination with Appvance is required.
Troubleshooting
Symptom | Likely Cause | Fix |
|---|---|---|
| Trust policy principal or External ID mismatch | Confirm the exact Principal ARN Appvance uses, and that the External ID matches exactly on both sides |
| IAM policy or bucket policy too narrow (wrong bucket name/prefix) | Verify Resource ARNs in both the role's permissions policy and the bucket policy match the actual bucket/prefix |
Objects upload but can't be read back | KMS permissions missing on the cross-account role — this applies to both customer-managed keys and the AWS-managed default key ( | Add |
Intermittent | Temporary credentials from AssumeRole expired mid-operation on long-running jobs | Confirm the Controller's AWS SDK layer is refreshing/re-assuming the role rather than caching credentials indefinitely |
FAQ
Is IMDSv1 required on the client side for this setup?
No. Neither IMDSv1 nor IMDSv2 is required in the client's AWS account for this integration, and clients can safely leave IMDSv1 disabled.
This setup does not involve any EC2 instances running in the client's AWS account. It consists entirely of an IAM role, a trust policy, an S3 bucket policy, and STS AssumeRole calls initiated from the Appvance side. The AIQ Controller runs in Appvance's AWS account (650030447088) and calls sts:AssumeRole against the client's role to obtain temporary credentials — no compute resource in the client's account is ever involved, so there is no instance in the client's environment that would query the Instance Metadata Service (IMDS) as part of this flow.
Whatever IMDS credential-fetching occurs for the Controller itself happens on Appvance's own EC2 instance, in Appvance's own AWS account, and is entirely independent of and invisible to the client's environment.
For a client's security review: AWS's current guidance favors IMDSv2-only (with IMDSv1 disabled) as the more secure default, since it protects against SSRF-based credential theft. Leaving IMDSv1 off is aligned with AWS best practice, not against it.
This answer is scoped specifically to the S3 cross-account repository integration described in this document. If a client is also running other AIQ components inside their own AWS account — for example, self-hosted TestNodes or agents on their own EC2 instances — those are separate compute resources with their own IMDS considerations, unrelated to this S3 cross-account setup.
Summary
The client only needs to create an S3 bucket, an IAM role with a scoped trust + permissions policy, and share the Role ARN (and External ID) with Appvance. No credentials ever leave the client's account — the AIQ Controller in Appvance's AWS account (650030447088) uses temporary, audit-able STS credentials obtained by assuming that role, keeping the client in full control of their own data at all times.
Atlassian Jira
Atlassian Jira
Appvance IQ supports integration with Jira Cloud and Jira hosted on a server. The following sections detail how to set up each type of integration and how to configure Appvance IQ Global Options.
Last updated: June 02, 2023
If you have any feedback on this topic, please contact us at documentation@appvance.ai
Configure AIQ Jira Cloud Integration
Configure AIQ Jira Cloud Integration
Use the Jira Cloud integration to connect AIQ execution findings with Jira tracking. Configuration details can vary by Jira tenant and AIQ release, so confirm the approved authentication and permission model before setup.
Before configuring
- Confirm the Jira Cloud site, project, and issue type that AIQ should use.
- Use an approved integration account or token management process.
- Verify the account has permission to create and update the required Jira issues.
- Document required custom fields and mappings before enabling the integration.
Validation workflow
- Configure the Jira Cloud connection in AIQ using approved credentials.
- Create or update a test issue from a non-production execution.
- Confirm required fields, links, and attachments are populated as expected.
- Record troubleshooting notes for permission or field-mapping errors.
Last updated: September 18, 2026
Configure AIQ Jira Server Integration
Last reviewed: September 29, 2026
Use this article when AIQ needs to connect to an on-premises or self-managed Jira Server/Data Center instance.
What changed in this article
- Separated Jira Server/Data Center guidance from Jira Cloud guidance.
- Added checks for base URL, network route, authentication method, project key, issue type, required fields, and custom-field mappings.
- Added a legacy note because Jira Server is no longer the default Atlassian path for many customers.
Validation workflow
- Confirm whether the customer uses Jira Server/Data Center rather than Jira Cloud.
- Validate AIQ can reach the Jira base URL and authenticate with the approved account.
- Create a test issue and verify required fields, attachments, and status transitions.
Review note: The page now clearly scopes Jira Server/Data Center and avoids mixing it with Jira Cloud token workflows.
Last updated: September 29, 2026
If you have feedback on this topic, contact documentation@appvance.ai.
Jira Integration API Notes
Jira Integration API Notes
This page keeps API-level notes for Jira integration. Use the main Jira Cloud integration article as the canonical setup guide for configuration, permissions, and troubleshooting.
Use this page for
- Confirming which Jira objects AIQ needs to create or update.
- Documenting API authentication requirements for the approved Jira environment.
- Capturing troubleshooting notes for API responses, permissions, or field mappings.
Maintenance guidance
- Do not duplicate the full Jira Cloud setup procedure here.
- Keep endpoint and permission notes aligned with the maintained Jira Cloud integration article.
- Remove examples that expose tokens, tenant-specific URLs, or internal project keys.
Last updated: September 18, 2026
Bamboo
Bamboo
Setup Build to run tests in Bamboo (Windows - localhost)
-
Download and install Atlassian Bamboo on one of your servers
-
Before you install Bamboo, check that you're running a supported Java version and that the JAVA_HOME (pointing to JDK) and JRE_HOME (pointing to JRE) environment variable is set correctly
Download Bamboo
-
Download Bamboo from the Atlassian download site.
Note: It is highly recommended to avoid placing the Bamboo home directory in any Windows security controlled directory, for example, C:\Program Files
-
Launch the Bamboo Windows installer to begin the installation wizard
-
The installer requires you to specify two directories:
Destination directory— This is the directory where Bamboo's application files will be installed. The default is:
C:\Program Files\Bamboo
-
Bamboo home directory— This is the directory where Bamboo will store its configuration data. If the directory you specify doesn't exist, Bamboo will create the directory when it launches. The default is:
C:\Users\<current-user>\Bamboo-home
-
Ensure that the Bamboo home directory is not located inside the <Bamboo installation directory>
Start Bamboo
-
In the command line, change the directory to <Bamboo installation directory> and run the following command:
bin\start-bamboo.bat
-
In your Web browser, enter the following address: http://localhost:8085/
Configure Bamboo
When you launch Bamboo for the first time, the Bamboo setup wizard will display. The wizard will lead you through the Bamboo settings that you need to configure before you can start using it.
-
You must have a valid Bamboo license (evaluation or commercial) to use Bamboo. You can generate your own Bamboo evaluation license from your Atlassian account
-
Setup Admin Account: The final step of the setup wizard is to enter the details of the first registered user for the Bamboo system. This user will have global administrative privileges over the entire installation of Bamboo and should not be removed
-
Once you have entered the details for your administrator user, click Finish. The Bamboo dashboard will be displayed

Bamboo Plug-in, Create test plan, configure and run Appvance IQ Scenario
NOTE: To avoid possible errors when trying to access the result page, the scenarios used for triggering from bamboo should NOT have the database set in the scenario XML. So it will use the default settings of the AIQ console.
-
Create a new Test Plan in Bamboo and fill out all the required fields

-
Once the project has been created, Click Crete Plan

-
Create a new Test Plan in Bamboo and fill out all the required field

-
Click any Repository options and click Configure plan. (Ex:- Git)

-
Configure the Job

-
Add the Ant Task by Clicking Add Task

-
Search Ant in Search Bar

-
Create a new Task in Bamboo and fill out all the required fields

-
Once the Task is created Click Projects and click the Created Project

-
Enable the Plan by clicking Edit and Click Actions > Enable Plan


-
Run the Plan by Clicking Run > Run Plan

-
View the Build Result Summary

Last updated: June 02, 2023
If you have any feedback on this topic, please contact us at documentation@appvance.ai
Governing Services
Governing Services
Appvance IQ is architected to the surface performance, interoperability, and functional issues in service environments. It should be natural to expect that Appvance runs as a service itself.
Governing Services Using Registry/Repository And Test Automation
Software developers, QA technicians, and IT managers are learning how SOA governance and test automation tools benefit their organization's ability to develop, manage and deliver services to determine quality levels. Examples of these governance platforms include SoftwareAG's X-Registry, BEA AquaLogic Enterprise Repository, and IONA Repository. Appvance publishes a commercial test automation tool that when combined with the power of an SOA repository delivers SOA governance benefits. Appvance IQ delivers an inter-operability mechanism between the Appvance test automation run-time and a repository platform:
-
Delivers immediate useful test automation functions to governance platform users
-
Provides metadata for services being governed, including service up / down status, time-since-last-failure data, service deployment correct validation status, and service reliability history
-
Provides a mechanism to do service monitoring, scalability, and performance tests managed by a governance platform
-
Provides a widely-adopted test API, test runtime environment, and test development toolkit to governance platform users
An SOA governance platform provides controls and functions enabling enterprises to manage a set of interdependent information services. From the developer's perspective, a governance platform gives a developer a way to discover a service that implements a particular function which therefore won't need to be written. In an SOA context, governance adds a registry, enabling developers to search for services, a database of metadata about the services' qualities, and a set of policies to control the service's use at development and deployment time. For example, a policy attached to a service creating new employee email accounts requires a developer to also use service authorizing requests. Inter-operability between a governance and test automation platform, an example policy says, "You must run a test script successfully to verify this service is correctly configured before deploying this service to a production environment". In this inter-operability, the governance tool manages policies, stores the functional tests scripts, issues a call for Appvance to run a test, and saves the results as metadata for the service entry in the repository. The inter-operability provides a way to accomplish "test by policy" methods.
Last updated: June 02, 2023
If you have any feedback on this topic, please contact us at documentation@appvance.ai
A Practical Example
A governance platform can help software developers and IT managers understand the policies, dependencies, and services used within an application. By exposing service dependencies, the platform helps teams evaluate service reliability and identify opportunities to build redundancy into the application when an upstream service becomes unavailable.
This type of knowledge can also be shared informally between developers. For example, one developer may recommend a U.S. Postal Service ZIP Code lookup service for a product registration page, allowing users to enter their ZIP code and automatically populate the city and state fields. The developer may also mention that the service has been observed to return errors on weekends.
This developer-to-developer exchange provides several pieces of useful information:
- The existence and location of the ZIP Code lookup service.
- The service's reliability varies depending on the time of use.
- The service behaves according to its published schema.
An ideal governance platform provides this information in a centralized and accessible way. For example, a service catalog can display available services and their metadata, including their current availability status.
Integration with the Appvance runtime provides additional insight into service functionality, reliability, and quality. In a service-oriented environment, Appvance can use native protocols to test composite applications and evaluate their functionality, scalability, performance, and availability.
Appvance IQ can also leverage existing unit and functional tests to perform service-level functional, scalability, performance, and monitoring tests. Because Appvance is a distributed test automation platform, tests can run on remote TestNodes across multiple networks and machines.
These tests can provide valuable data for governance and monitoring systems, including:
- Availability Feed — Provides data for evaluating Service Level Agreement (SLA) compliance.
- Functionality Feed — Helps identify service regressions and functional issues.
- Reliability Feed — Provides data for measuring service reliability over time.
Last updated: August 13, 2026
If you have any feedback on this topic, please contact us at documentation@appvance.ai.
Governing Services Using Registry/Repository and Test Automation
Software developers, QA technicians, and IT managers are learning how SOA governance and test automation tools benefit their organization's ability to develop, manage and deliver services to determine quality levels. Examples of these governance platforms include SoftwareAG's X-Registry, BEA AquaLogic Enterprise Repository, and IONA Repository. Appvance publishes a commercial test automation tool that when combined with the power of an SOA repository delivers SOA governance benefits. Appvance IQ delivers an inter-operability mechanism between the Appvance test automation run-time and a repository platform:
-
Delivers immediate useful test automation functions to governance platform users
-
Provides metadata for services being governed, including service up / down status, time-since-last-failure data, service deployment correct validation status, and service reliability history
-
Provides a mechanism to do service monitoring, scalability, and performance tests managed by a governance platform
-
Provides a widely-adopted test API, test runtime environment, and test development toolkit to governance platform users
An SOA governance platform provides controls and functions enabling enterprises to manage a set of interdependent information services. From the developer's perspective, a governance platform gives a developer a way to discover a service that implements a particular function which therefore won't need to be written. In an SOA context, governance adds a registry, enabling developers to search for services, a database of metadata about the services' qualities, and a set of policies to control the service's use at development and deployment time. For example, a policy attached to a service creating new employee email accounts requires a developer to also use service authorizing requests. Inter-operability between a governance and test automation platform, an example policy says, "You must run a test script successfully to verify this service is correctly configured before deploying this service to a production environment". In this inter-operability, the governance tool manages policies, stores the functional tests scripts, issues a call for Appvance to run a test, and saves the results as metadata for the service entry in the repository. The inter-operability provides a way to accomplish "test by policy" methods.
Last updated: June 02, 2023
If you have any feedback on this topic, please contact us at documentation@appvance.ai
Legacy SoftwareAG X-Registry Integration Reference
Last reviewed: September 28, 2026
This page is retained as a legacy reference for the historical SoftwareAG X-Registry proof of concept that connected AIQ governance results to an SOA registry.
What changed in this article
- Marked the SoftwareAG X-Registry workflow as historical POC/legacy content rather than current integration guidance.
- Replaced the old PAAS-heavy narrative with a concise explanation of what was integrated: service status, governance statistics, response timing, and registry metadata.
- Added a clear decision point: only use this page when supporting a customer that still references SoftwareAG X-Registry or the old GSRS governance result format.
Validation workflow
- Confirm the customer still has a SoftwareAG X-Registry dependency before using this article.
- Validate the service endpoint, registry access, and governance result format outside production first.
- Document any remaining X-Registry dependency as migration or legacy-support work.
Review note: The original article described a proof of concept with SendSMS, PAAS, GSRS, and X-Registry screenshots. It is now scoped as legacy reference material.
Last updated: September 28, 2026
If you have feedback on this topic, contact documentation@appvance.ai.
The PAAS Interface
Appvance IQ is an automation framework with a distributed test environment to test services for functionality, scalability, and performance. The AIQ Console sends required information to specialized and optimized TestNodes (located on several computers), runs the tests, and sends results back to the Console. The Console processes the results to create statistics files, charts, and reports. A simplified workflow of AIQ.

Appvance IQ enables the Console to receive soap-based Web service requests to operate a Test Scenario. AIQ has been upgraded to allow any application using a connector class to connect to the Console and run a test, with Appvance As A Service. The upgraded work-flow of AIQ;

Modify the TestNodes to Allow Them to Operate Multiple Tests Concurrently.
In previous versions of the Appvance IQ TestNetwork architecture, TestNodes could receive instructions from only one Console. The new Appvance IQ architecture allows TestNodes to receive instructions from multiple applications (Consoles), which have been checked for availability, stability, and confidentiality.
-
Availability means a scenario can access all of its resources
To accomplish this, each scenario is given a unique ID in the form of ID_ plus an ID number. Using the ID as its name, a directory (the application's root directory) is created and contains all the resources of each test -
Stability means any process can not affect any other process.
To accomplish this, each monitor is run as an isolated thread with its own variable and ClassLoader, used to load the new required jar resources for a JAVA test -
Confidentiality means any scenario can not access any other scenario's data.
To accomplish this, each scenario only knows its own root directory
Develop a Class that Becomes a Service
-
The goal was to create a new class and use Apache Axis to turn it into a Web Service. This involved two tasks, compiling the new class and configuring tomcat to accept the new service
-
The new class needed to be simple, yet functional and complete as described in Classes
Classes

Configuring Axis to accept the new class as a new service was surprisingly easy; simply add a new service tag to the Axis configuration file (server-config.wsdd)

Develop a Class to Connect to PAAS
This is an interface between the application and PAAS. It is available as a standalone library for clients to connect their applications to PAAS Farms. Class Method describes the class methods:
Class Method

Example implementation
This code snippet shows a simple communication connection between an application and PAAS:

We found these resources helpful while implementing PAAS:
Microsoft Developer Network: Software as a service
Microsoft Developer Network: Architecture Strategies for Catching the Long Tail
Anderson, Chris: The Long Tail
PAAS Response
Each PAAS request to Appvance IQ generates a PAAS response:
PAAS Request / Appvance IQ Response

The corresponding Web service result values are:
Web Service Result Values

Governance Statistics ResultSet (GSRS)
Appvance executes a test and returns a Governance Statistics Results Set (GSRS) response document.
A sample GSRS response:

Last updated: June 02, 2023
If you have any feedback on this topic, please contact us at documentation@appvance.ai
GitHub
GitHub
Contents:
Glass Box
Glass Box
Java Enterprise Application Monitoring with Glassbox
Glassbox is a utility that monitors Java enterprise applications (WAR or EAR.) Glassbox identifies thread contention, excess memory usage, and slow database connections. Appvance IQ(AIQ) integrates with Glassbox to correlate monitored performance problems to AIQ's load test operations. Used in combination, AIQ and Glassbox deliver root cause analysis and mitigation of performance bottlenecks in Java enterprise applications.
Glassbox locates the reasons for an enterprise application failure, performance bottleneck, or functional issue without requiring changes or instrumentation to your application. Glassbox uses Aspect-Oriented Programming (AOP) and Java Management technology. Glassbox is safe to use in production environments. Glassbox uses less than 1% of your server's CPU bandwidth. Glassbox supports Apache Tomcat, IBM WebSphere, Oracle BEA WebLogic, RedHat JBoss, and Jetty.
You may still need network and application "sniffers," test harnesses, and probes, but thankfully these can now be focused on exotic problems and their complexity avoided when dealing with day-to-day application performance issues.
The Glassbox Project maintains Glassbox. Appvance integrates and ships Glassbox in Appvance PerformanceCloud Edition. Appvance Global Services provides professional support, training, and consulting for Glassbox.
Last updated: June 02, 2023
If you have any feedback on this topic, please contact us at documentation@appvance.ai
Architecture
AIQ is a distributed test and monitor environment. As a load and performance test operates Glassbox observes performance metrics of a Java enterprise application, including memory use, thread contention, database connections, and object operation. Appvance Monitor (Appvance Monitor) communicates with Glassbox over Java management (JMX) protocols. AIQ gathers Glassbox data and correlates Glassbox findings into AIQ reports.

For example, Appvance operates a load and performance test on one or more TestNodes. A TestNode is a Web service that receives and operates a test. The TestNode is in your QA lab, data center, cloud computing environment, or both. Glassbox installs on a Java application server and uses Aspect-Oriented Technology to observe enterprise applications. The AIQ monitor system (Appvance Monitor) communicates over JMX protocols to Glassbox as the test operates. The Appvance Enterprise Results Analysis Engine correlates the Glassbox observations to the load test results for root cause analysis and mitigation.
Glassbox provides a Troubleshooter to view the live monitored data and performance alerts for your application. The following shows the Glassbox Troubleshooter interface.

Glassbox Troubleshooter highlights problems with your application achieving your criteria for acceptable performance criteria. For example, Glassbox identifies slow object performance by setting a threshold in milliseconds. Use the Glassbox com (Hyperlink) figuration to set the criteria.
Appvance designed AIQ's Results Analysis Engine to provide drill-down functions on any of the Glassbox performance observations. Contact Appvance Global Services to learn about additional charting and analysis functions.
Glassbox provides a Java management (JMX) interface to the Troubleshooter's extended performance monitor data. Access this data through the Java Management Console (JConsole). JConsole comes with the Java Development Kit (JDK.) With the JDK installed run the JConsol in a shell or terminal window by typing the following:
jconsole service:jmx:rmi:///jndi/rmi://localhost:7232/GlassboxTroubleshooter
JConsole connects to the Glassbox Troubleshooter and displays a graphical interface shown in the following.

Last updated: June 02, 2023
If you have any feedback on this topic, please contact us at documentation@appvance.ai
Glassbox Features and Benefits
-
100% FREE and Open Source.
-
Glassbox is a web app, drop it in and point your browser to our UI
-
Anyone can diagnose a problem with one click, without knowing the code
-
Concise English output ends miscommunication and finger-pointing
-
Measures SLA violations, so you know which problems matter
-
Low overhead won't slow down production applications
-
Plug and play. Up in minutes with no source or build changes needed.
-
Adapts to your code automatically, no need to 'train the app'
-
Monitor or Troubleshoot multiple agents simultaneously with the same client
-
Pinpoints Faults Out of the Box:
-
Slow database query
-
Database connection failure
-
Broken database query
-
Failing Java
-
Slow Java
-
Bottleneck or thread contention
-
Slow or Failing web service
-
Inefficient Java code
-
Slow or Failing remote procedure call
-
Faulty HTTP
-
Java Mail Issues
-
Broken FTP
-
-
Conclusive diagnoses, not piles of logs and reports
-
Simple web-based list/detail UI paradigm
-
Safe, only standards-based monitoring, no custom byte-code manipulation
-
Technology Supported:
-
Platforms: Windows/Linux/Solaris
-
Java6 Versions: From Sun, BEA JRockit, and IBM
-
Java5 Versions: Java 1.5 JVMs from Sun, BEA JRockit, and IBM
-
Other Java Versions: 1.4.x JVMs from Sun, BEA JRockit, and IBM
-
Databases: Oracle / MySQL / IBM DB2 / SQL Server
-
Application Servers: Apache Tomcat, WebLogic, JBoss, Oracle OC4j, Websphere, Resin
-
Please check back, or contact us on the forums about support for other platforms. We are actively adding support for other technology platforms.
-
-
Robust, flexible, easily adaptable: uses standards-based AspectJ and JMX infrastructure
-
No licensing and no rules about where you can or cannot run Glassbox 2.0
Last updated: April 14, 2023
If you have any feedback on this topic, please contact us at documentation@appvance.ai
Legacy Glassbox Installation Reference
Last reviewed: September 25, 2026
This page is retained as a legacy reference for environments that still require Glassbox integration or installation notes.
What changed in this article
- Marked Glassbox installation as legacy/environment-specific unless a current customer deployment still depends on it.
- Added validation steps around version compatibility, required access, and post-install evidence.
- Avoided presenting Glassbox installation as a default AIQ integration path.
Validation workflow
- Confirm the customer still uses Glassbox and identify the required version.
- Validate prerequisites and access with the Glassbox owner before installation work.
- After installation, run a small validation flow and capture evidence that AIQ and Glassbox data align.
Review note: Flagged the article as legacy to prevent it from being treated as standard integration guidance.
Last updated: September 25, 2026
If you have feedback on this topic, contact documentation@appvance.ai.
Install Glassbox on an AIQ Test Node
Recommended guidance
Install Glassbox on an AIQ Test Node only when the integration is approved for the target environment and the Test Node owner understands the performance, privacy, and monitoring impact. Coordinate installation with application, security, and observability teams.
Before installation
- Confirm the Glassbox version, AIQ version, Test Node operating system, browser version, and application scope.
- Validate network access, certificates, proxy settings, and endpoint security policy.
- Confirm what data Glassbox captures and whether masking is required.
- Back up current Test Node configuration before making changes.
Post-install validation
- Restart only the required services or host components.
- Run a small Scenario Editor smoke test.
- Confirm Glassbox captures expected sessions without exposing sensitive data.
- Monitor Test Node CPU, memory, browser stability, and execution time after installation.
Last updated: October 6, 2026
Resources
Appvance and Glassbox make the following resources available:
Glassbox User Guide (Adopt Acrobat PDF format)
Last updated: April 14, 2023
If you have any feedback on this topic, please contact us at documentation@appvance.ai
HAR
HAR
Contents:
Creating a HAR Script and Running it
About HAR
HAR, which stands for HTTP Archive Format, is an archive file derived through interactions within a web browser. The file contains protocol-level GET and POST request logging, as well as performance information and web page load times.
Why HAR
HAR files are quick and simple to produce. When used with Appvance IQ, HAR files provide detailed performance data and load testing capabilities.
Steps to be followed to create HAR script:
-
Open Google Chrome Browser.
-
Navigate to the web application that you wish to record.
-
Press F12 or right-click the page and click the Network tab.
-
Click the clear button, Refresh the page and click the Preserve Log check box.

-
Perform the desired actions of the web application
-
The network tab records all the protocol level GET and POST request logging
-
Once complete with the actions, right-click the requests and select 'Save as HAR with content'
-
Save the file to your machine with a .har extension

Run the HAR script in Appvance Scenario Builder:
-
Login to Appvance IQ.
-
Click in Build
-
Click File→New
-
Chose any Test Type(Ex: Functional)
-
Click the Test Case tab and click Add Test cases for Test Execution
-
Select Script type as HAR and Browse the HAR Script.
-
Save the scenario and Play the scenario to see the results in the controller window.
It's that simple!

Last updated: June 26, 2023
If you have any feedback on this topic, please contact us at documentation@appvance.ai
Data Enabling HAR Script
Data enabling HAR scripts for Web applications:
Appvance IQ implements a Data Production Library (DPL) as an extensible framework to provide operational test data to test script runners at test runtime. The DPL framework is general in that data may be input from a variety of sources, including a relational database, comma-separated-value file, and data generating objects. A DPL also provides a safe way to store data between test steps. Appvance IQ comes with pre-built DPLs and makes it easy for software developers to add their own custom DPLs.
In our case, we will be using the "CSV" datasheet to data enable the HAR script.
The steps that need to be followed while data enabling HAR scripts are as below:
-
Record the script with username and password on the Chrome Browser and save the script
-
Open the saved script and search for the username/password you have entered in the URL and create a .CSV sheet with the entered username and password as a header in the CSV sheet and give the desired number of usernames and passwords below the headers.
For example:
If the user has used appleuser1 as the Username and appleuser@123 as the password. Then the user needs to replace 'appleuser1' and 'appleuser%40123' (please see the below instruction for any special character used in the password) in the HAR script which will be used as a Header in the CSV sheet.

Also, make sure if there are any special characters in the password we need to replace it with the corresponding value with respect to the HAR script
For example:
-
! = %21
-
@= %40
NOTE: If the Password is appleuser@123 the entry in the csv sheet should be appleuser%40123
For more information on the special characters and the corresponding value to be used in the script refer to Special Character value to be replaced in HAR script.
-
-
User can now upload the .HAR script and .csv sheet in Appvance Scenario Builder.


Choose the Script type as HAR and name the test
Choose the HAR script and select
Upload the CSV sheet in Resources Tab and choose the Action as "Next row of Data" by clicking Add DPL in Test Cases tab
Save and play the scenario
-
Check the script execution in the AIQ controller
you can also monitor if the script is replacing the appropriate values through the Appvance IQ controller by Clicking on Test case(s) Executions and selecting the result and clicking on Output.

Last updated: June 26, 2023
If you have any feedback on this topic, please contact us at documentation@appvance.ai
HAR Options
Scenario Builder – HAR Options Usage
Appvance Scenario Builder provides some options which can be used in order to get different data or results when the user executes a HAR test scenario. These settings can be set and located in the "Options" panel of the Appvance Scenario Builder.
Below are the different options:
-
Connection resets marks the whole Test Case as a failure.
-
Mark each request as a step.
-
Validate response code against original HAR response code (Otherwise usual status codes will be expected).
-
Show headers, requests, and responses in each Test Case execution output.
-
Execute all HAR calls (even after a failure).
These options will allow you to establish some parameters settings different from standard Test Cases executing a HAR script. Users may find these options useful depending on what kind of test is being executed. i.e. If the user is testing a website, the user may want to have the default settings (unmarked options) for a HAR test, on the other hand, for a web service the user may find it useful to mark every single request as a step or validate the response code against the original HAR script.

Connection resets marks the whole Test Case as a failure
This option has to be used carefully depending on the desired results. The name of this option it's self-explanatory, it's used to mark the whole Test Case that's being executed as a failure when the connection resets.
Mark each request as a step
When this option is enabled, every single request retrieved from the HAR test is is being marked as a step–request key set instead of marking every request as a single request.
Also please make sure that this option is not used along with Autocorrelation.

Validate response code against original HAR response code
When enabled, the response codes received from the text case execution are going to be validated against the original HAR script response codes, otherwise, the usual response code for a request is passed as valid. Appvance Scenario Builder shows the response code for every request at the Test Case Execution tab in the results displays window as follows:

Show headers, requests, and responses in each Test Case execution output.
Meaning that for every request, exists a "parent" step with the same name of the request contained in that step. In the results display you may see these changes, the step has the timing for the request and the step request has the request size.
Execute all HAR calls (even after a failure).
Checking this option will let the HAR script run even if it encounters an error in any step.
Last updated: June 26, 2023
If you have any feedback on this topic, please contact us at documentation@appvance.ai
HAR - Adding Descriptions
Please follow the below steps for adding step names/descriptions for each transaction in the HAR script
-
Open the recorded script and search for "Pages" entry in the script.
"pages": [{"startedDateTime": "2016-12-13T07:55:39.815Z","id": "page_1","title": "http://sahitest.com/demo/training/books.htm","pageTimings": {"onContentLoad": 859.9610000001121,"onLoad": 875.251000001299}},{"startedDateTime": "2016-12-13T07:56:42.819Z","id": "page_2",
"title": "http://sahitest.com/demo/training/login.htm","pageTimings": {"onContentLoad": 29.318000000785105,"onLoad": 27.689000000464148}}]
and replace the value for "title" with the desired name for ex:- here replacing with the step1,step2
"pages": [{"startedDateTime": "2016-12-13T07:55:39.815Z","id": "page_1","title": "step1","pageTimings": {"onContentLoad": 859.9610000001121,"onLoad": 875.251000001299}},{"startedDateTime": "2016-12-13T07:56:42.819Z","id": "page_2","title": "step2","pageTimings": {"onContentLoad": 29.318000000785105,
"onLoad": 27.689000000464148}}]
After making changes save the updated script.
Now we can go ahead and create a scenario under Appvance Scenario Builder by attaching the updated script and running it.
-
The added step name should be reflected in the Appvance IQ controller window when the script completes.
Before adding description:

After adding description:

Last updated: June 26, 2023
If you have any feedback on this topic, please contact us at documentation@appvance.ai
Jenkins
Jenkins
This section details how to configure and run scenarios from Jenkins. This is applicable for both Jenkins installed locally as well as in the cloud, such as using Cloudbees-Jenkins.
Last updated: June 01, 2023
If you have any feedback on this topic, please contact us at documentation@appvance.ai
Jenkins Configuration
Setup a build in Jenkins: Configuration and pre-requisite:
-
Download Links for the following are available at “>CI Jenkins”
-
After installation, Jenkins automatically launches using port 8080. To change the port number, locate Jenkins/jenkins.xml and modify the --httpPort argument.
For example: -Xrs -Xmx256m -Dhudson.lifecycle=hudson.lifecycle.WindowsServiceLifecycle -jar "%BASE%\jenkins.war" --httpPort=8081 -
Install ANT using >http://ant.apache.org/bindownload.cgi
-
Download and install the appropriate file on your machine depending on the operating system used
-
Click Manage Jenkins
-
Click Configure System

-
Scroll to Global Properties
-
Check Environment variables
-
Enter PATH in the Name box
-
Enter the Java and Ant paths in the Value box as illustrated below
-
Click Save (Changes)
-
Configure Project to Point to Plugin

-
Please make sure to install GIT on the machine where Jenkins is installed, once installed please restart the Jenkins service.
Download git from >https://git-scm.com/downloads based on your operating system.
Last updated: April 28, 2023
If you have any feedback on this topic, please contact us at documentation@appvance.ai
Jenkins File Reference for AIQ Integrations
Last reviewed: September 24, 2026
Use this page to explain what the Jenkins files are for when AIQ test execution is triggered or coordinated from a CI pipeline.
What changed in this article
- Clarify which files define build parameters, which call AIQ, and which publish or collect results.
- Keep customer-specific job names, tokens, and workspace paths out of the shared documentation.
- Point users to the Jenkins job configuration article when they need step-by-step pipeline setup.
Validation workflow
- Identify the Jenkinsfile or helper script used by the project.
- Confirm required parameters such as AIQ project, scenario, environment, and result handling.
- Run the job in a non-production folder before adopting it for scheduled execution.
Review note: Made the article a file-purpose reference instead of a loose Jenkins note, so it fits with the Jenkins integration pages.
Last updated: September 24, 2026
If you have feedback on this topic, contact documentation@appvance.ai.
Required File Changes for AIQ Integrations
Required File Changes for AIQ Integrations
Track required integration file changes carefully and keep environment-specific values out of source files.
Last updated: September 8, 2026
Creating First Jenkins Project
Creating your first project and configuring GIT Repo:
-
Once downloaded and installed launch http://localhost:8080 (or with the changed port number) in your browser or log in to your Jenkins cloud

-
Click on New Item from the left navigation

-
Provide a valid Job name
-
Select “Build a free-style software project”

-
Click on the OK button

-
Provide a description of the project

-
Locate Source Code Management and choose Git, Provide the Repository URL with the credential details where all the above files reside and changes made

-
Mention the branch details from the files that reside

-
Build Environment - Check "Delete workspace before build starts", this will ensure the latest assets are uploading when running the Jenkins job
-
Build - Add Build step > Invoke Ant and add the Ant Call as mentioned below


** If Ant is not configured in Jenkins but its installed on the Jenkins agent, the job still can be executed with the following command:

Last updated: June 02, 2023
If you have any feedback on this topic, please contact us at documentation@appvance.ai
Run AIQ Scenarios from Jenkins with Ant
Recommended guidance
Use Jenkins and Ant only when the project still requires an Ant-based automation pipeline. For new pipelines, confirm whether a newer CI/CD approach is available before extending legacy Ant jobs.
Before configuring the job
- Confirm the AIQ environment, project, scenario, and execution target.
- Use service accounts or CI credentials stored in Jenkins credentials management.
- Do not hard-code AIQ usernames, passwords, tokens, or environment secrets in build files.
- Confirm the agent machine can reach AIQ, repositories, browsers, Test Nodes, and required application URLs.
- Keep build files, scripts, and configuration under version control.
Pipeline checks
- Run the Ant target locally or on a controlled Jenkins agent before scheduling it.
- Capture AIQ execution IDs, Jenkins build numbers, logs, and artifacts.
- Fail the Jenkins job when the AIQ result fails, times out, or cannot be retrieved.
- Archive only the evidence required for troubleshooting and compliance.
- Review old Ant jobs periodically and retire duplicate or unused jobs.
Terminology note: Use Scenario Editor when referring to current AIQ scenarios. Keep legacy terms only when describing old job names, file names, or historical assets.
Last updated: October 5, 2026
Configure ant to run Blueprints from Jenkins
Similarly, projects can also be created to run AISG based on templates.
blueprintDashboard would be the ant target that would be used to create a dashboard for the AISG which internally will call targets like report upload, AISG creation, etc.
Once the initial AISG is created, the Blueprint template exported from file menu options would be the input that would be used for the re-creation of the AISG in everyone runs or as scheduled.
Last updated: April 28, 2023
If you have any feedback on this topic, please contact us at documentation@appvance.ai
Configure a Parameterized Jenkins Project for AIQ
Configure a Parameterized Jenkins Project for AIQ
Use a parameterized Jenkins project when an AIQ-related automation job needs controlled runtime values such as environment, suite, branch, browser, or execution profile. Keep Jenkins as the orchestration layer and keep AIQ configuration, credentials, and test data in approved locations.
Recommended parameters
- Target environment or base URL.
- Suite, project, or execution profile name.
- Browser, device, or Test Node group when applicable.
- Build, branch, or release identifier for traceability.
Good practices
- Use clear parameter names and defaults that are safe for non-production execution.
- Validate required parameters before starting the job.
- Do not store secrets directly in job descriptions, scripts, or documentation.
- Record the Jenkins build URL with the related AIQ execution or report.
Last updated: September 8, 2026
Scheduling Jobs in Jenkins
By setting the schedule period to 15 13 * * * you tell Jenkins to schedule the build every day of every month of every year at the 15th minute of the 13th hour of the day.
Jenkins uses a >cron expression, and the different fields are:
MINUTES Minutes in one hour (0-59)
HOURS Hours in one day (0-23)
DAYMONTH Day in a month (1-31)
MONTH Month in a year (1-12)
DAYWEEK Day of the week (0-7) where 0 and 7 are Sunday
If you want to schedule your build every 5 minutes, this will do the job : */5 * * * *
If you want to schedule your build every day at 8h00, this will do the job : 0 8 * * *
For the past few versions (2014), Jenkins has a new parameter, H (extract from the >Jenkins code documentation):
To allow periodically scheduled tasks to produce an even load on the system, the symbol H (for “hash”) should be used wherever possible.
For example, using 0 0 * * * for a dozen daily jobs will cause a large spike at midnight. In contrast, using H H * * * would still execute each job once a day, but not all at the same time, better using limited resources.
Note also that:
The H symbol can be thought of as a random value over a range, but it actually is a hash of the job name, not a random function, so that the value remains stable for any given project.
Last updated: June 01, 2023
If you have any feedback on this topic, please contact us at documentation@appvance.ai
Changing Time Zones in Jenkins
By default, the timezone is in UTC.
If you want to change the timezone to a different one:
-
Navigate to Build Triggers.
-
Check the Build Periodically option.
-
Define the Schedule as:
TZ=EST5EDT0 16 * * 1-5
-
This means we are setting the timezone to be EST and setting the run time at 16:00 PM from Monday to Friday.
For more timezone codes, please refer to>Time Zones information at Java Locale for “English (United States)” (en-US) at LocalePlanet.
Last updated: April 28, 2023
If you have any feedback on this topic, please contact us at documentation@appvance.ai
Jenkins Email Notification
-
Login to Jenkins.
-
Navigate to Manage Jenkins.
-
Navigate to “Go to plugin manager”
-
Search for “Email Extension” under filter section in plugin manager

-
Download and Install the Email Extension
-
Create APP Password for GMAIL account - Follow below steps to create App Password
-
If you configure Jenkins e-mail please you should follow the below steps:
-
first enable two step verification for reference click here
-
generate an app password
-
add the app password instead of your password
-
-
After successfully creation of APP Password for GMAIL
-
Go to Configure System in Manage Jenkins.
-
Under Configure system go to “Extended Email Notification and add
-
SMTP Server field - smtp.gmail.com
-
SMTP Port - 465

-
-
Click Advanced button below SMTP Port

-
Click Add button
-
Go to Jenkins credentials provider and add the Username and APP Password ( Which was created on Step 6) and click Add button.

-
Click save button in Configure system
-
Go to the project and click configure
-
Under post-build Actions Choose Editable Email notification under Build


-
Under Editable Email notification add
-
“Email id” under Project From
-
Other field are by-default filled
-
Click Advance settings

-
All the field are are by-default filled
-
Click Add trigger under Triggers

-
Select Always (User can change as per requirement)

-
Click Advanced under Triggers

-
Add Recipient Mail id under Recipient List

-
Click Save and Apply
-
Recipient user will start getting Email Notifications
Last updated: June 02, 2023
If you have any feedback on this topic, please contact us at documentation@appvance.ai
JMeter Integration and Testing
JMeter Integration and Testing
Contents:
Run JMeter Scripts in AIQ
Recommended guidance
Run JMeter scripts in AIQ when a JMeter asset is already part of the performance or protocol-testing workflow. Confirm that the script, data, plugins, and environment are suitable for repeatable execution before adding it to automated runs.
Pre-run checklist
- Confirm JMeter version, script file, plugins, data files, and target environment.
- Validate credentials, tokens, endpoints, and certificates through approved secure handling.
- Check load generator capacity, network access, and artifact storage.
- Define success criteria such as response time, error rate, throughput, and duration.
Validation workflow
- Run the JMeter script locally or in a controlled environment first.
- Run a low-load AIQ execution before scaling.
- Review logs, assertions, response data, and generated reports.
- Separate JMeter script issues from application and load-generator bottlenecks.
Last updated: October 7, 2026
Correlation in JMeter for AIQ Tests
Last reviewed: September 22, 2026
Use correlation in JMeter when dynamic values from one response must be captured and reused in later requests during AIQ executions.
Recommended guidance
- Identify session IDs, tokens, hidden fields, and other dynamic values before scaling load.
- Use extractors and variables instead of hard-coded values.
- Validate correlation with one user before running a load test.
Validation workflow
- Record or inspect the request sequence and find dynamic values.
- Add the appropriate JMeter extractor for each value.
- Reference extracted variables in downstream requests.
- Run a single-user debug execution and confirm values update each iteration.
- Scale gradually and monitor errors that indicate missed correlation.
Note: Missed correlation is a common cause of false failures in performance tests.
Last updated: September 22, 2026
If you have feedback on this topic, contact documentation@appvance.ai.
Data Enabling in JMeter
We will follow the below steps to Data enable the JMeter script and run it successfully in AIQ.
-
Create a JMeter script that works fine in JMeter and run the same in AIQ to make sure that the script is working fine. The screenshot of the working script is given below

As from the above example, there are multiple websites that are used in the script. We can store all the above websites in a CSV sheet and have JMeter access the websites from the CSV sheet. The next step would be to data enable the JMeter script and make sure it runs fine.
-
The next step would be to remove all the individual websites and store that in a CSV sheet and create a single HTTP request and have it access the website from the CSV. Please follow the below steps
Create a CSV sheet with "Sites" as the column name and all the website details below it as shown below

Add a CSV Data set config and enter the following details
Right-click the thread group - Select Add - Select Config element - Select CSV Data Set Config.
Note: Please make sure to use the data.csv file in the same location as the .jmx project and also CSV Data Set Config should be available on top of HTTP Request.
Filename: Enter the name of the file
File encoding: Should be left blank
Variable Names: Should be left blank, If given data will be picked from the first column and the first entry in the CSV "SItes" will be picked and the script will fail
Delimiter: Comma
Add a new HTTP Request Sampler and Use the column name of the CSV sheet in the "Server Name or IP" as shown below

Once the above setting is done the script is data enabled successfully. Run the script and check in the results tree

All the values from the CSV have been picked successfully.
-
Run the Same script in AIQ. Steps are given below
Login to AIQ and click Build and Click File→New
Select the Scenario test type as the Performance test

Select the completion criteria as "Executions per user"
Go to the Test cases tab and click "Edit" browse the JMeter script and select the JMeter file
Go to Resources Click "Add Data Source" and browse the CSV file

Save the scenario and run the test.
Check the controller page and verify if the data is getting pulled from the CSV

For Appvance IQ Reporting purposes, instead of reporting different values of a data-enabled script that causes duplicate entries, the parametrized step can be displayed as a variable name that way it does not show them as different steps instead it shows as a summary of those steps just like Appvance IQ designer enabled scripts, below are the steps for the same:
The usage recommendation for dynamic parameters on how to add parameters so the Appvance IQ report will report the variable and not the different values. Basically, you have the URL's path and a parameters section. You should not put the query part in the path if you want to get a proper report using variable in Appvance IQ. The URL query parameters should go in the parameter section, for both POST and GET requests.

You can notice in the below reporting, it displays as one step else this would have been displayed as 4 different steps with 4 different values taken from the datasheet.

Last updated: June 26, 2023
If you have any feedback on this topic, please contact us at documentation@appvance.ai
JMeter FAQ
-
File Downloads from JMeter
-
How to run Jmeter DB script in AIQ
-
Jmeter - Java.lang.RuntimeException: Could not find the TestPlan class! Getting this error while running the scenario from AIQ.
-
JMeter - Note able to see the transactions in the Reports or Test Controller.
-
Jmeter - Steps Average duration calculation in Appvance IQ
-
Jmeter: Error while running MySQL DB script
-
Running JMeter Scripts in AIQ - Best Practices
-
File Downloads from JMeter
-
In JMeter, we need to add a "Save Responses to a file" listener to save the file downloads, we can provide a file name prefix or even the directory path for the download file.
Please refer to below screenshot on how to add "Save Responses to a file" Listener

For each sample in its scope, it will create a file of the response Data. The file name is created from the specified prefix, plus a number (unless this is disabled, see below). The file extension is created from the document type if known. If not known, the file extension is set to 'unknown'. If numbering is disabled, and adding a suffix is disabled, then the file prefix is taken as the entire file name. This allows a fixed file name to be generated if required. The generated file name is stored in the sample response and can be saved in the test log output file if required.
The current sample is saved first, followed by any sub-samples (child samples). If a variable name is provided, then the names of the files are saved in the order that the sub-samples appear. See below.

Please find below the detailed description of the parameters used

Without providing the path, the file gets saved in the "JMeter/bin" directory.
We can mention the path in the "Save Responses to a file" listener as seen below and this script can be used in Appvance IQ.

File downloaded after running the scenario from Appvance IQ
-
-

How to run Jmeter DB script in AIQ
-
We assume that the reader has knowledge of how to create a scenario and run the test in AIQ
The user creates a new scenario and selects a functional test

Navigates to Test case tab and selects Test type as "Jmeter" and attaches the Jmeter script which ran successfully in Jmeter

User now saves the scenario and runs the tests and navigates to Test Controller screen and verifies the output

In the above scenario we are running a simple functional test in AIQ. However if the user wants to run a Load test we will have to make some changes in the Jmeter script. The below screenshot highlights the changes that needs to be done to run the Load test in AIQ.

Need to check in the Thread Group the option Delay Thread Creation Until Needed. Once the changes is made we can go ahead and save the script.
User creates a Load test scenario with 5 users and 100 executions
-
-

Jmeter - Java.lang.RuntimeException: Could not find the TestPlan class! Getting this error while running the scenario from AIQ
-
Solution : Please add htmlunit - 2.15.2648 bundle.
Navigate to Scenario builder and open the scenario created.
Navigate to Resource Panel and click Add bundle.
Add htmlunit with version as 2.15.2648, Save and Re-run the scenario.
-
-
JMeter - Note able to see the transactions in the Reports or Test Controller
-
Resolution: Add a new bundle 'httpclient' with value '4.3.4' in the Resources panel of the Scenario Builder, Save and re-run the scenario to see the results in Reports as well as in Test Controller
-
-
Jmeter - Steps Average duration calculation in Appvance IQ
-
The below example gives a detailed explanation of how Step's average duration is calculated in the Jmeter-Appvance IQ combination.
1.3 TC01_DealID_03 - Average duration is 1.33 secs
All the requests below and calculations are shown below.
Number of Success transaction * Average duration of each request
72*10.92 = 786.24
37*3.23 = 119.51
36*2.15 = 77.4
37*0.93 = 34.41
36*0.9 = 32.4
580*0.04 = 23.2
36*0.48 = 17.28
36*1.88 = 67.68
Addition of all the successful transactions.
72+37+36+37+36+580+36+36 = 870
786.24 + 119.51 + 77.4 + 34.41 + 32.4 + 23.2 + 17.28 + 67.68 = 1158.2
1158.2/870 = 1.33
-
-
Jmeter: Error while running MySQL DB script
-
The user tries to run a MySQL DB script in Jmeter and receives the below error
Java.sql.SQLException: No suitable driver found for jdbc:mysql://localhost:3306/apc
The error message is self-explanatory stating that there is no suitable driver for running the MySQL script. For the script to run successfully we need to download the MySQL connector jar file and place it under the lib folder of Jmeter
For Ex:
If the Jmeter is in the C folder we need to place the mysql-connector-java-5.1.37-bin.jar in C:\Program Files\apache-jmeter-2.13\lib
Download link :
http://dev.mysql.com/downloads/connector/j/
and download the Zip file, Extract the file and copy the mysql-connector-java-5.1.37-bin.jar and place it in the lib folder of Jmeter
-
-
Running JMeter Scripts in AIQ - Best Practices
-
Disable the "View Result Tree" listener during the Load test in AIQ. Because it consumes more memory and causes JMeter running to run out of memory
-
Disable any other listeners from the Jmeter script before running it in AIQ
-
The number of Threads should be given 1 in Jmeter when running performance tests in AIQ because this will add up to the iterations
-
Better to give Ramp-up as 0 in Jmeter
-
Same as Number of Threads, loop count to be given as 1 by default
-
Thread group - Use continue, Stop test now accordingly, using stop now will stop all other remaining threads when a thread is a failure
-
-
Last updated: June 26, 2023
If you have any feedback on this topic, please contact us at documentation@appvance.ai
Selenium
Selenium Integration Reference for AIQ
Last reviewed: October 2, 2026
Use this article as a high-level reference for maintaining Selenium-based assets that still interact with AIQ workflows.
What changed in this article
- Converted the generic Selenium page into a scoped AIQ integration reference.
- Added guidance to treat Selenium assets as maintained dependencies with browser driver, framework, data, and reporting checks.
- Added migration guidance for when Selenium coverage should be replaced by Scenario Editor or other AIQ-native workflows.
Validation workflow
- Confirm what Selenium asset is being integrated and who owns its maintenance.
- Validate browser/driver compatibility, framework dependencies, test data, and result handoff into AIQ.
- Document whether the Selenium asset will be maintained, migrated, or retired.
Review note: This article now avoids presenting Selenium as a blank standalone topic.
Last updated: October 2, 2026
If you have feedback on this topic, contact documentation@appvance.ai.
Features and Benefits of Selenium
AIQ integrates Selenium to provide the following features and benefits:
-
AIQ re-purposes a single Selenium test as a functional test, load test, and performance test.
-
Scale up your Selenium tests to operate in your QA lab, in the Appvance On-demand Cloud Test Environment, or both!
-
AIQ data-enables Selenium tests for test-driven development.
-
Dramatically reduce test operating costs. AIQ efficiently operates multiple Selenium tests in a grid concurrently.
-
AIQ runs Selenium tests for browser compatibility testing of your Web application.
-
Produce actionable knowledge by analyzing the results into 350 or more performance and functional charts.
-
Transform Selenium tests into Java unit tests for additional features: looping, variables, conditionals
-
Run At User Levels Never Before Possible - Building a test lab used to be prohibitively costly for medium and large-scale load tests. Cloud computing delivers bandwidth and computing power to achieve tests in the millions-of-users levels at commodity prices.
Last updated: June 02, 2023
If you have any feedback on this topic, please contact us at documentation@appvance.ai
Repurposing Methodology and Architecture for AIQ Integrations
Last reviewed: October 2, 2026
Use this article to plan when existing automation assets can be repurposed for AIQ integrations instead of rebuilt from scratch.
What changed in this article
- Reframed the page as integration planning guidance rather than an abstract methodology note.
- Added checks for asset ownership, current relevance, dependency health, data compatibility, runtime support, and maintenance cost.
- Added decision guidance for reuse, refactor, migration, or retirement of existing assets.
Validation workflow
- Inventory the existing asset, its owner, runtime, dependencies, data inputs, and known limitations.
- Decide whether the asset should be reused as-is, refactored, migrated, or retired.
- Validate the repurposed asset in AIQ with clear evidence and a maintenance owner.
Review note: This page now supports practical integration decisions instead of generic architecture language.
Last updated: October 2, 2026
If you have feedback on this topic, contact documentation@appvance.ai.
Test Workshop Tutorial
Recommended guidance
Use workshop tutorials to teach a focused AIQ workflow with clear prerequisites, expected outcomes, and cleanup steps. Keep tutorials current with Scenario Editor, Service Suite, AISG, and Test Node terminology.
Tutorial structure
- Objective, audience, prerequisites, and estimated time.
- Environment, accounts, data, browser, and access requirements.
- Step-by-step workflow with expected results at each checkpoint.
- Troubleshooting notes and cleanup/reset instructions.
Quality checks
- Run the tutorial end-to-end before publishing updates.
- Remove obsolete screenshots, old navigation labels, and unsupported feature names.
- Use sample data that does not expose customer information.
- Document follow-up learning paths or related articles.
Last updated: October 7, 2026
Data-Driven Test Development in AIQ
Last reviewed: September 30, 2026
Use this article to plan AIQ tests that separate reusable scenario logic from controlled test data.
What changed in this article
- Modernized the broad data-driven testing article around Scenario Editor and AIQ data sources.
- Added guidance for choosing CSV, DPL, service responses, or integration-provided data based on ownership and refresh needs.
- Added validation checks for row coverage, negative cases, cleanup, deterministic replay, and report traceability.
Validation workflow
- Identify which values belong in the scenario and which should come from controlled data sources.
- Choose the data source that matches the refresh, security, and ownership requirements.
- Run at least one positive, negative, and boundary row and confirm each row is visible in results.
Review note: This article now acts as planning guidance instead of a generic data-driven testing overview.
Last updated: September 30, 2026
If you have feedback on this topic, contact documentation@appvance.ai.
Legacy Selenium IDE Import Reference
Last reviewed: September 28, 2026
Use this article only when a team still needs to understand older Selenium IDE assets in relation to AIQ.
What changed in this article
- Marked Selenium IDE guidance as legacy because current AIQ work should prefer Scenario Editor, supported Selenium/TestNG flows, or maintained automation code.
- Removed the implication that Selenium IDE is a primary authoring workflow.
- Added checks for export format, browser compatibility, locator quality, and whether the script should be rebuilt in Scenario Editor instead.
Validation workflow
- Confirm whether the Selenium IDE artifact is still needed or can be rebuilt in Scenario Editor.
- Validate exported commands and locators before importing or translating them.
- Run a small playback and review failures caused by outdated Selenium IDE commands.
Review note: This page now positions Selenium IDE as migration/reference content, not recommended new automation authoring.
Last updated: September 28, 2026
If you have feedback on this topic, contact documentation@appvance.ai.
Review Selenium Commands and Results in AIQ
Review Selenium Commands and Results in AIQ
Use Selenium command and result details when troubleshooting imported or integrated Selenium executions. This content is legacy-adjacent and should support maintenance of existing Selenium assets, while new functional automation should prefer current Scenario Editor guidance where appropriate.
What to review
- Command names, target locators, and values used during execution.
- Failure messages and the first command that produced a meaningful error.
- Screenshots, logs, or output attached to the execution.
- Differences between local Selenium behavior and AIQ execution behavior.
Maintenance notes
- Update brittle locators before rerunning under load or in a suite.
- Replace fixed sleeps with waits that prove the application is ready.
- Document whether the asset remains maintained or is being migrated to Scenario Editor.
Last updated: September 8, 2026
Maintain TestNG Framework Scripts in AIQ
Maintain TestNG Framework Scripts in AIQ
Use this article for existing TestNG framework scripts that still need to run through AIQ integrations. Treat this as maintenance guidance for legacy or specialized assets, not as the default path for new Scenario Editor tests.
Recommended structure
- Keep test logic, test data, and environment configuration separate.
- Use build tooling to produce repeatable artifacts.
- Store credentials and environment values in approved secure configuration locations.
- Record the framework version and dependency versions with the artifact.
Validation workflow
- Run the TestNG suite locally or in CI before executing from AIQ.
- Confirm required dependencies are packaged or available on the execution host.
- Review AIQ output for classpath, browser, data, or environment failures.
- Document migration candidates when Scenario Editor can cover the same flow.
Last updated: September 8, 2026
Selenium Integration FAQ for AIQ
Use this FAQ to answer common questions about maintaining Selenium-based assets that interact with AIQ workflows.
What changed in this article
- Changed the title from “Selenium Q&A” to a clearer AIQ-scoped FAQ.
- Aligned the page with the Selenium Integration Reference article and avoided treating Selenium as a standalone topic.
- Added checks for ownership, browser/driver compatibility, framework dependencies, data handoff, reporting, and migration planning.
Validation workflow
- Confirm the Selenium asset, framework, browser driver, and owner before troubleshooting.
- Validate the asset outside and inside the AIQ workflow so failures are assigned to the right layer.
- Document whether the Selenium coverage will be maintained, migrated to Scenario Editor, or retired.
Review note: This FAQ now complements the Selenium integration reference instead of duplicating generic Selenium content.
Last updated: October 2, 2026
If you have feedback on this topic, contact documentation@appvance.ai.
Continous Integration
Continous Integration
Configuring Bamboo, Hudson, Jenkins, and AIQ
Operate AIQ tests from Continuous Integration environments. Appvance checks AIQ compatibility with Hudson, Bamboo, and Jenkins.


Product Version Details
-
AIQ Version: 3.5
-
Bamboo Version: 2.6.2 (Standalone)
-
Hudson Version: 1.374
-
Java Verison: 1.6 (1.6 or later)
-
Jenkins Version: 1.502
-
Tomcat Verison: 6.0.26 (To run Hudson)
Last updated: April 14, 2023
If you have any feedback on this topic, please contact us at documentation@appvance.ai
Legacy Hudson Integration Reference
Legacy Hudson Integration Reference
Last reviewed: September 21, 2026
Hudson integration content is retained only as a legacy reference. New CI/CD work should use current Jenkins, GitHub Actions, or supported command-line/API integrations.
When to use this guidance
- You are maintaining an old environment that still references Hudson.
- You need to migrate historical CI jobs to a supported CI/CD tool.
- You are deciding whether to archive or consolidate older integration content.
Recommended approach
- Inventory any Hudson jobs that still trigger AIQ tests.
- Capture job parameters, credentials, triggers, and report locations.
- Recreate the workflow in a supported CI/CD platform.
- Validate the migrated job with a small AIQ execution.
- Mark Hudson-specific instructions as legacy or remove them when no longer needed.
Note: Hudson is obsolete for current AIQ documentation. Prefer Jenkins or another supported CI/CD platform.
Last updated: September 21, 2026
If you have feedback on this topic, contact documentation@appvance.ai.
Legacy Team Foundation Server Integration Reference
Last reviewed: September 30, 2026
This page is retained as a legacy reference for teams that still maintain AIQ integrations with Team Foundation Server or Azure DevOps Server-era workflows.
What changed in this article
- Marked TFS integration as legacy because many teams have moved from Team Foundation Server to Azure DevOps Services or newer CI/CD integrations.
- Added checks for repository URL, credentials/token handling, branch/path mapping, build triggers, artifact ownership, and migration planning.
- Warned against storing passwords in integration configuration and recommended maintained token-based access where supported.
Validation workflow
- Confirm whether the environment still uses TFS/Azure DevOps Server or should migrate to a current integration path.
- Validate repository access, token scope, branch/path settings, and artifact retrieval with a controlled test.
- Document ownership and migration status so legacy TFS dependencies are not expanded accidentally.
Review note: This page is now clearly labeled as legacy rather than current default integration guidance.
Last updated: September 30, 2026
If you have feedback on this topic, contact documentation@appvance.ai.
Run AIQ Tests from the Command Line
Run AIQ Tests from the Command Line
Last reviewed: September 21, 2026
Use command-line execution when AIQ tests need to run from scripts, schedulers, or CI/CD agents. Keep commands repeatable and avoid embedding secrets in scripts.
When to use this guidance
- A pipeline or automation host needs to trigger AIQ tests.
- You need reproducible execution commands.
- Results must be returned to the calling process.
Recommended approach
- Confirm the supported AIQ command-line or API entry point for your version.
- Create a dedicated service account or token with least-privilege access.
- Parameterize project, scenario, environment, dataset, and threshold settings.
- Capture execution output, logs, and reports in the automation system.
- Handle non-zero exit codes and failed quality gates clearly.
Note: Do not commit credentials, tokens, or environment-specific secrets into source control.
Last updated: September 21, 2026
If you have feedback on this topic, contact documentation@appvance.ai.
CICD - TeamCity Integration
-
Information within illustrates how to configure and run scenarios from TeamCity
-
Applicable for both TeamCity installed locally as well as in the cloud
Setup a build in TeamCity: Configuration and pre-requisite:
TeamCity can be downloaded from this location
-
Download Links for the following are available at “CI Jenkins”
-
After installation, TeamCity automatically launches using port 8080. Change the port to a different one (Example: 8087)
-
Install ANT using http://ant.apache.org/bindownload.cgi
-
Download and install the appropriate file on your machine depending on the operating system used
-
Login to TeamCity with your credentials

-
Once logged in, click the Project button to Create a project

-
Click From a Repository URL, provide your GitLab creds and the repository URL, and Click Proceed

-
Click Version Control Settings


-
Click Edit and change the branch as per your requirements (Changed the Default Branch to Demo)

-
Click Build Steps and Add Build Step
-
Choose Runner Type as Ant

-
Choose the Targets by clicking the Edit Like button


-
Click Run and choose the options


Now how does the git-lab project look and what are the files that need to be changed?

Above is the screenshot of the project that was configured in Jenkins.
Build.xml File: Build.xml file and other files and the folder structure can be downloaded from here.
creds.json File:
{
"controller": {
"instances": ["i-0a8ede7xxxxx"],
"ec2Creds": "ec2.creds",
"timeOut": 60,
"username": "AIQUSERNAME",
"password": "AIQPASSWORD",
"workFolder": "."
}
}
Basically has details about the controller machine and the credentials. Above can be used when we have the EC2 setup.
When we are running AIQ local builds, instances in the 2nd line could be replaced with "URL" and the full URL of the AIQ controller could be provided.
ec2.creds will have details of the Ec2 account: This can be used when we are using AIQ Controller on the EC2 machine and when your tests are run in the AWS cloud.
AWS_ACCESS_KEY_ID=YOURAWSACCESSKEY
AWS_SECRET_ACCESS_KEY=YOURAWSSECRETKEY
REGION:us-west-2.ec2.amazonaws.com
Look for Build Triggers and look for Invoke Ant.
Under Targets, call
-
deps
-
startNode
-
createScenarioDashboard
-
stopNode
Note: All the above are case-sensitive
Last updated: June 26, 2023
If you have any feedback on this topic, please contact us at documentation@appvance.ai
CICD - Repository Alone
This guide shows CI/CD Integration without the use of any cloud services like S3 buckets to store the results and create the dashboard.
You can configure the repository to store test assets, the same Repository (Which could be any flavors of GIT or SVN) can be used to store all the test results and create dashboards.
Below are the steps that need to be followed.
-
Configure repository in AIQ under preferences > Repository. Please visit the Repository chapter to know more about how to configure repositories using HTTP or SSH
-
Below is the required folder structure and files

-
lib will hold the Restclient.jar file.
-
The scenario folder holds all the scenario files that are required to be run.
-
scenarioReports and scenarioResults are the files that are required to store the results that will be uploaded to the git repo that is configured
-
build.xml is the file that holds all the configuration details and the ant targets
-
creds.json file holds the server details and login details of AIQ
-
githttp.json file holds details of git repo to use along with HTTP credentials and branch details.
-
gitSsh.json file holds details of the git repo, the URL, ssh credentials, and the branch details.
Here is the zip of the above folder structure to download for reference
-
-
Configure build.xml with buildversion to use, specify product, specify customer name, specify an environment, specify dir, and the scenario file to use
If the AISG is going to be run, make changes accordingly and point to the abpt file from the freshly run AISG
-
creds.json - provide the URL of AIQ services running, provide credentials of AIQ
-
Depending on SSH or HTTP, provide the details of the Repo, credentials, branch, sshPhrase, and sshKey in either githttp.json or gitSsh.json
Note: Depending on which file is being used, make the reference of that file in build.xml for the below-mentioned property
<property name="gitCredentials" value="githttp.json" />
Once all the changes are made and saved
Open command prompt of if this is driven from any CICD tools, run "blueprintDashboard" for creating dashboard report and "scenarioDashboard" for creating scenario dashboards


-
Once the build is successfully run, go to AIQ > Preferences > Repository
-
Click Explore Repository

-
Look for the folder called reports

-
Click Reports> Products > main.html to have the dashboards created

Last updated: June 26, 2023
If you have any feedback on this topic, please contact us at documentation@appvance.ai
CICD- AntTags
Appvance IQ - CICD - All about Ant tags
Below is the list of all Ant tags/Java Class that is defined in build.xml file and their descriptions

Below are Ant Tasks and their descriptions and examples
-
S3Downlaod
-
StartNode
-
WaitForAIQ
-
CreateBlueprint
-
Report (AISG)
-
CheckBlueprintResults
-
Dashboard (AISG)
-
GenerateScenario
-
ExecuteScenario
-
UpdateJiraTicket
-
FetchScenarioResults
-
Report (Scenario)
-
UploadToDashboard
-
HouseKeeping
-
CheckScenarioResults
-
ProductDashboard
-
ShutdownAIQ
-
StopNode
-
AddAIQUser
-
ForEachInDPL
-
UpdateBlueprintTemplate
-
ForEachInFolder
-
ExtractAutovalidations
-
UpdateCSVValidations
-
DownloadRepository
-
GitReporter
-
History Manager
-
ProjectManager
-
ProductManager
-
UploadRepository
-
Git Support
-
ConsumeBlueprint
-
FunctionalExecuter
-
FunctionalReport
-
Dashboard Git Support
-
Terminate Instance
-
Launch Instance
-
UploadReportToS3
S3Downlaod
Description
Downloads a folder from S3. Requires S3 credentials and an output file.
Input Parm
credentials: This points to the credentials file. It is a property file similar to
AWS_ACCESS_KEY_ID=AKIA........
AWS_SECRET_ACCESS_KEY=G8w...............
REGION:us-west-2.ec2.amazonaws.com
bucketBase: It is the AWS Bucket where the folder is located
localFolder: The folder where the file will be downloaded
remoteFolder: Remove the folder inside AWS Bucket
StartNode
Description
Starts an AIQ Machine using the information in aiqCreds. Creates machine id in the generatedConfig file.
Input params
aiqCreds: Path of the configuration relative to the project (build.xml). Should have next format
{
"controller": {
"instances": ["i-07cb37f006XXXX"],
"ec2Creds": "ec2.creds",
"timeOut": 60,
"username": "AIQUserName",
"password": "AIQPassword",
"workFolder": "."
}
}
ec2Creds is a creds file to connect to EC2, the format is
AWS_ACCESS_KEY_ID=AKIA....
AWS_SECRET_ACCESS_KEY=W96Axh4UqDl.....
REGION:us-west-2.ec2.amazonaws.com
-
generatedConfig Path of the generated configuration file relative to the project (build.xml). Contains EC2 AMI information. Should have next format
{"instanceId":"i-07cb37f006083a225",
"url":"http://ec2machine1:8080/TMServer/ws/TestNode"
}
WaitForAIQ
Description
Waits until AIQ is ready
Input Params
-
timeout: The timeout for this ant task in seconds. If AIQ is not ready after these seconds the task will fail. IF the parameter is not set the default value is 10 minutes
-
aiqCreds: The AIQ credentials are in JSON format, the same format for running a scenario. The URL is optional. if not set. The Task will use the URL from consoleDetails
{"controller":{"url":"http://localhost:8080",
"username":"",
"password":""
}
}
-
consoleDetails: File which contains URL if it is not set in aiqCreds
{"url":"http://localhost:8080"
}
Output
AIQ should be ready and available otherwise the ant task will fail
CreateBlueprint
Description: Creates a AISG.
Inputs
-
projectName: "LeadGenius".
-
template: "<Project-Folder>/blueprintTemplateFile.abpt".
-
aiqCreds: "<Project-Folder>/localhost.json".
{"controller":{"url":"http://[ec2.machine.dns]:8080",
"username":"appvance",
"password":"appvance",
"workFolder":"/Users/[UserName]/workFolder" <--- for mac users
"workFolder":"c:/Users/administrator/workFolder" <--- for windows users
}
}
-
outputFolder: "<Project-Output-Folder>/Output"
-
forceNewScan: "true" // is defined as true
-
requestMaxDuration: "2000"
-
reportStatusCode: "300" for page updates
-
customer: CustomerSample.com
-
buildVersion: 0001
Ant Task Example
<taskdef name="createBlueprint" classname="com.appvance.ci.CreateBlueprint">
<classpath refid="RestClientLibPath" />
</taskdef>
<createBlueprint template="${template}" aiqCreds="${aiqCreds}" buildVersion="${buildVersion}" outputFolder="${blueprintResults}"
projectName="${projectName}" requestMaxDuration="4000" consoleDetails="${consoleDetails}" reportStatusCode="400" customer="${customer}" forceNewScan="true" />
Output
AISG is created inside outputFolder parameter
Report (AISG)
Description
Creates a Dashboard report based on Junit results. It can handle integrations in the Junit results
Input Params
-
fileConfig="generateRegressionScenario.json"
-
aiqCreds="controller01.json"
-
consoleDetails="consoleDetails.json"
-
logsRemoteFolder="E:/Regression/Logs"
-
projectName="moduleName"
-
outputFolder="Output"
Output
Generates a Scenario and its scripts inside the Output folder
Ant Task Example
<taskdef name="uploadReportToS3" classname="com.appvance.AISG.UploadReportToS3">
<classpath refid="RestClientLibPath" />
</taskdef>
<uploadReportToS3 buildVersion="${buildVersion}" credentials="${awsCredentials}" bucketBase="${Bucket}" executionType="blueprints"
reportFolder="${blueprintResults}" environment="${environment}" product="${product}" />
CheckBlueprintResults
Description
Checks AISG and fail if results are worse than expected
Input Params
-
maxFailingRequests : max allowed number of requests with failing status codes. If not set, it will not be tested
-
maxValidationFailures : max allowed number of AISG validations failures. If not set, it will not be tested
-
minValidationRatio : minimum allowed percentage integer (1-100) that shows the ratio of succeeded validations. If not set, it will not be tested
Output
Fail if results are worse than expected
Ant Task Example
<taskdef name="checkBPResults" classname="com.appvance.AISG.CheckBlueprintResults">
<classpath refid="RestClientLibPath" />
</taskdef>
<checkBPResults maxFailingRequests="${maxFailingRequests}" maxValidationFailures="${maxValidationFailures}" minValidationRatio="${minValidationRatio}" reportFolder="${reports}" />
Dashboard (AISG)
Description
Creates the history for the current branch and product using the AISG history.
Input params
-
credentials="${awsCredentials}" s3 credentials
-
customer="${customer}" customer name for description
-
bucketBase="${Bucket}" s3 source to save data
-
environment="${environment}" parameter used for classifying content
-
executionType="blueprints" helps create an html with two tabs (for scenarios and for AISG content only)
-
product="${product}" parameter used for classifying content
Output
Creates the AISG HTML for the history dashboard and uploads these all synchronized files to s3.
Ant Task Example
The first scenario saves the initial time and the second scenario is set to false to avoid overwriting it.
<taskdef name="dashboard" classname="com.appvance.AISG.BlueprintDashboard">
<classpath refid="RestClientLibPath" />
</taskdef>
<dashboard credentials="${awsCredentials}" customer="${customer}" bucketBase="${Bucket}" environment="${environment}" executionType="blueprints" product="${product}" />
GenerateScenario
Description
Generates a regression scenario
Input Params
-
fileConfig="generateRegressionScenario.json"
-
aiqCreds="controller01.json"
-
consoleDetails="consoleDetails.json"
-
logsRemoteFolder="E:/Regression/Logs"
-
projectName="moduleName"
-
outputFolder="Output"
Output
Generates a Scenario and its scripts inside the Output folder
Ant Task Example
<taskdef name="genScenario" classname="com.appvance.ci.GenerateScenario">
<classpath refid="RestClientLibPath" />
</taskdef>
<genScenario fileConfig="${fileConfig}" aiqCreds="${aiqCreds}" consoleDetails="${consoleDetails}" logsRemoteFolder="${logsRemoteFolder}" projectName="${projectName}" outputFolder="${outputFolder}" />
ExecuteScenario
Description
Executes a Scenario and, if saveIntitialTime is not true, timing information will be saved in results.properties file in the resultsFolder.
Input params
-
aiqCreds: Path of the configuration relative to the project (build.xml). Should have the next format.
{
"controller": {
"instances": ["i-07cb37f006083a225"],
"ec2Creds": "ec2.creds",
"timeOut": 60,
"username": "appvance",
"password": "appvance",
"workFolder": "."
}
}
-
dir: Path to the scenario folder, current scenario folder value is "scenario"
-
scenario: Name of the scenario to execute, example "LeadGenius_31_34_TestEnv.scenario"
-
resultsFolder: The place where results.properties are saved. It contains useful information to create reports and dashboards. By default, its value is "results".
-
saveInitialTime: Indicates the results.properties file should be created in the result folder directory. By default it is true.
Output
The scenario should be completely executed and, if saveIntitialTime is not true, timing information will be saved in results.properties file in the resultsFolder.
Ant Task Example
The first scenario saves the initial time and the second scenario is set to false to avoid overwriting it.
<taskdef name="executeScenario" classname="com.appvance.ci.ExecuteScenario">
<classpath refid="RestClientLibPath" />
</taskdef>
<executeScenario aiqCreds="controller01.json" dir="${dir}" scenario="Scenarioname.scenario" consoleDetails="${consoleDetails}" resultsFolder="${scenarioResults}" />
UpdateJiraTicket
Description
Logs into Jira, and updates the ticket status, adding a comment based on the execution result file.
Input:
-
jiraCreds: it is a JSON file with the next format:
{
"url": "httpS://.....",
"username": "userQA",
"password": "XXXXXXXX",
"destinationStatus" : {
"success": "done",
"failure": "in progress"
}
}
-
ticketId: this is the identifier for the ticket to be updated.
-
executionResult: the JSON file.
-
updateStatus:
-
maxFailures: maximum number of failures before considering the test fails.
-
minSuccessPercentage: minimum percentage before considering the test fails.
Output:
FetchScenarioResults
Description
Save scenario results in the results folder. It will update the results.properties file inside the results folder with useful timing properties for report and dashboard creation.
Inputs
-
aiqCreds: Path of the configuration relative to the project (build.xml). Should have the next format.
{
"controller": {
"instances": ["i-07cb37f006083a225"],
"ec2Creds": "ec2.creds",
"timeOut": 60,
"username": "appvance",
"password": "appvance",
"workFolder": "."
}
}
-
scenario: name of scenario to execute
-
consoleDetails:
-
resultsFolder: name of the folder to save result files. It should contain the results.properties file which contains useful timing properties for report and dashboard creation.
-
stopOnFailure: boolean, this enables the process to continue or stop when fails.
Output
Save scenario results into the results folder parameter. The report.properties file will be updated with useful timing properties for report and dashboard creation.
Ant Task Example
<taskdef name="fetchScenarioResults" classname="com.appvance.ci.FetchScenarioResults" >
<classpath refid="RestClientLibPath"/>
</taskdef>
<fetchScenarioResults aiqCreds="creds.json" scenario="BasicScenario.scenario" consoleDetails ="params.json" stopOnFailure="false"/>
Report (Scenario)
Description
Creates a Dashboard report based on Junit results. It can handle integrations in the Junit results
Input Params
-
projectName="moduleName"
-
resultsFolder="${scenarioResults}"
-
reportFolder="${scenarioReports}"
-
executionType="scenarios"
-
environment="${environment}"
-
consoleDetails="consoleDetails.json"
-
product="${product}"
-
buildVersion="${buildVersion}"
-
bucketBase="${Bucket}"
-
aiqCreds="controller01.json"
-
credentials="${awsCredentials}"
Output
Generates a Scenario and its scripts inside the Output folder
Ant Task Example
<taskdef name="Report" classname="com.appvance.ci.Report">
<classpath refid="RestClientLibPath" />
</taskdef>
<Report projectName="${projectName}" resultsFolder="${scenarioResults}" reportFolder="${scenarioReports}" executionType="scenarios"
environment="${environment}" consoleDetails="${consoleDetails}" product="${product}" buildVersion="${buildVersion}" bucketBase="${Bucket}" aiqCreds="${aiqCreds}"credentials="${creds.json}" />
UploadToDashboard
Description
This ant task uploads files.
Input Params
-
bucketBase="${Bucket}"
-
product="${product}"
-
projectName="${projectName}"
-
environment="${environment}"
-
executionType="scenarios"
-
credentials="${awsCredentials}"
-
buildVersion="${buildVersion}"
-
reportFolder="${scenarioReports}"
-
consoleDetails="${consoleDetails}"
-
aiqCreds="${aiqCreds}"
Output
No output, this ant task only uploads files
Ant Task Example
<taskdef name="uploadToDashboard" classname="com.appvance.ci.UploadToDashboard">
<classpath refid="RestClientLibPath" />
</taskdef>
<uploadToDashboard bucketBase="${Bucket}" product="${product}" projectName="${projectName}"
environment="${environment}" executionType="scenarios" credentials="${awsCredentials}" buildVersion="${buildVersion}"
reportFolder="${scenarioReports}" consoleDetails="${consoleDetails}" aiqCreds="${aiqCreds}" />
HouseKeeping
Description
Keeps a max number of builds in s3
Input Params
-
credentials="${awsCredentials}"
-
keep="${MaxBuilds}"
-
bucketBase="${Bucket}"
-
executionType="scenarios"
-
product="${product}"
-
environment="${environment}"
Output
Keeps a max number of builds in s3
Ant Task Example
<taskdef name="HouseKeeping" classname="com.appvance.ci.HouseKeeping">
<classpath refid="RestClientLibPath" />
</taskdef>
<HouseKeeping credentials="${awsCredentials}" keep="${MaxBuilds}" bucketBase="${Bucket}" executionType="scenarios" product="${product}" environment="${environment}" />
CheckScenarioResults
Description
Checks a set of JUnit results and fails if the results are worse than the expected in report.json file.
If ANY high-important TestCase fails, it will fail.
Even if every low importance fails, it won't fail because of this.
The minSucessRatio and maxFailingTestCases are applied to normal importance
Input Params
-
reportFile: The dir where the JSON report is located. If not set the default is "report/report.json".
-
minSuccessRatio: minimum allowed percentage integer (1-100) that shows the ratio of succeeded validations. If not set, it will not be tested
-
maxAllowedFailures : max allowed failed test cases. If not set it will not be tested
Output
Checks a set of JUnit results and fails if the results are worse than expected. Will do nothing if the results are good enough.
Ant Task Example
<taskdef name="checkScenarioResults" classname="com.appvance.ivy.CheckScenarioResults" >
<classpath refid="IvyPath"/>
</taskdef>
<checkScenarioResults reportFile="report/report.json" minSucessRatio ="95" maxAllowedFailures ="5" />
ProductDashboard
Description
Creates the main dashboard report for the CICD
-
reportFile: The dir where the JSON report is located. If not set the default is "report/report.json".
-
minSuccessRatio: minimum allowed percentage integer (1-100) that shows the ratio of succeeded validations. If not set, it will not be tested
-
maxAllowedFailures : max allowed failed test cases. If not set it will not be testedSinchronize the historical files and create a report with the latest results for all the history
Input Params
-
credentials="${awsCredentials}" AWS credentials
-
bucketBase="${Bucket}" AWS path to locate files
-
customer="${customer}" Customer description to show in the html
Output
Creates the main dashboard report for the CICD
Ant Task Example
<taskdef name="ProductDashboard" classname="com.appvance.ci.ProductsDashboard">
<classpath refid="RestClientLibPath" />
</taskdef>
<ProductDashboard credentials="${awsCredentials}" bucketBase="${Bucket}" customer="${customer}" />
ShutdownAIQ
Description
Shutdown and AIQ Server based on specs from the configuration file
Input Params
-
aiqCreds: The AIQ credentials are in JSON format, the same format for running a scenario. The URL is optional. if not set. The Task will use the URL from consoleDetails
{
"controller":{
"url":"http://localhost:8080",
"username":"appvance",
"password":"appvance"
}
}
-
consoleDetails: File which contains URL if it is not set in aiqCreds
{
"url":"http://localhost:8080"
}
Output
AIQ should be stopped. If not the task will fail.
Ant Task Example
<target name="stopAIQ" depends="deps">
<taskdef name="shutdown" classname="com.appvance.ci.ShutdownAIQ">
<classpath refid="RestClientLibPath" />
</taskdef>
<shutdown
aiqCreds="${aiqCreds}"
consoleDetails="${consoleDetails}" />
</target>
StopNode
Description
Stops an AIQ Machine using the information in aiqCreds.
Input:
-
aiqCreds:
{
"controller": {
"instances": ["i-07cb37f006083a225"],
"ec2Creds": "ec2.creds",
"timeOut": 60,
"username": "appvance",
"password": "appvance",
"workFolder": "."
}
}
-
dir: name of the scenario
-
consoleDetails:
Ant Tag Example
<taskdef name="stopNode" classname="com.appvance.ci.StopNode">
<classpath refid="RestClientLibPath" />
</taskdef>
<stopNode aiqCreds="${aiqCreds}" consoleDetails="${consoleDetails}" />
AddAIQUser
Description
Creates a user into AIQ.
Input Parm
-
username="${username}"
-
password="${password}"
-
role="${role}" valid values: “Admin”, “User”
-
aiqCreds="CICD/localhost.json"
Output
An user is created.
Ant Task Example
<target name="checkCreateUsers" depends="init">
<path id="TestPath">
<pathelement path="${javac.classpath}"/>
<pathelement path="${build.test.classes.dir}"/>
<pathelement path="${build.classes.dir}"/>
<pathelement location="dist/AppvanceCIClient.jar"/>
</path>
<taskdef name="forEachInDPL" classname="com.appvance.ci.ForEachInDPL" >
<classpath refid="TestPath"/>
</taskdef>
<taskdef name="addAIQUser" classname="com.appvance.ci.AddAIQUser" >
<classpath refid="TestPath"/>
</taskdef>
<forEachInDPL csv="test/com/appvance/ci/users.csv" >
<addAIQUser username="${username}" password="${password}" role="${role}" aiqCreds="CICD/localhost.json"/>
</forEachInDPL> </target>
ForEachInDPL
Description:
Receives the DPL path, the DPL type, and a task list.
Input Params
csv: "CICD/templates.csv"
type: "JsDPL" || “HashDPL”
task=<updateBlueprintTemplate input="CICD/Legacy.mbpt" output="output/original-${template}.mbpt.json" type="none" />
<updateBlueprintTemplate input="output/original-${template}.mbpt.json"
Ant Task Example
<forEachInDPL csv="CICD/templates.csv" >
<updateBlueprintTemplate input="CICD/Legacy.mbpt" output="output/original-${template}.mbpt.json" type="none" />
<updateBlueprintTemplate input="output/original-${template}.mbpt.json"
output="output/dpl-${template}.mbpt.json"
resource="CICD/templates.csv"
type="updateDataset" />
</forEachInDPL>
UpdateBlueprintTemplate
Description
Updates the Blueprint template.
Input Params
-
input="output/original-${template}.mbpt.json"
-
output="output/dpl-${template}.mbpt.json"
-
resource="CICD/templates.csv"
-
type="updateDataset"
Output
From a Blueprint template, it generates a list of modified Blueprint templates.
Ant Task Example
<target name="checkUpdateBlueprintTemplate" depends="init">
<path id="TestPath">
<pathelement path="${javac.classpath}"/>
<pathelement path="${build.test.classes.dir}"/>
<pathelement path="${build.classes.dir}"/>
<pathelement location="dist/AppvanceCIClient.jar"/>
</path>
<taskdef name="updateBlueprintTemplate" classname="com.appvance.AISG.UpdateBlueprintTemplate" >
<classpath refid="TestPath"/>
</taskdef>
<taskdef name="forEachInDPL" classname="com.appvance.ci.ForEachInDPL" >
<classpath refid="TestPath"/>
</taskdef>
<forEachInDPL csv="CICD/templates.csv" >
<updateBlueprintTemplate input="CICD/Legacy.mbpt" output="output/original-${template}.mbpt.json" type="none" />
<updateBlueprintTemplate input="output/original-${template}.mbpt.json"
output="output/dpl-${template}.mbpt.json"
resource="CICD/templates.csv"
type="updateDataset" />
</forEachInDPL>
</target>
ForEachInFolder
Description
Processes a list of files, using a pattern to filter file types inside a folder, then executes a list of tasks.
Input Params
-
folder = theFolder
-
match = theMatch
<taskdef name="forEachInFolder" classname="com.appvance.ci.ForEachInFolder" >
<classpath refid="TestPath"/>
</taskdef>
Ant Task Example
<forEachInFolder folder="testfolder">
<echo message="Filename: ${filename}${line.separator}" file="output/ForEachFolder.txt" append="true" />
</forEachInFolder>
<forEachInFolder folder="testfolder" match =".*.csv">
<echo message="Filename: ${filename}${line.separator}" file="output/ForEachMatch.txt" append="true" />
</forEachInFolder>
ExtractAutovalidations
UpdateCSVValidations
Description
Updates a CSV file according to a pattern using a replacement string.
Input Parm
-
type:
-
Possible values for type:
-
disable, enable, updateMatch.
-
input:
-
It is the CSV file path.
-
output:
-
match:
-
replace:
Ant Task Example
<target name="updateCSV" depends="deps">
<taskdef name="updateCSVData" classname="com.appvance.AISG.UpdateCSVValidation">
<classpath refid="RestClientLibPath" />
</taskdef>
<updateCSVData
type="disable || enable || updateMatch"
input="folder"
output="outputFolder"
match="getData"
replace="getContent"
/>
</target>
DownloadRepository
Description
Clones a git repository
Input Parm
-
folder="c:/pathToFutureGitFolder"
-
credentials= path to a json file with Git credentials, this is a json file as follows:
For https connection
{
"username": "*****@appvance.com",
"password": "*******",
"repository": "https://gitlab.com/pathtest/development.git ",
"branch": "branchName",
"sshPhrase": "";
"sshKey": ""
}
For ssh connection
{
"username": "theUser@appvance.com",
"password": "",
"repository": "git@gitlab.com:pathtest.git",
"branch": "master",
"sshPhrase": "thisIsMyKeyPharse"; // optional if not required by git
"sshKey": "pathToprivateKeyFile"
}
Output
Git repository is cloned in to file system
Ant Task Example
<taskdef name="downloadRepository" classname="com.appvance.ci.git.DownloadRepository">
<classpath refid="RestClientLibPath" />
</taskdef>
<downloadRepository folder="${localEmptyFolder}" credentials="${gitCredentialsFile}" />
GitReporter
Description
Generates internal Statistics
Input Parm
-
folder="${localEmptyFolder}" // location for local dashboard files
-
reportFolder= "${blueprintResults}"
-
environment="${environment}"
-
executionType="blueprints" // valid values "blueprints" || "scenarios"
-
projectName="${projectName}"
-
buildVersion="${buildVersion}"
-
product="${product}"
-
resultsFolder= "" // for AISG keep it blank, for scenario you may enter "ScenarioResults"
Output
Updates the statistics for local files
Ant Task Example
<taskdef name="gitReporter" classname="com.appvance.ci.git.GitReporter">
<classpath refid="RestClientLibPath" />
</taskdef>
<gitReporter
folder="${localEmpyFolder}"
reportFolder= "${blueprintResults}"
environment="${environment}"
executionType="blueprints"
projectName="${projectName}"
buildVersion="${buildVersion}"
product="${product}"
resultsFolder= ""
/>
History Manager
Description
Generates internal Statistics
Input Params
-
folder="${localEmpyFolder}" // location for local dashboard files
-
product="${product}"
-
environment="${environment}"
-
buildVersion="${buildVersion}"
-
executionType="blueprints" // valid values "blueprints" || "scenarios"
-
projectName="${projectName}"
Output
Updates the statistics for local files
Ant Task Example
<taskdef name="historyManager" classname="com.appvance.ci.git.HistoryManager">
<classpath refid="RestClientLibPath" />
</taskdef>
<historyManager
folder="${localEmpyFolder}"
product="${product}"
environment="${environment}"
buildVersion="${buildVersion}"
executionType="blueprints"
projectName="${projectName}"
/>
ProjectManager
Description
Generates internal Statistics
Input Params
-
folder="${localEmpyFolder}" // location for local dashboard files
-
buildVersion="${buildVersion}"
-
product="${product}"
-
environment="${environment}"
-
executionType="blueprints" // valid values "blueprints" || "scenarios"
-
customer="${customer}"
Output
Updates the statistics for local files
Ant Task Example
<taskdef name="dashboard" classname="com.appvance.ci.git.ProjectManager">
<classpath refid="RestClientLibPath" />
</taskdef>
<dashboard
folder="${localEmpyFolder}"
buildVersion="${buildVersion}"
product="${product}"
environment="${environment}"
executionType="blueprints"
customer="${customer}"
/>
ProductManager
Description
Generates internal Statistics
Input Parm
-
folder="${localEmpyFolder}" // location for local dashboard files
-
customer="${customer}"
Output
Updates the statistics for local files
Ant Task Example
<taskdef name="productManager" classname="com.appvance.ci.git.ProductManager">
<classpath refid="RestClientLibPath" />
</taskdef>
<productManager
folder="${localEmpyFolder}"
customer="${customer}"
/>
UploadRepository
Description
Commits changes into a git repository
Input Parm
-
credentials="${gitCredentials}"
-
folder="${localEmpyFolder}" // location for local dashboard files
-
customer="${customer}"
Output
Updates the statistics for local files
Ant Task Example
<taskdef name="commitReports" classname="com.appvance.ci.git.UploadRepository">
<classpath refid="RestClientLibPath" />
</taskdef>
<commitReports
credentials="${gitCredentials}"
folder="${localEmpyFolder}"
customer="${customer}"
/>
ConsumeBlueprint
Description
Detects a AISG that is loaded in memory.
Input Parm
aiqCreds="${aiqCreds}"
it’s the JSON file that contains the IQ credentials.
{
"controller":{
"url":"http://[ec2.machine.dns]:8080",
"username":"appvance",
"password":"appvance",
"workFolder":"/Users/[UserName]/workFolder" <--- for mac users
"workFolder":"c:/Users/administrator/workFolder" <--- for windows users
}
}
buildVersion="001" // define the number of copilation according to the pipeline number.
outputFolder="blueprintResults" //it’s the folder where is going to be downloaded the reports.
projectName="aProjectName" //the name that discribes to of the projet
requestMaxDuration="4000" //maximum duration per request
consoleDetails="${consoleDetails}" //
reportStatusCode="400" // minimum expected error code.
customer="${customer}" // it’s a name that describes to the customer.
Output
c:\Builds\Resources\[blueprint-name].abp
Ant Task Example
<target name="blueprintConsume" depends="ivyDeps">
<taskdef name="consumeBlueprint" classname="com.appvance.ci.ConsumeBlueprint">
<classpath refid="RestClientLibPath" />
</taskdef>
<consumeBlueprint
aiqCreds="${aiqCreds}"
buildVersion="${buildVersion}"
outputFolder="${blueprintResults}"
projectName="${projectName}"
requestMaxDuration="4000"
consoleDetails="${consoleDetails}"
reportStatusCode="400"
customer="${customer}" />
</target>
FunctionalExecuter
Description
This Ant task runs complex functional scenarios.
This Ant task does not require AIQ, but it requires Test Designer if the script uses it. You can create a report from the results of the ant task using the FunctionalReport ant task (FunctionalReport )
Qualified Class Name
com.appvance.ci.functional.FunctionalExecuter
Input Params
<taskdef name="functionalExecuter" classname="com.appvance.ci.functional.FunctionalExecuter" >
<classpath refid="CIPath"/>
</taskdef>
<functionalExecuter maxThread="1" resultFolder="${resultFolder}" testclass="${testclass}" />
The Locker & Bridge Variable support
If scripts have variables in the locker or the bridge, it is important to notice they required some details in the script java class but no change is required in the script itself
@Test
public void doFirstTestBroken() {
//Somewhere in the script this happens
new TheLocker().put("myVar", "MyValue");
//Leave the script
}
@Test(dependsOnMethods = {"doFirstTestBroken"})
public void doSecondTestBroken() {
/**
-
This is NOT 100% to succeed IT could succeed times, if you have
-
Only 1 thread BUT if you have multiple threads, the first thread could run
-
Different TestCase and
-
maxThread take a look!!! if maxThread=1 this will
-
Always work but it is not guaranteed to work with many threads
-
<functionalExecuter maxThread="10" resultFolder="p10${resultFolder}" testclass="${testclassParallel}" />
*/
//Fresh thread will run this piece
Assert.assertEquals("MyValue", new TheLocker().get("myVar"));
}
// --------------------------------------------------------------------------------
// -- DO NOT WORRY, our Shiny new Appvance CI Runner can do this and much more
// -- IF the scripts save the data in the locker you need to move it to a
// -- local variables and back to the locker for the next script
// -----------------------------------------------------------------------------
private Object myVar;
@Test
public void doFirstTestFixed() {
//Somewhere in the script this happends
new TheLocker().put("myVar", "MyValue");
//..
// Now before leaving we put it in a script level variable
myVar = new TheLocker().get("myVar");
}
@Test(dependsOnMethods = {"doFirstTestFixed"})
public void doSecondTestFixed() {
/**
-
As we do not want to change the script, so we retrieve it from local
-
script and add it to the locker of this thread*
*/
new TheLocker().put("myVar", myVar);
//Eventually the script will read it from
Assert.assertEquals("MyValue", new TheLocker().get("myVar"));
}
//------------------------------------------------
//-- For ServiceSuiteBrige & TestDesginer bridge variables
//-- Solution is simpler, you keep the bridge as Java Class variables
//--------------------------------------------------
@Test
public void doFirstServiceSuiteBridgeBroken() throws Exception {
ServiceSuiteBridge bridge = new ServiceSuiteBridge();
bridge.put("myVar", "myValue");
}
@Test(dependsOnMethods = {"doFirstServiceSuiteBridgeBroken"})
public void doSecondServiceSuiteBridgeBroken() throws Exception {
ServiceSuiteBridge bridge = new ServiceSuiteBridge();
//This will aalways fail because brige is new object
Assert.assertEquals("myValue", bridge.getVariable("myVar"));
}
//---------------------------------
// Solution is to have a setup
//---------------------------------
private ServiceSuiteBridge serviceSuiteBridge;
@BeforeClass
public void setup() throws Exception {
serviceSuiteBridge = new ServiceSuiteBridge();
}
@Test
public void doFirstServiceSuiteBridgeFixed() throws Exception {
serviceSuiteBridge.put("myVar", "myValue");
}
@Test(dependsOnMethods = {"doFirstServiceSuiteBridgeFixed"})
public void doSecondServiceSuiteBridgeFixed() throws Exception {
//This is fine as long as doFirstServiceSuiteBridgeFixed do not branch!
//CAREFULL with multiple threads accessing this bridge at the same time
// If you need to branch use same approach as the locker, save variables
//as Java class variables
Assert.assertEquals("myValue", serviceSuiteBridge.getVariable("myVar"))
FunctionalReport
Definition
Qualified Class Name
com.appvance.ci.functional.FunctionalReport
Input Params

credentials File will be similar to this
AWS_ACCESS_KEY_ID=XXX
AWS_SECRET_ACCESS_KEY=XXX
REGION:us-west-2.ec2.amazonaws.com
Ouput
Upon successful ant task, the “reportFolder” will contain a correctly generated report of the execution based on the results inside the “resultsFolder”.
If the bucketBase & credentials are set, the task will find previous executions (if any) inside Amazon AWS to fill the results column.
Ant Task Example
<taskdef name="Report" classname="com.appvance.ci.functional.FunctionalReport">
<classpath refid="CIPath" />
</taskdef>
<Report
projectName="${projectName}"
resultsFolder="${resultFolder}"
reportFolder="${reportFolder}"
environment="${environment}"
credentials="${awsCredentials}"
product="${product}"
buildVersion="${buildVersion}"
bucketBase="${Bucket}" />
Dashboard Git Support
A sample of targets that are added to your build.xml will enable you to run scenarios and AISG and upload the results to a GIT repository.
You will need to provide GIT credentials in a credentials JSON file pointed by the gitCredentials property
Terminate Instance
Terminates an ec2 instance using the instance id coming from the console details file.
Input
{
"instanceId": "i-TheInstanceId",
"url": "http://[some domain goes here]:8080/TMServer/ws/TestNode"
}
Cloud File
This XML file can be encrypted by AIQ or visible in plain text, this file is required to establish a connection with AWS
<?xml version="1.0" encoding="UTF-8"?>
<cloud type="EC2" version="1">
<config-param key="AIQProtocol" value="http"/>
<config-param key="AIQPort" value="8080"/>
<config-param key="AccountName" value="XXX"/>
<config-param key="AWSKey" value="XXX"/>
<config-param key="AWSSecretAcessKey" value="XXX//XX"/>
<config-param key="AMI" value="ami-XX"/>
<config-param key="InstanceType" value="t2.xlarge"/>
<config-param key="KeyPair" value="XX"/>
<config-param key="Security" value="sg-XX"/>
<config-param key="AWSRegion" value="http://us-west-2.ec2.amazonaws.com "/>
<config-param key="vpcId" value="vpc-XX"/>
<config-param key="subnetId" value="subnet-XX"/>
</cloud>
Tag Definition
<target name="TerminateInstance" depends="deps">
<taskdef name="TerminateInstance" classname="com.appvance.ci.TerminateInstance">
<classpath refid="RestClientLibPath" />
</taskdef>
<LaunchInstance
testNodeDetails="${testNodeDetails}"
cloudFile="${cloudFile}"/>
</target>
Output
There is no output since the instance is terminated and all processes are completed.
Launch Instance
This tag can create an ec2 instance from an existing AMI.
Note:
The AMI should have everything configured:
-
AIQ running as a service
-
Database fully installed
Inputs:
Cloud File created with AIQ:
AWS Creds
Note:
These three fields are required.
AWS_ACCESS_KEY_ID=AKIAZ******
AWS_SECRET_ACCESS_KEY=eFK*****ojk/7ZCNb1fk*****Lq
REGION=us-west-2.ec2.amazonaws.com
Cloud File
This xml file can be encrypted by AIQ or visible in plain text
<?xml version="1.0" encoding="UTF-8"?>
<cloud type="EC2" version="1">
<config-param key="AIQProtocol" value="http"/>
<config-param key="AIQPort" value="8080"/>
<config-param key="AccountName" value="XXX"/>
<config-param key="AWSKey" value="XXX"/>
<config-param key="AWSSecretAcessKey" value="********"/>
<config-param key="AMI" value="ami-XXX"/>
<config-param key="InstanceType" value="t2.xlarge"/>
<config-param key="KeyPair" value="XXX"/>
<config-param key="Security" value="sg-XXX"/>
<config-param key="AWSRegion" value="http://us-west-2.ec2.amazonaws.com "/>
<config-param key="vpcId" value="vpc-XXX"/>
<config-param key="subnetId" value="subnet-XXX"/>
</cloud>
Tag Definition
<target name="LaunchInstance" depends="deps">
<taskdef name="LaunchInstance" classname="com.appvance.ci.LaunchInstance">
<classpath refid="RestClientLibPath" />
</taskdef>
<LaunchInstance
aiqCreds="${aiqCreds}"
credentials="${awsCredentials}"
testNodeDetails="${testNodeDetails}"
cloudFile="${cloudFile}"/>
</target>
Output
Updates the ConsoleDetails File:
{
"instanceId": "[auto generated instance ID]",
"url": "http://[auto generated domain]:8080/TMServer/ws/TestNode"
}
UploadReportToS3
Description
Creates a Dashboard report based on Junit results. It can handle integrations in the Junit results
Qualified Class Name:
com.appvance.AISG.UploadReportToS3
Input Params
-
fileConfig="generateRegressionScenario.json"
-
aiqCreds="controller01.json"
-
consoleDetails="consoleDetails.json"
-
logsRemoteFolder="E:/Regression/Logs"
-
projectName="moduleName"
-
outputFolder="Output"
Output
Generates a Scenario and its scripts inside the Output folder
Ant Task Example
<taskdef name="uploadReportToS3" classname="com.appvance.AISG.UploadReportToS3">
<classpath refid="RestClientLibPath" />
</taskdef>
<uploadReportToS3 buildVersion="${buildVersion}" credentials="${awsCredentials}" bucketBase="${Bucket}" executionType="blueprints"
reportFolder="${blueprintResults}" environment="${environment}" product="${product}" />
Last updated: June 26, 2023
If you have any feedback on this topic, please contact us at documentation@appvance.ai
CICD - Dashboards

Dashboards Explained:
The main dashboard looks like the below:

-
The main dashboard will have all the entries for the scenarios and the AISG run for the application under test
-
The top right will have last updated with the date and time
-
Product is a drop-down field that lists out all the products of the dashboard, remember product was a property that was set in build.xml, and based on the provided value, a dashboard would be created

-
The environment is again a drop-down field that lists out all the environments, remember environment is again a property that was set in build.xml, and based on the provided value, dashboards would be created or updated
-
Type Lists out all the test types, like functional scenarios, AISG etc

-
Build id - is again is a value provided in build.xml, it can be driven to be dynamically generated from other tools like Jenkins.
From Jenkins:
buildNumber=Appvance$BUILD_NUMBER
$BUILD_NUMBER is an inbuilt method that creates a build number by itself so every time a pipeline is run, a number would be appended to Appvance (Example: Appvance01)
Within Build.xml:
Below example shows picking today's date as the build number which is defined inside build.xml as shown below:
<property name="buildVersion" value="${TODAY_MY}" />
<tstamp>
<format property="TODAY_MY" pattern="MM-dd-yyyy" locale="en,US" />
</tstamp>
-
Test Name - It is the name of the test scenario name/AISG execution name
-
Date - Date of when the AISG or the test scenario was run
-
Duration - is the pipeline duration
-
Failures - will show the number of script failures for scenarios and the number of validation failures for AISG
-
Success Rate - Success rates in percentage for both Scenarios and AISG
-
Toggle Columns - You have options to toggle columns with Build Id, Product, Environment

Products and Environments:

Environments:

History Results:
Click the icon for each of the entries under History Results to check the history results for a scenario run based on product/Environment/Test Type (AISG or Scenario)

AISG:

-
It has a search option on top so you can search for something specific, like dates, build number, etc
-
ID is the same as the build number
-
Name is the name of the AISG
-
Success rate gives the success rate of the AISG, if there are some validation failures, those can be checked using Validators
-
Start Time - shows when the AISG was started
-
Duration - shows how long the AISG was run
-
SmartTags - shows all the SmartTags that were used in the Green tick box and also the ones that are not used in the orange box. You can click them for a quick view

-
Validations - will list all the successful validations and the failed validations, just like SmartTags, you can open the quick view to list out all the validations that were passed and all the validations that were failed
-
Extractions - will list all the successful and failed extractions and you can use the quick view to see the list of successful extractions and the failed ones
-
Slow requests - Depending on the user entry in the build.xml to filter out the slow responses (like 2000 msecs) - this will list out all the slow requests
-
Failed Requests - Depending on the user entry in the build.xml to filter out all the failed requests (302 and above) - this will list out all the failed requests

The graph shows successful and failed validations, slow and failing requests over a period of time. You can mouse hover on both graphs to get more details.
View:

-
Test Coverage shows all the Unique Actions created, Unique pages found statistics and total scripts created, and an option to download all the JS scripts created from the AISG
Coverage is basically:
The list of unique actions is divided by total actions, The list of unique pages divis ided by total pages found, then both results are summarized and divided into 2, so the coverage is an average of the percentage of actions and pages found, Just those values are considered to generate the final value.
-
AISG section details will show the AISG type (Web or Mobile), AISG duration in minutes, and the number of browsers
-
Below sections - Failed Validations, Failed Requests, Failed Extractions, Successful Validations, Successful Extractions, Slow Requests, SmartTags-All can be expanded and collapsed
-
These sections can be dragged and dropped based on user needs, like dragging all the failed sections to one side and all the successful sections to the other side, even if the browser is refreshed, these sections stay as the user made changes
-
Reset to Defaults can be used to re-arrange the sections as default options
-
Each of the sections will have a Filter option to filter out based on the needs

-
Under failed requests, you can expand a particular request and copy the generated script which can be pasted in JS Edit & Play to be replayed back. The same applies to slow requests as well.
-
The entire report can be downloaded as pdf using Save report as PDFon top of the page next to the Last updated
Scenarios:
-
Just like a AISG, a search option is available to filter out the entries
-
ID is the build-id
-
NameThen is the scenario name
-
Type shows if it is a functional, performance, or bulk scenario type
-
Initial Time - This shows when the scenario started executing
-
Success/Failure - This shows the list of success test cases and failed test cases, you can click the quick view to see the full list
-
Success percentage - This shows the success percentage
-
Duration - This shows the duration of the scenario run from AIQ. When scenarios are run in parallel, the duration will show the duration of the scenario which took longer. When scenarios are run in sequence, the duration will show the duration of all the scenarios summed up.

You will also be able to view the graphs of history on the success and failure of the scenarios over a period of time
View:

-
On top, it lists out the total Failures, Successes, and Success Percentages
-
Failed test case detailed section lists all the test cases that were failed and a one-line Failure reason with the importance set in the Scenario Editor test case section
-
You can expand each of the test cases to look at more details on the failure like Steps, script and resources to download, Failure snapshot, Instant replay to download, Failure snapshot of step highlighted, Trace, and error logs

-
Each of the above details can be expanded to look into more details


-
The success test case will have the same details excluding the failed screen-shots and failed error logs
-
Previous 5 Execution Pass or Fail - This will give details about a test case consistency over the last 5 executions
Min Actions and Min Pages:
This is an optional field, but if you want to enable it on the dashboards, you should make the following changes.
Based on the entries from the user, min pages, and min actions, the build would be marked as success or failure.

In order to have these changes on dashboards, please modify the build.xml as follows:
All these parameters are required in order to fully display this feature.
<property name="minSuccessRate" value="95" /> //minSuccessRate to skip set to “0“ zero
<property name="minActions" value="40" /> // set the minimum expected actions in the AISG, minActions to skip set to -1
<property name="minPages" value="30" /> // set the minimum expected pages in the AISG, minPages to skip set to -1

This would be used in the below ant tags.
-
createBlueprint
-
consumeBlueprint
-
checkBlueprintResults
Last updated: August 14, 2023
If you have any feedback on this topic, please contact us at documentation@appvance.ai
CI/CD: Optimize Disk Space on AIQ Controller and Test Nodes
CI/CD: Optimize Disk Space on AIQ Controller and Test Nodes
Use this article when CI/CD activity or frequent AIQ executions consume disk space on the Controller or Test Nodes. Clean up only approved files and keep execution evidence required for reporting or troubleshooting.
Common disk consumers
- Execution artifacts, screenshots, videos, logs, and downloaded files.
- Browser caches, temporary folders, package-manager caches, and build outputs.
- Old installers, archived reports, and unused test assets.
- Database backups or exports stored on the same host.
Safe cleanup workflow
- Measure disk usage before deleting anything.
- Confirm the retention requirement for evidence, reports, logs, and backups.
- Remove only files that match the approved cleanup target and date range.
- Automate cleanup through CI/CD or scheduled maintenance only after the manual process is verified.
- Run a small AIQ execution afterward to confirm the node and controller still operate normally.
Warning: Do not delete active execution folders, current logs needed for troubleshooting, or database files unless the maintenance plan explicitly covers them.
Last updated: October 8, 2026
CI/CD FAQ for AIQ Integrations
CI/CD FAQ for AIQ Integrations
Last reviewed: September 21, 2026
This FAQ summarizes common questions for running AIQ tests from CI/CD pipelines. Use current integrations such as Jenkins, GitHub Actions, and command-line execution.
When to use this guidance
- You are wiring AIQ tests into a build or release pipeline.
- You need to pass parameters, trigger executions, and collect results.
- You are replacing older CI references with current terminology.
Recommended approach
- Decide which pipeline system will trigger AIQ and what environment it targets.
- Store AIQ credentials or tokens in the CI/CD secret store.
- Pass project, scenario, dataset, environment, and threshold parameters explicitly.
- Publish execution IDs, reports, and failure summaries back to the pipeline.
- Use exit codes or quality gates so failed tests block releases when appropriate.
Note: Retire duplicate CI pages when they repeat this FAQ without adding tool-specific steps.
Last updated: September 21, 2026
If you have feedback on this topic, contact documentation@appvance.ai.
SoapUI Integration
SoapUI Integration with AIQ
Recommended guidance
SoapUI integration should be treated as legacy or customer-specific unless it is actively required. For current API testing, prefer Service Suite when it can cover the same requests, assertions, data handling, and reporting.
Integration review points
- SoapUI project location, version, plugins, dependencies, and execution host.
- Endpoint configuration, authentication, certificates, proxy, and firewall rules.
- Data sources, DPL mappings, assertions, and expected artifacts.
- Pass/fail mapping between SoapUI results and AIQ execution status.
Maintenance guidance
- Keep SoapUI assets in version control with clear ownership.
- Do not store secrets inside project files or shared logs.
- Run small validation tests before scheduled or high-volume execution.
- Retire or consolidate redundant SoapUI content when Service Suite replaces it.
Last updated: October 7, 2026
Run SoapUI as a Functional Test in AIQ
Recommended guidance
Run SoapUI as a functional test in AIQ when existing SoapUI projects still provide required validation. Keep the integration controlled and consider migration to Service Suite for new API coverage.
Before execution
- Confirm the SoapUI project file, version, dependencies, endpoint, environment, and credentials.
- Use secure placeholders or approved secret storage for sensitive values.
- Validate network, proxy, certificate, and firewall access.
- Define expected assertions, return codes, and artifacts.
Review workflow
- Run the SoapUI test independently before AIQ execution.
- Run a small AIQ wrapper and confirm output handling.
- Review logs and generated reports for the first meaningful failure.
- Document legacy dependency and replacement options if applicable.
Last updated: October 7, 2026
Run SoapUI as a Performance Test in AIQ
Recommended guidance
Use SoapUI for performance testing only when the SoapUI project is thread-safe, data-ready, and still required by the customer workflow. For new API performance tests, evaluate Service Suite or native AIQ performance assets first.
Performance checks
- Thread safety, setup and teardown behavior, and shared state inside the SoapUI project.
- Data uniqueness, account pools, cleanup, and endpoint rate limits.
- Load generator CPU, memory, network, and artifact storage.
- TPS, response-time, error-rate, ramp-up, and duration targets.
Validation workflow
- Run one thread first and verify assertions and cleanup.
- Increase concurrency gradually while monitoring AIQ and the target system.
- Review whether bottlenecks come from SoapUI, the load generator, or the application.
- Document results and any migration plan away from legacy SoapUI assets.
Last updated: October 7, 2026
Run Data-Enabled SoapUI Tests in AIQ
Recommended guidance
Run data-enabled SoapUI tests in AIQ only when the SoapUI asset remains required. For new API automation, consider whether Service Suite and DPLs can provide the same coverage with fewer legacy dependencies.
Before running
- Confirm SoapUI version, project file, data source, environment, endpoint, and credentials.
- Validate the data file or DPL values before execution.
- Check network, proxy, certificate, and firewall access from the AIQ host.
- Define expected pass/fail behavior for each data row.
Validation workflow
- Run the SoapUI project with a small sample outside AIQ.
- Run the AIQ wrapper with the same sample.
- Review failures for malformed data, exhausted rows, endpoint issues, or assertion defects.
- Document migration options if Service Suite can replace the SoapUI dependency.
Last updated: October 7, 2026
How to query and validate Splunk logs in Service Suite
Overview
The splunk.js library provides a reusable integration layer between AIQ Service Suite and Splunk. It allows test scripts to query Splunk indexes using SPL (Search Processing Language), filter and retrieve log data, and assert on the results as part of a functional or end-to-end test validation flow.
Common use cases include:
- Asserting that an audit log event was written after a user action (e.g. login, purchase, payment)
- Validating specific field values in application logs (e.g. transaction status, HTTP response codes)
- Checking that no ERROR or FATAL log entries appeared after a critical scenario
- Waiting for async events to appear in Splunk before continuing a test
- Extracting values from Splunk and storing them in TheLocker for downstream test cases
Prerequisite: The AIQ TestNode executing the script must have network access to the Splunk REST API on port 8089. Verify security group / firewall rules before using this library.
Setup
1. Add splunk.js to your repository
splunk.js file: splunk.js
Upload splunk.js to your scenario repository. A recommended location is a shared folder so it can be reused across multiple scenarios:
2. Configure DPL variables
Never hardcode Splunk credentials in scripts. Add the following variables to your DPL (Data Provider Library) or scenario data file:
DPL Variable | Description | Example |
|---|---|---|
| Hostname or IP of the Splunk instance |
|
| Splunk service account Bearer token |
|
To generate a Bearer token in Splunk: Settings → Tokens → New Token. Use a dedicated service account, not a personal user.
Do not commit credentials to the repository. Always use DPL variables or TheLocker for sensitive values.
3. Include the library in your script
Use the Service Suite include directive at the top of any script that needs Splunk access. The {ds} token resolves to the root of your scenario's data source directory at runtime:
/** * @aiq.servicesworkbench */include('{ds}/shared/splunk.js');
Initialization
Call splunk.init() once at the beginning of each script before making any queries:
splunk.init({ host: $SPLUNK_HOST, // DPL variable port: 8089, token: $SPLUNK_TOKEN, // DPL variable defaultIndex: 'app_logs', // used when no index is specified in SPL defaultEarliest: '-15m', // default look-back window for all searches});
Full init options
Option | Default | Description |
|---|---|---|
|
| Splunk hostname or IP |
|
| Splunk REST API port |
|
|
|
|
| Bearer token (preferred auth method) |
|
| Basic auth username (alternative to token) |
|
| Basic auth password (alternative to token) |
|
| Fallback Splunk index |
|
| Default time window start |
|
| Default time window end |
|
| Max rows returned per search |
|
| How often to poll for job completion (ms) |
|
| Max poll attempts before timeout (30 × 2s = 60s) |
How HTTP calls work internally
The library uses native Service Suite HTTP commands throughout. No browser-style fetch or external modules are used.
Operation | Service Suite command used |
|---|---|
Submit search job |
|
Poll job status |
|
Fetch results |
|
Per-request auth header |
|
Read response body |
|
Read HTTP status code |
|
Sleep between polls |
|
Base64 encode (Basic auth) |
|
API Reference
Query methods
Method | Returns | Description |
|---|---|---|
|
| Run any SPL query and return all result rows |
|
| Return only the first result row, or null if none |
|
| Return the number of matching events |
|
| Return a single field value from the first row |
|
| Return multiple field values from the first row |
|
| Return one field's value across all rows |
|
| Poll until at least one matching event appears |
All query methods accept an optional opts object: { earliest, latest, count }. waitForEvent also accepts pollMs and maxAttempts.
Assertion methods
Method | Description |
|---|---|
| Fails if row count ≠ n |
| Fails if fewer than n rows returned |
| Fails if the field on row[0] ≠ expected value |
| Fails if the field on row[0] does not contain the substring |
| Fails if any ERROR or FATAL entries exist in the time window |
| Combined search + assertAtLeast(1) in one call |
Utility methods
Method | Description |
|---|---|
| Store a field value from row[0] into TheLocker for downstream scripts via |
Usage Examples
Example 1 — Assert a login audit event was written
After executing a login API call, verify that Splunk captured the corresponding audit entry:
/** * @aiq.servicesworkbench */include('{ds}/shared/splunk.js');splunk.init({ host: $SPLUNK_HOST, token: $SPLUNK_TOKEN, defaultIndex: 'audit',});var testUser = $TEST_USERNAME;splunk.assertEventOccurred( 'index=audit action=login userId="' + testUser + '" result=SUCCESS', 'Login audit event must appear in Splunk after successful authentication', { earliest: '-5m' });log('✓ Login audit event confirmed in Splunk');
Example 2 — Validate field values on a specific transaction
Retrieve a transaction log by its ID and assert that its status and currency fields are correct:
/** * @aiq.servicesworkbench */include('{ds}/shared/splunk.js');splunk.init({ host: $SPLUNK_HOST, token: $SPLUNK_TOKEN,});var txnId = _retrieve('LAST_TXN_ID'); // value stored by an upstream test casevar rows = splunk.search( 'index=payments txnId="' + txnId + '" | head 1', { earliest: '-10m' });splunk.assertAtLeast(rows, 1, 'Transaction ' + txnId + ' must appear in Splunk');splunk.assertFieldEquals(rows, 'status', 'APPROVED', 'Transaction must be APPROVED');splunk.assertFieldEquals(rows, 'currency', 'USD', 'Currency must be USD');log('✓ Transaction ' + txnId + ' validated — status=APPROVED, currency=USD');
Example 3 — No-error assertion after a critical flow
After running a checkout scenario, assert that no ERROR or FATAL entries were written to the application log index during the test window:
/** * @aiq.servicesworkbench */include('{ds}/shared/splunk.js');splunk.init({ host: $SPLUNK_HOST, token: $SPLUNK_TOKEN, defaultIndex: 'app_logs',});splunk.assertNoErrors('app_logs', '-10m', 'No ERROR or FATAL log entries expected after checkout flow');log('✓ No errors found in Splunk after checkout flow');
Example 4 — Wait for an async event
Some flows write to Splunk with a delay (e.g. payment processors, message queues). Use waitForEvent to poll rather than failing immediately:
/** * @aiq.servicesworkbench */include('{ds}/shared/splunk.js');splunk.init({ host: $SPLUNK_HOST, token: $SPLUNK_TOKEN,});var txnId = _retrieve('LAST_TXN_ID');// Poll every 3 seconds, up to 10 times (30s total)var rows = splunk.waitForEvent( 'index=payments event=PAYMENT_CONFIRMED txnId="' + txnId + '"', { earliest: '-5m', pollMs: 3000, maxAttempts: 10 });splunk.assertFieldEquals(rows, 'processorCode', '00', 'Processor must return approval code 00');log('✓ Async payment confirmation found in Splunk');
Example 5 — Extract a value and store it in TheLocker
Retrieve a generated value from Splunk and make it available to downstream test cases:
/** * @aiq.servicesworkbench */include('{ds}/shared/splunk.js');splunk.init({ host: $SPLUNK_HOST, token: $SPLUNK_TOKEN,});var testUser = $TEST_USERNAME;var rows = splunk.search( 'index=sessions userId="' + testUser + '" | sort -_time | head 1', { earliest: '-5m' });splunk.storeResult(rows, 'sessionId', 'SPLUNK_SESSION_ID');// Downstream scripts: var sid = _retrieve('SPLUNK_SESSION_ID');log('✓ Session ID extracted from Splunk and stored in TheLocker');
Example 6 — SPL aggregation: validate counts across all hosts
Use a | stats pipe to check that no host served 5xx errors on a specific endpoint:
/** * @aiq.servicesworkbench */include('{ds}/shared/splunk.js');splunk.init({ host: $SPLUNK_HOST, token: $SPLUNK_TOKEN,});var rows = splunk.search( 'index=api endpoint="/checkout" | stats count(eval(status>=500)) as server_errors by host | where server_errors=0', { earliest: '-30m' });log('✓ ' + rows.length + ' host(s) had zero 5xx errors on /checkout in the last 30 minutes');
Example 7 — getAllValues: check for unexpected HTTP status codes
Retrieve all HTTP status codes from recent API calls and fail if any 5xx appears:
/** * @aiq.servicesworkbench */include('{ds}/shared/splunk.js');splunk.init({ host: $SPLUNK_HOST, token: $SPLUNK_TOKEN,});var statuses = splunk.getAllValues( 'index=api endpoint="/api/order" | head 200', 'status', { earliest: '-5m' });var badStatuses = statuses.filter(function(s) { return parseInt(s) >= 500;});assert(badStatuses.length === 0, 'Found ' + badStatuses.length + ' 5xx response(s) on /api/order: ' + badStatuses.join(', '));log('✓ All ' + statuses.length + ' /api/order responses were below 500');
Error handling
All library methods throw a descriptive error on failure. These surface directly in the AIQ test report with context including the HTTP status code, Splunk SID, field name, or assertion mismatch. No additional try/catch is required — let errors propagate so the scenario fails with a clear message.
Common issues
Symptom | Likely cause | Fix |
|---|---|---|
HTTP 401 on job creation | Invalid or expired token | Regenerate the token in Splunk Settings → Tokens |
Connection refused / timeout | TestNode cannot reach Splunk port 8089 | Check EC2 security groups and firewall rules |
| Log ingestion lag — event not yet indexed | Use |
Search times out | Broad query or slow Splunk cluster | Narrow the SPL time window or add more filters; increase |
Field not found error | Field name differs from what Splunk extracts | Run the same SPL in the Splunk UI and verify field names in the results table |
Best practices
- Always use DPL variables for
SPLUNK_HOSTandSPLUNK_TOKEN. Never hardcode connection details in scripts. - Keep time windows short (e.g.
-5mor-10m) to keep searches fast and assertions specific to the current test run. - Use
| head Nin SPL to cap result sizes when you only need a few rows. - Prefer
waitForEventover a fixed sleep for async flows — it stops as soon as the event appears. - Use
assertNoErrorsas a blanket post-scenario health check in addition to specific field assertions. - Use
storeResultto pass Splunk values into TheLocker rather than re-querying Splunk in every downstream script. - Call
splunk.init()once per script at the top, before any othersplunk.*call.
Integration with Datadog (APM)
Datadog is a supported third-party APM integration with AIQ. Datadog is an observability service for cloud-scale applications, providing monitoring of servers, databases, tools, and services, through a SaaS-based data analytics platform.
Datadog Setup
- Login to your Datadog Dashboard at: https://app.datadoghq.com/dashboard/
- Sign in with your credentials.
- Navigate to a dashboard that you want to integrate with AIQ and select the duration range using the Unix timestamps option as in

4. Copy the URL of the dashboard.
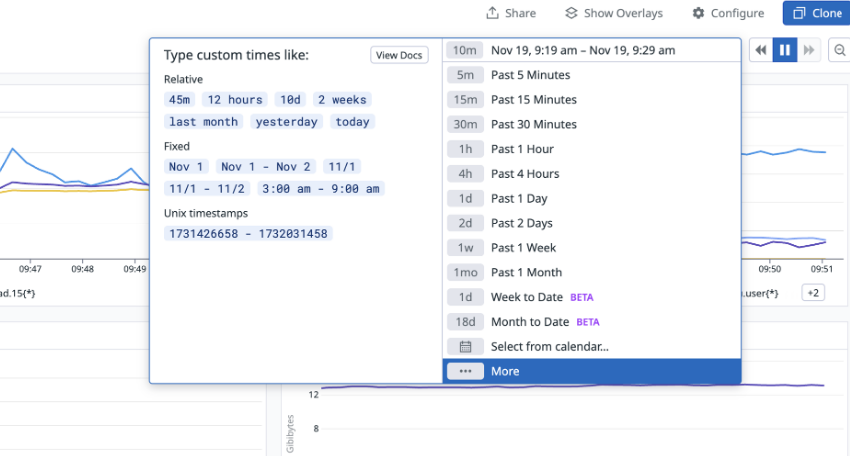
AIQ Setup
Test the Integration
- Log in to AIQ and go to the reports section. Look for a past scenario with logged detailed executions.
- Click Analyze link and select the Testcase Executions report in the drop down.

- Click on one of the triangles in the graph to show the details of that execution. Remember the time that is shown.
Example: Datadog execution details at 4:11:59 PM.
- Below the graph you will find a button with a label matching the name you gave to the APM integration. When you click this button it will open a new window with the DataDog report between the time specified in the APM integration settings.
Example: 10 minutes, should show the report between 4:06pm and 4:16pm.