.
# Using Appvance AIQ with Docker/Containers
### What is Docker?
Docker is a container management service that allows developers to build applications, ship them into containers and run them anywhere.
### What is a container?
Is the encapsulation os an application with it dependencies, appears to be a lightweight form of virtual machine (VMs).
### Facts about containers
- Share resources with the host OS (more efficient).
- Can be started and stopped in a fraction of the time a virtual machine would do it.
- Incurs into little to no overhead compared to applications running natively on the host OS.
- Allows changes in the running environment easily.
- A developer can run dozens of containers at the same time, making it possible to emulate a production-ready distributed system.
- Allows run complex applications without needing to spend hours of configuration and installation issues or worrying about the changes required for their system.
- This concept is not new, it's an old concept in UNIX systems, they had the chroot command, there have been different implementations across the time and different distributions. coming to what we are discussing today.
### Docker Hub
Get started by downloading Docker Desktop, and learn how you can build, tag and share a sample image on Hub, please take a look to https://hub.docker.com/, create an account and log in, you will find an enormous number of public container images for download, avoiding duplicates work already done by others; in our case could use one of those images as the base to create a new one for AIQ.
Docker philosophy "Batteries included but replaceable", meaning that a complete solution would be provided, but parts could be swapped out.
One of the biggest use cases and strongest drivers behind the uptake of containers are microservices.
### Installing Docker
The official way to install docker as below.
$ culr http://get.docker.com > /tmp/install.sh
A good install practice is checking the changes to be performed, do it as below.
$ cat /tmp/install.sh
Change the access permission for /tmp/install.sh.
$ chmod +x /tmp/install.sh
Issue the script file as below
$ /tmp/install.sh
A few checks, then install docker using the appropriate package for your system, this documentation does not include the installation procedure for Windows platforms, there are a lot of considerations beginning by Docker is native for Unix alike systems and there are not strong implementations and experiences in Windows.
In case of Red Hat based distributions, it is recommended you run SELLinux in permissive mode, which will log rather than enforce errors, check mode by issuing as below.
$ sestatus
If the current mode is "enforcing" then change into the permissive mode as follows.
$ setenforce 0
### Additional tasks
As Docker is a privileged binary, it will need to prefix commands with sudo to avoid that add the current user to the docker group as follows.
$ sudo usermod -aG docker
The last command is for Ubuntu but would be similar for other Linux distributions, now restart the Docker service by performing.
$ sudo service docker restart
In order to test that the Docker has been properly installed run the command as follows.
$ docker run debian echo "hello world"
Some verbosity will be obtained, the last line must be "hello world"
### Building images from Dockerfiles
Dockerfile is a plain text file containing instructions to create an image, a Docker image is a file, comprised of multiple layers, used to execute code in a Docker container.
Most common instructions are:
- FROM, specify the base image to use, the format for this instruction is "FROM <image>:<version>" latest version will be used if no version is specified e.g. (FROM ubuntu:18.04)
- WORKDIR, specify the default folder in the container.
- ENV, specify environmental variables in pairs e.g. (ENV folderTemp /tmp)
- LABEL, customized labels e.g. (version=1.0)
- EXPOSE, informs Docker that the container listens on the specified network ports at runtime e.g. (EXPOSE 80/tcp)
- USER, sets the user name (or UID) and optionally the user group (or GID) to use when running the image and for anyRUN,CMDandENTRYPOINTinstructions that follow it in theDockerfile e.g. (USER patrick)
- VOLUME, creates a mount point with the specified name and marks it as holding externally mounted volumes from native host or other containers, these volumes will persist the data.
- COPY, This copies one or many local files or folders into the destination within your Docker image e.g. (COPY Gemfile Gemfile.lock ./)
- ADD, same that COPY but additionally If <source> is a local tar archive in a recognized compression format, then it is automatically unpacked as a directory into the Docker image. e.g. (ADD rootfs.tar.xz /)
- RUN, executes the command(s) that you give in a new layer and creates a new image. This is mainly used for installing a new package, e.g. (RUN apt-get update && apt-get install -y apache2)
- ENTRYPOINT, Entrypoint sets the command and parameters that will be executed first when a container is run, e.g. (ENTRYPOINT \["/usr/sbin/apache2ctl", "-D", "FOREGROUND"\]
- CMD, The main purpose of a CMD (Dockerfiles) / command (Docker Compose files) is to provide defaults when executing a container. These will be executed after the entrypoint.
There are more instructions and details over this stuff, but this document is not intended to be a Docker course but the necessary tools to implement AIQ in containers.
### Best Practices
- Needs to be easy to destroy.
- One service per container.
- Avoid undesired files by declaring them in .dockerignore file.
- As few layers as possible.
- Use multiline in instructions for readability and layers reduction.
- Have the more arguments as possible.
- Avoid installing unnecessary packages.
- Adding labels that help and guide the usage.
---
Last updated: May 17, 2023
If you have any feedback on this topic, please contact us at
# GitHub Action
[https://docs.github.com/en/actions/automating-builds-and-tests/building-and-testing-java-with-ant](https://docs.github.com/en/actions/automating-builds-and-tests/building-and-testing-java-with-ant)
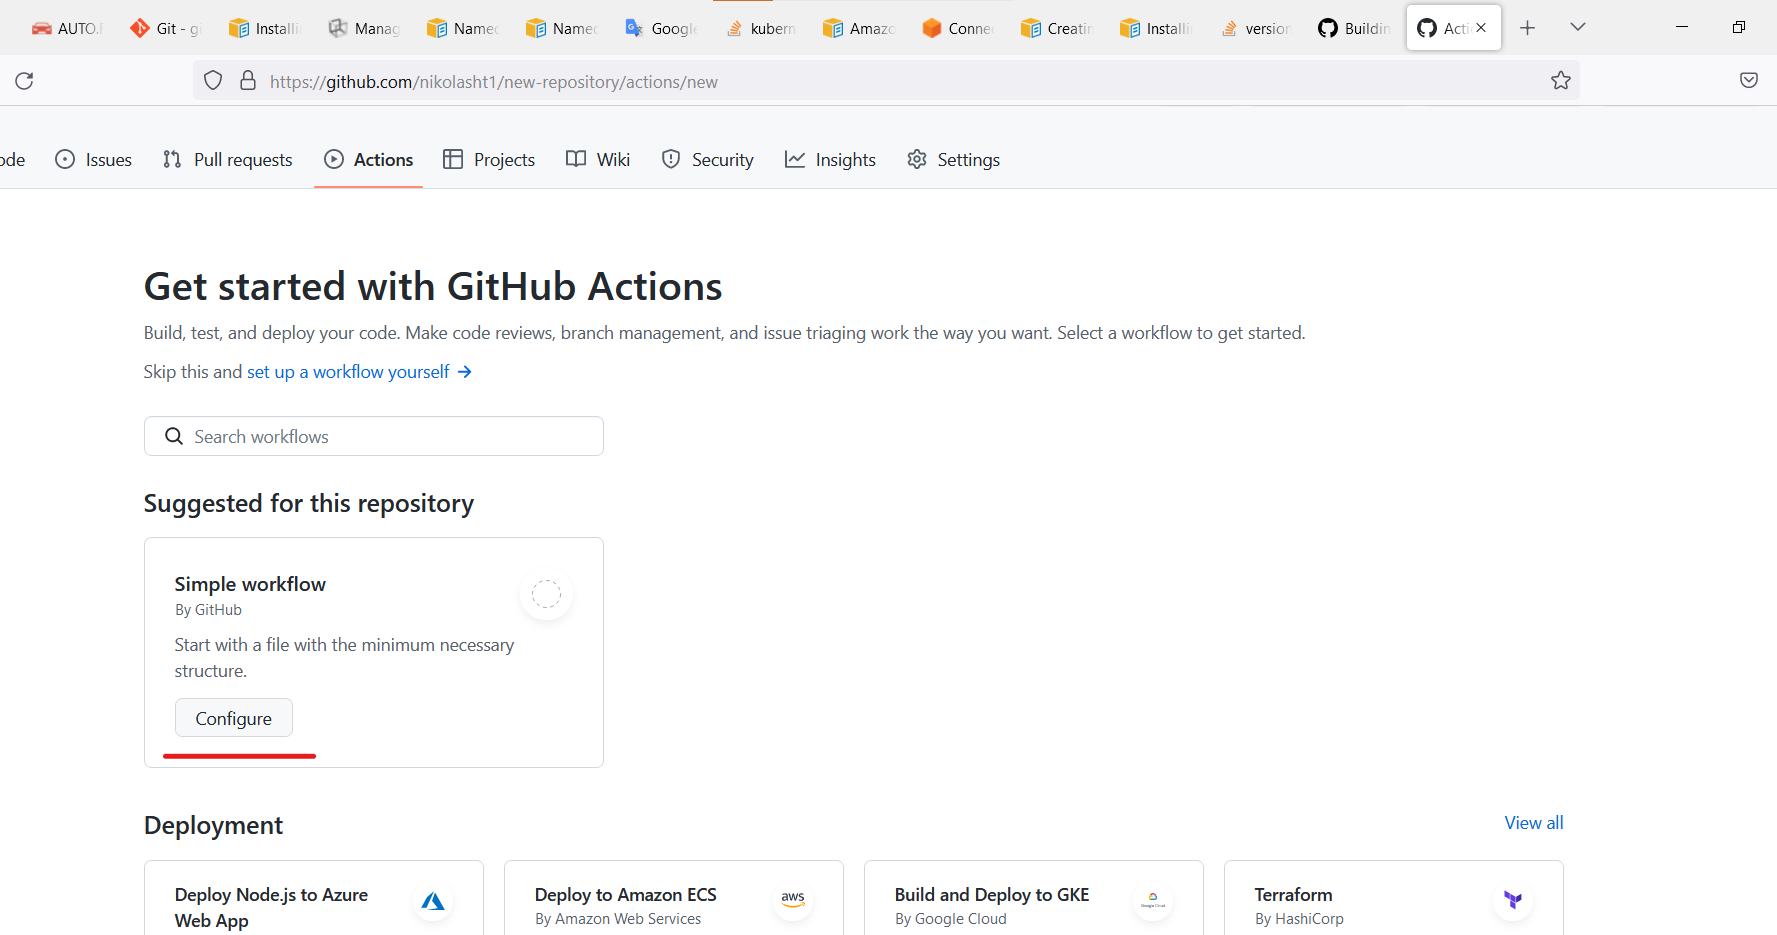
You must be authorized on GitHub with the public key.
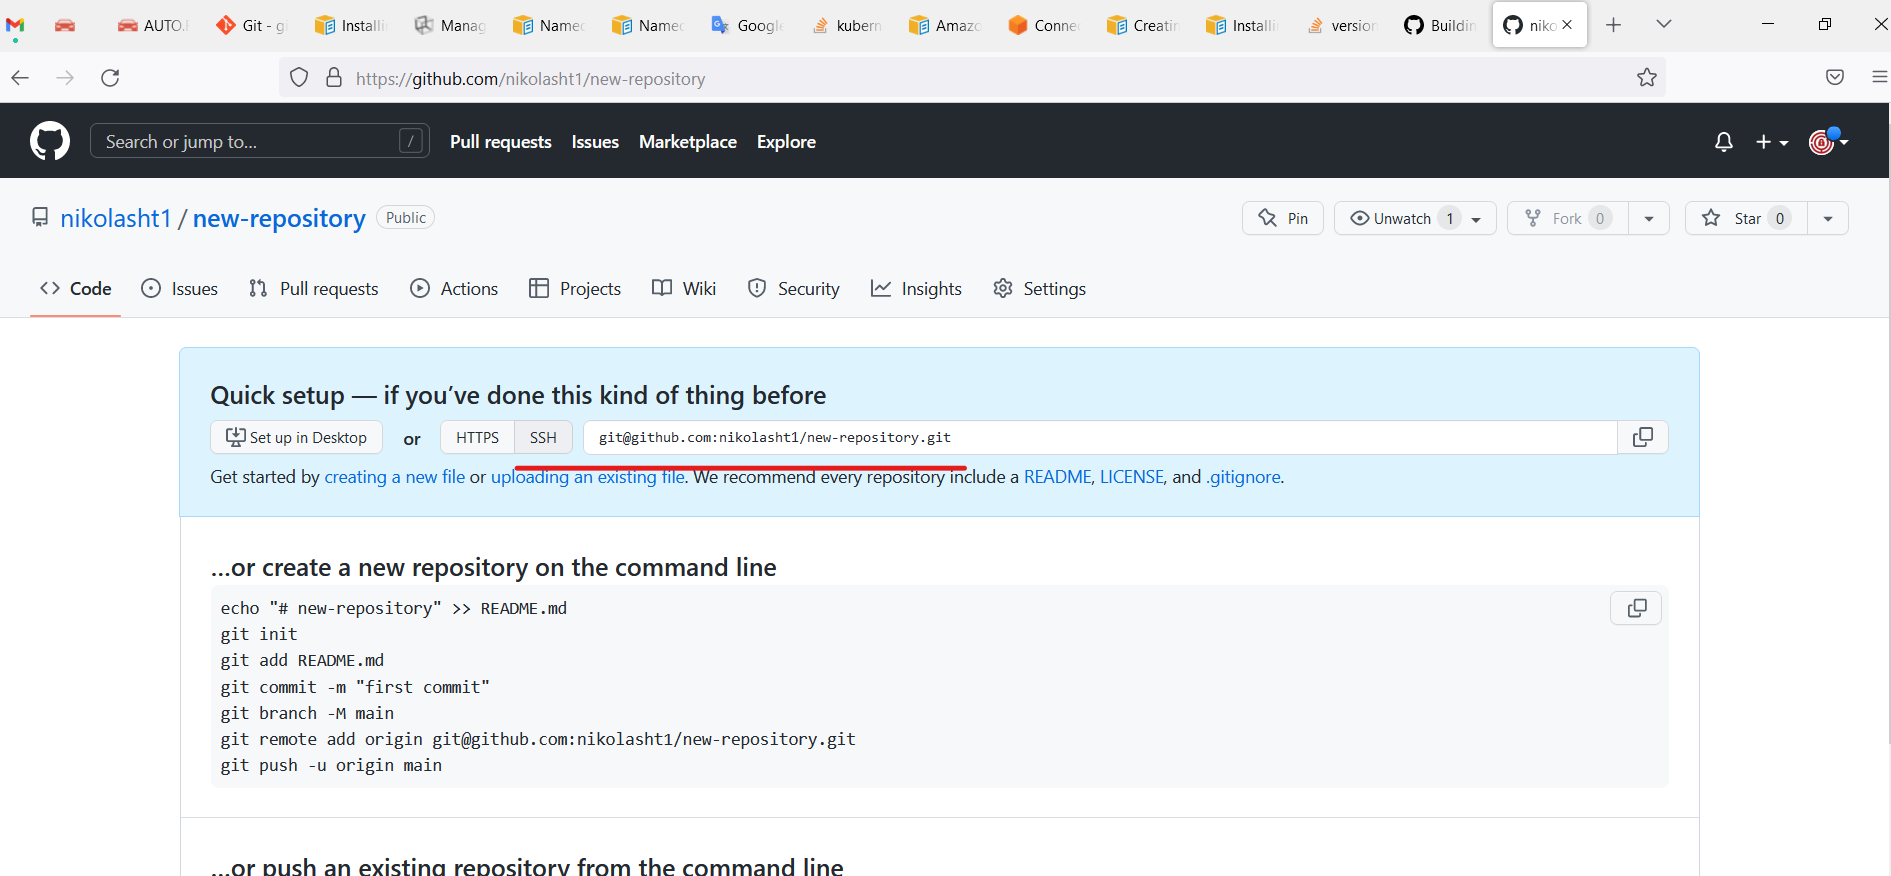
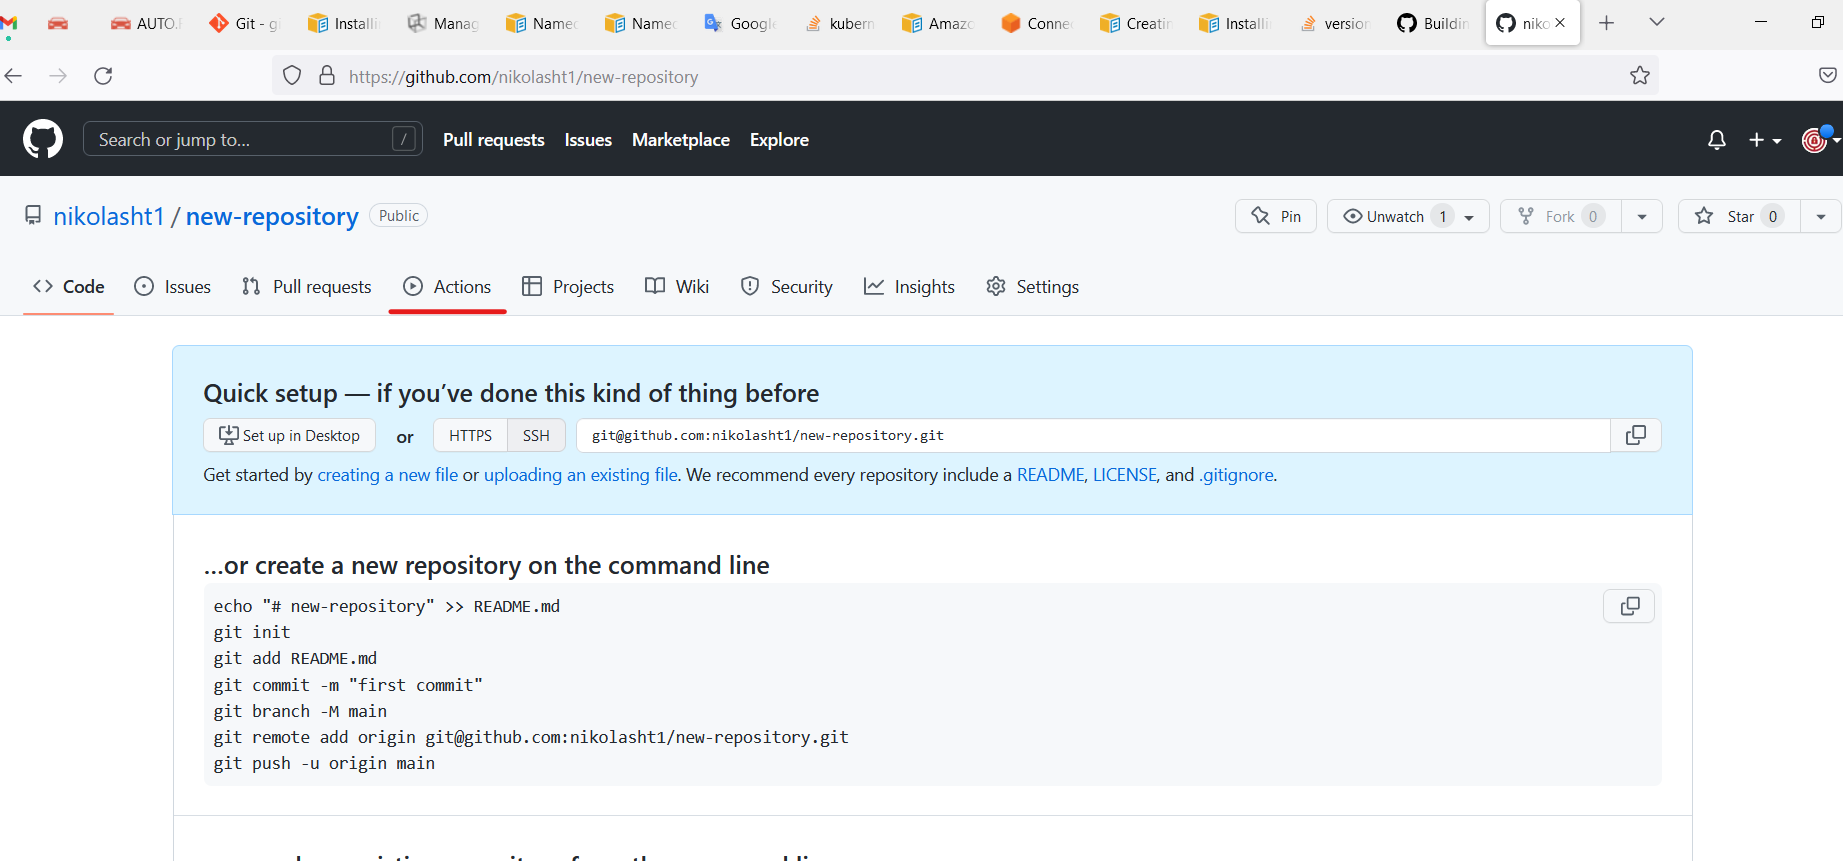
Create a new repository.
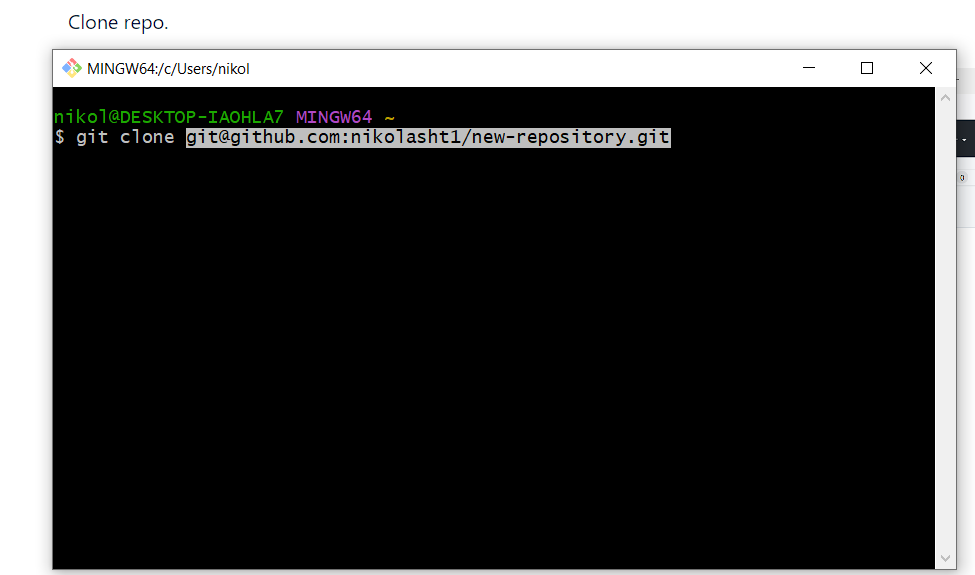
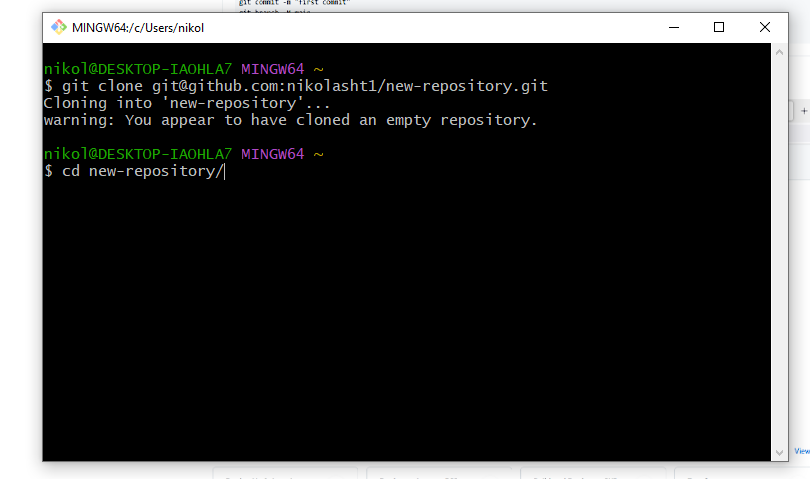
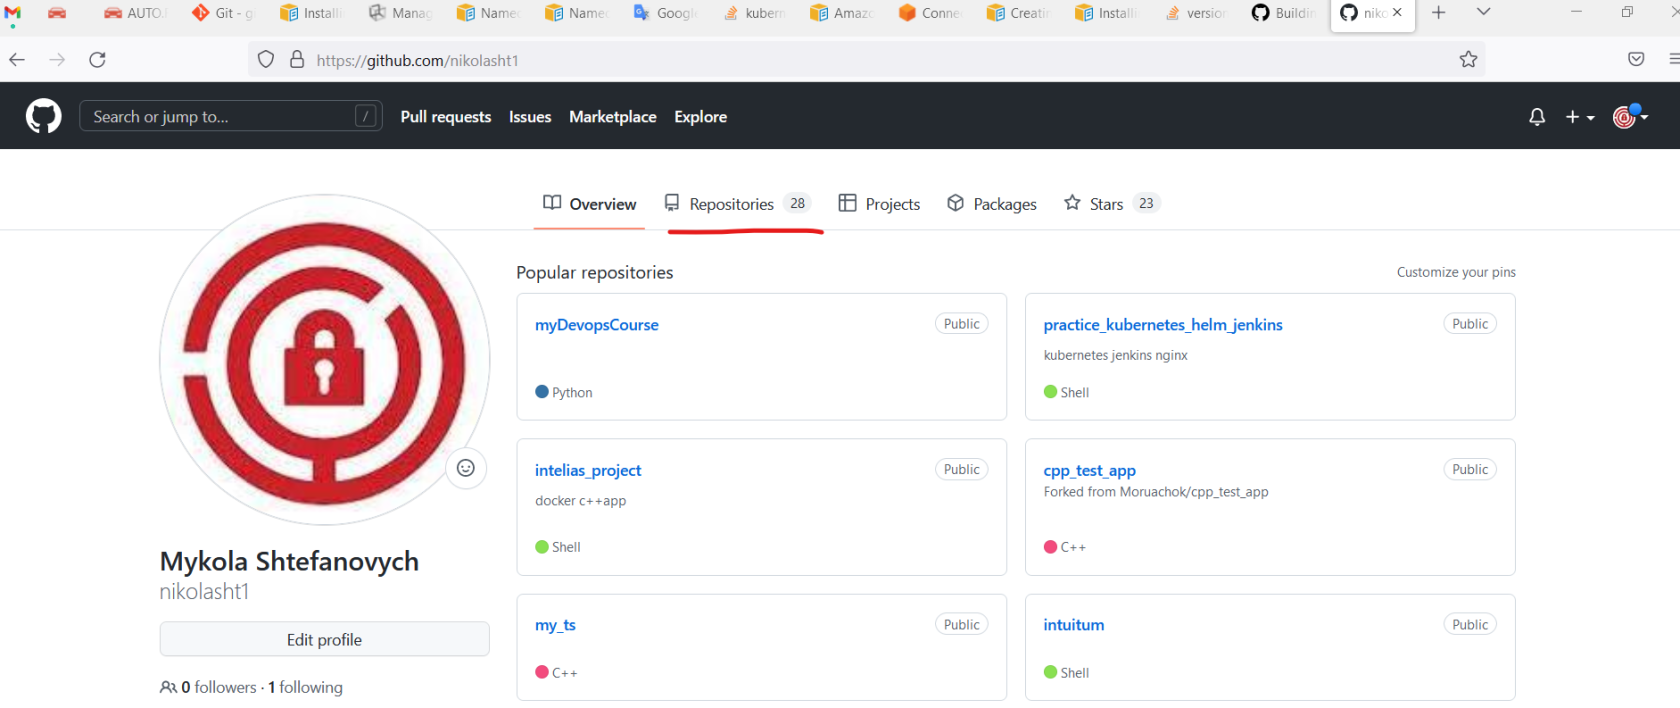 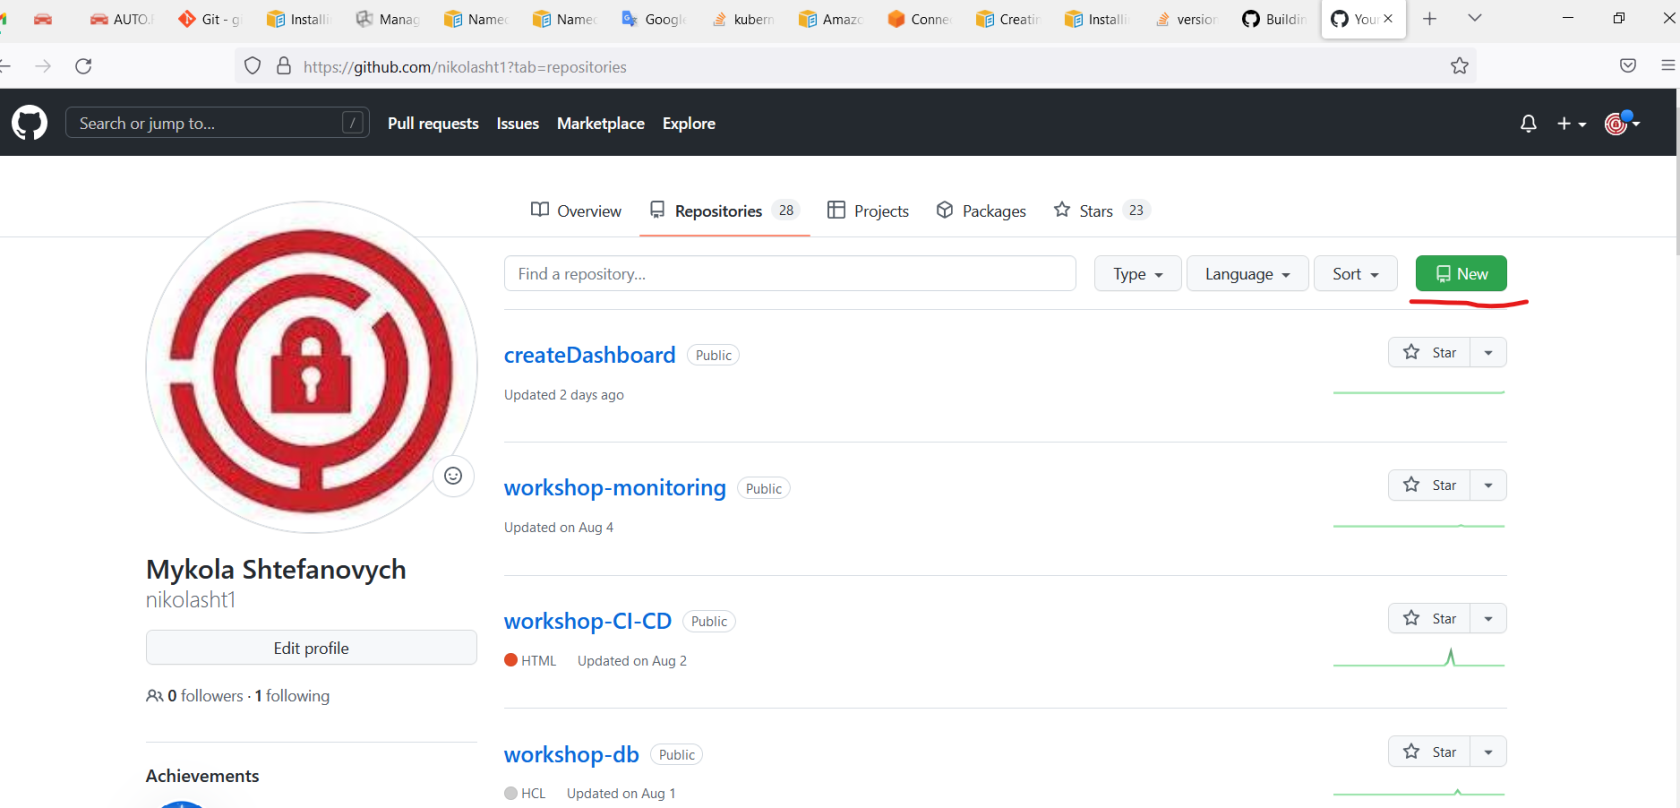 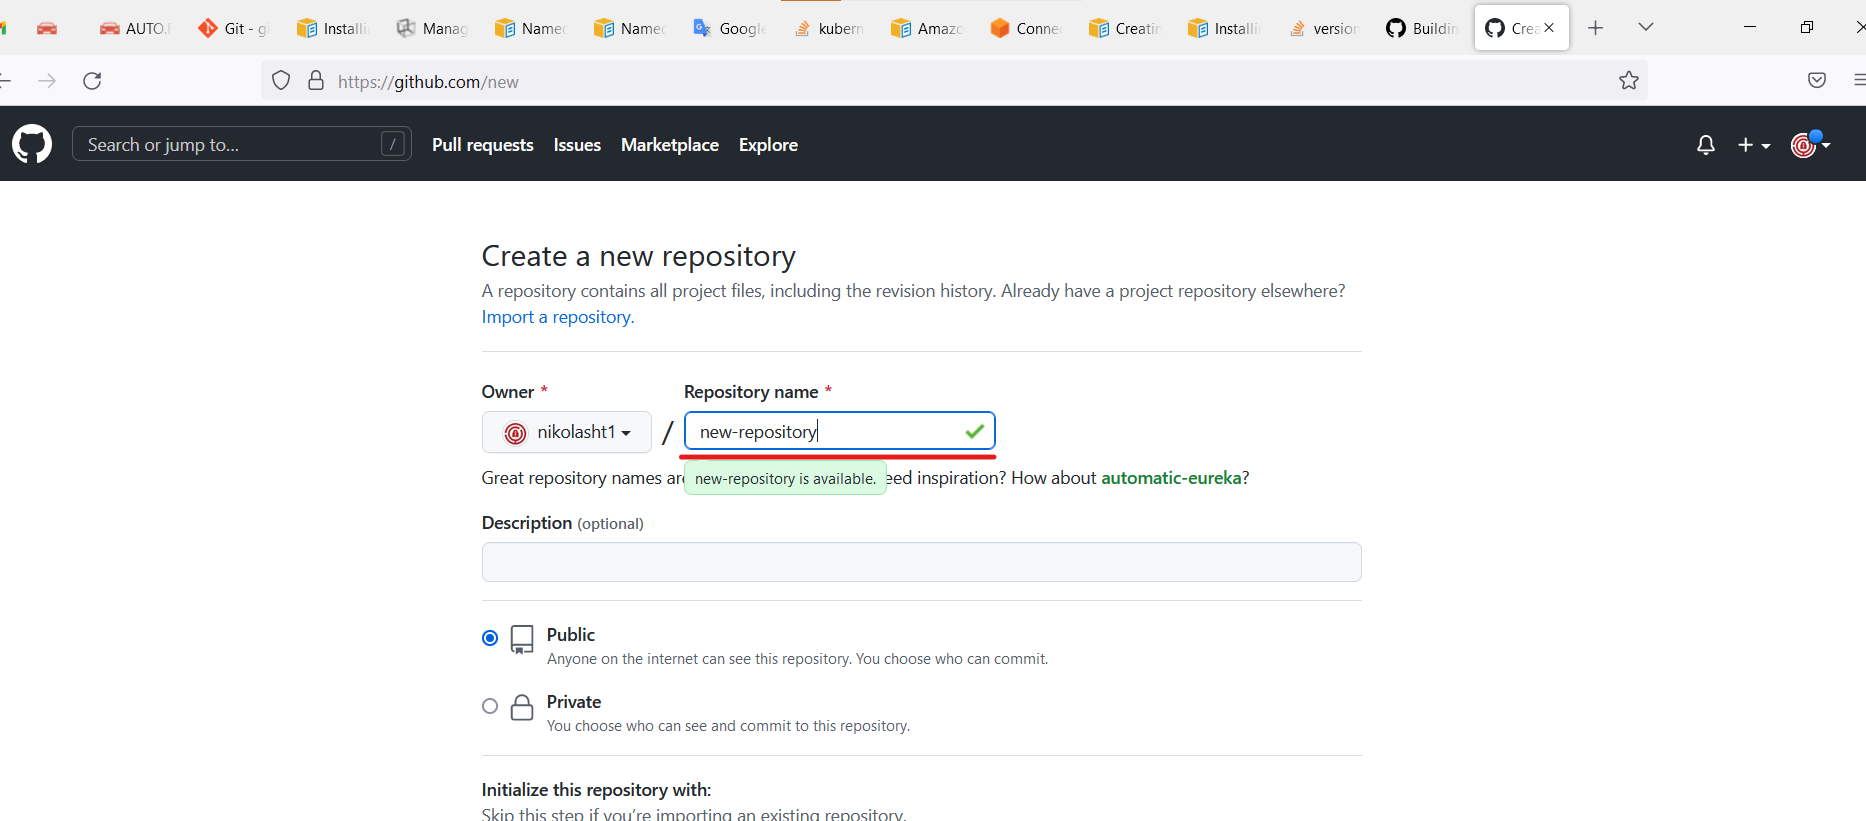 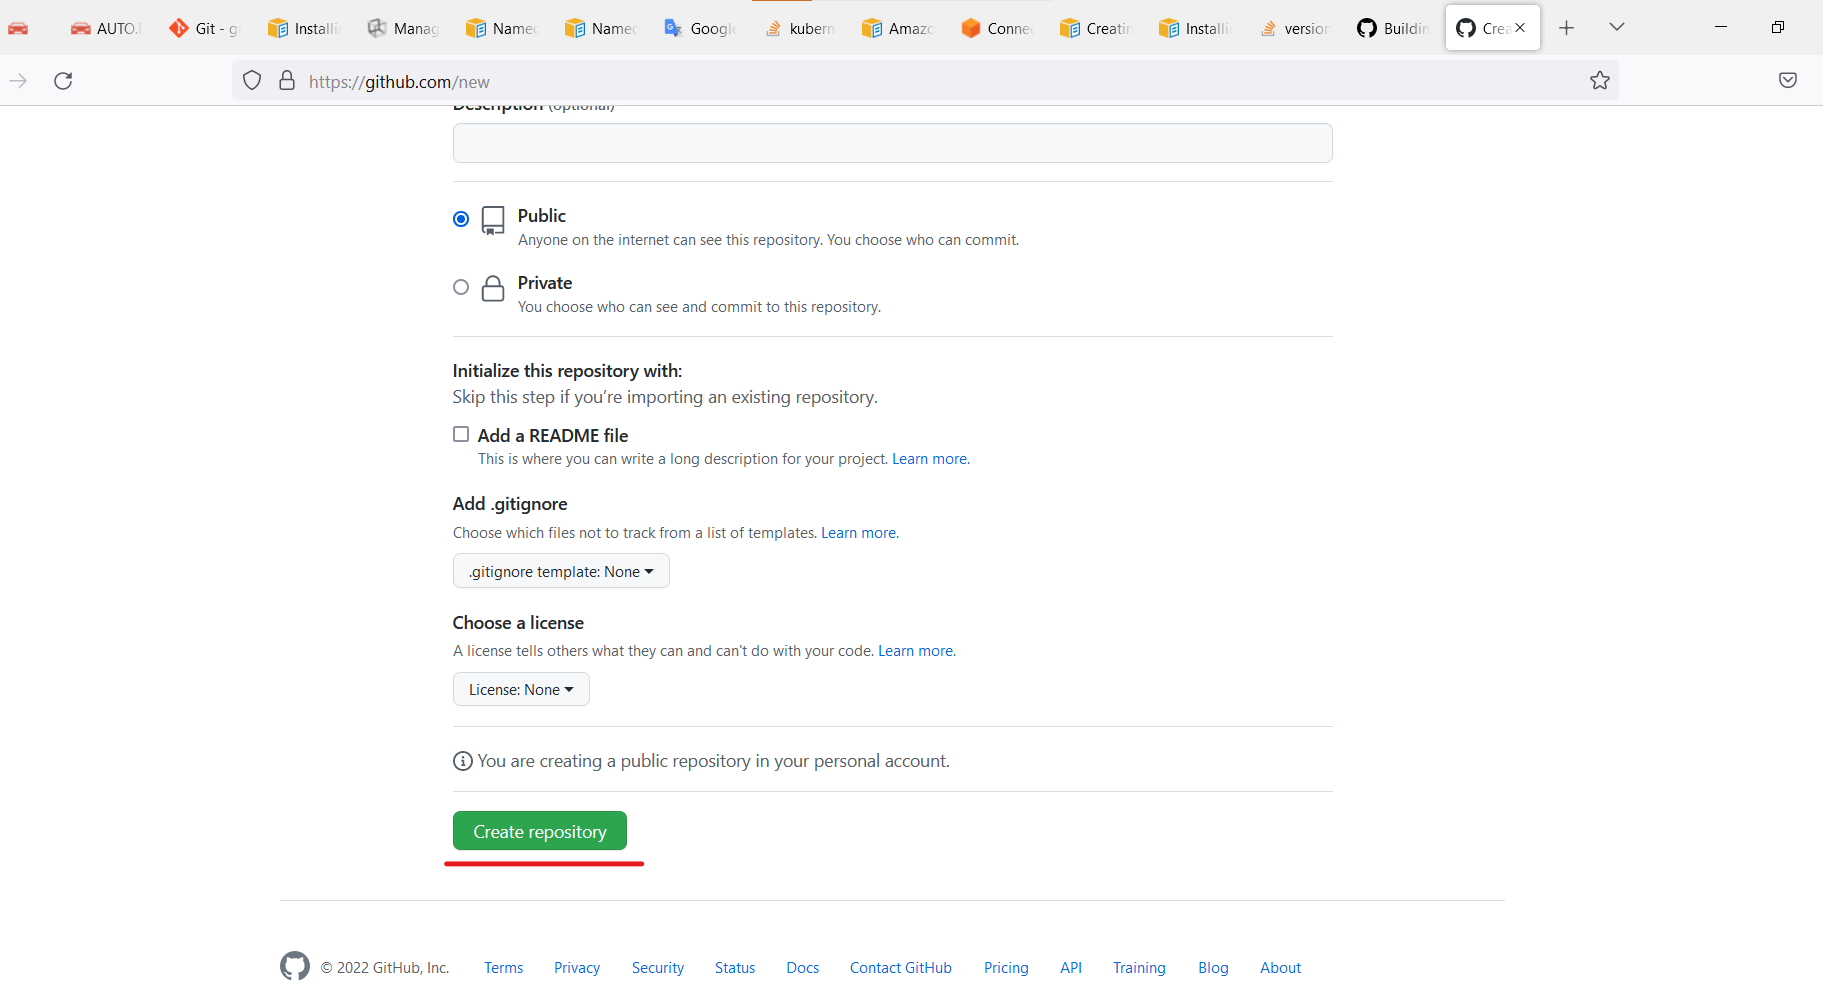Clone repo.
Open the terminal on his machine.
 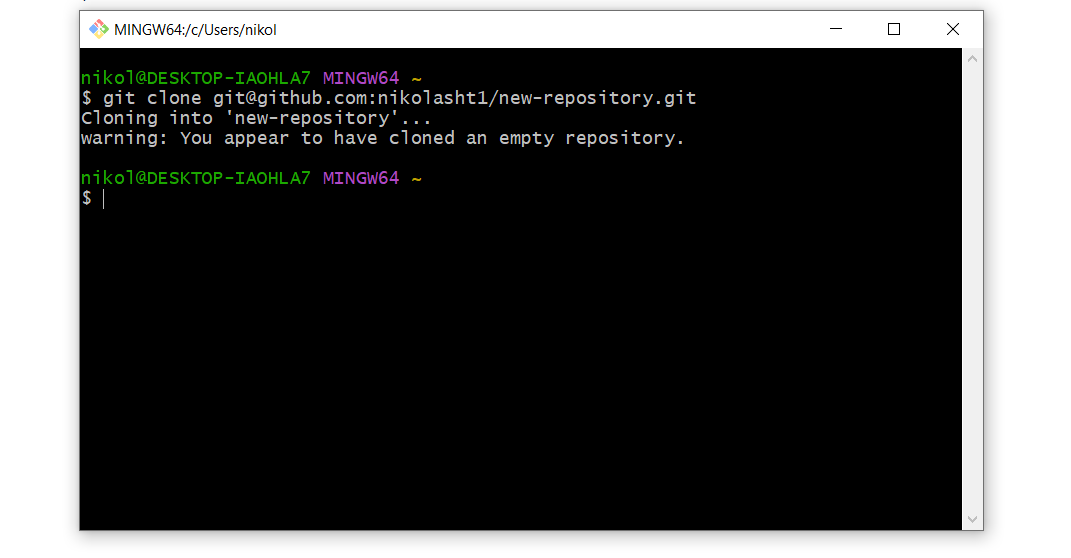  Change directory.
 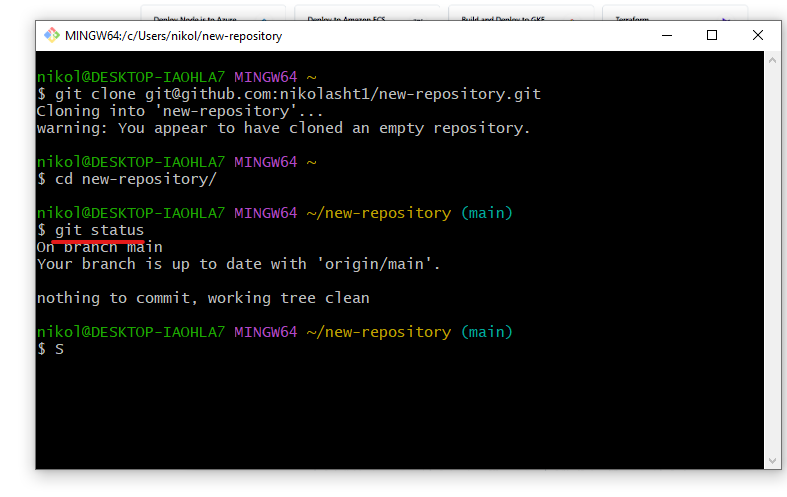Create files or paste some code into the repo
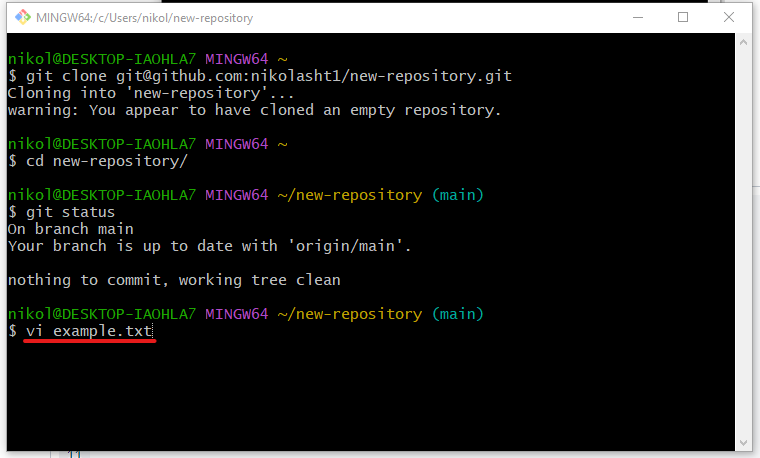 ```
name: CI-Create-Dashboard
on:
push:
branches:
- master
workflow_dispatch:
env:
REGISTRY: jobs:
lint:
runs-on: ubuntu-latest
name: Lint Code Base
steps:
- name: Checkout Code
uses: actions/checkout@v3
with:
fetch-depth: 0
- name: Lint Code Base
uses: github/super-linter@v4
env:
VALIDATE_ALL_CODEBASE: false
DEFAULT_BRANCH: master
GITHUB_TOKEN: ${{ secrets.GITHUB_TOKEN }}
build_and_push:
runs-on: ubuntu-latest
name: Build and push docker image
needs: lint
outputs:
commit_hash: ${{ steps.commit_hash.outputs.commit_hash }}
steps:
- uses: actions/checkout@v3
- name: Set up JDK 11
uses: actions/setup-java@v3
with:
java-version: '11'
distribution: 'adopt'
- name: Build with Ant
run: ant -noinput -buildfile build.xml
- id: commit_hash
run: echo "::set-output name=commit_hash::${GITHUB_SHA::7}" - name: Login to uses: docker/login-action@v2
with:
username: ${{ secrets.DOCKER_USER }}
password: ${{ secrets.DOCKER_TOKEN }}
- name: Build and push
uses: docker/build-push-action@v3
with:
context: .
push: true
tags: |
${{ env.REGISTRY }}:${{ steps.commit_hash.outputs.commit_hash }}
```
|
Copy code from above example main.yml and paste into, or use example from GitHub
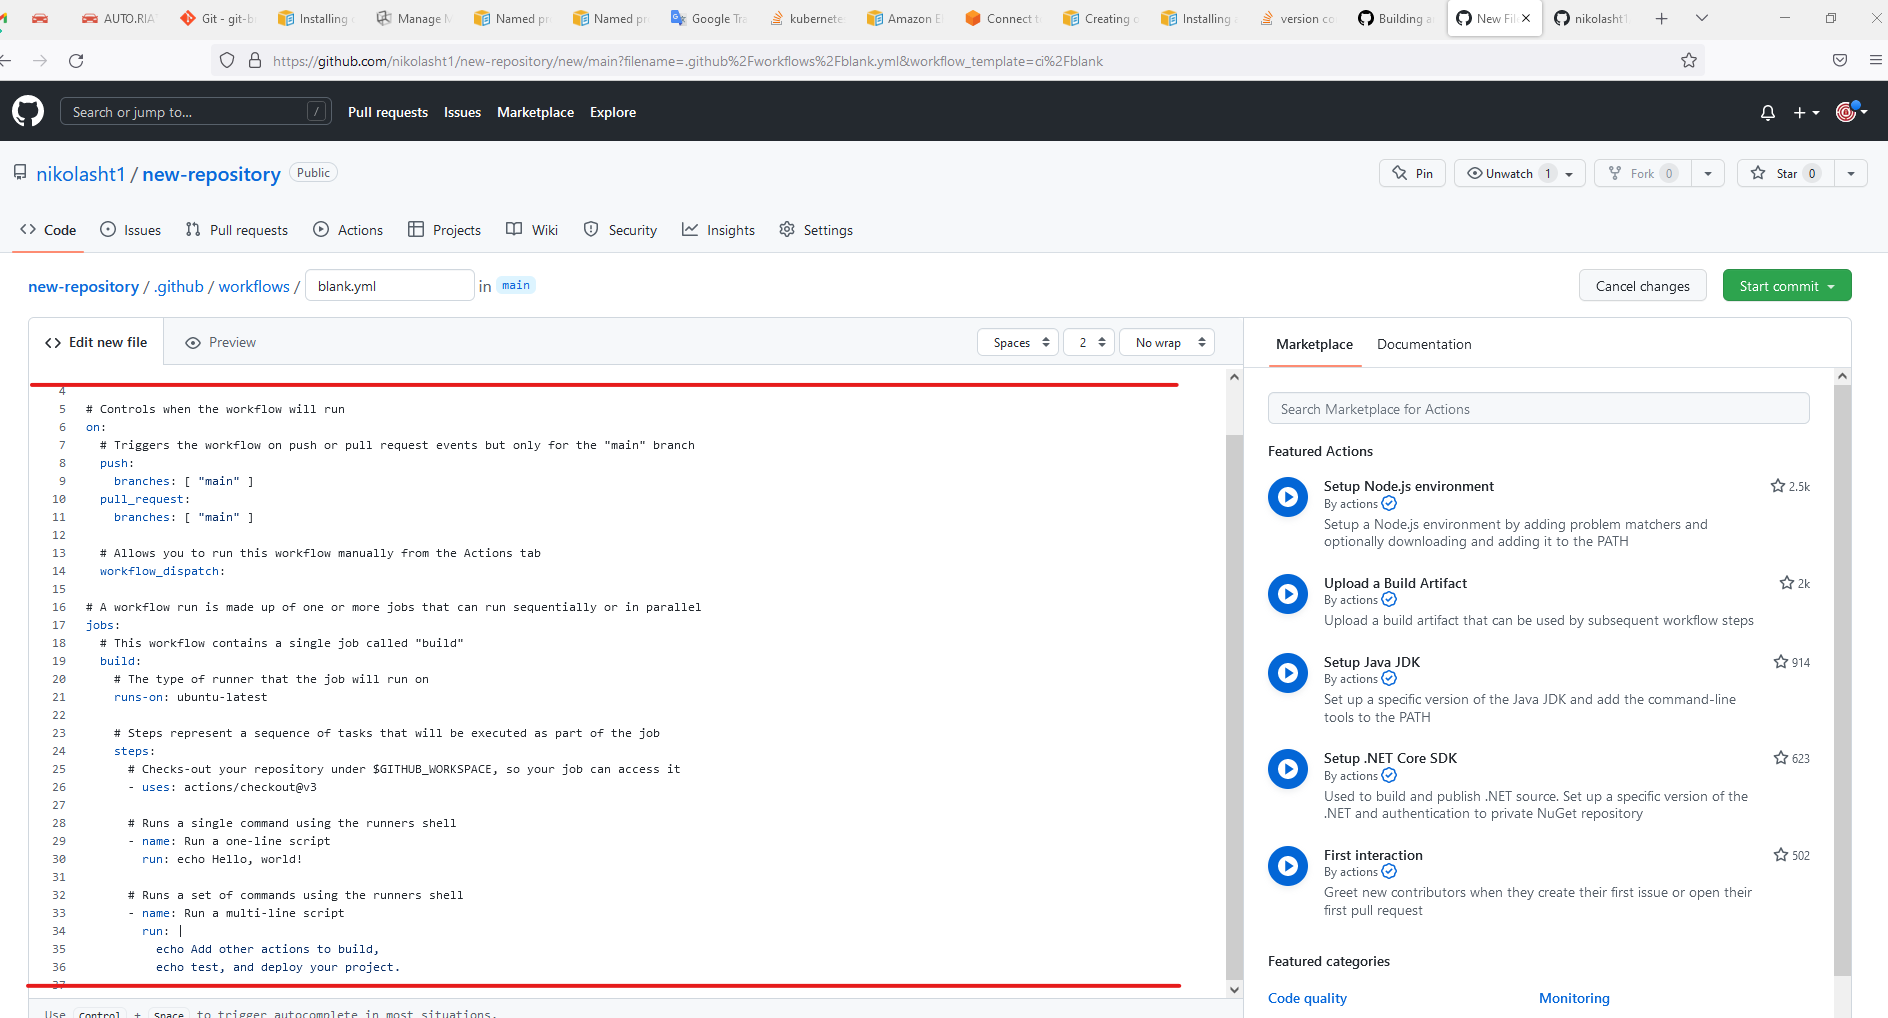 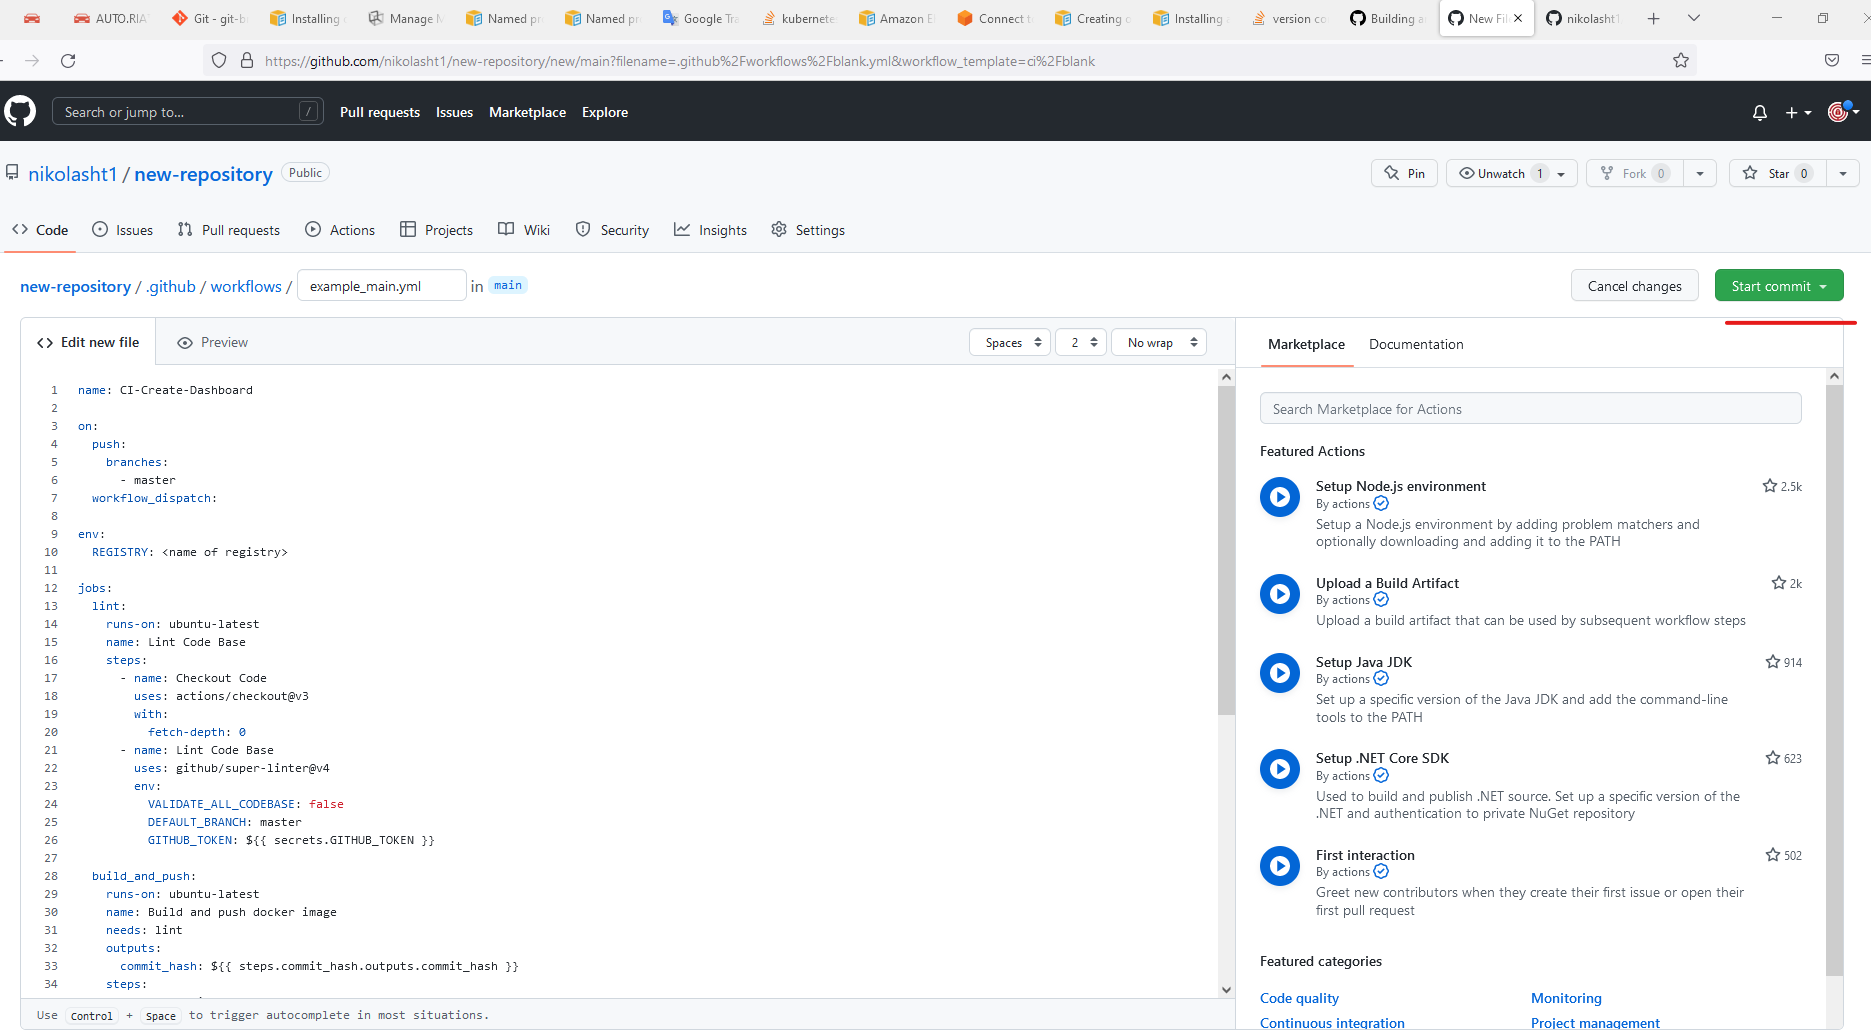 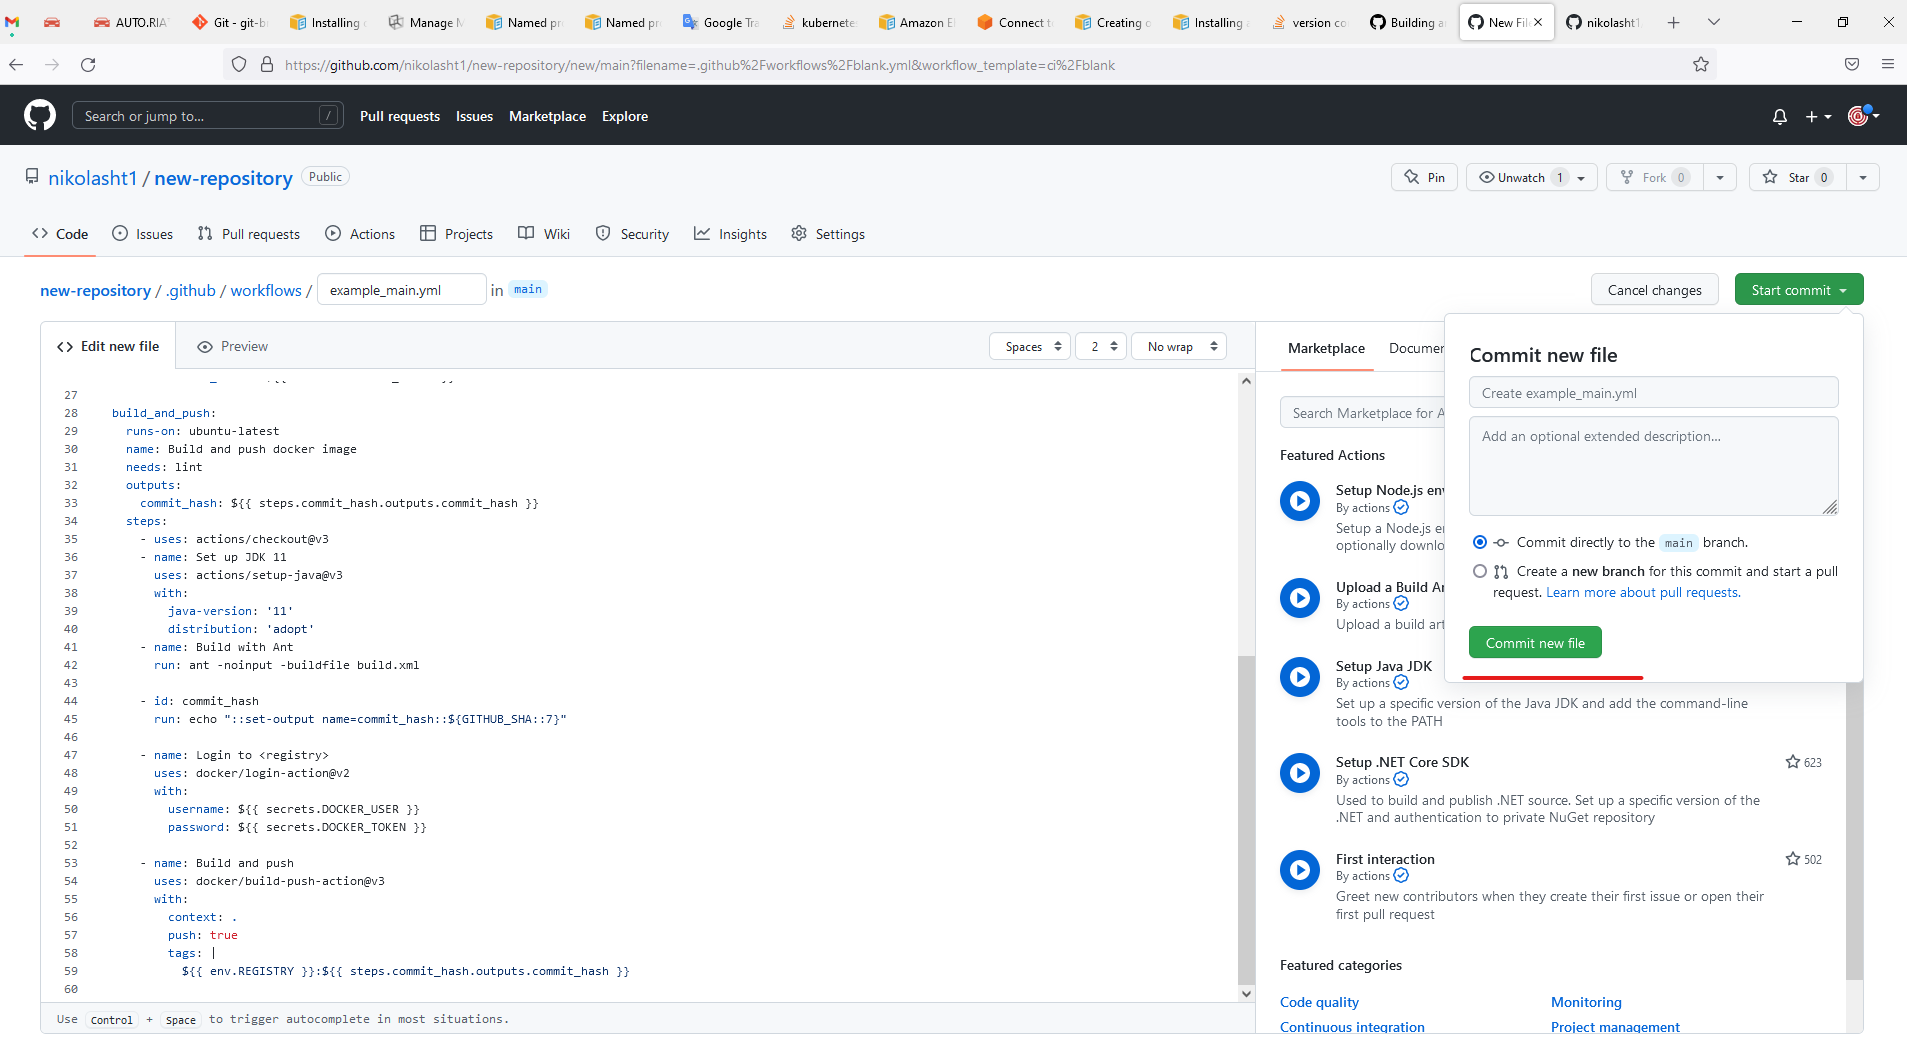 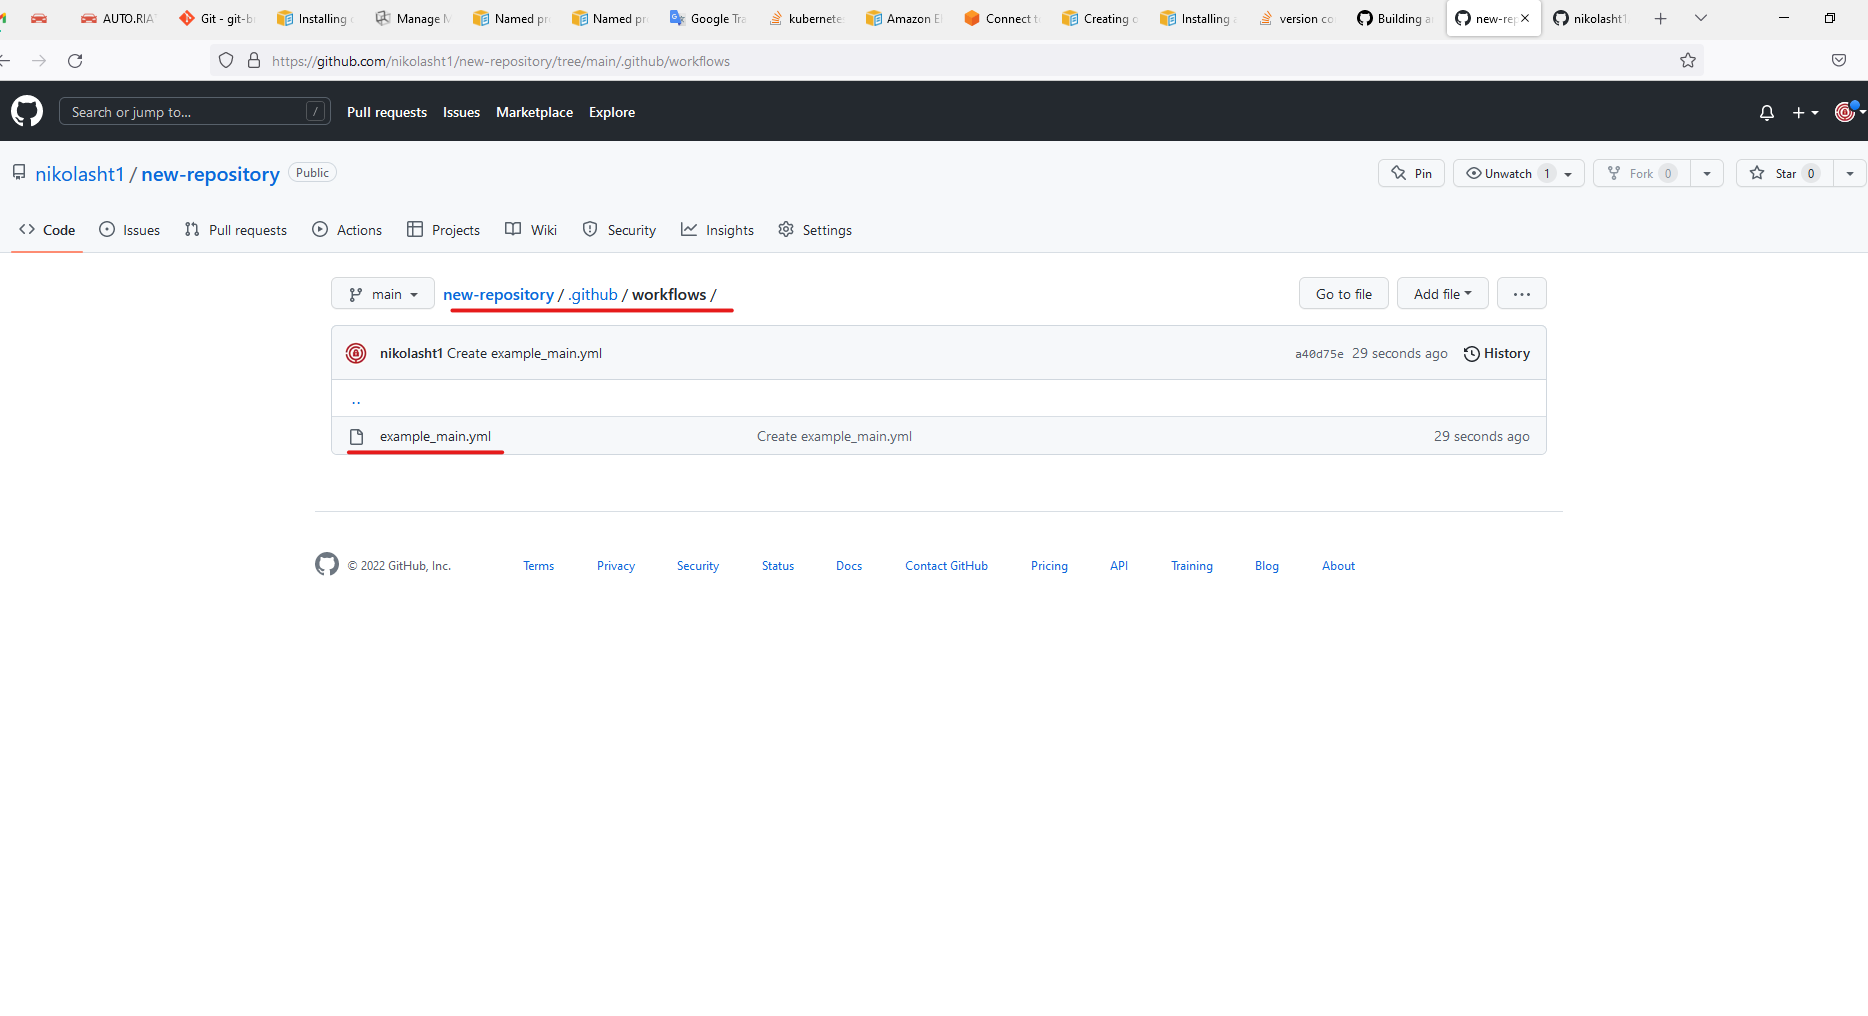GitHub created directory for you [.github](https://github.com/nikolasht1/new-repository/tree/main/.github)/**workflows**/
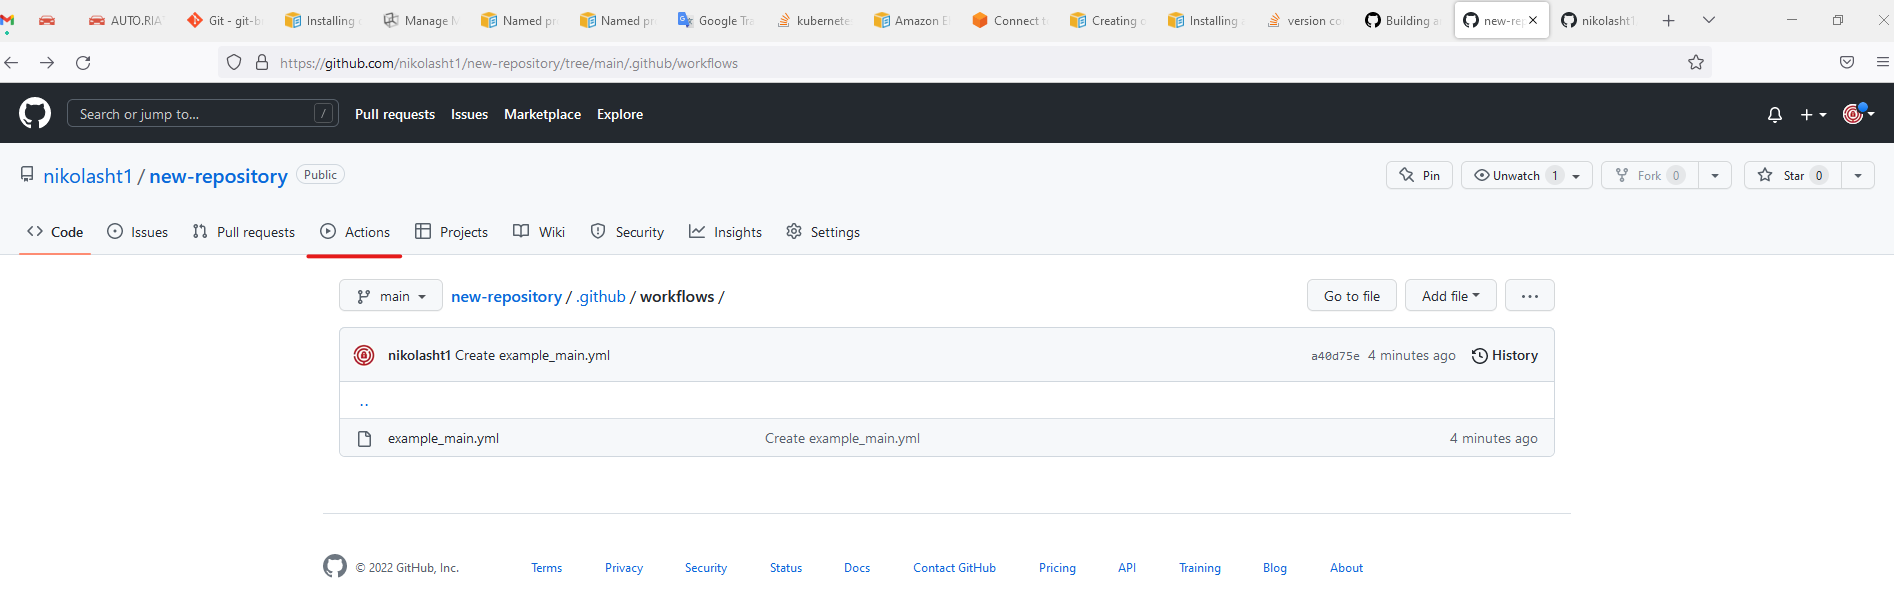 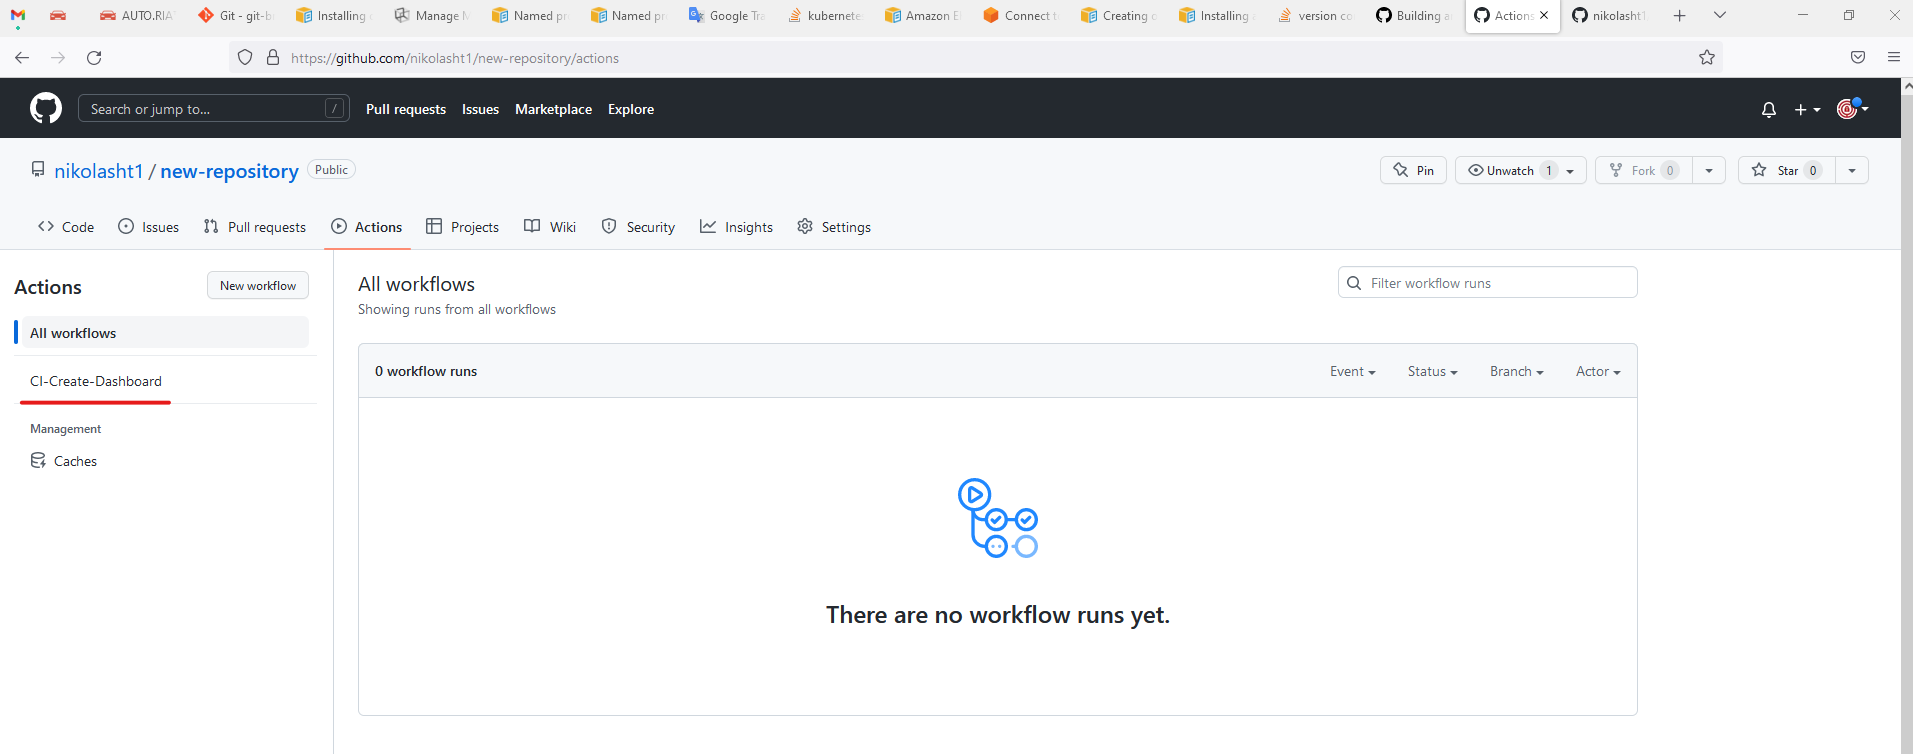 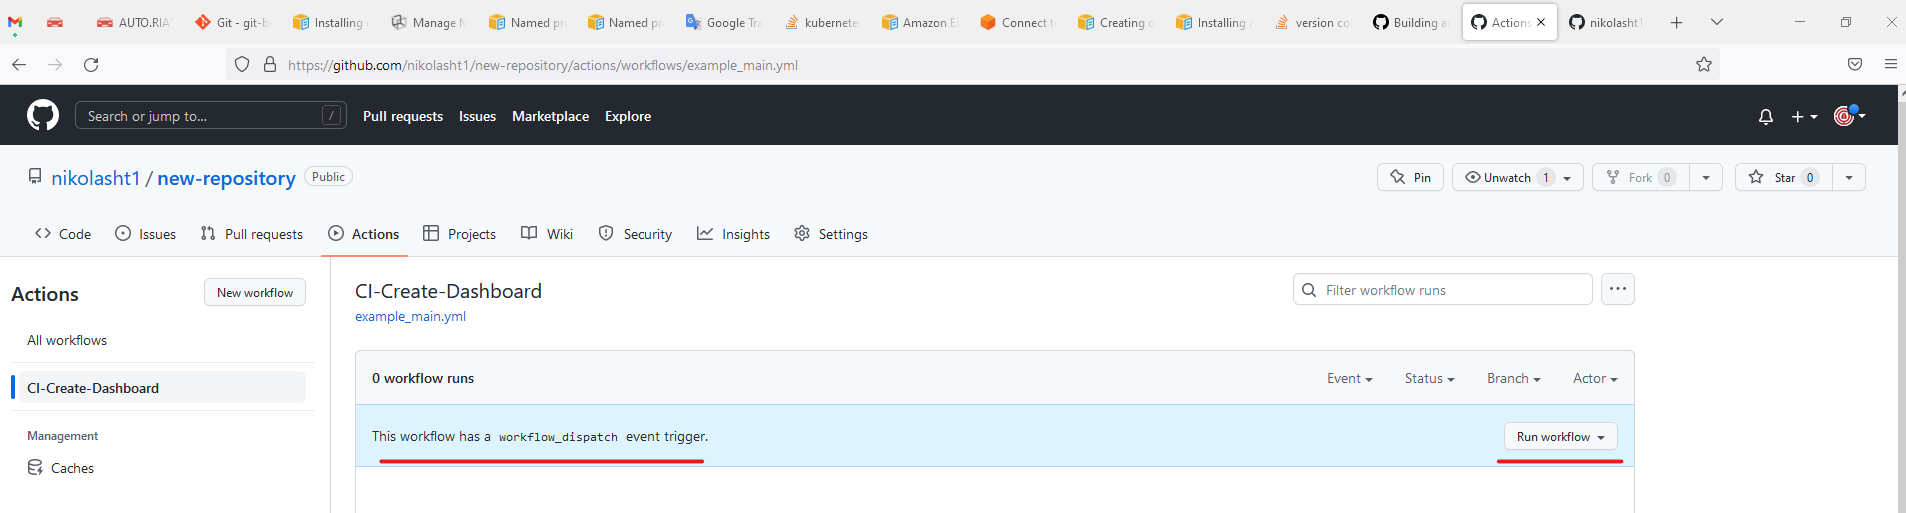 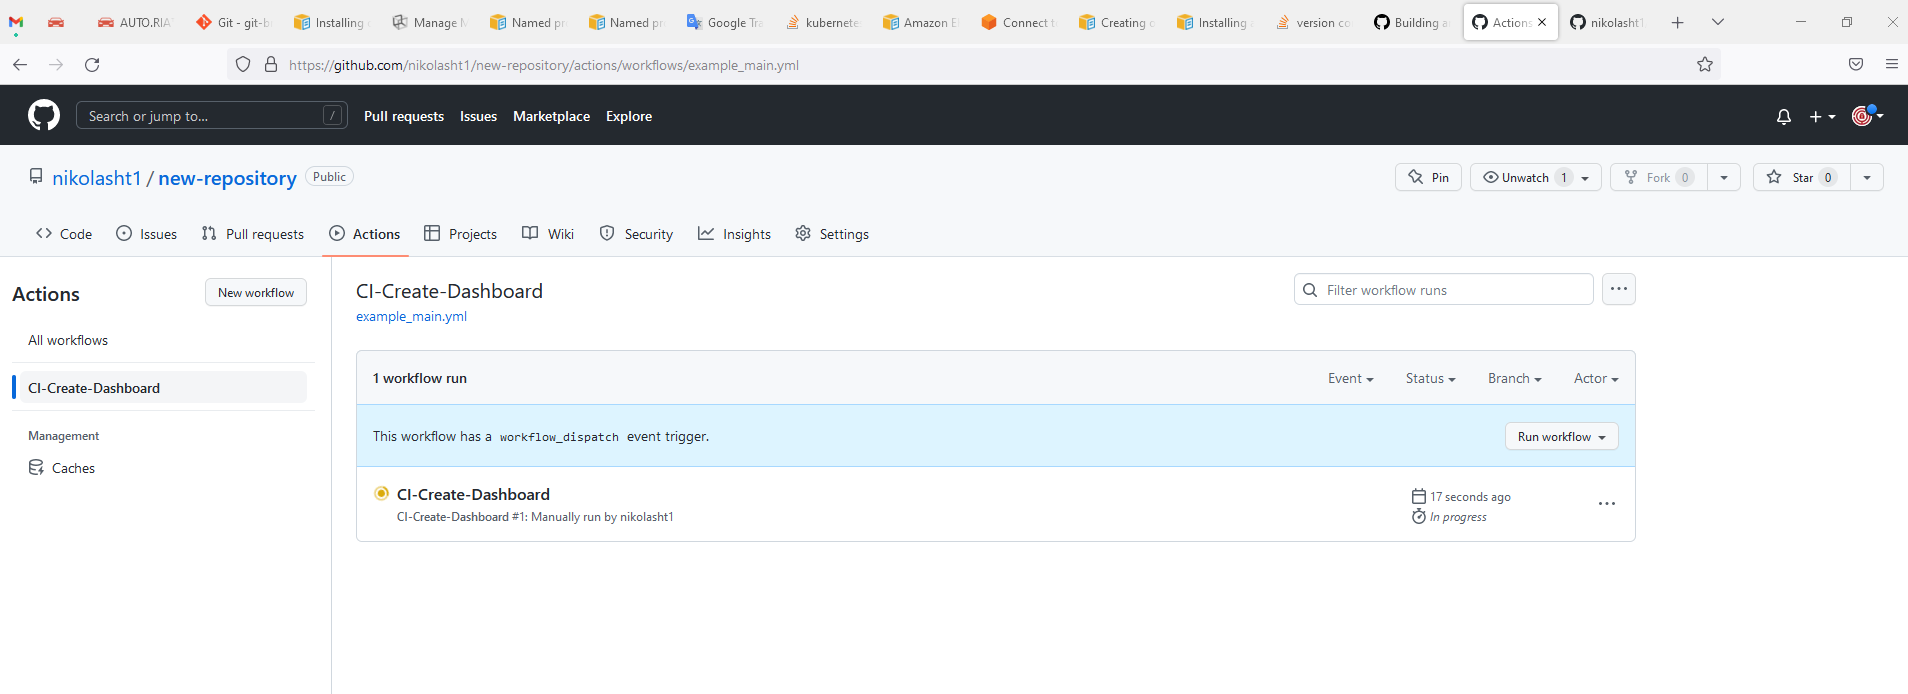 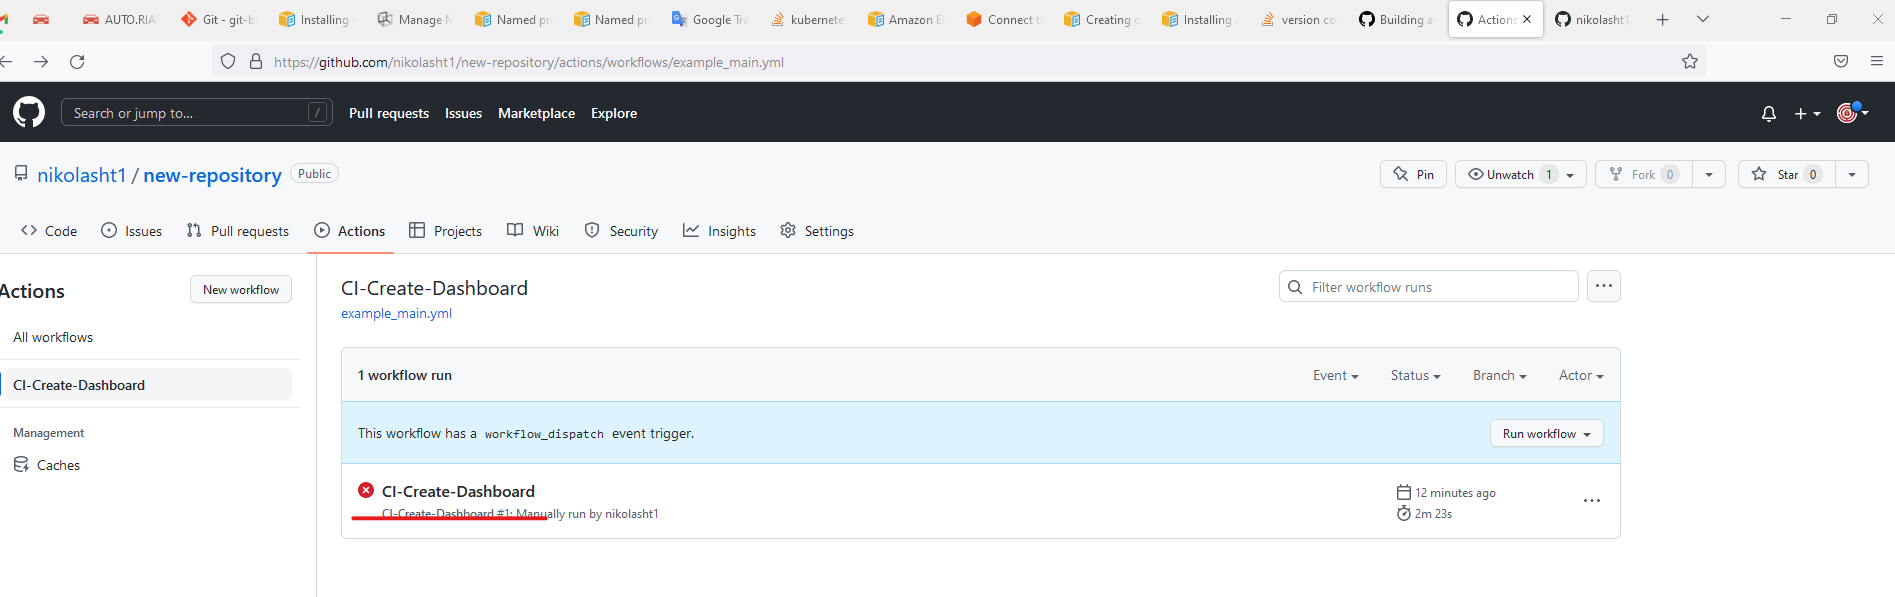 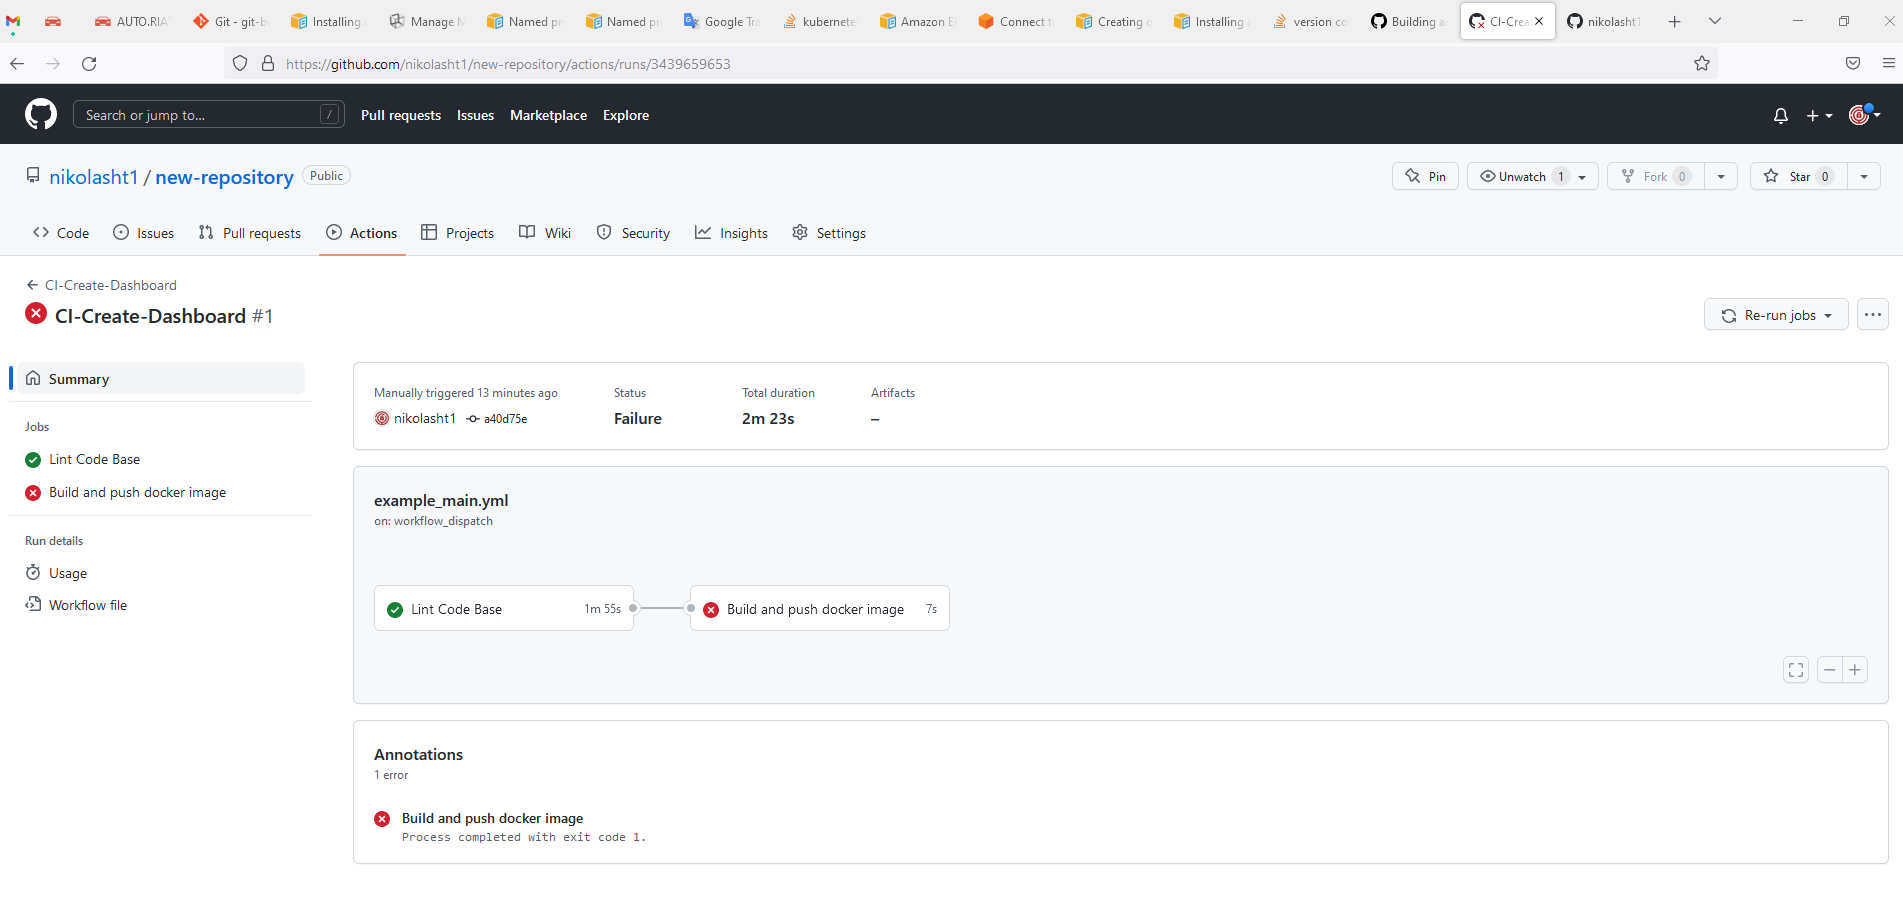For more information visit [https://docs.github.com/en/actions/automating-builds-and-tests/building-and-testing-java-with-ant](https://docs.github.com/en/actions/automating-builds-and-tests/building-and-testing-java-with-ant)
---
Last updated: June 26, 2023
If you have any feedback on this topic, please contact us at
# GitHub Action CICD
Prerequisite: Attached file, GITRepo.zip should be present in the GitHub repo as shown in the first snapshot
- [GITRepo.zip](../../../Resources/Scripts/GITRepo.zip)
The following files are available in the folder. The following information details the configuration changes need to be made.
- Build.xml
- controller.json
- ec2.creds
## Build.xml
Build.xml files hold the configuration settings and also all the defined ANT tags.
Some of the ant tags are explained below:
- deps - Downloads the required AppvanceRestClientWithDeps.jar
- startNode - Starts the mentioned EC2 instance using the file ec2.creds and controller.json files which holds details about account and instance details.
setupEnvironment - Depending on the parameters, we could use this to set up the environment.
- executeScenario - Executes the mentioned scenarios.
- stopNode - Stops the instance once the execution is done.
- createScenariosDashboard - This tag will create the Scenario Dashboard once execution is complete.
- createScenariosDashboard - This tag will create the Scenario Dashboard once execution is complete.
### AISG Related Targets
- blueprintCreation - Starts the creation of the AISG.
- reportUpload - uploads the smoke test report, timing report and a BlueprintReport.html which is a human-readable report.uploads the smoke test report, timing report and a BlueprintReport.html which is a human-readable report.
- blueprintDashboard: this target generates an HTML report that includes the history of all previous build reports and uploads it to an S3 bucket.
- checkResult: this target checks the AISG generated report and it will fail the build if the number of failures surpases a user defined parameter.
- generateRegressionScenario - Generates the Regression scenarios.
Details about all the ant targets can be found in [CICD- AntTags.](https://docs.appvance.net/Content/AIQ/Integrations/ContinousIntegration/CICD__AntTags.htm)
## controller.json
Basically has details about the controller machine and the credentials. Above can be used when we have the EC2 set-up.
When we are running AIQ local builds, instances in the 2nd line could be replaced with "url" and full URL of the AIQ controller could be provided.
```
{
"controller": {
"url": ":8080",>
"instances": [""],
"ec2Creds": "ec2.creds",
"timeOut": 180,
"username": "",
"password": "",
"workFolder": ""
}
}
```
```
name: CI-Create-Dashboard
on:
push:
branches:
- master
workflow_dispatch:
env:
REGISTRY: <name of registry>jobs:
lint:
runs-on: ubuntu-latest
name: Lint Code Base
steps:
- name: Checkout Code
uses: actions/checkout@v3
with:
fetch-depth: 0
- name: Lint Code Base
uses: github/super-linter@v4
env:
VALIDATE_ALL_CODEBASE: false
DEFAULT_BRANCH: master
GITHUB_TOKEN: ${{ secrets.GITHUB_TOKEN }}
build_and_push:
runs-on: ubuntu-latest
name: Build and push docker image
needs: lint
outputs:
commit_hash: ${{ steps.commit_hash.outputs.commit_hash }}
steps:
- uses: actions/checkout@v3
- name: Set up JDK 11
uses: actions/setup-java@v3
with:
java-version: '11'
distribution: 'adopt'
- name: Build with Ant
run: ant -noinput -buildfile build.xml
- id: commit_hash
run: echo "::set-output name=commit_hash::${GITHUB_SHA::7}" - name: Login to <registry> uses: docker/login-action@v2
with:
username: ${{ secrets.DOCKER_USER }}
password: ${{ secrets.DOCKER_TOKEN }}
- name: Build and push
uses: docker/build-push-action@v3
with:
context: .
push: true
tags: |
${{ env.REGISTRY }}:${{ steps.commit_hash.outputs.commit_hash }}
```
---
Last updated: July 03, 2023
If you have any feedback on this topic, please contact us at
# How to consume scenario into the dashboard
- Unzip the files that are available (That we got by making use of CreateScenarioDashboard ant call)
- edit the build.xml:
- change product property value
- change environment property value
- change project property value
- change the customer property value
- change bucket property value
- RMScenario1: run **ant report1**
- RMScenario2: run **ant report2**
---
Last updated: June 02, 2023
If you have any feedback on this topic, please contact us at
# How to link 2 jobs in Jenkins
How to create linking between different jobs or projects in Jenkins. For our learning purposes, we have created two small jobs named ‘Job 01’ and ‘Job 02’ in Jenkins server:
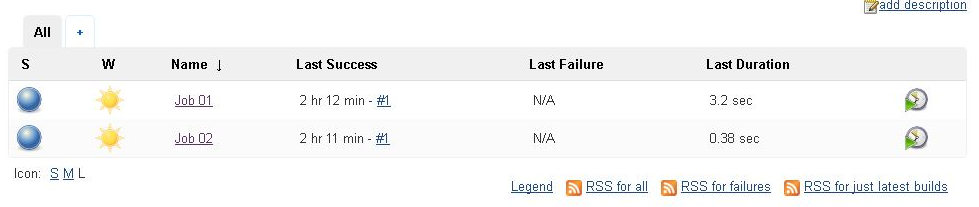In order to this, let’s go to job 02 and select configure from dropdown:
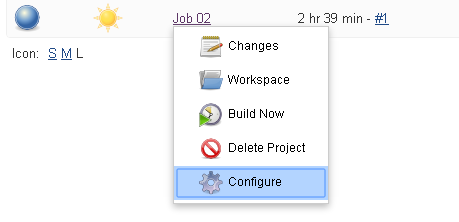Now go to ‘Build triggers’ and select ‘Build after other projects are built’. Under ‘Projects to Watch’ to select ‘job 01’:
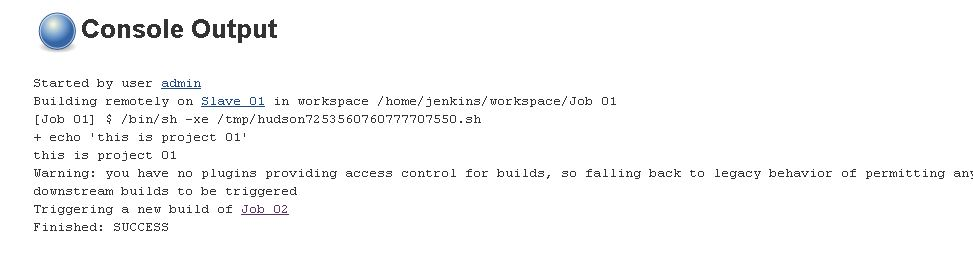
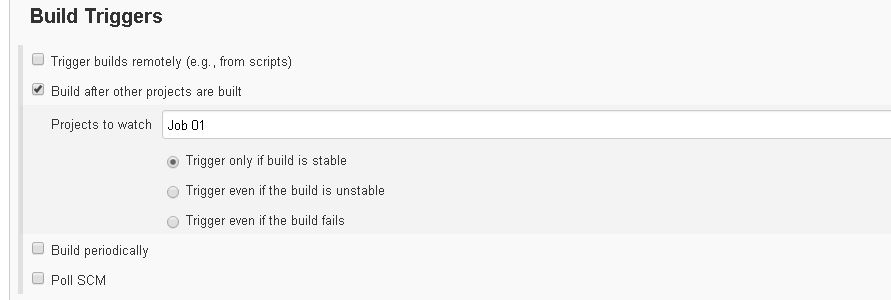Let’s select ‘Trigger only if build is stable’ so that ‘Job 02’ is executed only when ‘Job 01’ is successfully completed. After this, select save and apply. Now when you build ‘Job 01’ and see the log output, it should be something like this:
---
Last updated: June 26, 2023
If you have any feedback on this topic, please contact us at
# Move/Re-locate Dashboard projects
Dashboard projects stored in one location can be moved into another s3 bucket or GIT repository.
**The dashboard projects can be moved from one location to another :**
**I) s3 to another s3 bucket.**
**ii) s3 bucket to GIT repository.**
**iii) GIT to GIT Repository.**
**iv) GIT Repository to s3 bucket.**
### **Steps to be followed to move/re-locate:**
**1.Below ant tag must be added to build.xml of a CICD project:**
i) Ant Tag to **relocate**:
ii) Ant Tag to **UpdateDashboard**:
Here, **ProductDashboard** is to re-generate all the Html content for you (history and main file only )
**2. Follow the below steps to add config.json file to move from one s3 bucket to another s3 bucket:**
i. Open a CICD project.
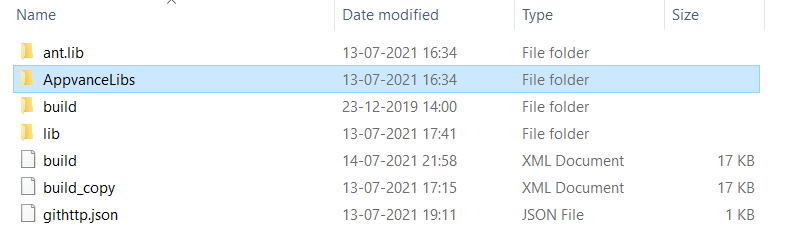 ii. Create and add config.json file to the CICD project.
In the below example, it is added inside the AppvanceLibs folder
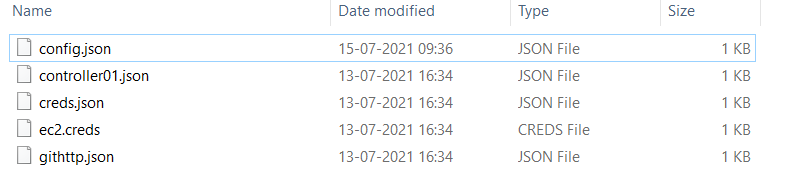 iii. Copy the below content to the config.json file.
Input S3 > S3
```
{
"in": {
"type":"s3",
"source":"appvance-source",
"folder": "products",
"creds": "AppvanceLibs/ec2A.creds" },
"out": {
"type":"s3",
"target":"appvance-target",
"creds": "AppvanceLibs/ec2B.creds" }
}
```
```
{
"in": {
"type":"s3",
"source":"appvance-qa",
"folder": "products",
"creds": "AppvanceLibs/ec2.creds" },
"out": {
"type":"git",
"creds": "AppvanceLibs/githttp.json" }
}
```
```
{
"username": "someUserAccount@appvance.com",
"password": "theUserPassword",
"repository": "https://gitlab.com/theGitRepository.git",
"branch": "thebranch",
"sshPhrase": "";
"sshKey": ""}
```
```
{
"in": {
"type":"git",
"creds": "AppvanceLibs/githttpA.json" },
"out": {
"type":"git",
"creds": "AppvanceLibs/githttpB.json" }
}
```
```
{
"in": {
"type":"git",
"creds": "AppvanceLibs/githttp.json" },
"out": {
"type":"s3",
"target":"appvance-wtc",
"creds": "AppvanceLibs/ec2.creds" }
}
```
---
Last updated: June 26, 2023
If you have any feedback on this topic, please contact us at
# Questions on Jenkins Server Questions on Jenkins Server
Regarding the test execution machine to trigger build XML for the dashboard (2 Core and 8GB for Jenkins, with ant and git plugin), can this be shared for different teams/applications?
Can you also confirm, that this machine will have a copy of the automated scripts? And if this is shared with different application teams, everyone will have access to the test scripts for all applications?
Responses -
1- Yes, it can be shared with different applications or teams, just change the product/environment to differentiate results.
2- Workspaces are created for each pipeline, and it gets saved there as a temp folder right and we don't know how long it stays there is a plugin called workspace clean up plugin, that can be configured to clean up workspaceshttps://computingforgeeks.com/automatically-clean-up-jenkins-workspace-after-builds-complete/#:~:text=Login%20to%20Jenk\[…\]20tab%20below%20the%20page
3- yes, I think everyone will have that access, again depends on 2
---
Last updated: June 02, 2023
If you have any feedback on this topic, please contact us at
# Parameterize the AIQ Controller URL in a GitLab CI/CD Pipeline
# Parameterize the AIQ Controller URL in a GitLab CI/CD Pipeline
Parameterize the AIQ Controller URL so the same GitLab CI/CD pipeline can run against different AIQ environments without changing the pipeline script for every deployment.
## Recommended approach
- Store the Controller URL as a GitLab CI/CD variable instead of hard-coding it in the pipeline file.
- Use separate variables for development, staging, and production-like AIQ environments.
- Keep authentication tokens and credentials in protected or masked variables.
- Validate the URL before triggering a long-running suite so failed configuration is caught early.
## Pipeline checklist
1. Define the Controller URL variable in GitLab settings or the pipeline environment.
2. Reference the variable from the AIQ execution command or integration script.
3. Run a small smoke test to confirm the pipeline reaches the intended controller.
4. Review logs to make sure sensitive values are not printed.
5. Promote the same pipeline definition across environments by changing only variable values.
*Last updated: October 8, 2026*
# Runing Appvance IQ on Windows as a Service
It is recommended that you start AIQ services automatically rather than manually. The suggested method is to use the Autologon utility to setup Appvance IQ to run as service on Windows.
Autologon is Microsoft utility that enables you to easily configure Windows’ built-in autologon mechanism. Instead of waiting for a user to enter their name and password, Windows uses the credentials you enter with Autologon, which are encrypted in the Registry, to log on the specified user automatically.
Prerequisites:
- Appvance IQ is installed on Windows OS
- Login to Windows using an account with administrator privileges
## Download and Install Autologon
1. Download Autologon from Microsoft here: [Download Autologon](https://docs.microsoft.com/en-us/sysinternals/downloads/autologon)
2. Extract `Autologon.zip` archive. For example, extract to `C:\Autologon`.
## Setup Autologon Service
### Checking for Previous Configurations
Verify that no other entries for Autologon service exist as follows. If there are previous configurations on the server, it may prevent Autologon from working correctly.
For any past users for which an Autologon service was created:
1. Open Autologon.
2. Enter the Username, Domain and Password.
3. Click **Disable**.
Check the Registry for Autologon entries:
1. Inthe Registry navigate to **HKEY\_LOCAL\_MACHINE\\SOFTWARE\\Microsoft\\Windows NT\\CurrentVersion\\Winlogon**
2. Change the value of the `AutoAdminLogon` key from `1 (true)` to `0 (false)`, to disable the `AutoAdminLogon` feature.
See [Turn on automatic logon in Windows](https://learn.microsoft.com/en-us/troubleshoot/windows-server/user-profiles-and-logon/turn-on-automatic-logon) on the Microsoft site for more information.
Active Directory considerations:
- When the user used to login is provided by an Active Directory domain and the Active Directory is set to have an interactive login, autologon process will not work. In those cases, try creating a local user in the machine itself, edit its group policy to remove any interactive logon and use this local user to set the autologin process.
### Configuring Autologon
1. Open Autologon.exe (64 bit). The **Autologon - Sysinternals** window appears.
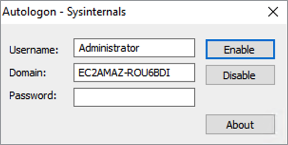
2. Enter the user’s password and click **Enable**.
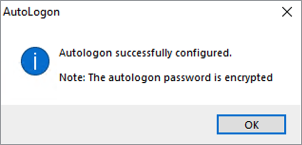
3. Open **Task Scheduler** with administrative privileges, click **Action** and select **Create Basic Task**. The Create Basic Task Wizard appears.
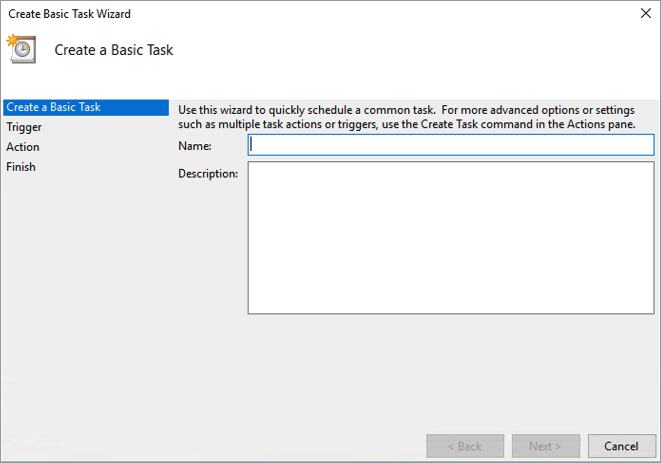
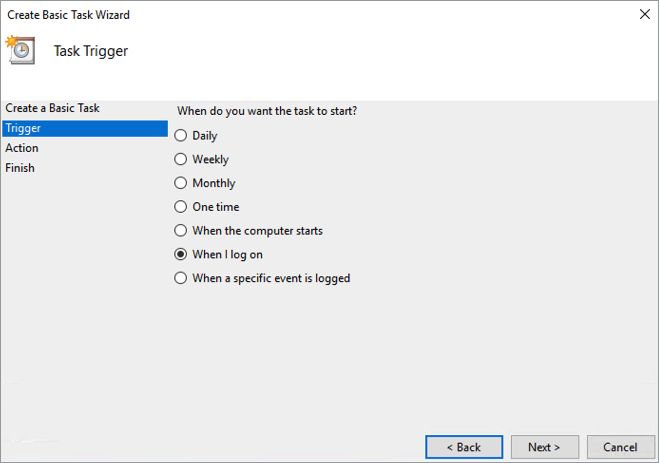
4. Enter a name in the **Name** box (such as AIQ or Appvance) and click **Next**The Task Trigger list appears
5. Select **When I log on** and click **Next**
6. The Action list appears.
7. Select **Start a Program** and click **Next**
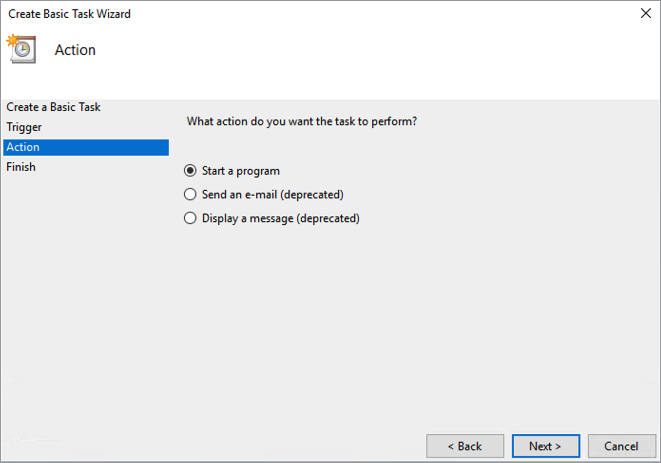
8. The Start a Program configuration appears.
9. Click **Browse**.
10. Browse to and select **<aiq-path>/TestNode/startup.bat** and click **Open**.
11. **IMPORTANT**: Also enter the **<aiq-path>/TestNode/** path in the **Start in** box and click **Next**.
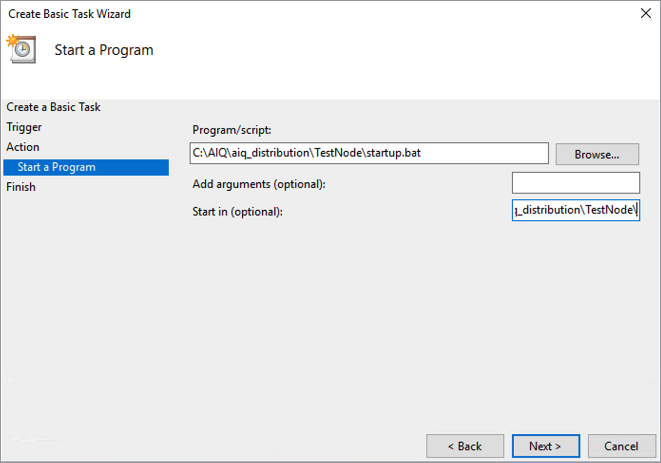
12. Select **Open the Properties dialog for this task when I click Finish**.
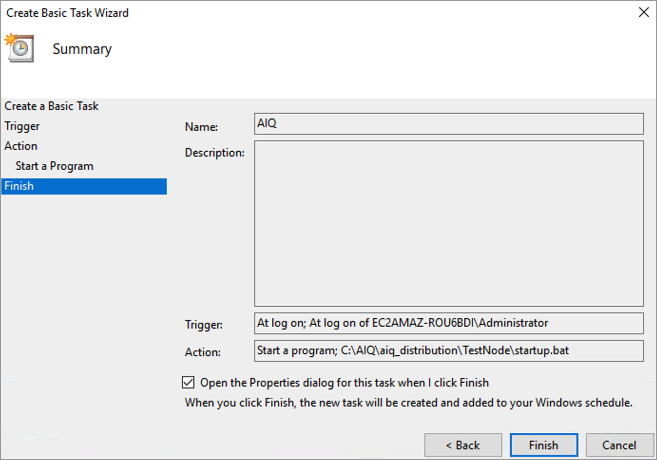
13. Click **Finish**The Properties dialog appears.
14. Select **Run only when user is logged on**.
15. Check **Run with highest privileges**.
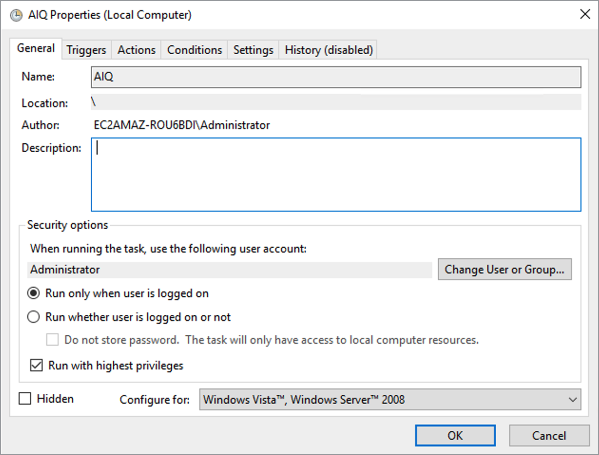
16. Click **Settings**.
17. Uncheck the **Stop the task if it runs longer than** option.
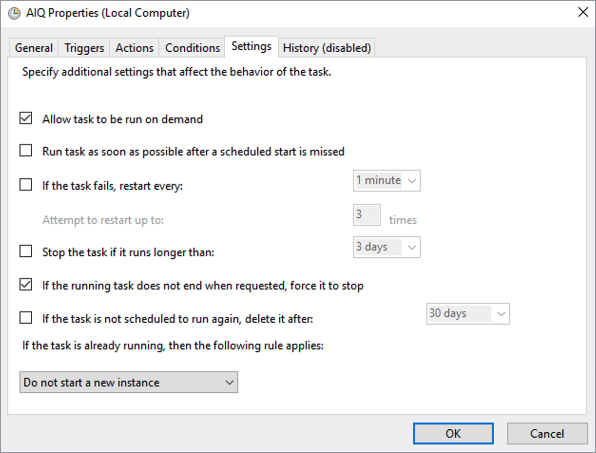
18. Click **OK**.
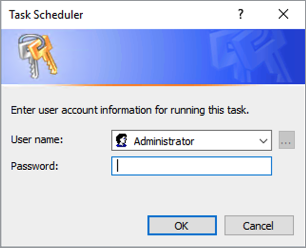
19. When prompted, enter the service username and password to apply the changes and click **OK**.
### Verifying Autologon Service
You may test the Autologon service by running it manually from the Task Scheduler. However to ensure the settings are working as expected, it is recommended that you restart the server and confirm that Appvance IQ launches properly without a user directly logging into the server.
---
Last updated: March 26, 2024
If you have any feedback on this topic, please contact us at
# Legacy Bamboo CI Setup for AIQ Execution
**Last reviewed:** September 29, 2026
This page is retained for teams that still run AIQ execution plans from Atlassian Bamboo.
## What changed in this article
- Marked Bamboo CI setup as legacy/environment-specific because many current CI workflows use Jenkins, GitHub, Azure DevOps, or another maintained runner.
- Replaced the long Bamboo installation walkthrough with targeted AIQ execution-plan guidance: agents, Ant tasks, repositories, credentials, and result handling.
- Called out stale dependencies from the old article, including Ubuntu 16.04, Oracle JDK 8, old Bamboo agent versions, and credential files such as creds.json.
## Validation workflow
1. Confirm Bamboo is still the customer’s active CI system before using this page.
2. Validate agent OS, JDK, Ant, browser, repository, and AIQ connectivity before creating the execution plan.
3. Run one controlled Bamboo build and confirm AIQ execution results are created before scheduling recurring jobs.
**Review note:** Kept as legacy CI guidance and removed the impression that old Bamboo/JDK/Ubuntu setup is current default practice.
---
Last updated: September 29, 2026
If you have feedback on this topic, contact .
# Why Jenkins job is failing with an Out of Memory error?
Typically default Jenkins setup has a low setup amount of heap memory space (256Mb). This is good enough for medium size scenarios, but bulk scenarios needing to upload a lot of files for the scenario execution might fail with an `OutOfMemoryError: Java heap space` error similar to
```
C:\ProgramData\Jenkins\.jenkins\workspace\Smoke\Smoke.xml:221: java.lang.OutOfMemoryError: Java heap space
at java.base/java.util.Arrays.copyOf(Arrays.java:3745)
```
---
Last updated: June 26, 2023
If you have any feedback on this topic, please contact us at
# CI/CD Dashboard Credential Encryption
## Recommended guidance
Credential encryption for CI/CD dashboards protects sensitive values used by automation. Treat this page as security-sensitive guidance: never paste real passwords, tokens, keys, or decrypted values into documentation, tickets, chat, or screenshots.
## Recommended controls
- Store secrets in approved secret managers or CI/CD credential stores.
- Encrypt values before they are committed or shared with deployment artifacts.
- Limit decryption capability to the runtime or owner that actually needs it.
- Rotate credentials when ownership, access scope, or exposure risk changes.
- Audit who can view, edit, or deploy encrypted dashboard configuration.
## Validation checklist
1. Confirm the dashboard can read encrypted values at runtime.
2. Confirm logs do not print decrypted credentials.
3. Test failure behavior when a credential is missing, expired, or revoked.
4. Document rotation and emergency revocation steps.
*Last updated: October 6, 2026*
# Encrypting EC2 Cloud Configuration Files using API Calls