Creating Custom Actions
You can create a custom action to resolve failed actions.
-
Determine which actions you want to interact with. You can create custom actions for a single action or multiple actions.
-
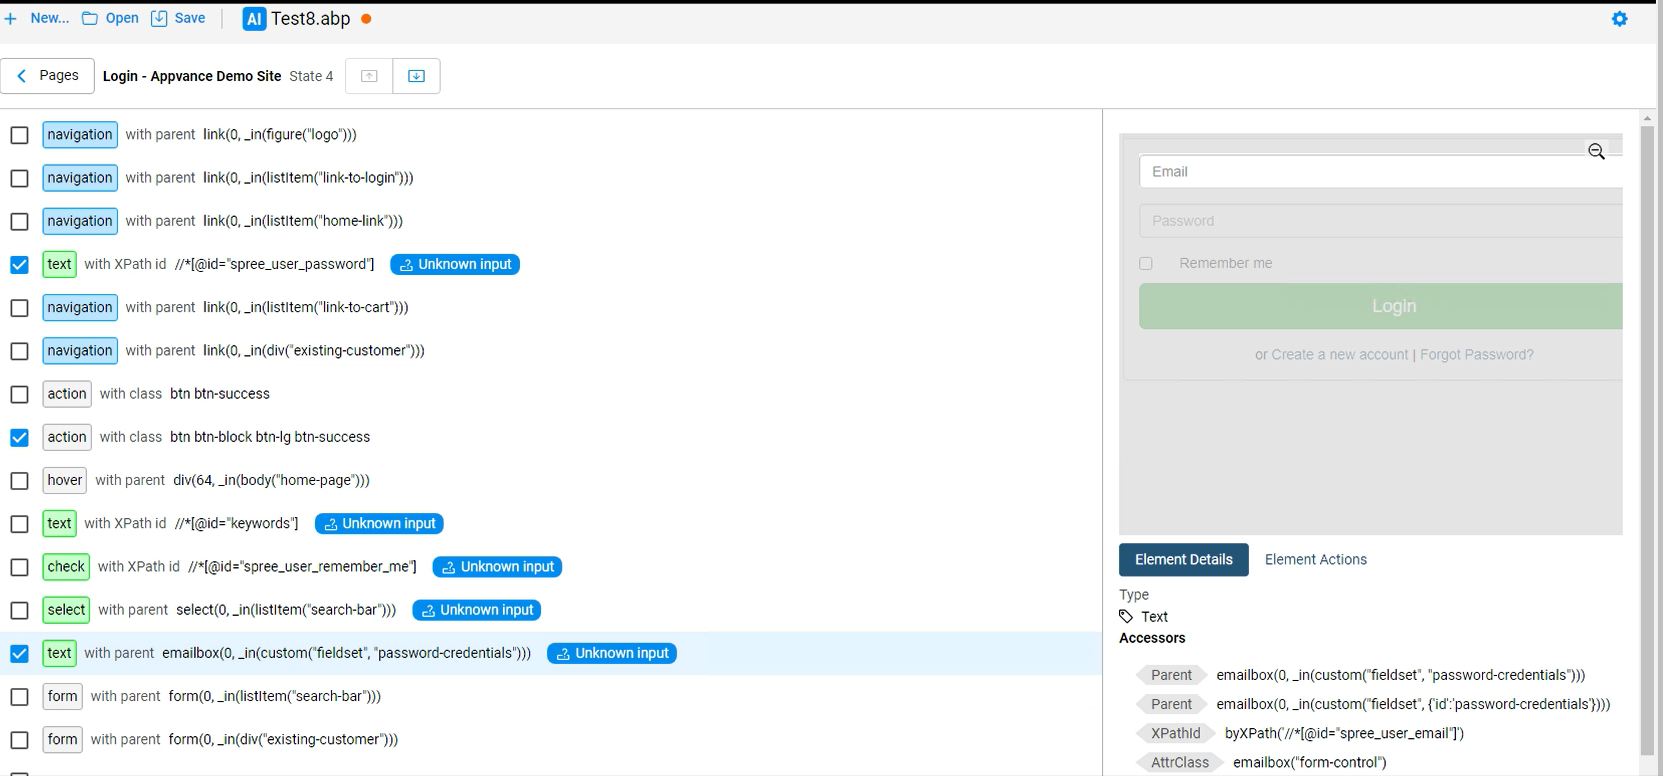
Click Create Custom Action at the top of the page to create multiple custom actions or click the blue Unknown Input button by failed action to create a custom action for that specific action.
-
Select the actions you want to interact with. This shows Email, Password, and the submit button.
-
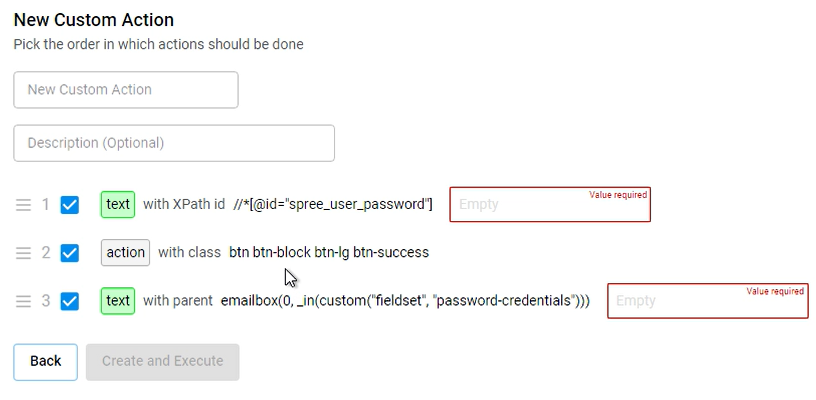
Click Next to open the Create New Action page.
-
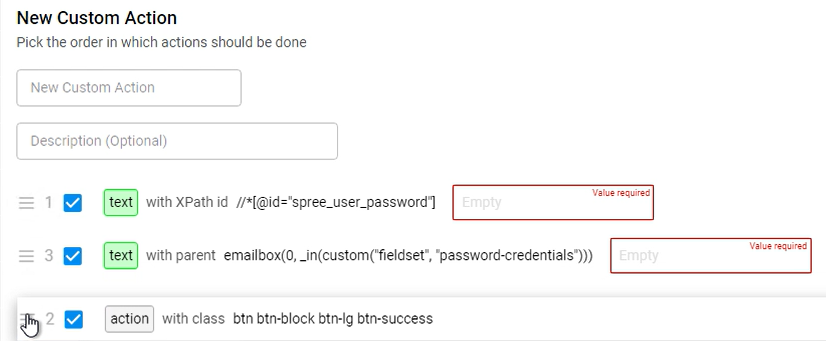
If needed you can reorder the actions by dragging and dropping them.
-
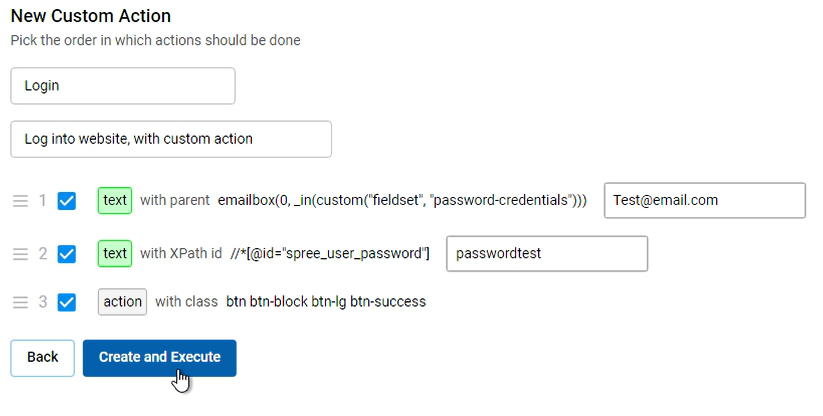
Define all the information for your custom actions. Any information you define here will be saved in a default.csv file. If you have a data set containing your variables you can select from that file here. See the information on adding Data Sets to an execution.
-
Optional. You can select the Try All option.
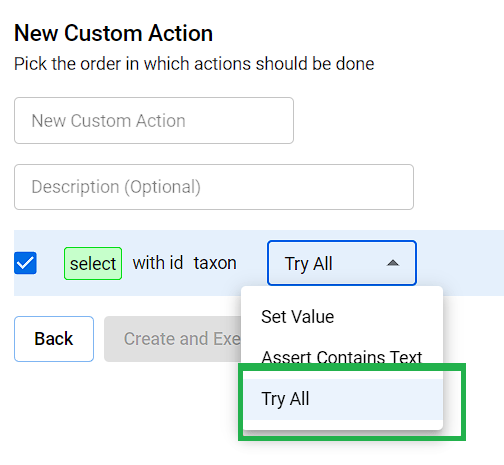
The Try All option was added in the 5.2.0 release of AIQ.
-
Click Create and Execute.
-
Your new custom action displays in the Custom Actions section.
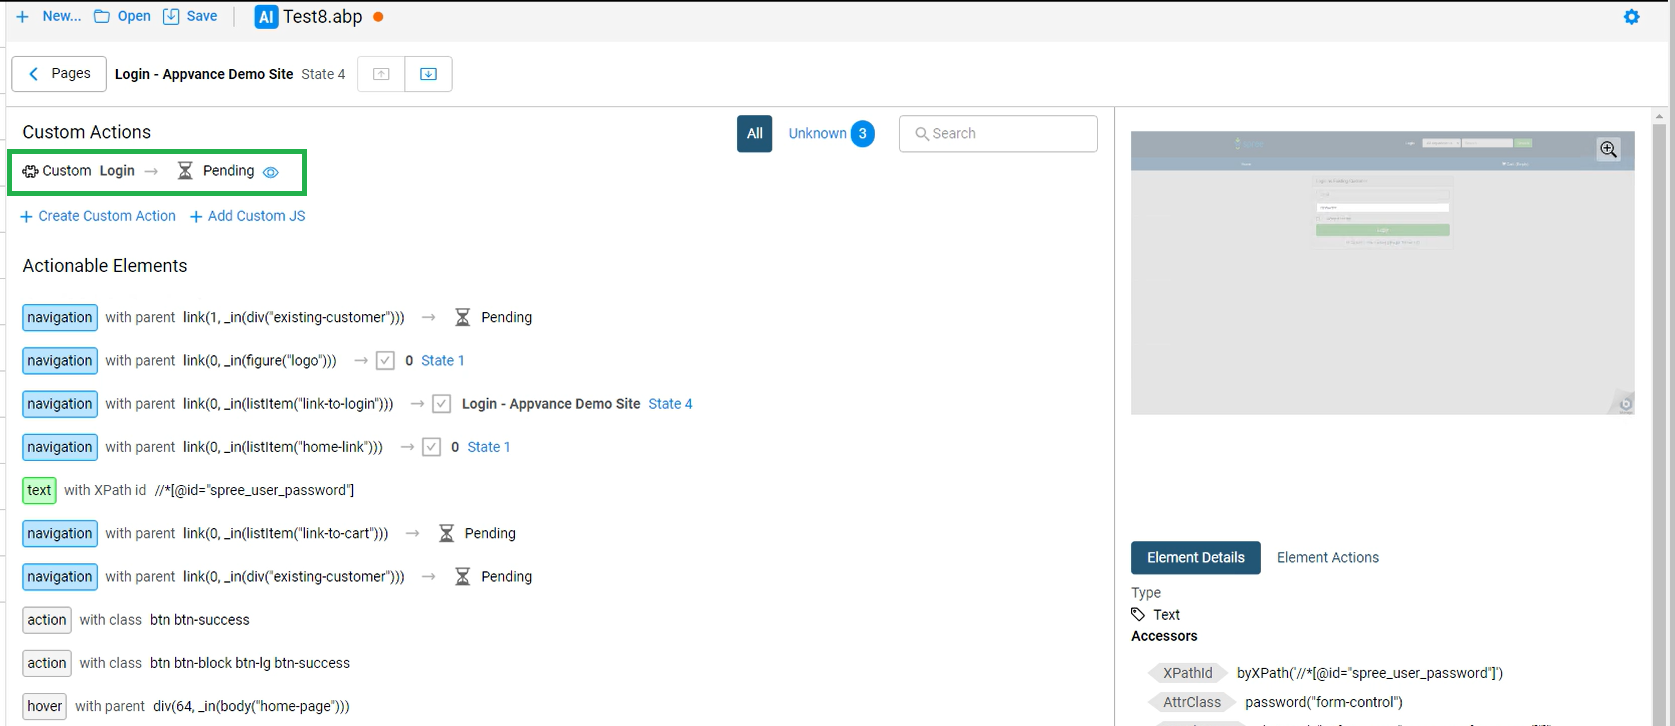
-
The Blueprint will try and execute your new custom action as soon as possible.