Mobile AI - Create Blueprint
Introduction:
Create Blueprint is all about application learning. Appvance AI creates a file called Blueprint (.mbp file) which contains more information than any HTTP interactions (HTTP Traffic)
In this process of creating Blueprint, Appvance AI scans the mobile app to find out as much about it as it can, dig as far as it can. It then identifies areas for input and prompts for that input, which can be provided for example via a CSV. Using that data, or input, Appvance AI then scans further into the mobile app and produces a Blueprint which is saved as a .mbp file.
-
Serves as a map or Blueprint of the mobile app.
-
Knows all the functionality and features, how they are used, how they are accessed, and where they are in the mobile app.
-
Only needs initial parameters and data for the application’s text boxes, selects, checkboxes, radio buttons, and other user controls.
Mobile AI is Appvance IQ extends the AI capabilities available for years for web applications to native mobile apps. No coding or scripting. Just pure test results, up to 100,000X faster than human scripting.
The process is the same as Appvance’s web technology.
Setup AI hints. These help to guide the engine in the right direction.
-
Setup forms that will be data-driven and the resource with the data (CSV, DB, etc.)
-
Setup app-wide validations
-
Store the above as a template to be re-used at each build
-
Launch an AI Blueprint (from CI) against your new build (<60min depending on # of threads)
-
Evaluate reported errors
-
Launch regression tests (these are generated by scanning the standard W3C production logs which provide hints of actual user stories) (<60min depending on # of threads and use cases)
-
Review dashboards of results and repeat step 5-8 on each new build
Blueprint Parameters:
-
Begin with File > New to begin a new Blueprint.
-
File > Open can be used to open any existing MBP files for further Blueprinting of the mobile apps.
-
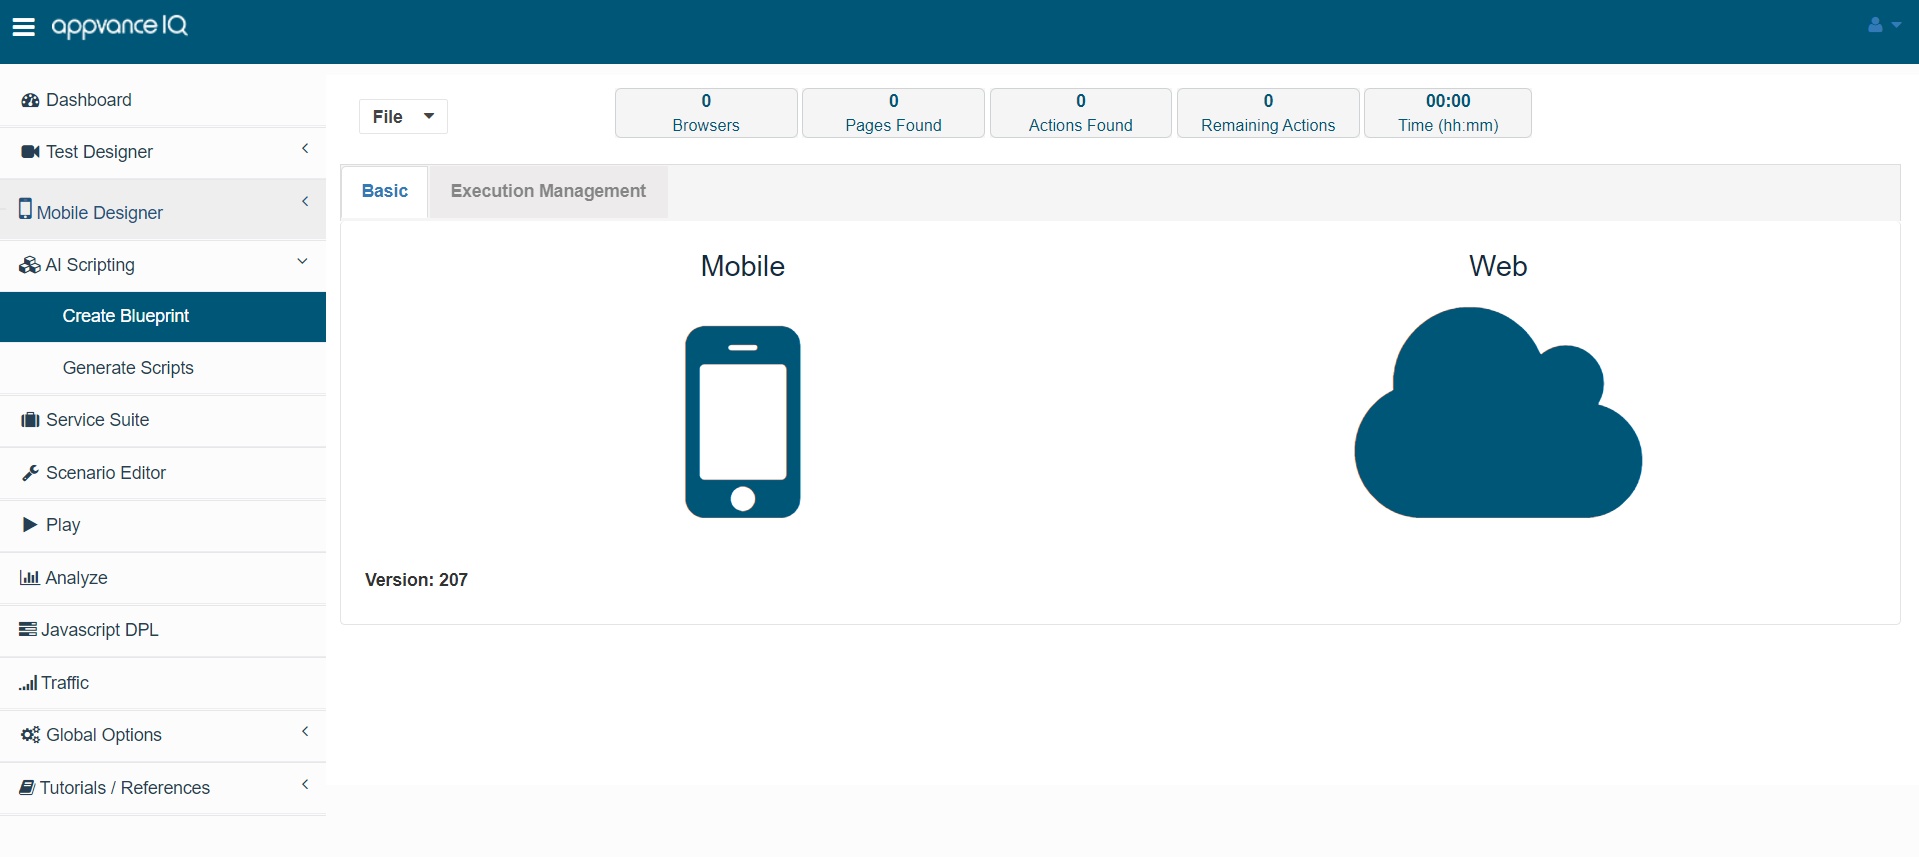
In the Basic tab, choose Mobile.
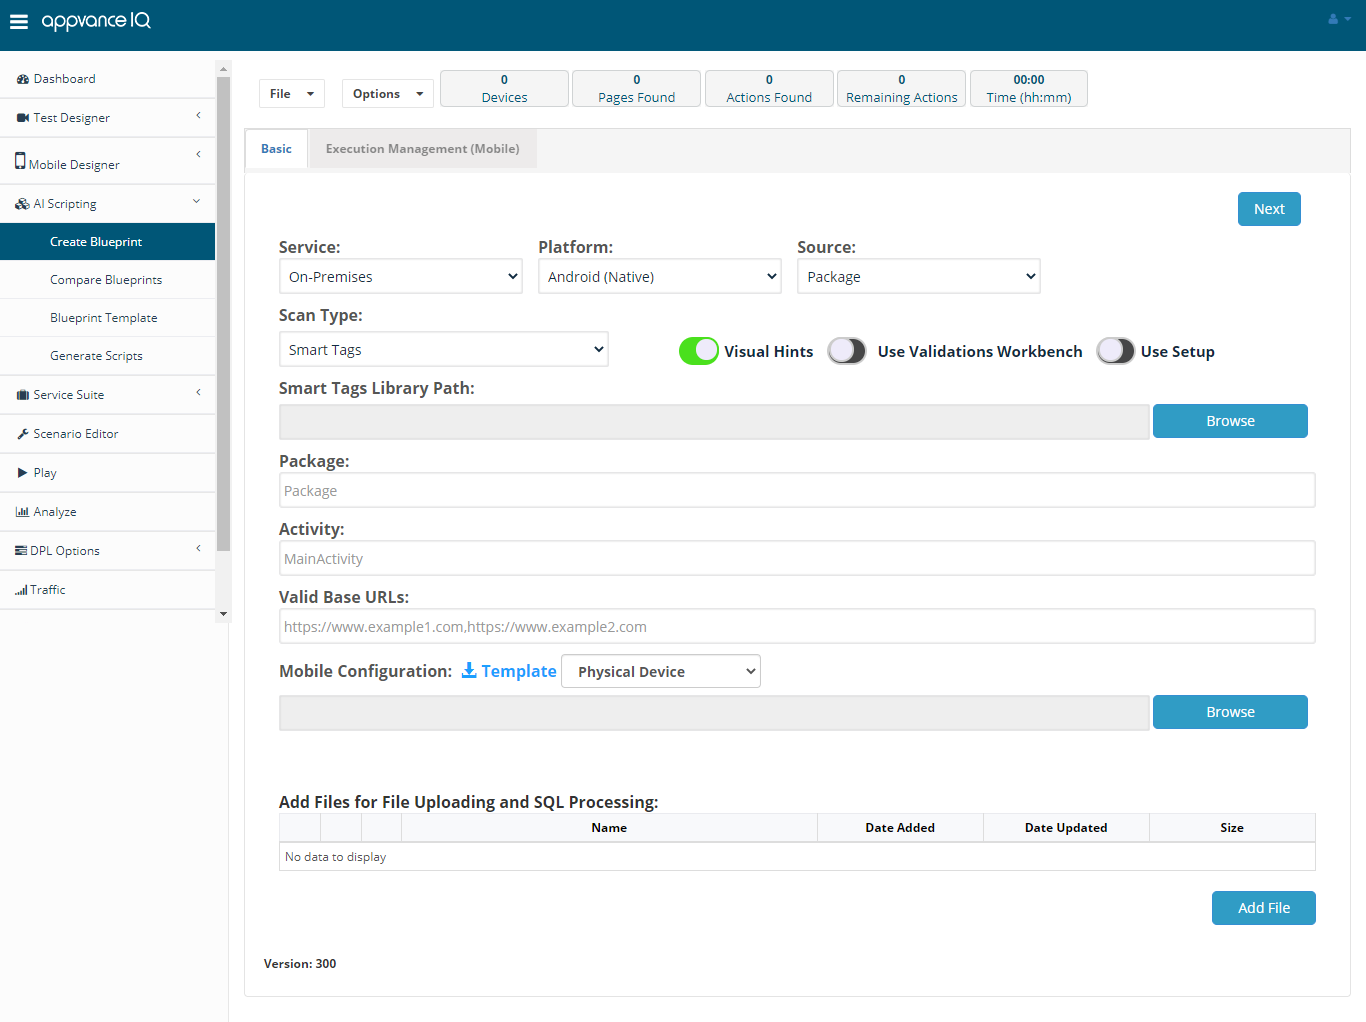
Service:
AIQ Supports 4 kinds of services
-
On-Premises - Hosted internal services of Appium/Mobile
-
BrowserStack
-
Experitest
-
SauceLabs
AIQ supports integration with SauceLabs, Experitest, and BrowserStack where you can set up config files to run mobile scans by making use of these platforms.
Platform:
Has options to choose between Andriod (Native) and IOS (Native).
Please Choose the right Platform as per your needs.
Source:
URL: Selecting URL, URL of the apk (Andriod)/ipa (IOS) should be provided which downloads and installs in the mentioned Emulator/device to run the Blueprint.
Package: Selecting the package, you will need to provide the Package and the Activity of the Application Under Test.
Scan Type:
There are 3 scan types that are supported,
-
SmartTags
-
SmartTags + Tags
-
Tags
If the SmartTags were created for the application under test, SmartTags can be used and the created SmartTags to be browsed before starting the Mobile Blueprint.
Refer SmartTag Workbench topic to learn more about mobile SmartTags.
Visual Hints:
Enabling this would indicate if screen-shots should be saved and displayed for the text-boxes, selects, checkboxes, radio buttons, form submit buttons, and other user controls.
Allows users to easily recognize which fields need data to be entered.
Use Validation Workbench:
Can be enabled or disabled based on the validation file that was created using Validation Workbench under Mobile Designer.
Refer to the Validation Workbench topic to learn more about the Validation Workbench for mobile.
Valid Base URLs:
Comma-separated list of valid domains that are allowed.
The valid domain must have; protocol://hostname:port. Port is needed only if it is not the default port for the protocol. Example: https://appvance.ai , https://cloud.appvance.ai
Mobile Blueprint also saves network requests as Web Blueprint does. Mobile apps communicate with a server and this traffic can go through a proxy. The valid Base URLs field allows entering the domains that are relevant for the Blueprint and filtering out domains such as ads, which can cause problems when generating AI Scripts from the logs.
Mobile Configuration:
Provides a template to download and provide the entries which should be uploaded back with the actual values, details of which would be discussed in the next section.
You can download the Template based on the parameters chosen:
Service:
Platform:
Source:
Physical Device or Emulator or Simulator:
Depending on the choices, the template could be downloaded, filled up, and re-uploaded to the system.
Creating the Blueprint (Android - Appium)
-
The first and foremost pre-requisite for this case is installing the Appium, Please check Appium Installation for detailed steps for installing Appium and Andriod Studio (which shows steps to install different Emulators and their versions)
Note: It is required to use the latest version of Appium (This document was written and tested using Appium Version 1.13.0)
Note: For Blueprinting using Mobile AI, it is required to start Appium as an Administrator.
-
Start the required Emulators from the Android Studio after installing all the emulators, Emulators usually take a lot of RAM, it is recommended to use a system with a bigger Ram.
-
Next is to get the UDID of all the Emulators that are going to be used to run the Blueprint.
Open Command Prompt and Enter "ADB devices"
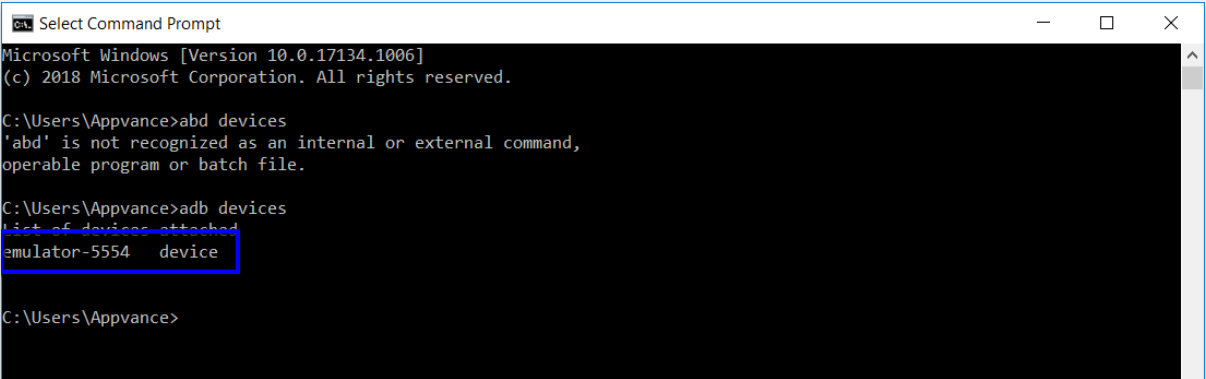
It will list all the running devices along with the UDID, in the above example "emulator-5554" is the UDID of the running device.
-
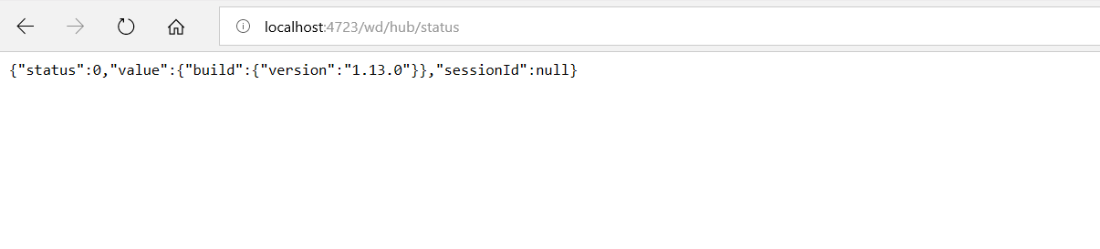
Appium's default port is "4723", you could go to the browser and run "http://localhost:4723/wd/hub/status" to see the below message.
-
Mobile Configuration: Requires us to provide the .json file, This is a basic JSON file that configures the devices on which the Blueprint runs.
A Template will be provided to download which needs to be downloaded and modified based on the choices as mentioned above.

Once downloaded, open the file to modify the contents:
Example below is for On-Premises, Android Emulator.
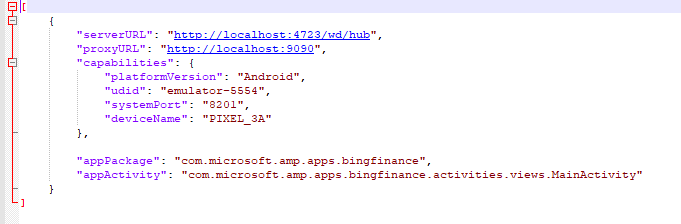
a) ServerURL - is where the Blueprint would be running, provide the server IP address if the Blueprint would be running on a different machine or an AWS DNS (genymotion instances) or localhost if we are running the mobile Blueprint in the local instance
b) udid - As already discussed how to get the UDID - The UDID value of the device should be mentioned here
c) port - Appium supports ports, the ports that is used are from 8201 - 8300, which means
we could launch as many as 100 Emulators to run a Blueprint by defining different ports in this field. Recent releases of Appium support this multi-threading
d) Capabilities - are the options that allow us to configure in which the test will run. All the capabilities are documented here on the Appium website
All of the entries can be removed so it runs with default capabilities
e) platformVersion - From your Android Virtual Device Manager, The API column would show all the platform versions that need to be used
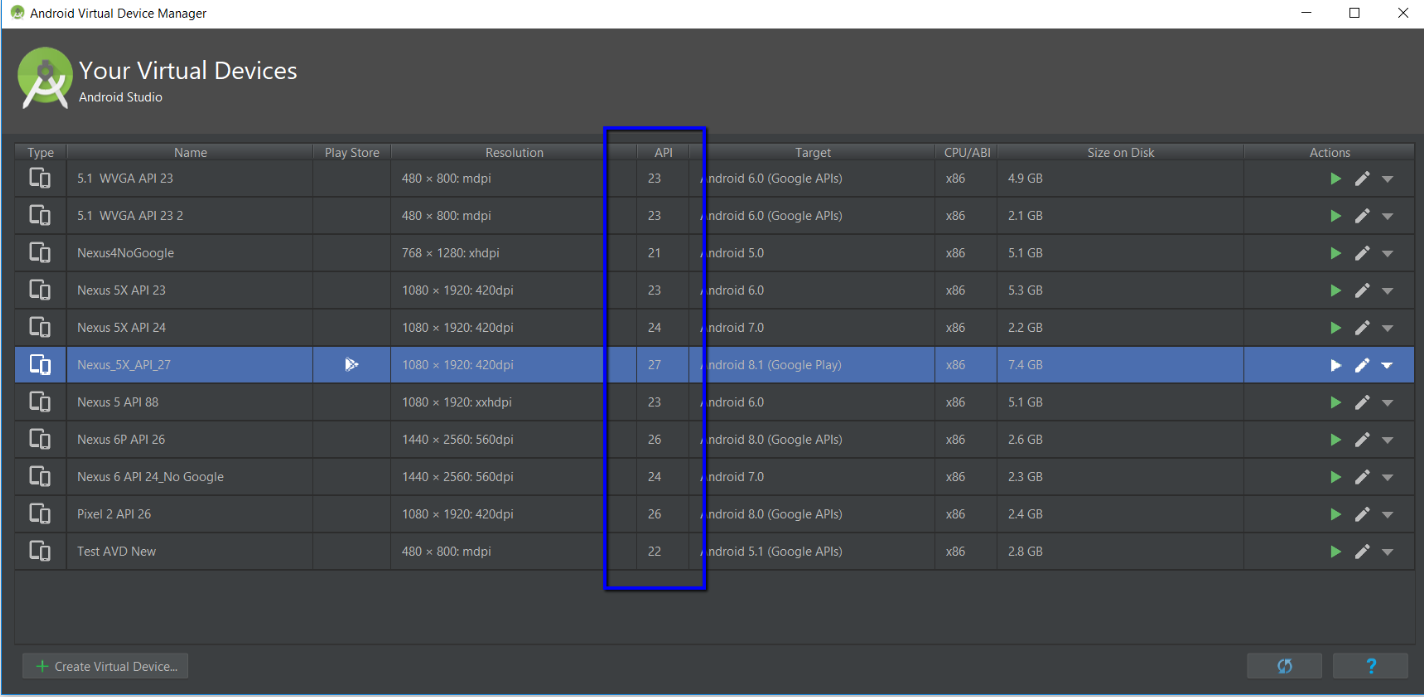
f) deviceName - Device Name should be the same as the Name column from the above screen-shot which is configurable and can be changed in Android Device Manager.
g) id - can be anything, could provide as 0, to begin with.
Similarly, we could add multiple entries as an array to run different emulators concurrently.
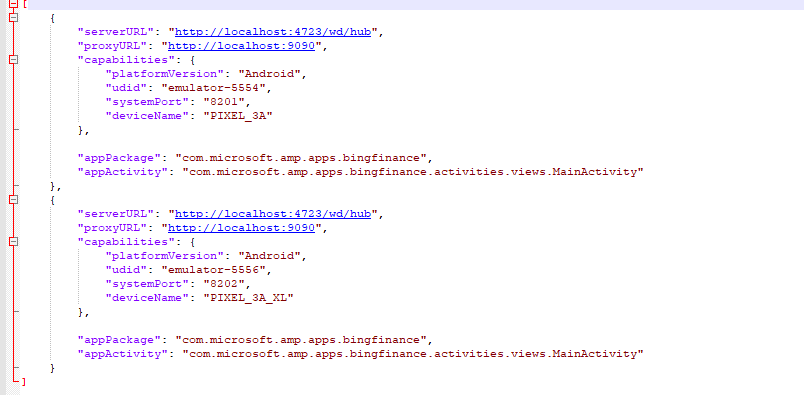
Need to make sure of different udid, port, and device names for each entry in the JSON file.
-
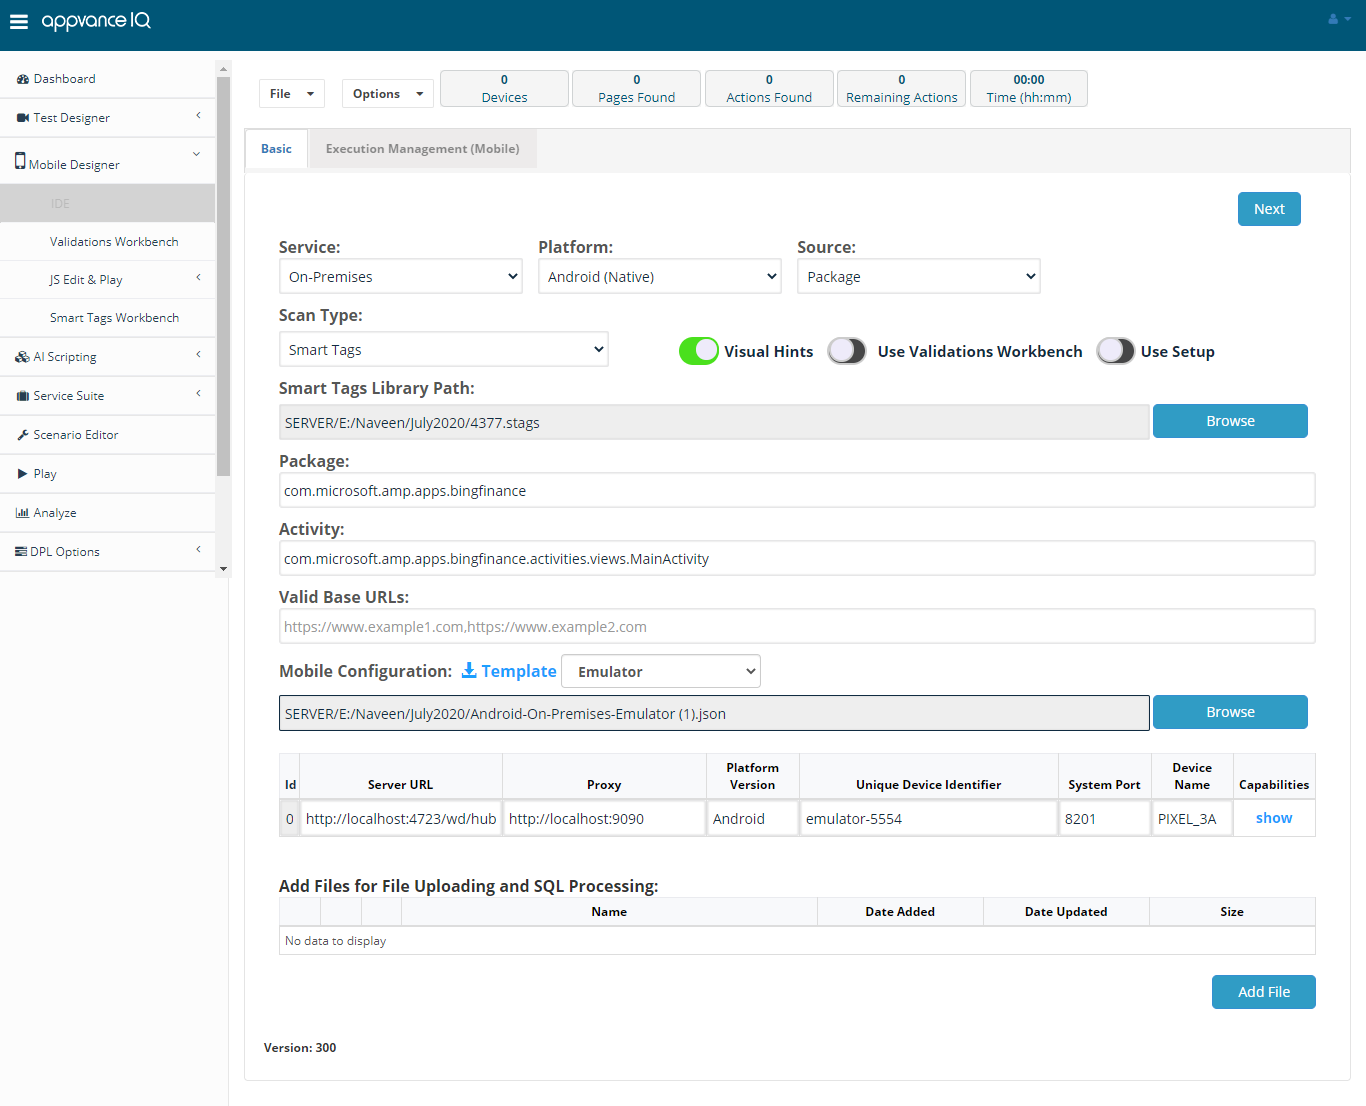
Save the created JSON file, browse the file and the details should be shown in the below table.
For multiple entries:
-
Source: If you choose URL, provide the URL where the .apk file is located, that can be downloaded.
When providing the URL, Mobile AI installs the apk on the mobile device configured, and then it shall run the Blueprint.
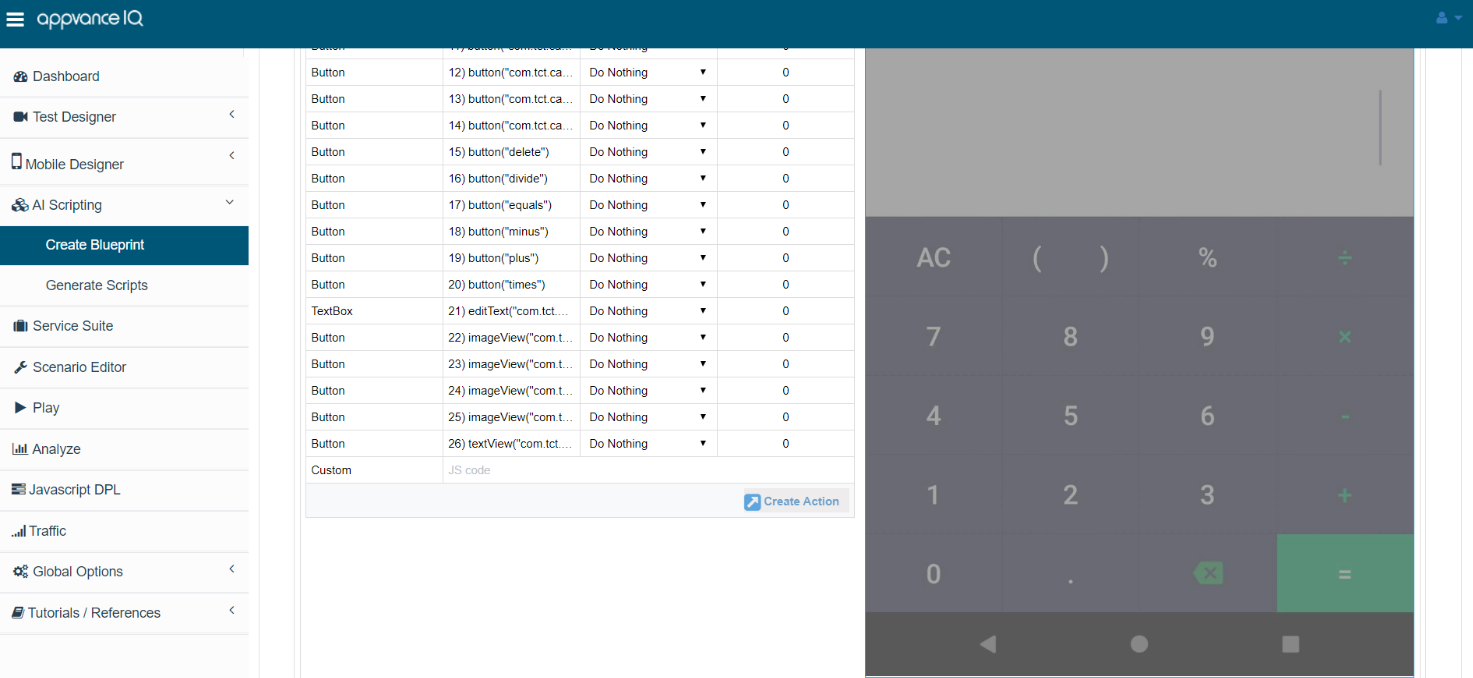
Package - When selecting the package, it is required to provide the Application Package details and Activity.
Now how to find those details?
a) Open the Emulator and open the application and have it running.
b) Open the command prompt and type "adb shell"
c) Inside the shell prompt, type " dumpsys window windows|grep -E 'mCurrentFocus'
Type a message" and hit Enter.
d) The output would be something like the below:
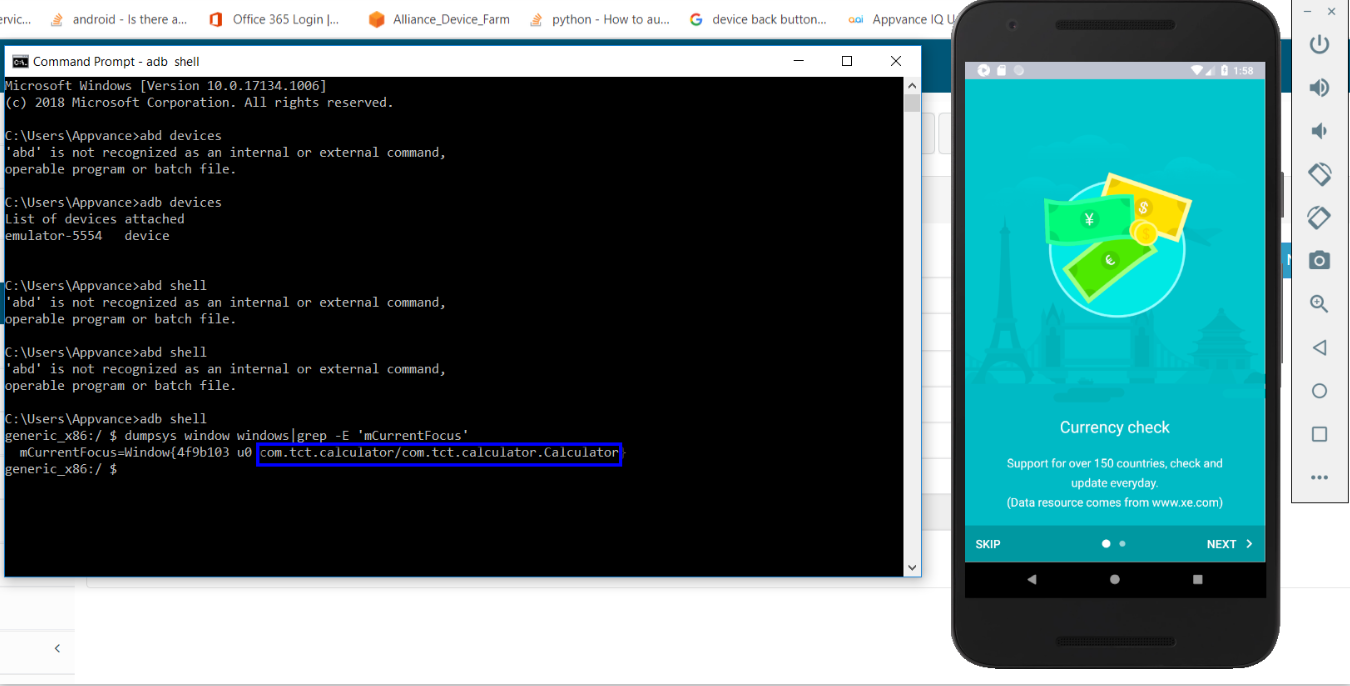
This is for the example that being used "Calculator" - The app can be downloaded from here
In the highlighted part, the first part before the slash (/) is the Package details, and after the / is the Activity details of the application under test.
-
Copy Package and Activity from the previous step and provide the details in the Package and Activity fields respectively.
-
Click Next
Create Execution:
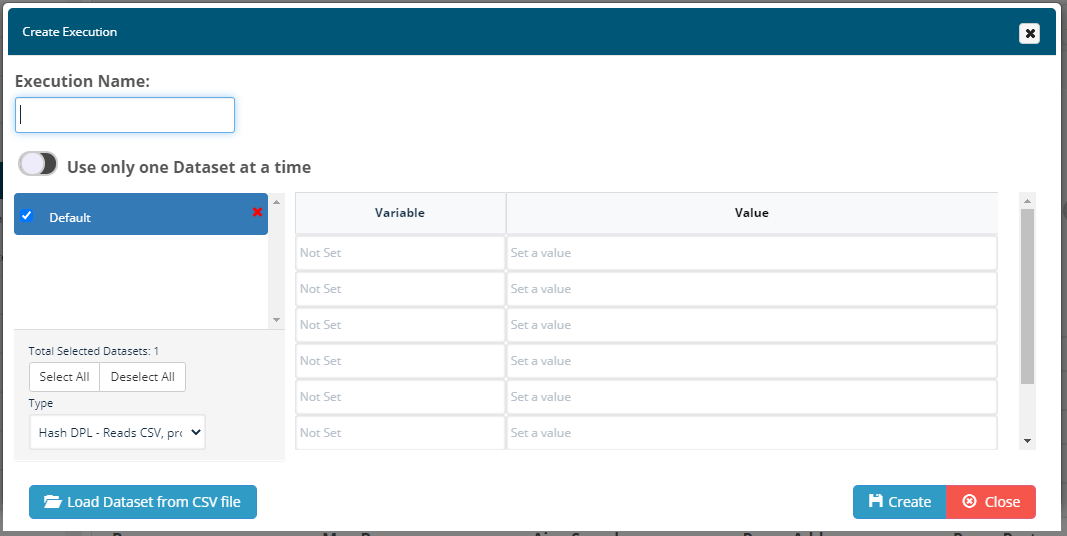
Execution Name:
Provide a user-friendly name to identify execution.
Use only one Dataset at a time:
If this option is checked, the number of concurrent browsers will be equal to the number of selected data sets for the execution. This is helpful when the application accepts only one use session at a time and when you will be using several browsers it is important to choose this option that way each credential is passed to a browser execution while doing the application Blueprinting.
Use previously defined bindings:
Available only when creating additional executions.
If checked, the new execution will use mapped fields of the selected execution
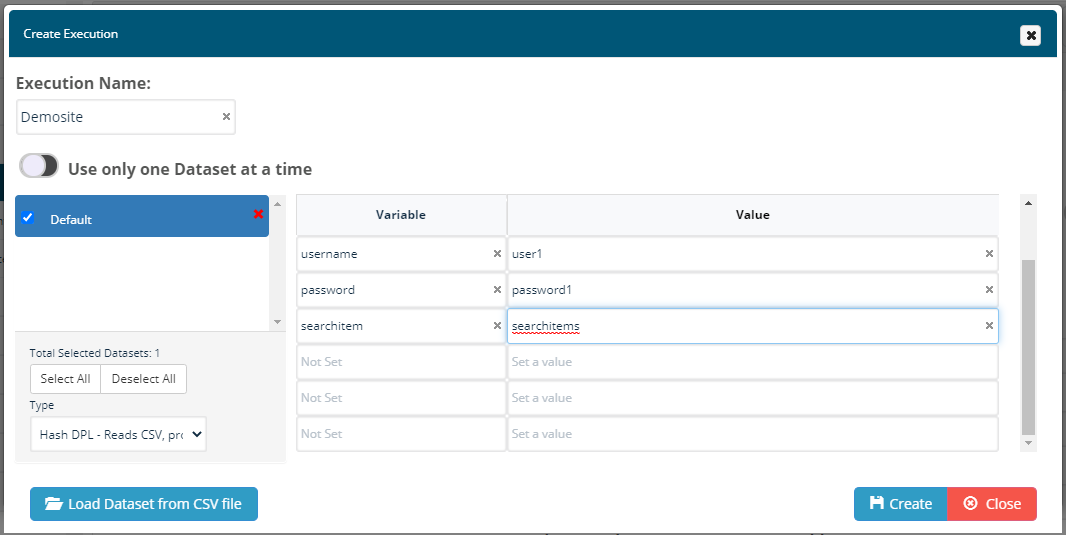
Default:
Default data set could be used by checking the option and providing any inputs that are required for the application like the user names, password, search terms, etc, which could be used to map later after the application scan finds the inputs.
This is something that could be entered later as well by choosing Data Set Manager Button
under Execution Management tab.
Load Dataset from the CSV file:
if you already have data that is stored in a csv file, those data could be browsed using this option and we could use that dataset for the application Blueprint scanning.
Selecting a Dataset:
Binds an execution with the values for the chosen dataset.
The main use case is to simultaneously scan the application with different user profiles and roles.
Click Create.
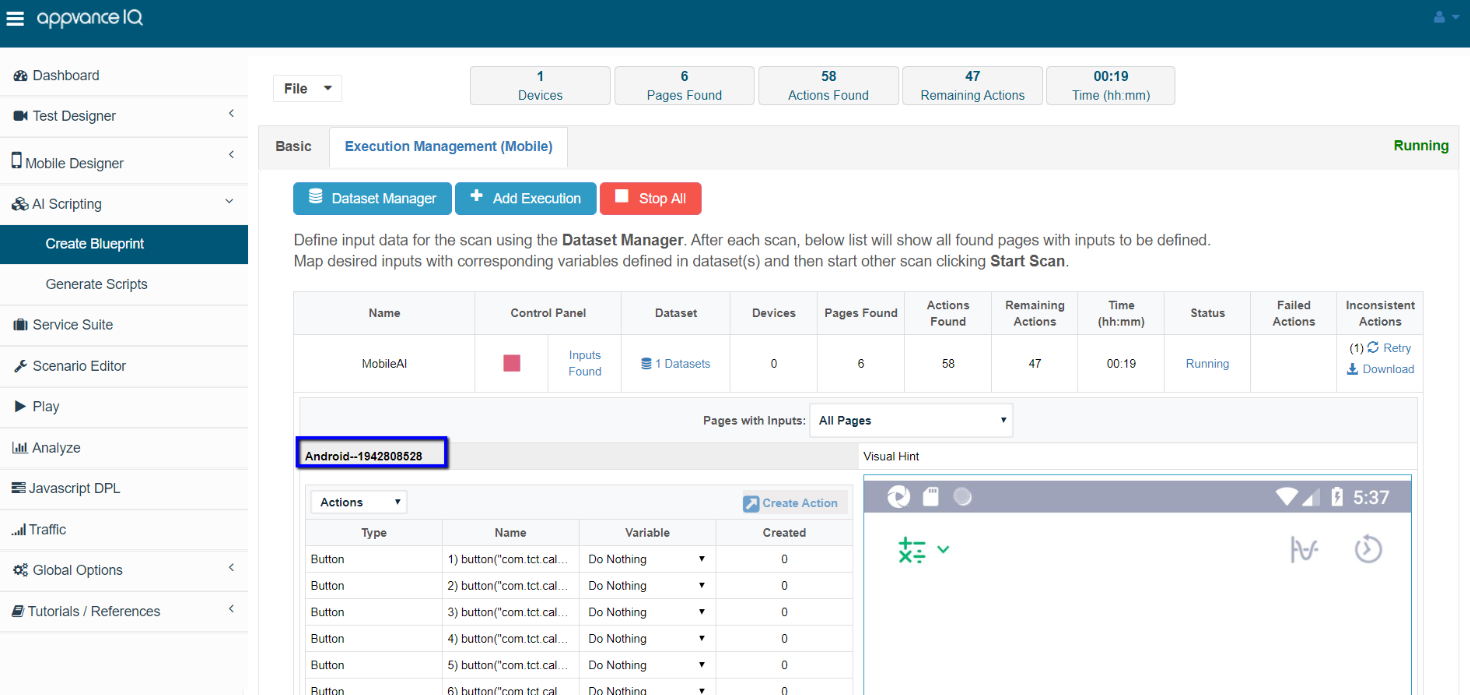
Execution Management:
Hitting Create will begin the mobile application Blueprint process, you should be seeing the Emulator(s) opening and performing the actions on the application under test, The Status should say Running.
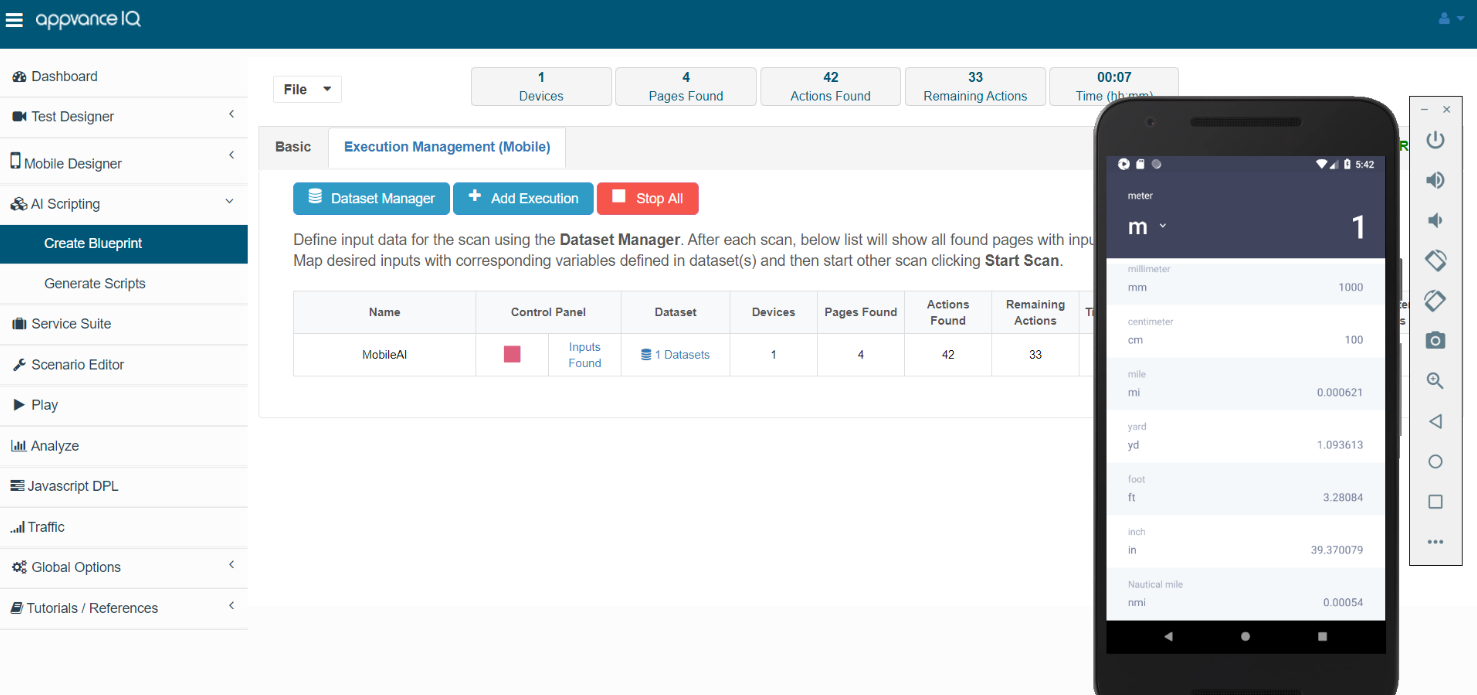
The Scan shall run for a while depending on the number of pages AI finds.
-
On top, the number of Devices used shall be displayed
-
It also shows the number of pages found during the scan
-
Actions found so far
-
Remaining Actions
-
Time took so far
All the above data are live, the numbers shall keep changing as and when AI finds different pages and different actions, the remaining actions keep varying as well since it depends on different pages as well.
Once the "Remaining Actions" shown is 0, which means the first scan is completed.
NOTE: It is important not to interrupt the Blueprint process, it is requested to wait till the Blueprinting says "Not running" and only then map the variables and continue Blueprinting, when mapping the variables during the Blueprint process itself it alters the remaining actions that way the Blueprinting could take much longer than expected.
Data Set Manager:
The Data Set Manager is the place to define input data for the scan using the Data Set Manager. After each scan, a list will be shown of all pages found with inputs to be defined.
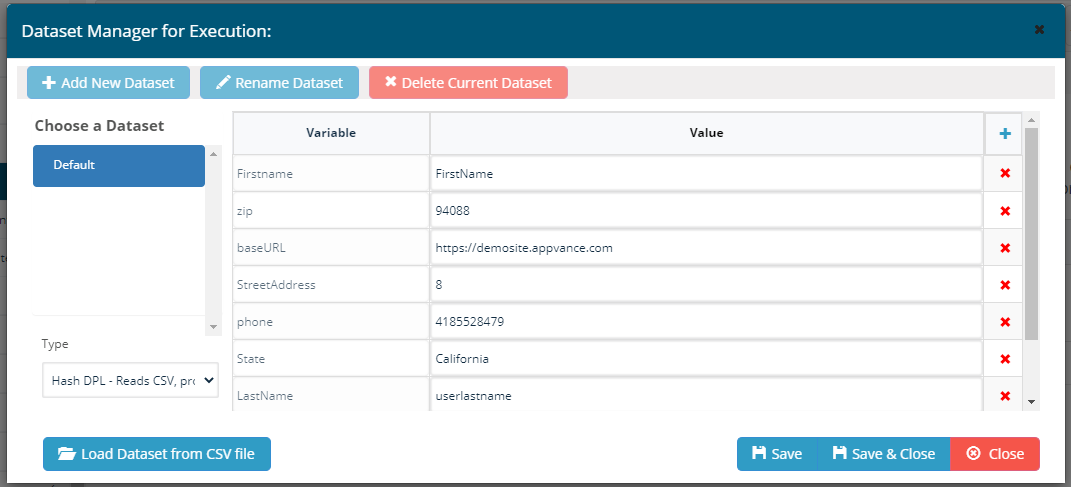
Data Set Manager is the place to define all the input data variables that are used to map to the desired elements on the web page.
Data can also be loaded from an external CSV file into this Data Set Manager.
Several Data sets can be created using the 'Add New Data Set' button.
DataSet sample, using two sets of variables
AdminRole
username = root
password = ABC123xyz!
domain = every_items
QAUser
username = qatesting
password = t3sting
domain = company_param_001
Data Set can also be Renamed or/and Deleted using the 'Rename Data Set' and 'Delete Current Data Set' buttons.
Enter all your variable names and the corresponding values in the text fields provided, you can add more rows using the 'Add New Row' button at the bottom.
'Save and Close' can be used to save all the changes.
'Load DataSet from CSV file' can be made use when we have the data sets saved in the CSV file, the CSV file can be browsed and can be used as variables which later can be used to map to the elements after the scan.
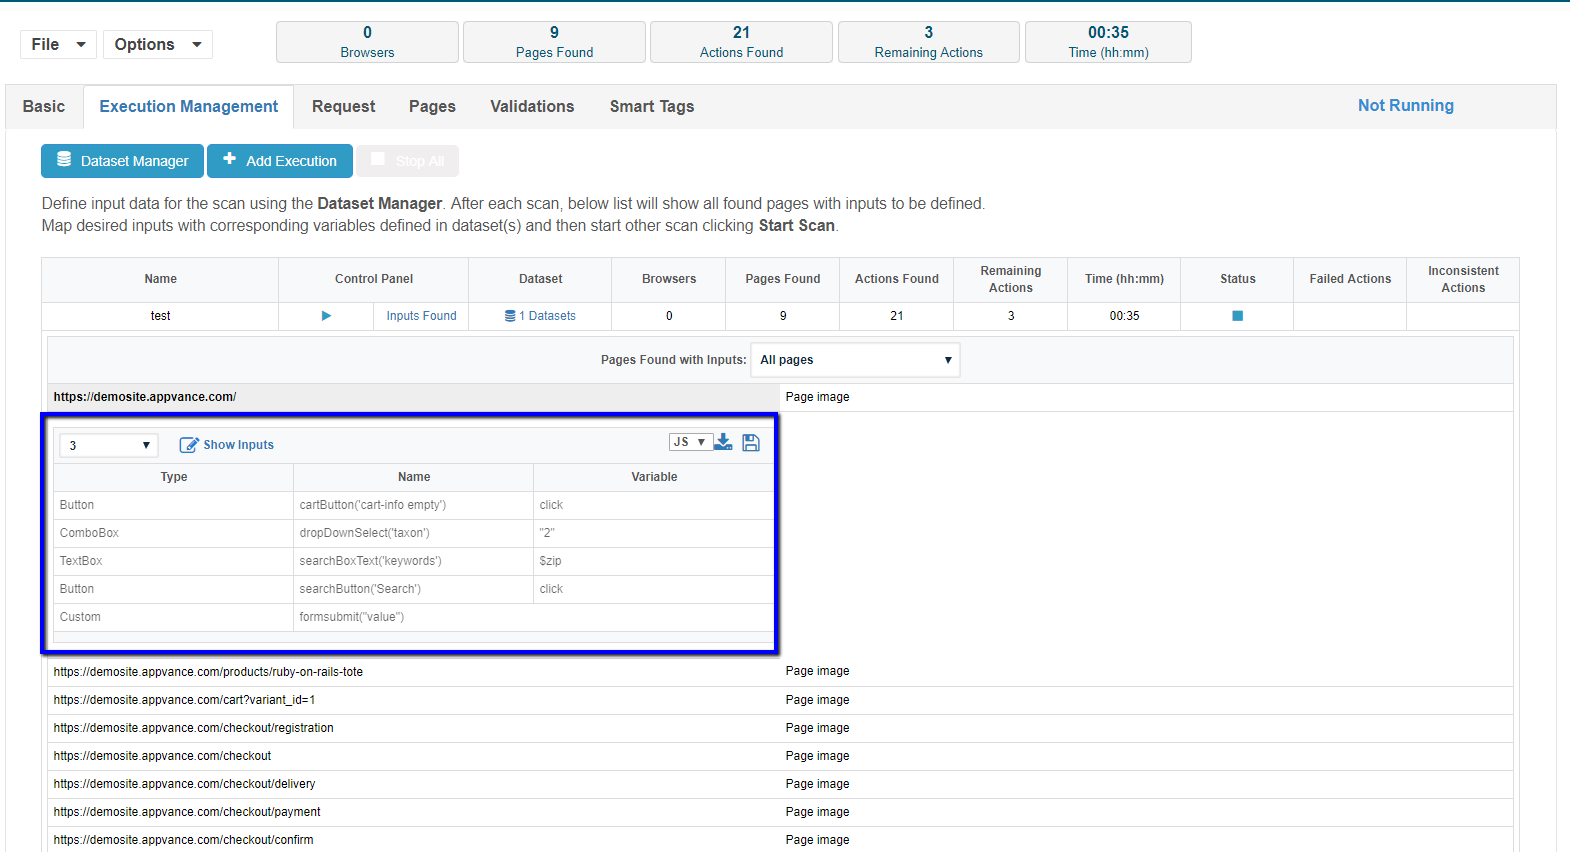
Once we have the first set of Blueprinting done, Execution Management shall show the link with Inputs found, Clicking that link will show all the pages where the scan found the inputs.

A particular page could be chosen by clicking the link and then clicking show inputs will show all the elements where you would be able to provide inputs like the texts, radio buttons, check-boxes, text area, etc.
All the defined inputs for the text boxes can be chosen from the variable drop-downs.
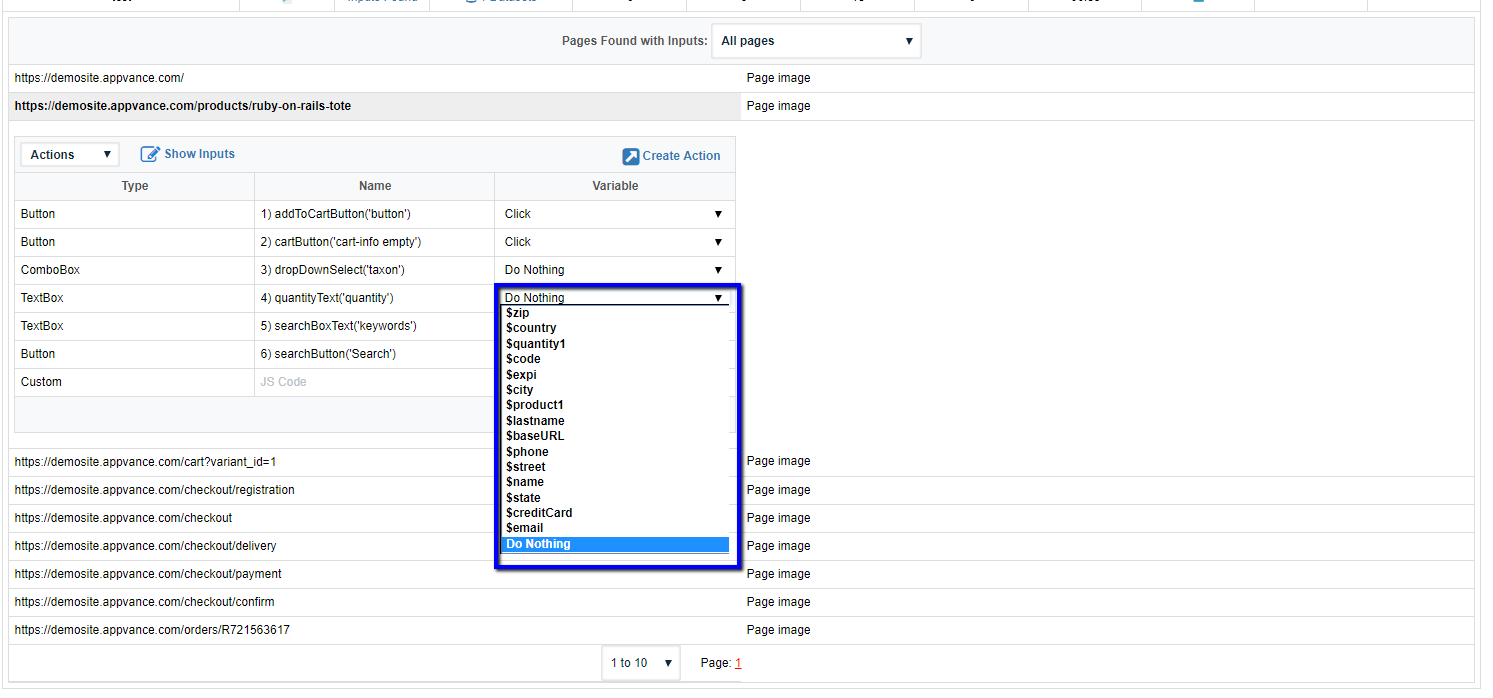
For other inputs, AI will suggest all the options say for example, for a radio button, it will show the options that we could choose from if that input is required, and for a drop-down with values, it will show all the options including an option to try all the options, etc.
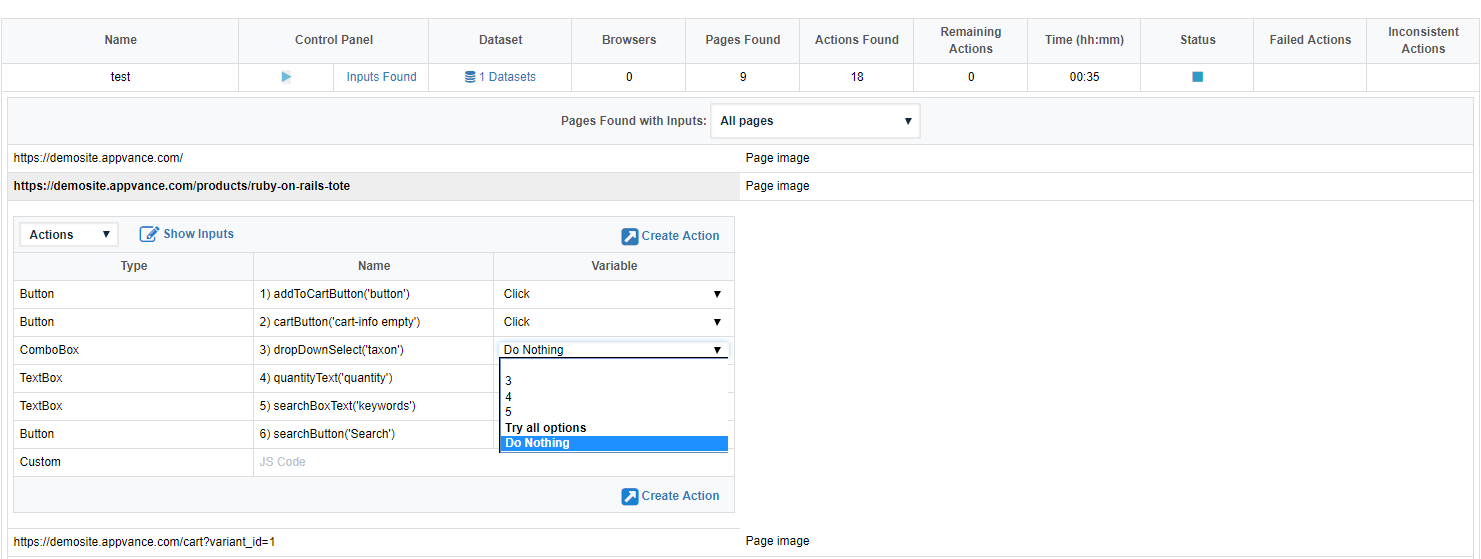
If there are any custom actions that need to be created apart from this, Custom Type could be used with the JS Code.
For example: after logging in, if you need to go to a different URL, or if we need to process something we could make use of customJS.
After selecting all the required inputs, as seen below, Create Action link shall get enabled > Clicking which will create a new action to be performed for the next scanning or Blueprinting.
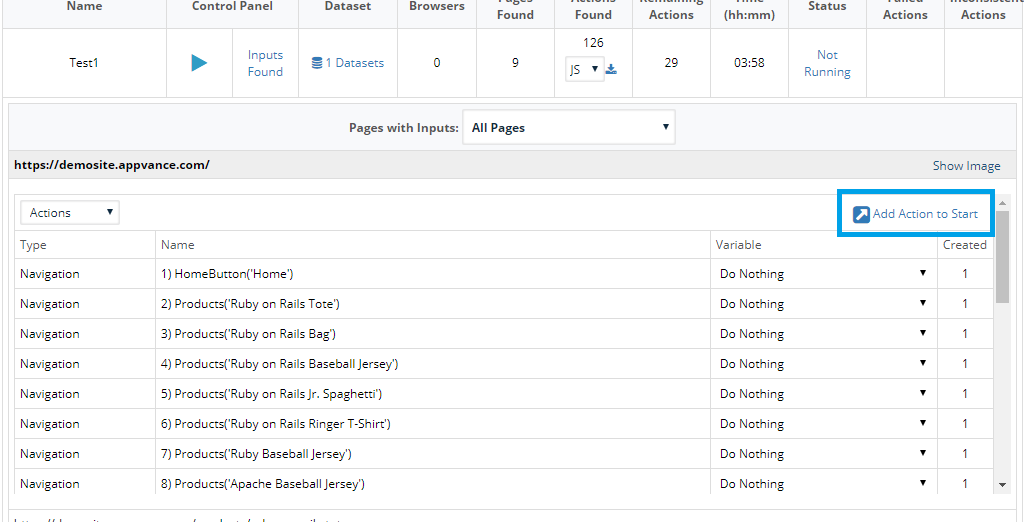
With the created actions, you could download the MDS and also the JS and also save them using the save option.
You could create actions like this for all other different pages.
And once all those actions are created, click the play button to begin the next round of application Blueprint using all the provided inputs and data.
Appvance AI will use the inputs provided by you and will continue Blueprinting until it finds no other actions.
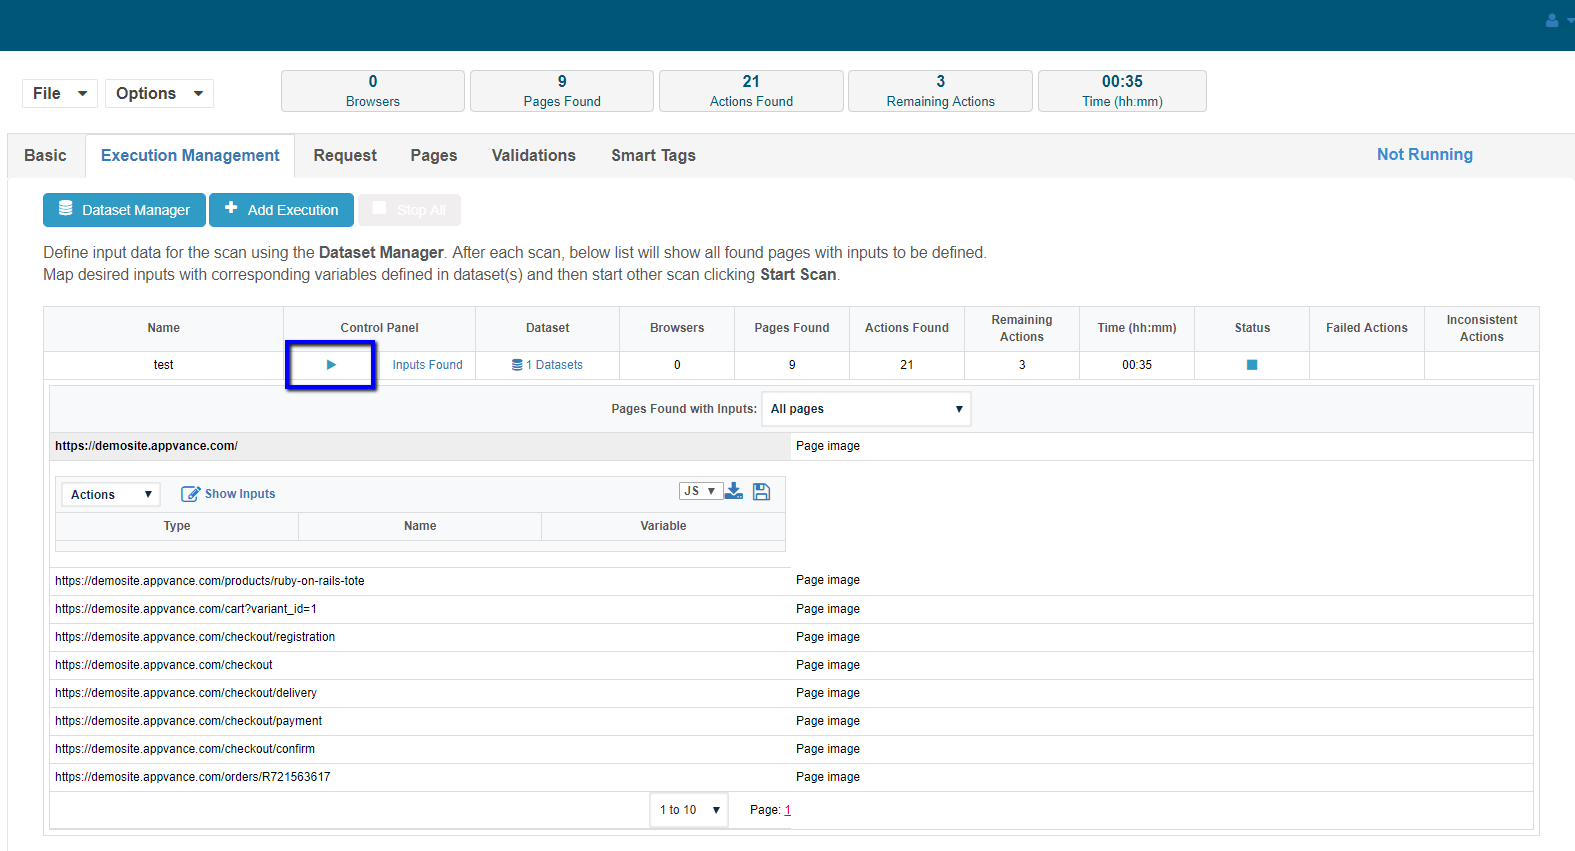
You could add more execution with different data sets by using the Add Execution option.
Blueprint will allow users to view the source of each State found.
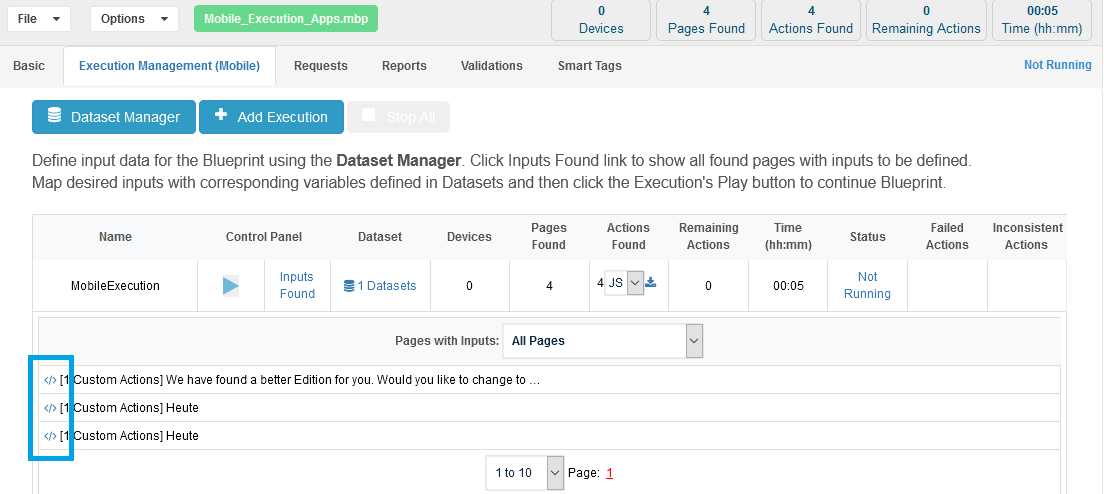
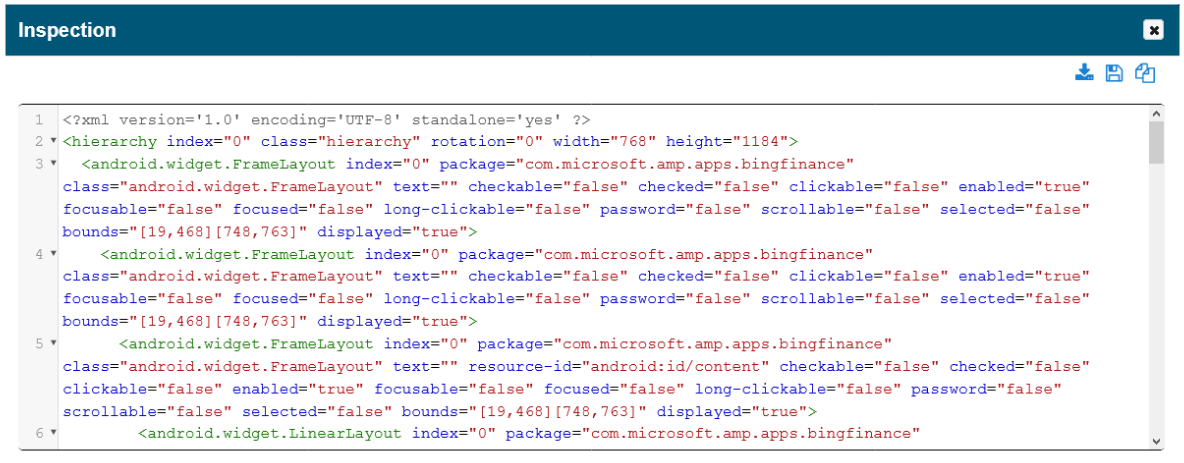
This feature is more useful for Mobile because it allows the Mobile Blueprint user to:
-
Visualize the structure of the elements (as given by Appium)
-
Verify that there are no missing elements that should have been found for the Page or State (Tags of SmartTags)
-
This is also useful for devs, QA, and scriptwriters
-
You also have an option to download the HTML file/copy the contents to a clipboard
Failed and Inconsistent Actions:
For every action, you may notice Failed and inconsistent actions.
Failed Actions are the actions that caused an error during their execution, there are several different failures that could occur like the element not found in 90 seconds, network interruptions, etc.
Failed Actions will have a number of failed actions including a retry option, you could click the retry link which loads all those actions again to see if they work, else it will still mark them as Failed Actions.
You could also download the JS scripts of the failed actions to check the failures and the reason for failures.
Inconsistent Actions are actions that lead to different pages each time they are executed, Suppose for example after a login page, the first time it navigates to Page A which we store with an ID, and the 2nd time if the path takes to a different page, say Page B, we mark an action as inconsistent action and again it will show the number of inconsistent actions with a retry option to retry all the inconsistent actions.
The Stop All button at the top could be used anytime during the Blueprinting to stop the entire process.
File Menu Options
File > New - is to create a new Blueprint file.
File > Open - to open any existing Blueprint files.
File > Save - To save the Blueprint file.
File > Save As - To save the Blueprint file with a different name.
File > Export Template - After all the Blueprinting of the application is done, you could save a template of the file. This template file is used when running a Blueprint using CI CD.