Setup and Configuration of AI Blueprints for Salesforce Applications
The following information details the required setup and configuration for this example.
This section documents the process when using AI 3.0 (AIQ 5.0.0 and later).
Accessor Preferences
Accessor preferences must be set on the controller or test node where the blueprint will be run. This is because each Test Designer instance is local to the machine where it is installed.
For example, if you want to run a Blueprint on Machine XX via Controller YY, access machine XX via remote desktop protocol and login to an AIQ instance of either YY or XX.
Whenever a Controller or the Test Node is upgraded, the accessor preferences are reset. You must make sure that the preferences are set again post-upgrade.
-
Navigate to the Web Designer to set the accessor preferences. You can use either the new Web Designer interface or the Web Designer (Classic) interface.
-
Web Testing > Web Designer > Options (gear icon) > Accessor Preferences.
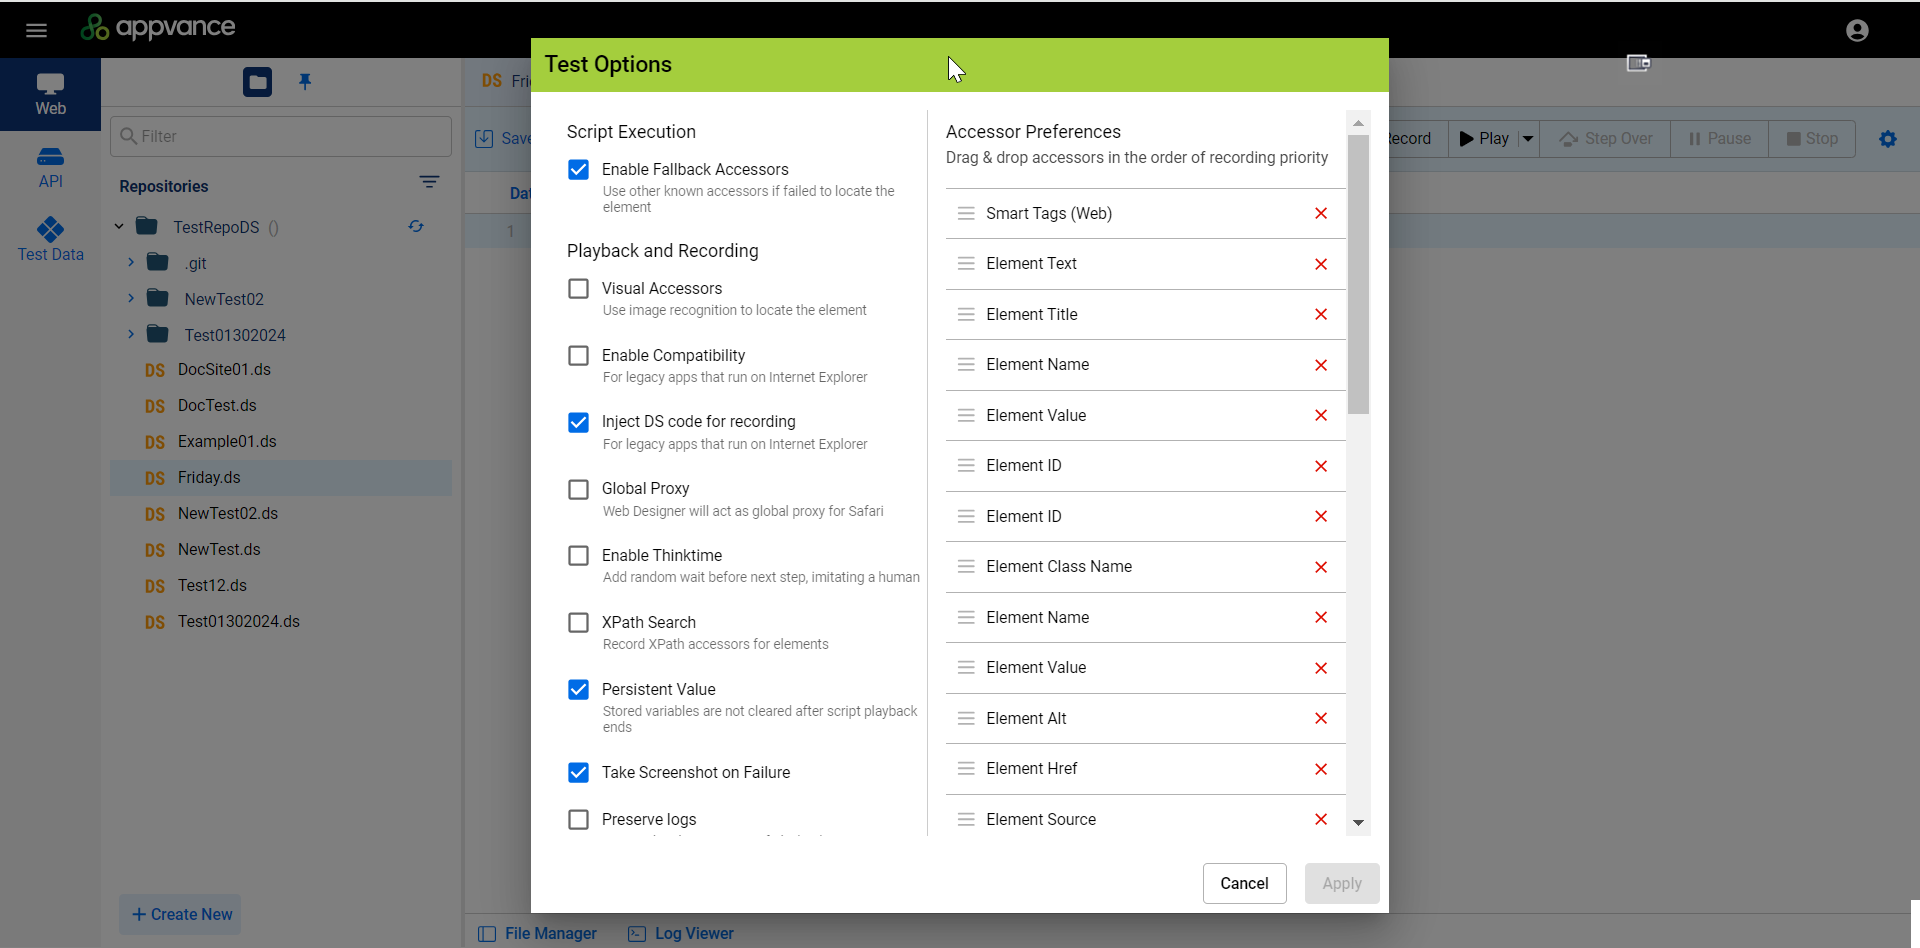
-
Web Testing > Web Designer (Classic) > Options > Accessor Preferences.
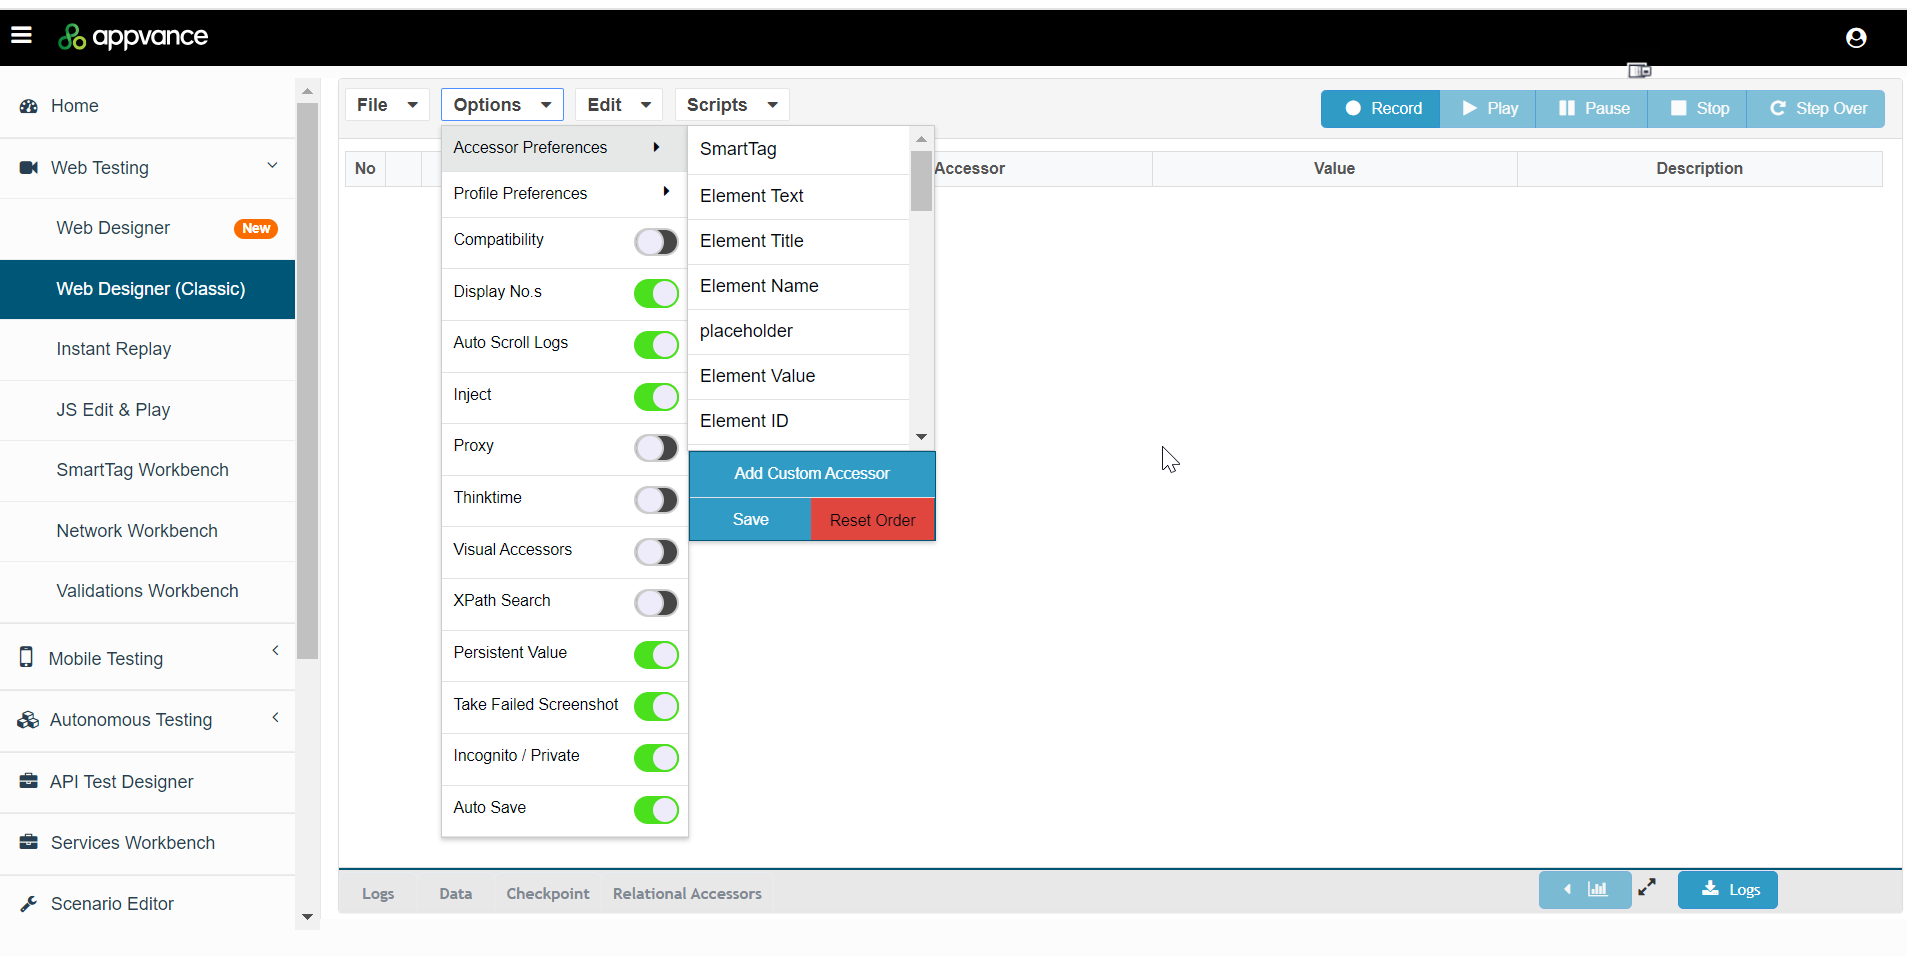
-
-
Make sure that the XPath Search is disabled.
-
Click Reset to reorient to the default list.
-
Update the Accessor Preferences as follows:
- SmartTag
- Element Text
- Element Title
- Element Name
- Element Value
- Element ID
- Element Class Name
- Element Parent
- Element Alt
- Element Href
-
Leave the remaining accessors in default order.
-
Click Save in Web Designer (Classic) or click Apply in Web Designer..
Blueprint Configuration
Various settings need to be enabled and configured in the Blueprint.
- Scan Type
- Blueprint Settings
- Getting Valid URLs
- Browser Settings
- Proxy Settings
- Data Production Library
Scan Type
The scan type determines how the application will be scanned.
In the Blueprint Designer:
-
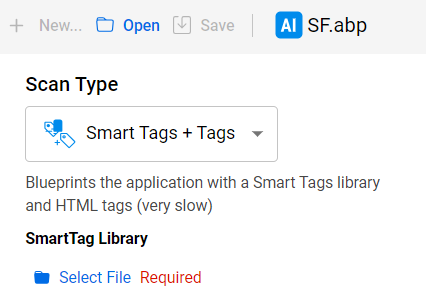
In the Scan Type option, select SmartTags + Tags. This means the scan will use a combination of Tags and SmartTags.
-
In SmartTag Library click Select File to add your SmartTag file.
For more information about SmartTags, refer to these topics:
- Web SmartTags
- Understanding your Application with SmartTags
- Useful smartags workbench custom actions and other js examples
Blueprint Settings
Enable the following options:
-
Visual Hints - This means that screenshots will be saved for each page state.
This option only applies to AI 2.0. Screenshots are automatically saved for each page state in AI 3.0.
-
Shadow Dom - Must be enabled for applications that are developed using Shadow Dom. Enabling this helps the AI to scan all of the custom accessors in the application.
Getting Valid URLs
You need to identify all of the valid URLs for the application you are testing, using the base URL of the application as the starting point.
Salesforce example base URL: https://d41000000649seaq-dev-ed.lightning.force.com/lightning/page/home
Using the Web Designer (Classic) interface
To identify all the valid URLs :
-
Navigate to Web Testing > Instant Replay.
-
Click Record. The status should display “Record”.
-
Navigate to Web Designer (Classic).
-
Click Record.
-
Select “Chrome” as the browser type.
-
Enter the base URL in the new browser launched by Test Designer.
-
Login to the Salesforce application.
-
Perform a few actions.
-
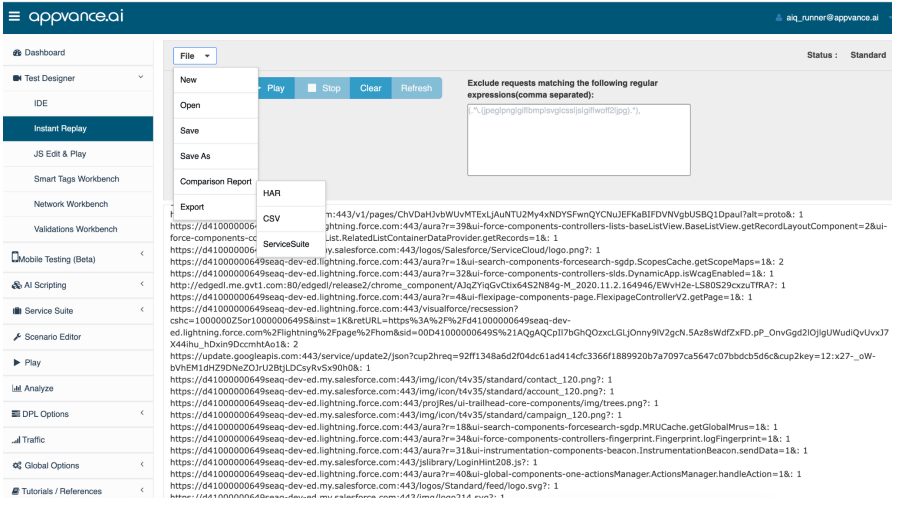
Navigate back to Instant Replay. A list of URLs is displayed.
-
Click Stop.
-
Click File > Export > CSV.
-
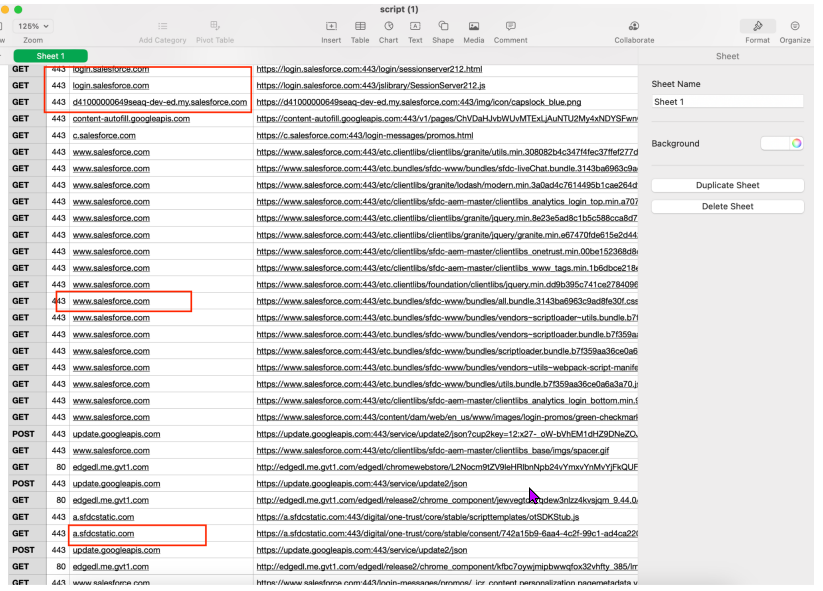
From the generated CSV file, identify all valid URLs pertaining to the application, keeping in mind the application may use domains outside of the primary domain of valid URLs pertaining to the application.
For example, the highlighted URLs in the following screenshot pertain to Salesforce. Notice also the ‘noise’ from the browser, for example most of those containing google as well as Google Chrome.
Browser Settings
Configure your browser settings.
On the Add Execution page:
-
Start with : Specifies the number of AI bots / browsers to run. If you have a machine with sufficient resources, you can run up to twenty AI bots / browsers concurrently.
-
Browser : Select the browser that will run the Blueprint. Chrome is the default browser.
-
Use Headless Browser : Select whether to use a headless browser. Enabled by default.
-
Delay Between Requests (ms) : This determines the wait time between requests and should be adjusted based on the responsiveness of your deployment. See Resource Considerationsfor more information.
Proxy Settings
Configure your proxy settings.
-
Configure a Proxy Address:
-
Localhost - If running the Blueprint on the same controller.
-
IP address of the test node - If running the Blueprint on the test node via the controller.
-
-
Configure a Proxy Port. Port 9090 is recommended.
Data Production Library
Configure your DPL settings. You can add a Synthetic or Java Script file defining all the input values required.
For more information on DPLs, see Operational Test Data with DPL's.
Next step: Executing the Blueprint for the First Time