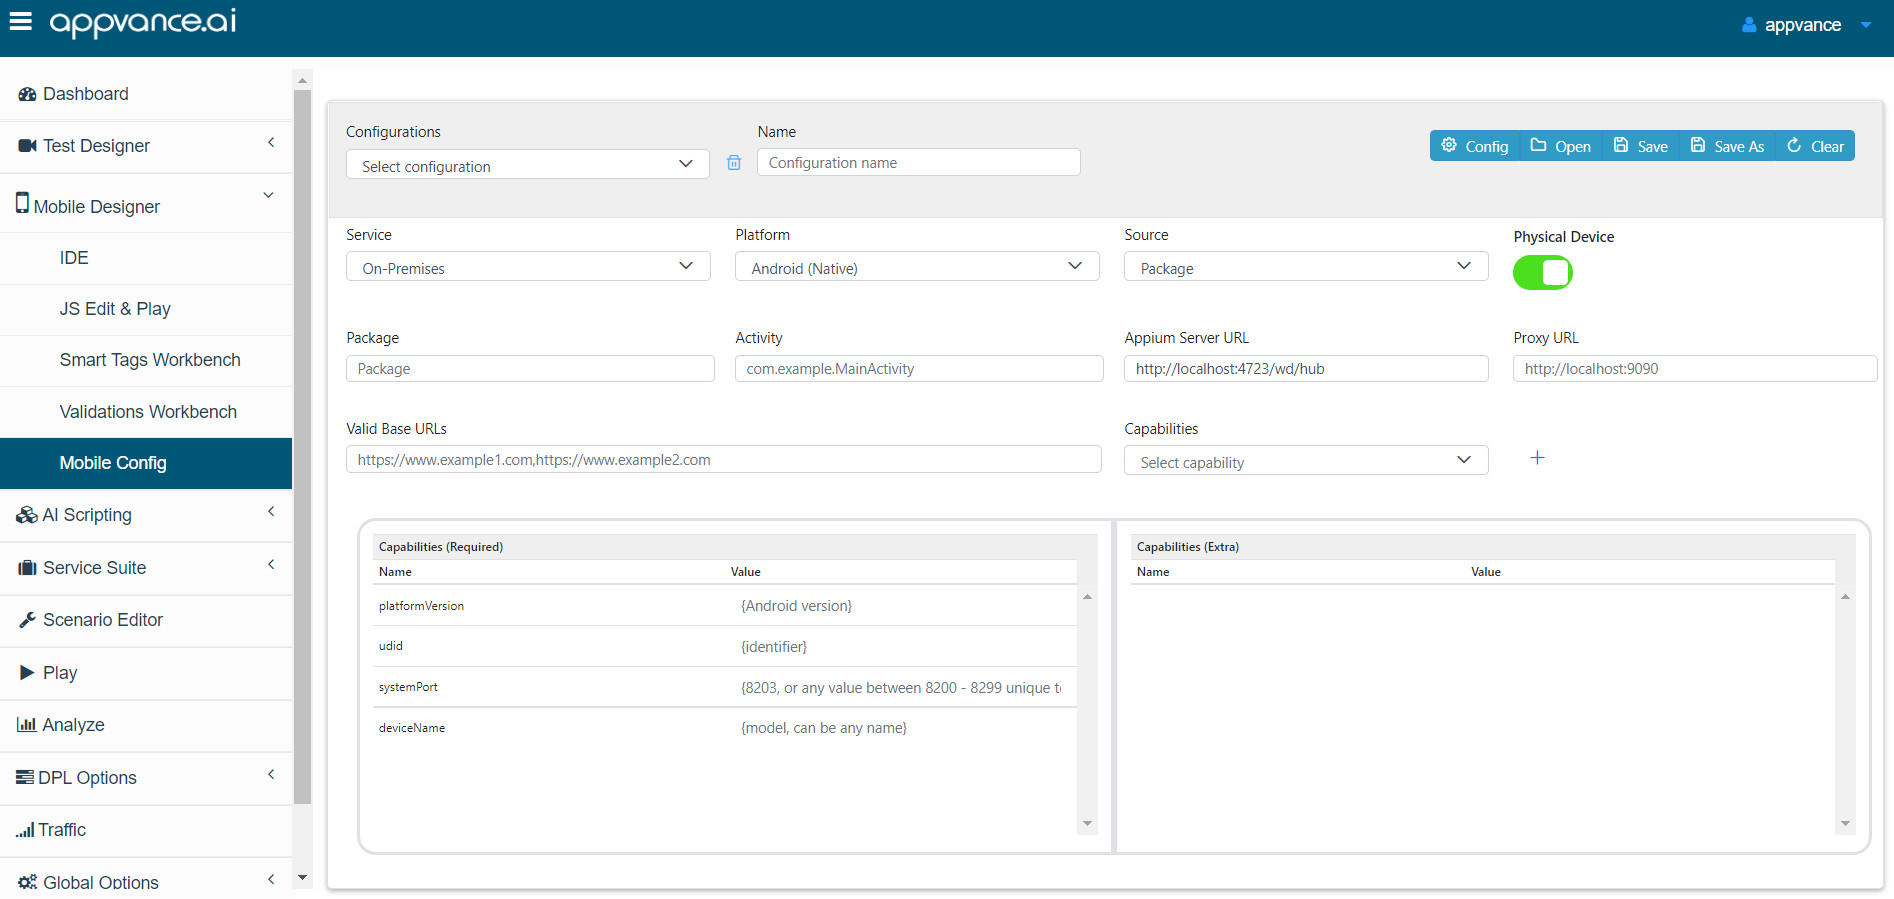
A Mobile Configuration file is required to describe which app will be launched during the Play/Recording/Blueprint.
- In AIQ navigate to Mobile Designer > Mobile Configuration.
-
The first step is to get the basic parameters from the Device. Open a Console/Terminal in the adb directory.
See Setting up the Environment for information on how to get the directory if a variable path is not assigned to it.
-
Open the Universe app in the Device Emulator and perform the following steps:
-
UDID: adb devices
List of devices attached
emulator-5554 deviceSo: UDID=emulator-5554
-
appPackage: adb shell pm list packages
package:com.android.traceur
package:com.android.contacts
package:com.google.android.apps.messaging
package:com.ed.universe
package:com.android.internal.emulation.pixel_3a_xl
package:com.android.location.fused
package:com.android.vpndialogsIt returns a list with active packages, and searches for the app name, in this case, Universe (appPackage=com.ed.universe).
-
Activity/appActivity: adb shell dumpsys package com.ed.universe
Activity Resolver Table:
Non-Data Actions:
android.intent.action.MAIN:
237c878 com.ed.universe/.MainActivity filter 5a51b51
Action: "android.intent.action.MAIN"
Category: "android.intent.category.LAUNCHER"
.DayInDetailActivity:
7457fb6 com.ed.universe/com.edu.sundroid.DayInDetailActivity filter 24504b7
Action: ".DayInDetailActivity"
Category: "android.intent.category.DEFAULT"versionCode=37 minSdk=21 targetSdk=32
minExtensionVersions=[]
versionName=1.7.4
usesNonSdkApi=false
splits=[base, config.arm64_v8a, config.en, config.xxhdpi]
apkSigningVersion=3appActivity=.MainActivity
Also, AndroidVersion appears as targetSDK = 32 ( it can be an upper version if OS is supporting it)
-
-
Now fill the Mobile Configuration Panel with the parameters
-
Name the configuration.
-
In Source select Package.
-
In Capabilities add
"noReset": "true"to prevent the app from asking repeatedly to log in. -
Accept the default parameters for the remaining fields.
-
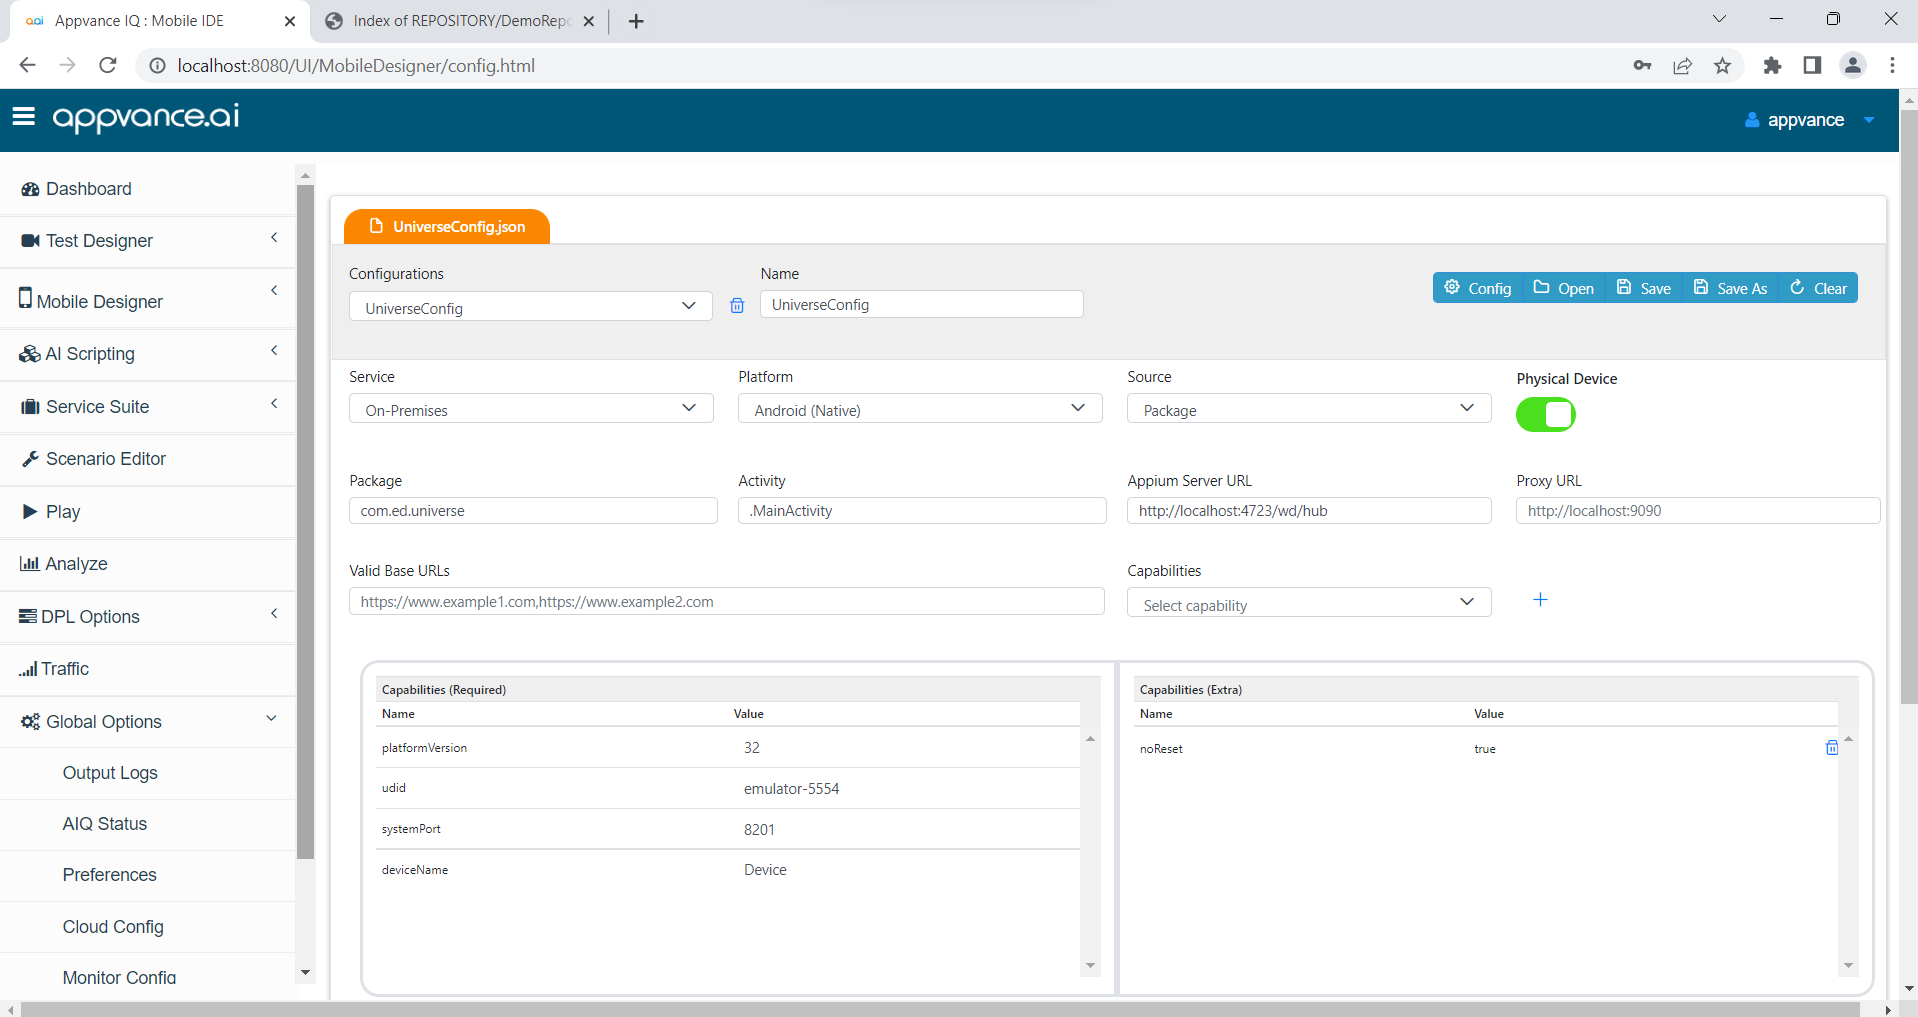
Save the configuration as "UniverseConfiguration".
-
Verifying the Mobile Configuration File
The file configuration can be opened in text format:
[
    {
        "configName": "UniverseConfig",
        "app": "",
        "appPackage": "com.ed.universe",
        "proxyURL": "",
        "bundleId": "",
        "source": "package",
        "appActivity": ".MainActivity",
        "deviceMode": true,
        "service": "On-Premises",
        "serverURL": "http://localhost:4723/wd/hub",
        "platformName": "Android",
        "validDomains": "",
        "capabilities": {
            "platformVersion": "33",
            "udid": "emulator-5554",
            "systemPort": "8201",
            "deviceName": "Device",
            "noReset": "true"        }
    }
]
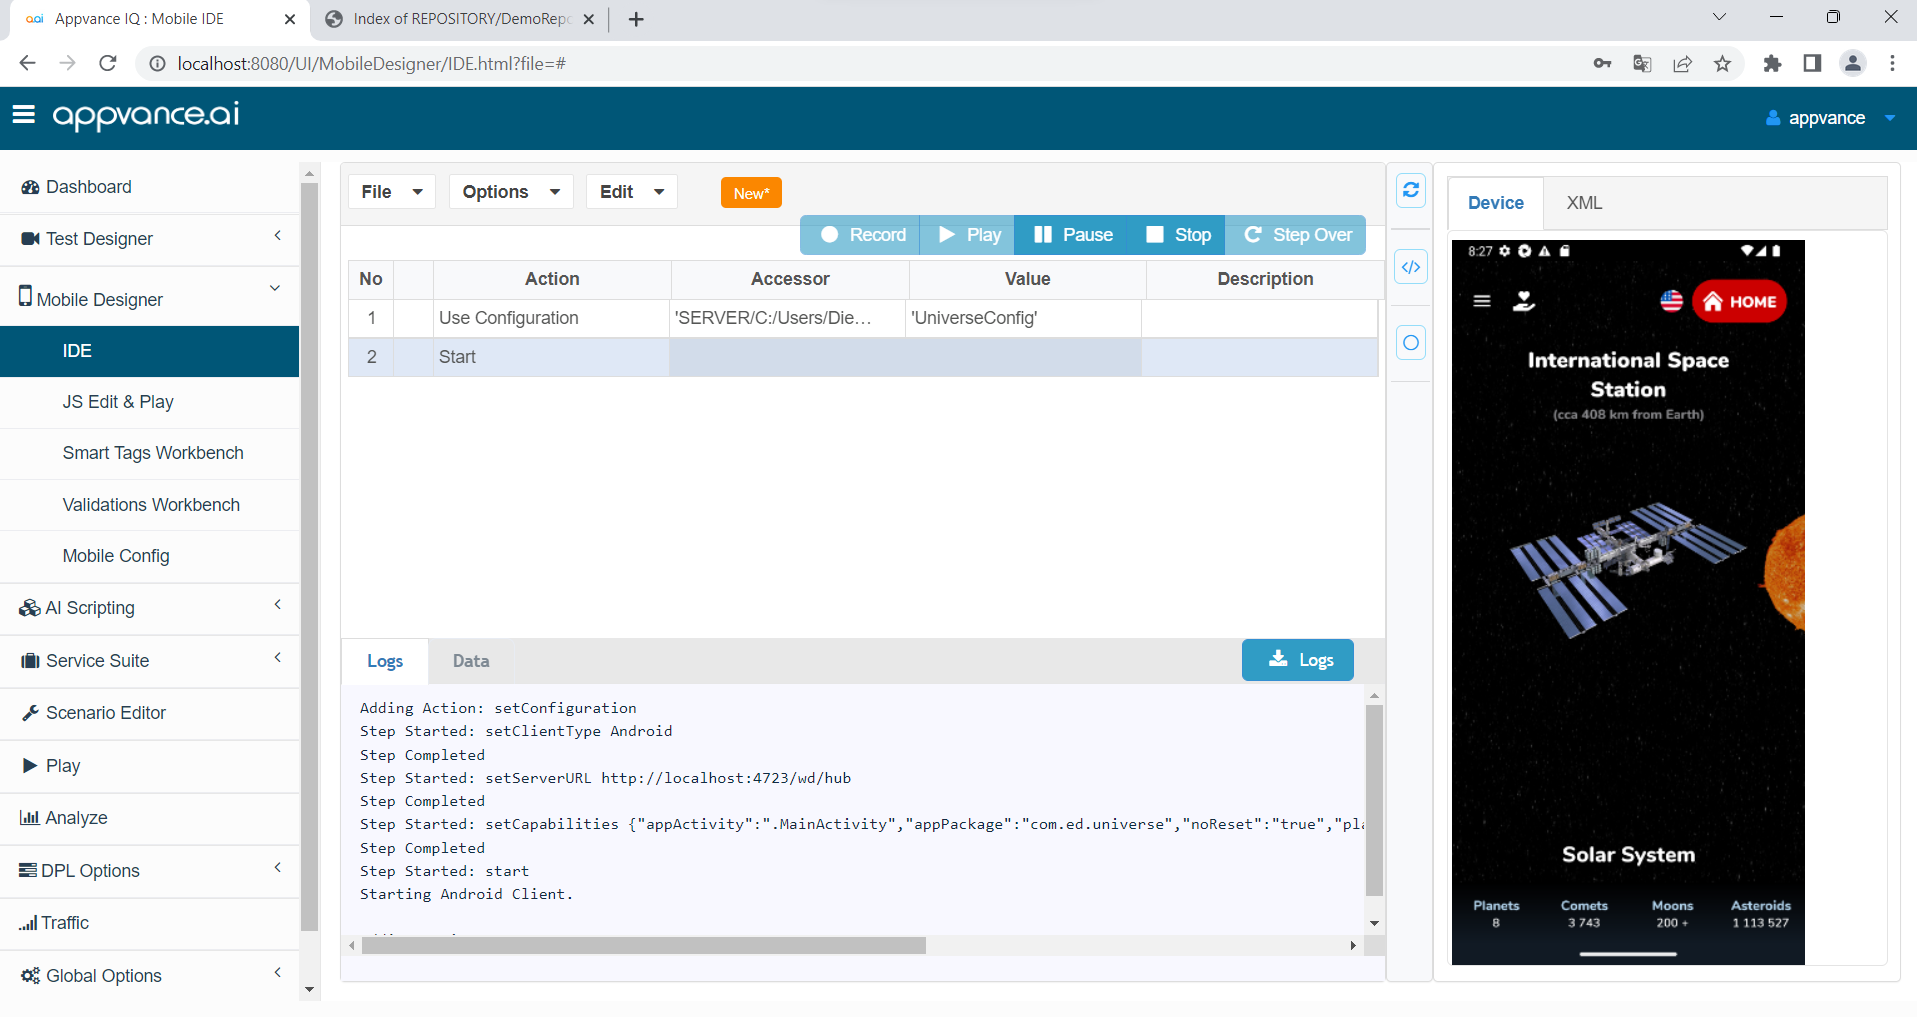
Testing the Configuration
For testing, if the configuration is correct,
-
Start an Appium Server and an active emulator.
-
In Appvance IQ navigate to Mobile Designer > IDE.
-
In the File dropdown select New.
-
Click Record.
-
Add the configuration you created. Wait until the app is launched.
-
If there is a problem with the configuration, it will display in the log or the Appium Inspector. Use the log file to fix any configuration issues. Typically errors are related to incomplete names or copied parameters. Use the example file above to help.
-
If there are no configuration errors, you will see the emulator with the Universe app running in AIQ.
-
You are now ready to proceed to the next step Getting Access to a Repository.