
The top part of Test Designer has the following options:
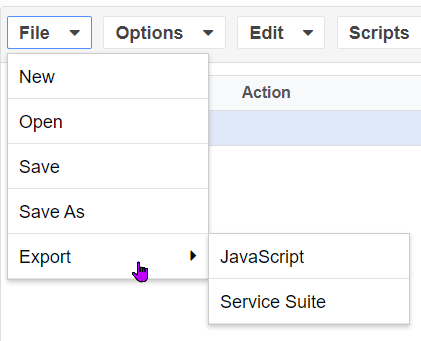
File Menu
-
New - Create a new script.
-
Open - Open an existing Test Designer scripts;
-
Save - Save the scripts recorded, to save the scripts after making any changes.
-
Save As - Save as an already opened script with a different script name.
-
Export - Export the script to JavaScript format or to Service Suite.
Options Menu
Accessor Preferences
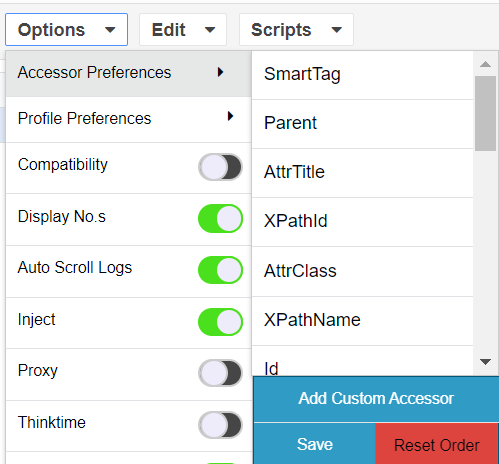
From this menu you can specify what has to be recorded, based on what attributes and the elements are on the page.
You can drag and drop these accessor preferences into the order in which you want them. Click Reset Preferences which will go back to defaults.
Above will be the list and the priorities by default, User can drag and drop between these choices and it will be saved as the accessor preferences to record the scripts, there is also an option to Reset the preferences which will go back to the list as mentioned above.
If an element on the web page has all the above-mentioned attributes, then all those will be recorded and listed in the accessor drop-down (But an element will likely have all those attributes).
If for example the accessor preference chosen is Element ID and that element does not have an element ID, then the next choice from the accessor preferences shall be chosen and recorded with that preference, applies to any choice made.
The list of available accessors is:
-
SmartTag
-
Parent
-
AttrTitle
-
XPathId
-
AttrClass
-
XPathName
-
Id
-
AttrName
-
AttrValue
-
AttrAlt
-
AttrHref
-
Src
-
Text
-
XPath
-
XPathClass
-
XPathText
-
AbsoluteXPath - Absolute XPath traversing starts from the root, except that we shall not display HTML/body, traversing starts from the next element after the body.
-
RelativeXPath - Relative Xpath deals with traversing elements and their parents concerning class and id, it reaches the id at any level, so starting point which is unique with help of id is found, so from that point it frames the Xpath of the target element. This combines ids and Class, unlike normal XPath framing.
-
TableXPath
-
Attribute
-
Image
-
JQuery
-
Index
-
XY
After changing the preferences, you can save the preferences, and based on that recording of the elements from the web page would happen.
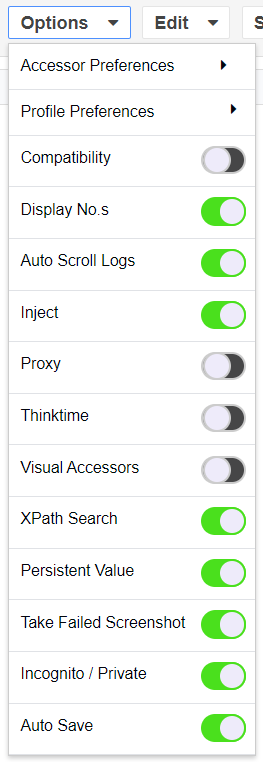
Compatibility
Specific functionality that is used for legacy apps that run on Internet Explorer, enable it when you need to record legacy IE apps and should be disabled for non-legacy apps which run on Google Chrome and Firefox browsers but are not compulsory.
Internet Explorer is no longer a supported browser in AIQ.
Display Numbers
Can be enabled to display numbers in the Test Designer IDE.
Auto-Scroll Logs
Can be enabled for the logs section to auto-scroll as the script plays back in IDE.
Inject
Inject when enabled will inject DS code that will allow you to do UX recording, Test Designer can also record HTTP History calls when it is disabled.
Proxy
Enabling proxy makes Test Designer a global proxy, useful for recording on Edge browser on Windows and Mac operating systems, should be enabled when recording with Edge and Safari browsers because they need the global proxy settings and it can be disabled when working with Google Chrome or Firefox browsers but not compulsory to do so.
Thinktime
Think time options can be enabled or disabled depending on the requirements. Enabling think times will add wait for statements in between every action performed from the designer script.

Playing back this recorded script with think times will use the same recorded wait statement with the recorded timings while playing back as well.
XPath Search
There are several ways to identify an element on the webpage, XPath search is one among them.
When you record a use case with this option enabled, under the Accessor list you will notice the XPath accessors of that particular element as well. Disabling this option will not add any Xpath references to that element being identified.
Take Failed Screenshot
Determines if a screenshot is taken even if the script fails before we reach that step where a snapshot was to be captured..
Incognito / Private
Determines if the script will be run in incognito mode. See Incognito / Private Option for more information on this option.
Auto Save
If enabled your file with auto save every 30 seconds.
This option was added in the AIQ 5.0 release.
Edit Menu
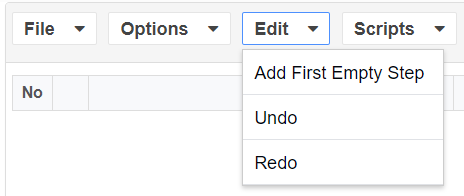
The Edit menu contains some useful functions for editing scripts.
Scripts Menu
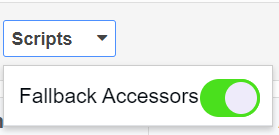
Fallback Accessors
As we know a designer script consists of an Action, an accessor, and a value column, when a script has recorded a step could have more than one accessor, and also with the use of other features like Relational Accessors, one could build several custom accessors to identify an element on the page and only one accessor could be used at a time.
When an accessor is used to execute a step, there are chances that the chosen accessor may not work and the other accessor in the drop-down may work, Accessor fallback is the feature that lets make use of other accessors in the drop-down in case the current accessor failed to locate the element on the page dynamically during the playback.
This enhances the success of script execution in Test Designers by enabling the Fallback locators to feature which chooses an alternate accessing mechanism.
In case a step fails with a certain accessor, with fallback locators enabled, Test Designer falls back to the alternate set of accessors one by one and tests them dynamically during the playback until all the accessors are tried and if none of them work, the step is marked as error/failure in the logs with the latest tested accessor.
The fallback accessor option can be found under the Options drop-down of Appvance Designer, by default fallback accessor is not enabled, the user can enable it whenever required by toggling the button.
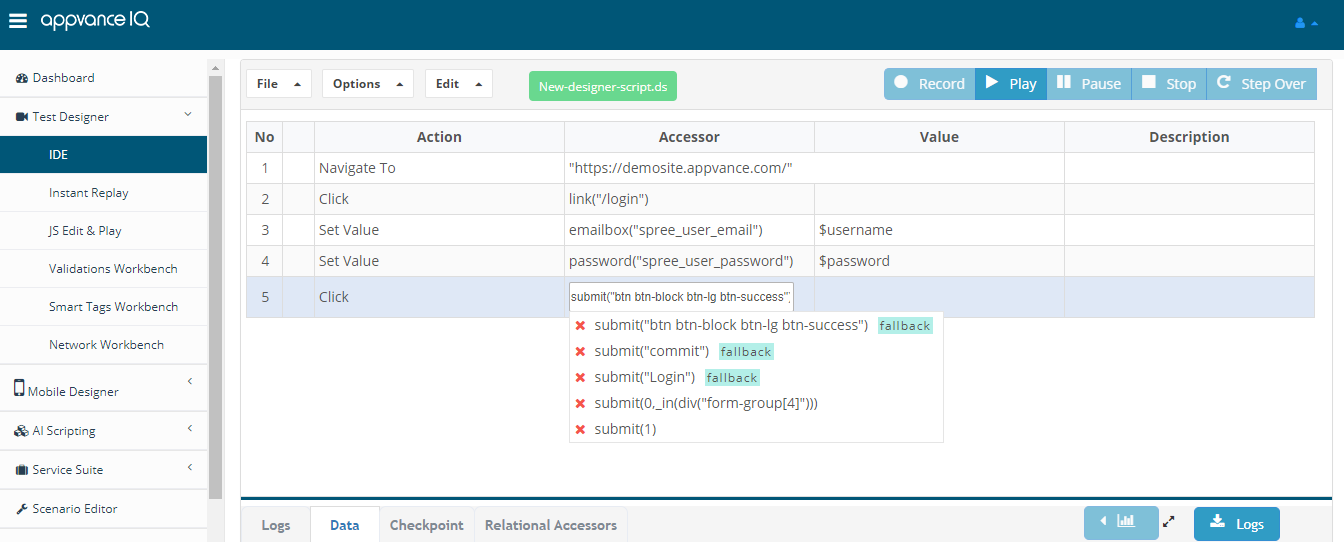
Drag and Drop Accessor
After setting the fallback accessors and recording a script, if you still feel that the order of accessors that were recorded needs to be changed, you can still drag and drop those accessors and change the order of those accessors based on what you feel has more priority among the list of accessors.

Please make sure to save the script after making any changes.
File Saved Status
The save status of the file since the last changes were made is indicated by the color of the box behind the file name.
-
Saved - Green

-
Unsaved - Orange

Script Controls
-
Record - Record will be enabled by clicking File > New, clicking the Record button will show all the configured browsers, and you can click the browser and provide the URL in the address bar for the recording to begin.
-
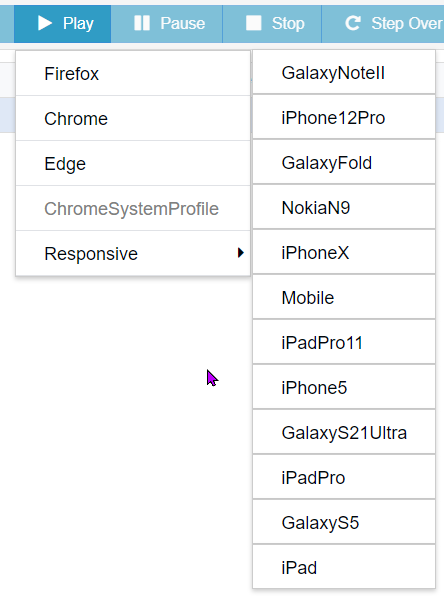
Play - The Play button can be used to re-play the recorded scripts. Similar to Record, Clicking Play will show all the configured browsers, you can pick a browser depending on your choice, Play will be enabled when a script is opened and saved.
During recording or play, There is also the option to record and replay against Chrome Responsive modes by choosing Responsive > And choosing the responsive mode.
-
Pause - Pause can be used to pause the recording when certain steps are not required to be recorded.
-
Stop - Recording can be stopped which will also close the browser under test using the stop button.
-
Step Over - Step Over is one of the important tools while debugging the scripts. You can place a breakpoint and use Step over to replay the script step by step.