
Install and Configure MySQL 8 for AIQ on Windows
Installing
Install MySQLand is not required on for Test Node instances.
MySQL Server Requirements
SinceConfigure MySQL 8 isfor requiresAIQ moreon resourcesWindows
than
Use this guide when preparing a Windows-hosted MySQL 8 database for an AIQ environment. Confirm the supported database version, sizing, and security requirements before installing or changing an existing database.
Preparation
- Confirm the target AIQ version
5.7,andissupportedisMySQLnecessary8 configuration. - Use a dedicated database host or instance when possible.
- Plan storage, backup location, retention, and recovery requirements.
- Create service and database accounts with only the permissions required by AIQ.
- Document port, hostname, schema, account, and maintenance-window details.
Validation workflow
- Install MySQL 8 using the approved Windows installer and configuration profile.
- Apply the required character set, time zone, networking, and service settings.
- Create the AIQ database/schema and account according to
assignthe installation plan. - Test connectivity from the AIQ host before starting AIQ services.
- Run a
bigger instance type. Following are the minimumlogin andrecommendedsmallresource configurations.Do not use MySQL 8.1 as it has some changes not yet supported.MinimumvCPU - 4Memory (GB) - 16Network Performance (Gbps) - 1
RecommendedPerformance or load testing requires a stronger database as there are performance related processes executed by store procedures. For this case this is a recommended setup:vCPU - 8Memory (GB) - 32Network Performance (Gbps) - Up to 5
Recommended MySQL ParametersSetup the MySQL parameters (my.cnf or my.ini) with the below values.If you are creating a AWS RDS, do not run theMySQLAppvance.sqlscript until you have created and applied the parameter group with below settings, otherwise you will get the following error:"ERROR 1419 (HY000): You don't have the SUPER privilege and binary logging is enabled (you might want to use the less safe log_bin_trust_function_creators variable)"After applying this settings you need to stop and start the RDS instance so this parameters options take effect.Parameter NameDescriptionSuggested ValueAWS RDS Onlybulk_insert_buffer_sizeThis variable limits the size of the cache tree in bytes per thread. Setting it to 0 disables this optimization. The default value is 8MB, we are suggesting 512MB for massive transactional load.536870912Noconnect_timeoutThe number of seconds that themysqldserver waits for a connect packet before responding withBad handshake. The default value is handle by AWS dynamically but we are suggesting 10 secs even more depending if there is latency between controller and test nodes and the RDS.10Nomax_allowed_packetThe maximum size of one packet or any generated/intermediate string/media, or any parameter sent by themysql_stmt_send_long_data()C API function. No value by default, 400MB is suggested.419430400Nomax_connectionsThe maximum permitted number of simultaneous client connections, 500 connections would be more than enough even for the more demanding environments (ourexecution smoke testRDSafterreached a maximum of 150 connections by the time this has been written), this parameterAIQ isa TOTAL global connections watermark.500 (Do not apply for RDS instances!)Nomax_user_connectionsThe maximum number of simultaneous connections permitted to any given MySQL user account. A value of 0 (the default) means “no limit”, but this behavior would be inconvenient since in the case of an external factor that affects the RDS connections; such that they'll increase without an error until the mysqld service hangs up, a value of 200 is recommended200Nomyisam_use_mmapIt’s a switch to use memory mapping for reading and writingMyISAMtables, by default the value is 0 but must be 1.1Noread_buffer_sizeEach thread that does a sequential scan for aMyISAMtable allocates a buffer of this size (in bytes) for each table it scans. If you do many sequential scans, you might want to increase this value, which defaults to 131072. The value of this variable should be a multiple of 4KB. If it is set to a value that is not a multiple of 4KB, its value is rounded down to the nearest multiple of 4KB.This option is also used in the following context for all storage engines:For caching the indexes in a temporary file (not a temporary table), when sorting rows forORDER BY.connected.For bulk insert into partitions.For caching results of nested queries.
A lot of sub-queries and not natural relations queries are performed against different and nested tables, so it’s needed to set an important amount of cache memory for this purpose 524288 (512MB)524288Yeswait_timeoutThis is really important, MySQL 8 kernel works totally different than 5.7 and it’s very sensitive to latency letting all the un-closed connections sleep for a lot of time before closing them by default causing a lot of accumulated connections using resources even when they are not in use anymore.Set this parameter to 300seconds as the maximum time to wait before destroying the connection1080 (AIQ-6619)Yesvalidate-passwordIf password validation doesn’t need to performed just set this parameter to OFF, if it is needed let it remains as default (ON) just set passwords according to MySQL 8 security policies.log_bin_trust_function_creators1 (stop and start RDS for this to take effect)Yes
ItMaintenance isnote: recommendedBack that you install MySQL on a separate server machine such as an Amazon RDS.
You must have an AWS account. First create the parameter group and then createup the database so you can specify the new parameter group when creating the database.
Create AIQ Parameter Group
You will need to create a parameter group for AIQ mysql database before creatingupgrades, theconfiguration actualchanges, database.or Refercleanup to the correct values in the Parameter Group info above.
In Amazon RDS, selectParameter Group.
Enter the details for the parameter group. ClickCreate.
ClickEdit Parametersto configure the parameters. SeeRecommended MySQL Parametersfor the list of parameters and values.ClickSave Changes.
Creating RDS MySQL Database
On the Console Home page, select the region in which you need the database.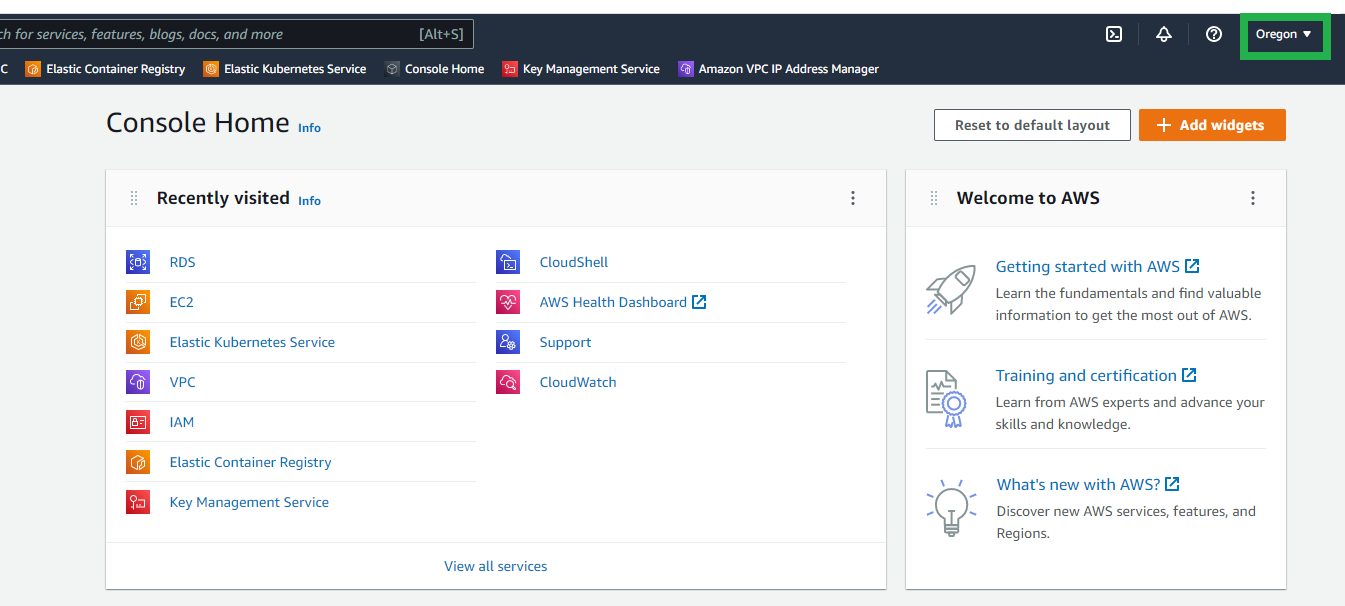
SelectRDS.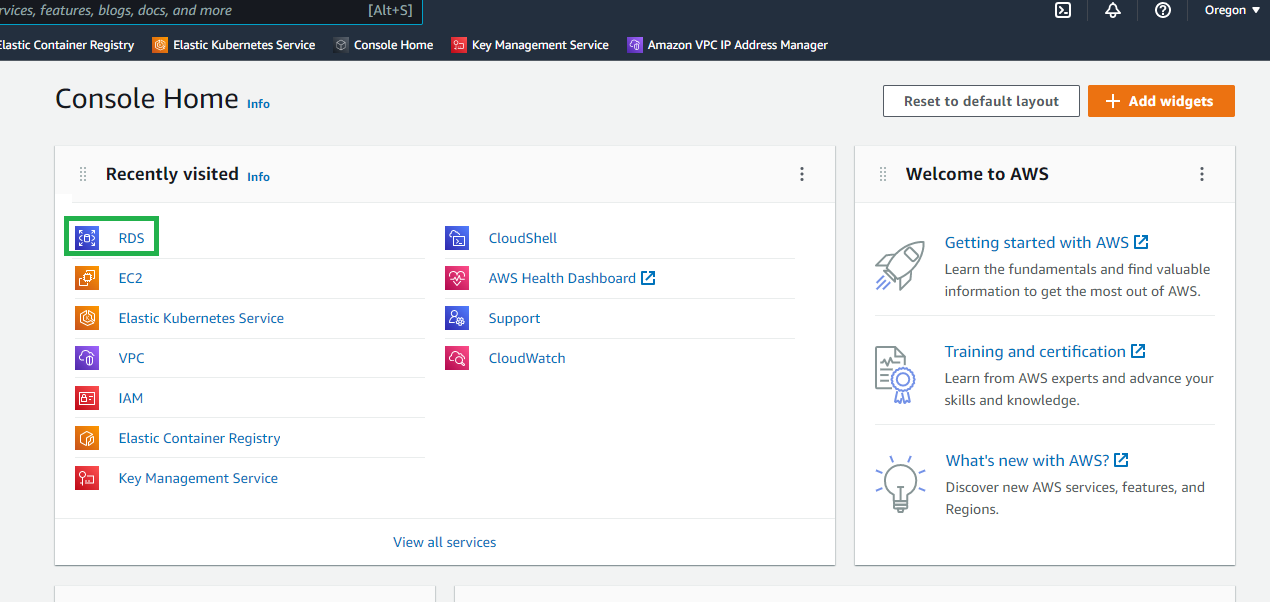
ClickCreate Database.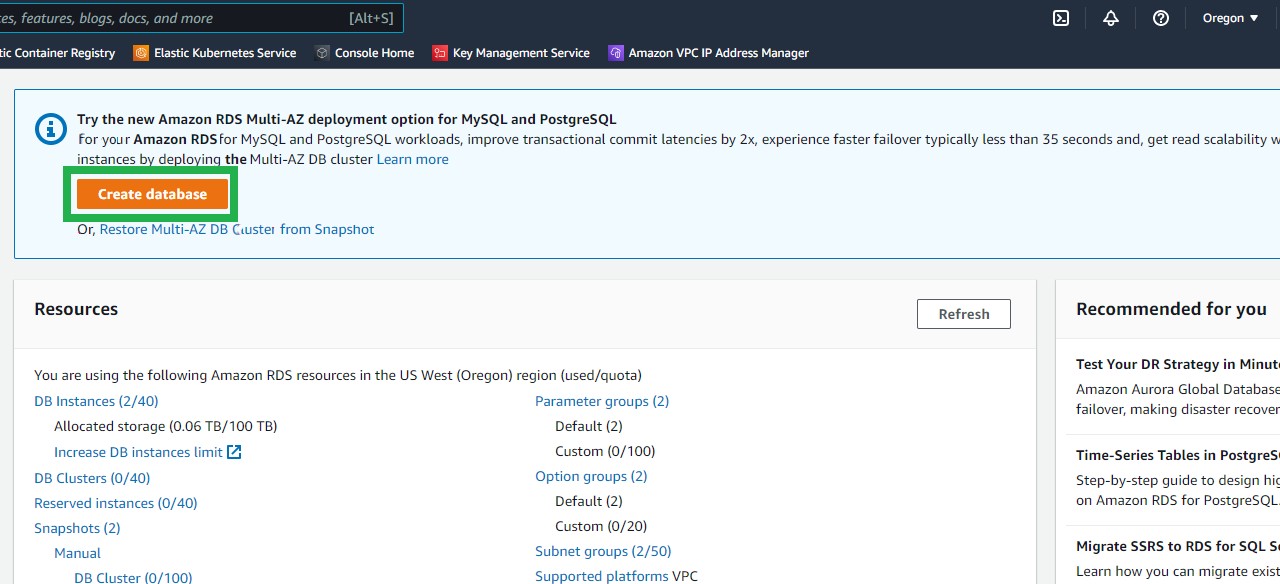
SelectStandard CreateandMySQL.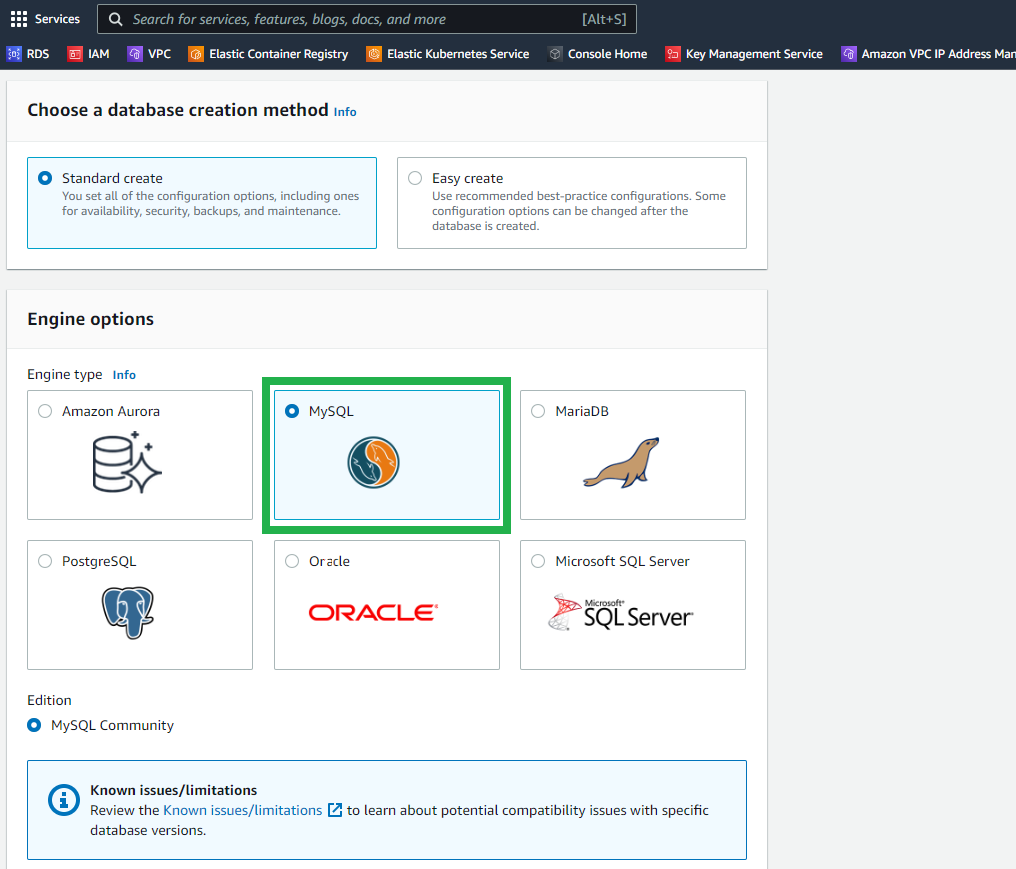
Select MySQL version 8,Production, andSingle DB Instance.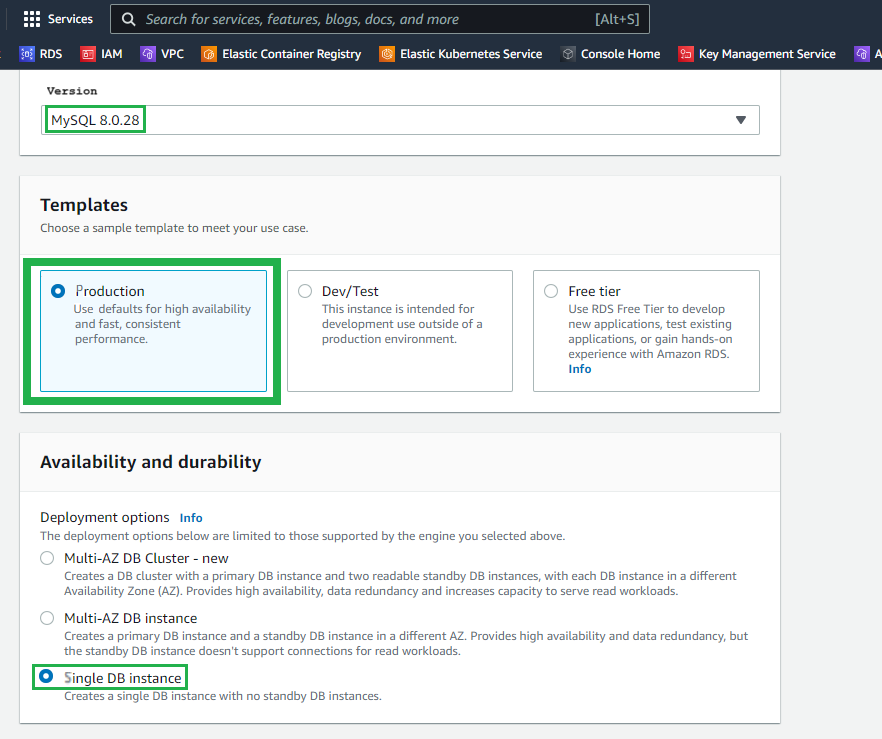
Enter your credentials.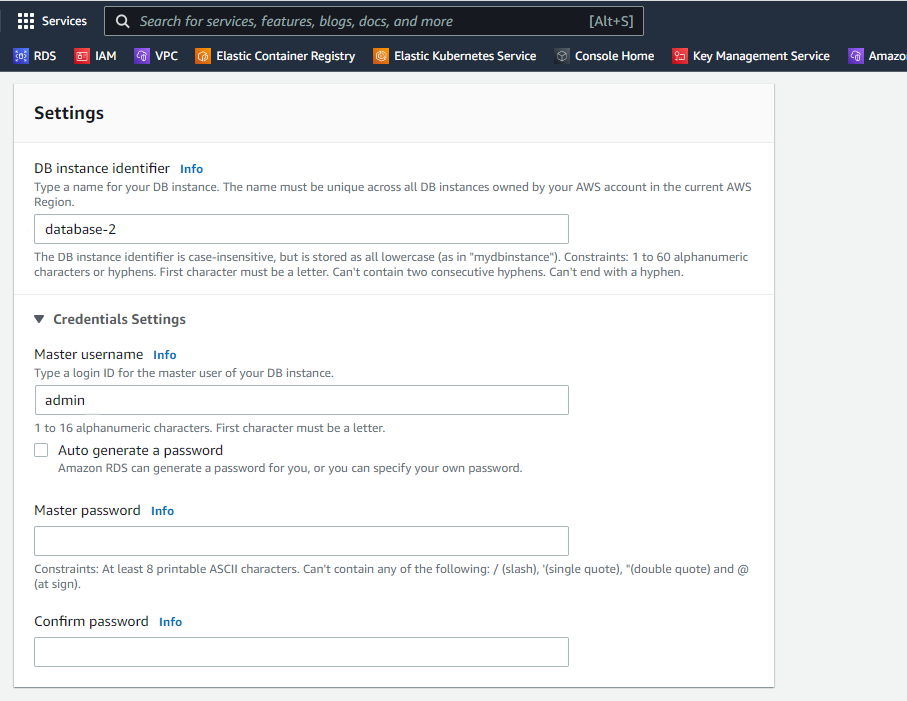
Select theDB Instance class, theStorage Type, and the size of theAllocated Storage.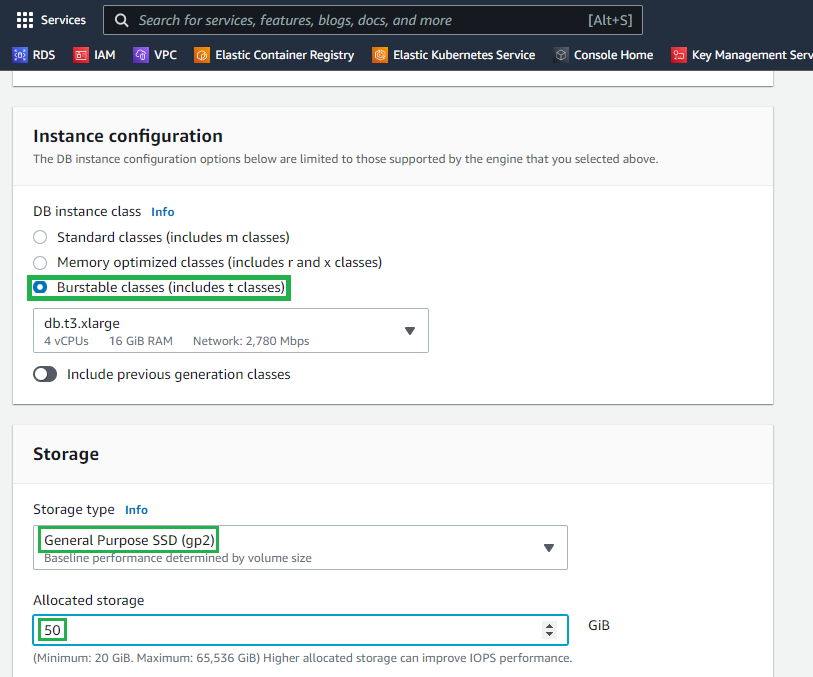
SelectEnable storage autoscalingand the VPC.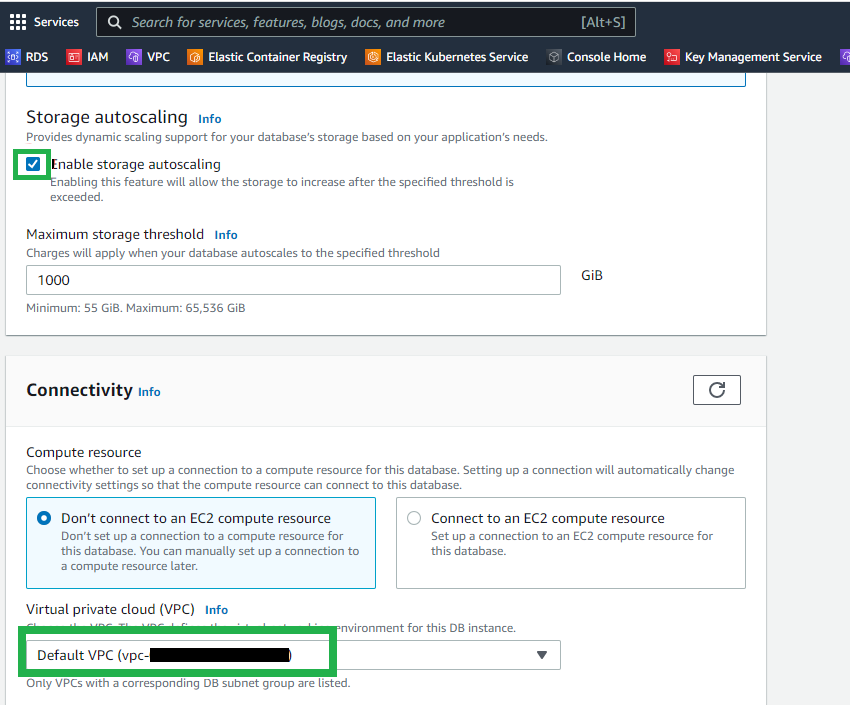
Choose theDB Subnet group,Public Accesssetting andVPC Security Group.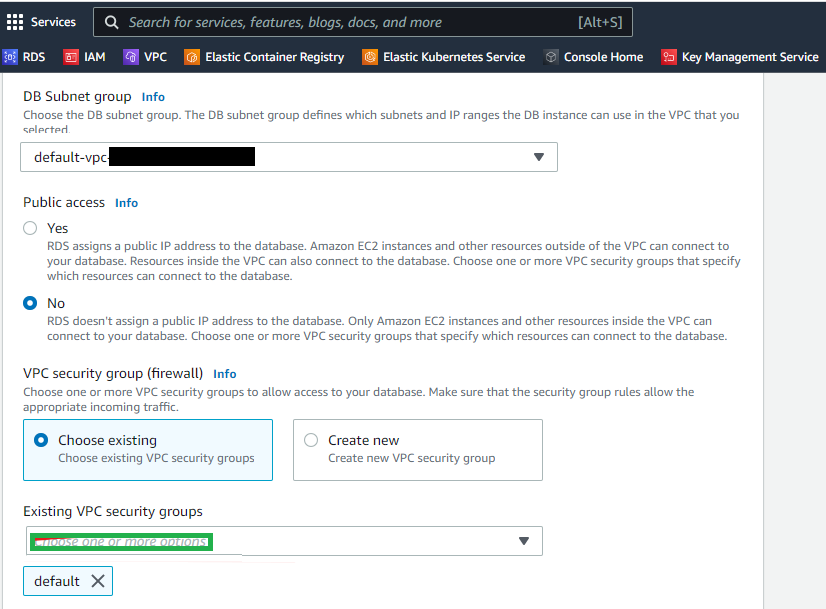
Choose yourDatabase authenticationmethod.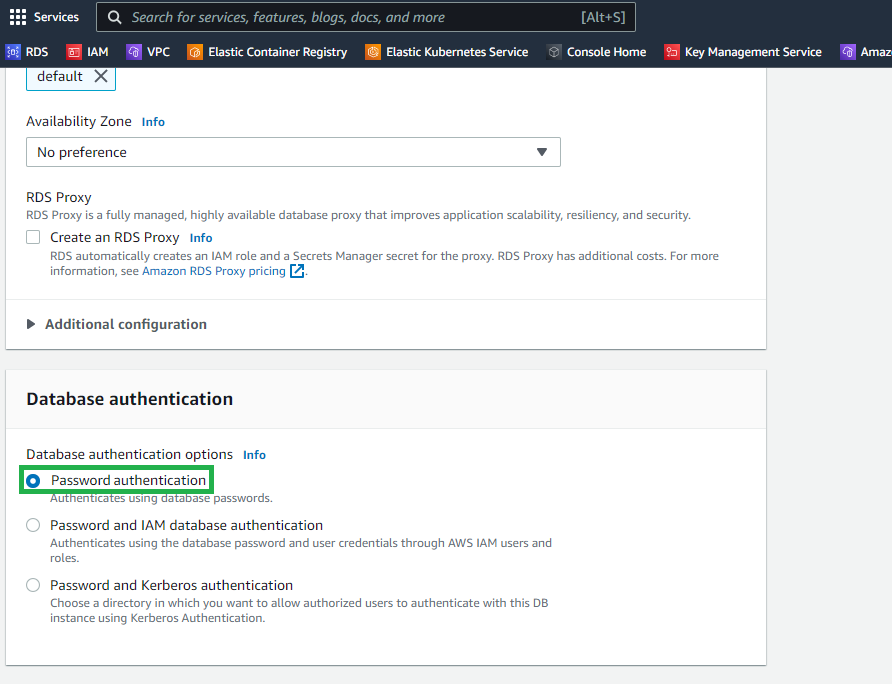
Select your monitoring preferences.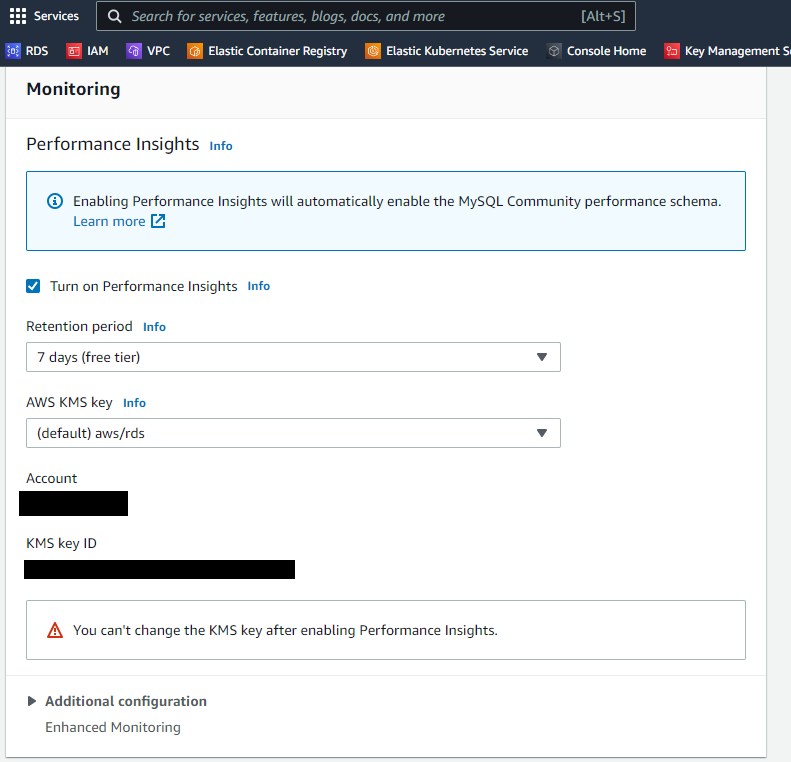
Verify the settings are correct and clickCreate Database.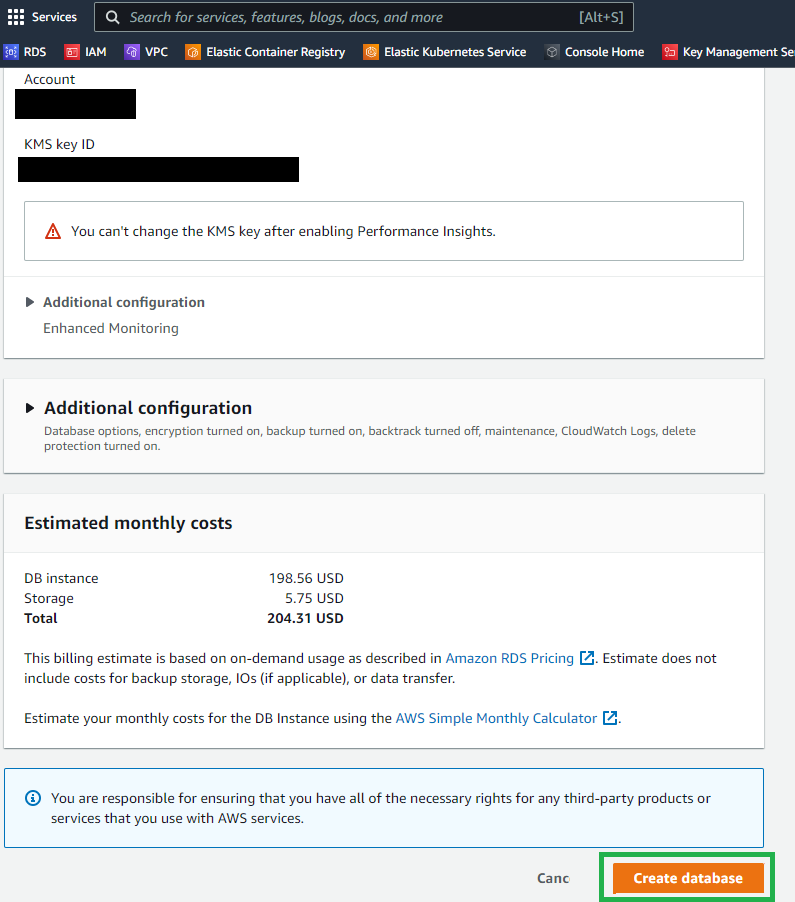
Create a new parameter group for AIQ MySQL databases.After creating the database.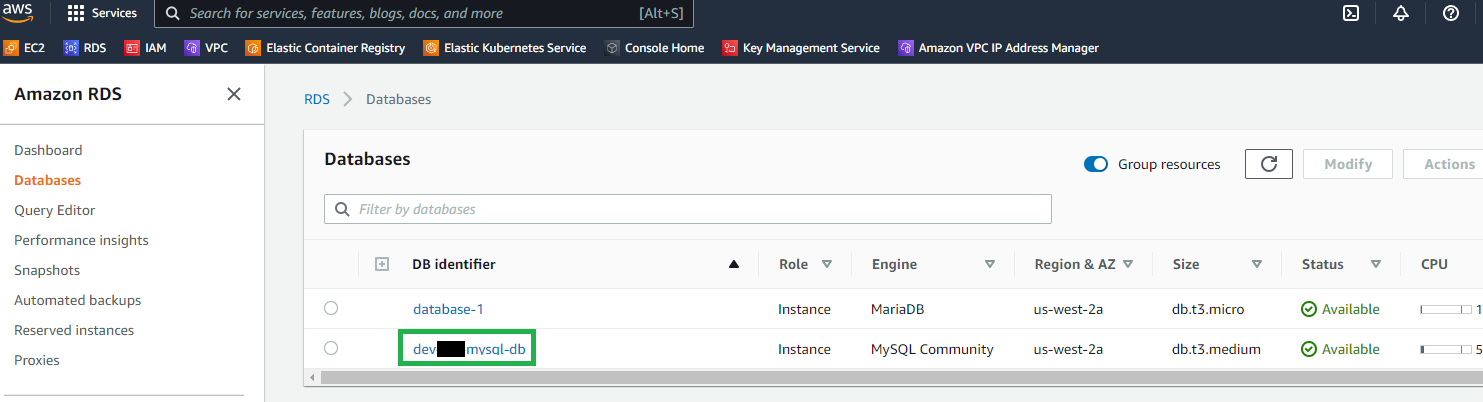
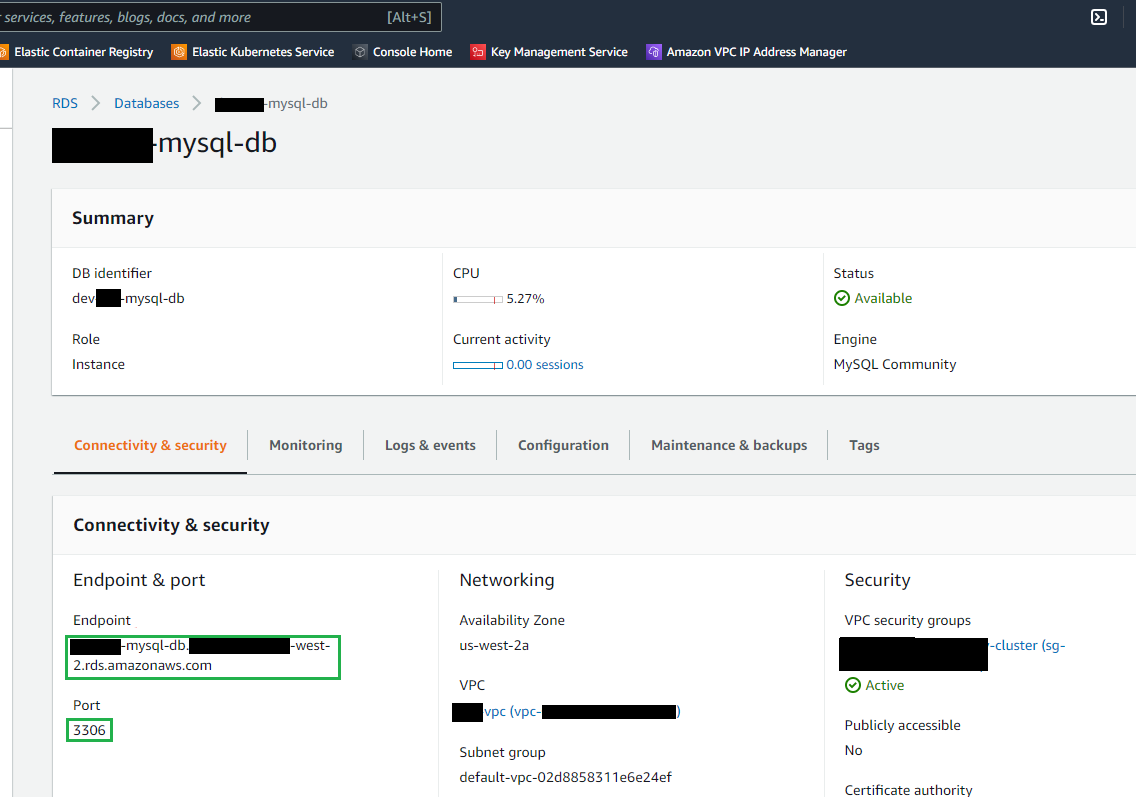
Check connection to the database.Install the MySQL client.Syntax example:mysql -h <example-endpoint-db.rds.amazonaws.com> -P 3306 -u <user_name> -p <push enter>Run theMySQLInitial.sqlscript using the admin/root user.Log out and log back into the mysql client but using the aiq/aiq user, then execute the following statement:
After you have installed and configured MySQL, proceed to the next step: Runing Appvance IQ on Windows as a Serviceoperations.
Last updated: October 02,8, 20242026
If you have any feedback on this topic, please contact us at documentation@appvance.ai