
Run JMeter Scripts as Functional Tests in AIQ
AppvanceLast IQreviewed: September 25, 2026
Use this article when a JMeter script is abeing platformexecuted in AIQ for functional validation rather than load generation.
What changed in this article
- Clarified that
supportsfunctional JMeter runs should validate behavior, assertions, and transaction success, not virtual-user scalability. - Added guidance to
runkeepJMeterdatasetsscripts.smallHereandareexpectedtheresultsstepsexplicit. - Separated
thatfunctionalweexecutionneedfromtoperformancefollowexecutiontosorunteams do not interpret functional results as load-test evidence.
Validation workflow
- Import or select the JMeter
scriptsscriptfromandAppvanceconfirmIQ.assertions are present.
Review Homenote: screenReduced ambiguity between functional JMeter execution and click Build.
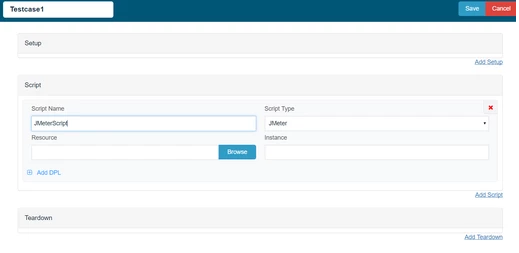
8. Click Browse and browse theperformance JMeter file. Save the test case.
execution.
9. Click Locations tab.
10. Enter Name: localhost and URL: http://localhost:8080/TMServer/ws/TestNode
12. Also make sure the resources are added with Name, Type and the correct path of the jmx file.
14. Click check box Custom Database Credentials (Database Logging) and make the following settings:
Database Type: MySQLDriver: com.mysql.jdbc.DriverURL: jdbc:mysql://localhost:3306/utp?useSSL=falseDefault Schema: utpUsername: utpPassword: utp
15. Click File >Save to save new scenario.
16. Click Play Scenario from the top navigation bar.
17. Controller window will open in a new tab which displays the tests running and will display the pass/fail status of the tests upon the test completion.
18. Left part shows the steps and the duration in milliseconds and right side shows the test run status under Output tab.
19. On The transactions tab we can find the request/response and an error tab to drill down further.
20. Click Click here link to get to the list of Reports that Appvance IQ supports.
Last updated: JulySeptember 28,25, 20232026
If you have any feedback on this topic, please contact us at documentation@appvance.ai.