
Setting up MYSQL RDS Instance from AWS
Log in to your Amazon account with valid credentials
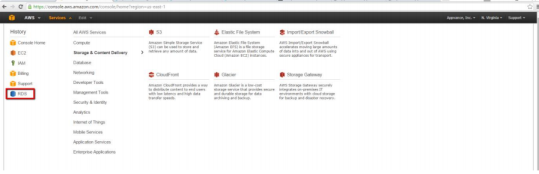
Once logged in successfully, click Services and select RDS from the list as seen in the below screenshot
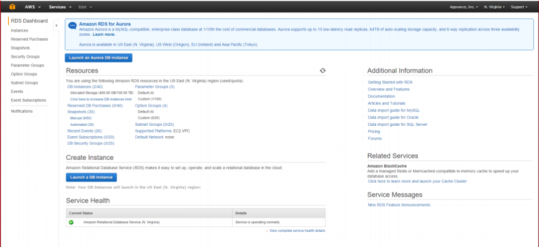
Now click the "Launch a DB Instance" button
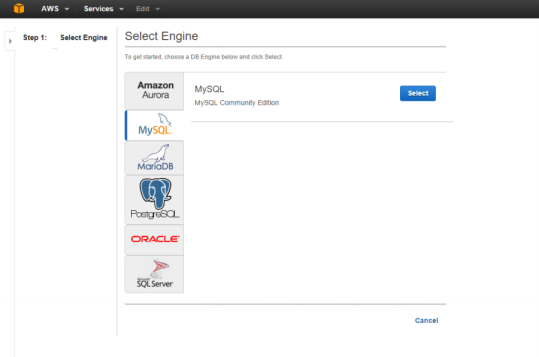
In the next screen, select MySQL as the engine and Click the 'Select' Button
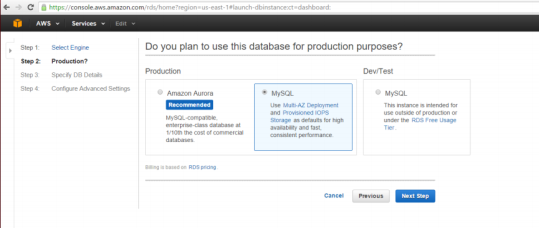
Under Production, Select MySQL as shown below and click Next Step
NOTE: Please make sure the instances that you create and the database are in the same region.
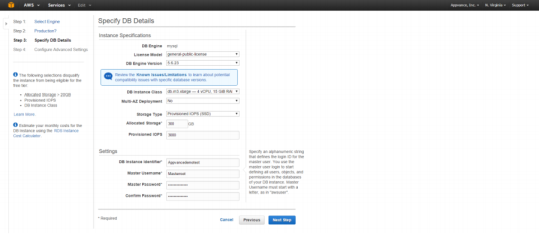
DB Instance Class: Select the DB instance class that allocates the computational, network, and memory capacity required by the planned workload of this DB instance
Multi-AZ Deployment can be marked as 'No'
Storage Type can be Provisioned IOPS (SSD) storage is suitable for I/O-intensive database workloads. Provides flexibility to provision I/O ranging from 1,000 to 30,000 IOPS
Under Settings:
DB Instance Identifier: Specify a name that is unique for all DB instances owned by your AWS account in the current region. DB instance identifier is case insensitive, but stored as all lower-case, as in "mydbinstance"
Master Username: Specify an alphanumeric string that defines the login ID for the master user. You use the master user login to start defining all users, objects, and permissions in the databases of your DB instance. Master Username must start with a letter, as in "awsuser"
Master Password: Specify a string that defines the password for the master user. Master Password must be at least eight characters long, as in "mypassword"
NOTE: The Above "Master Username" and "Master Password" will be used to connect to SQL Workbench which is explained in the later section.
Click Next
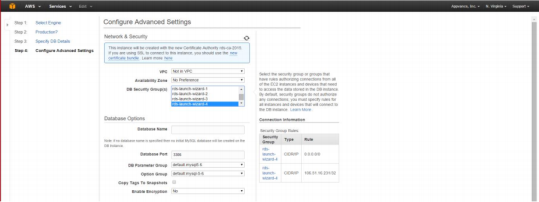
In the next step, you can select the DB instance in any available VPC or create a new one
DB Security Group: This is Important
Select the security group or groups that have rules authorizing connections from all of the EC2 instances and devices that need to access the data stored in the DB instance. By default, security groups do not authorize any connections; you must specify rules for all instances and devices that will connect to the DB instance
All other fields can be left to default
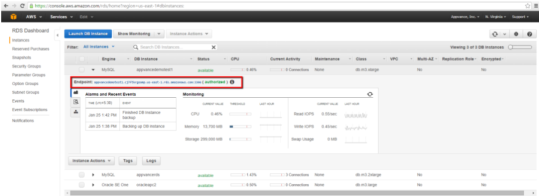
Your DB Instance will be in 'creating' Status for about 4-5 minutes and will be in 'Available' status as seen in the below screenshot

Open Workbench that is installed (if not this needs to be installed) in your local machine or on any of the EC2 machines
Click Database > Connect to Database
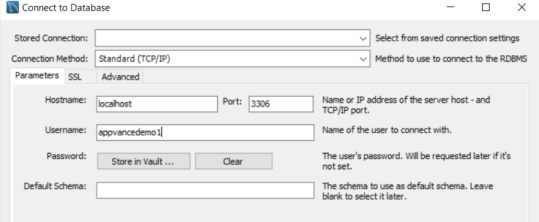
Host Name should be the End Point URL and provide valid credentials (which were created while creating the DB i.e. "Master Username" and "Master Password")
Endpoint URL can be obtained from dB instance page by clicking that arrow button as seen in the below screen-shot which needs to be replaced in place of 'localhost' from the URL
The user will be successfully connected to the database
Creating Database and Tables:
Open MySQL Workbench and connect to the local instance of MYSQL
Drag and drop MySQLInitial.SQL file into the workbench and execute the query
File located at "\AIQ\TestNode\webapps\AppvanceServer\WEBINF\classes\database"
Now drag and drop MySQLAppvance.sql and execute
File located at "\AIQ\TestNode\webapps\AppvanceServer\WEBINF\classes\database
Launch Appvance IQ
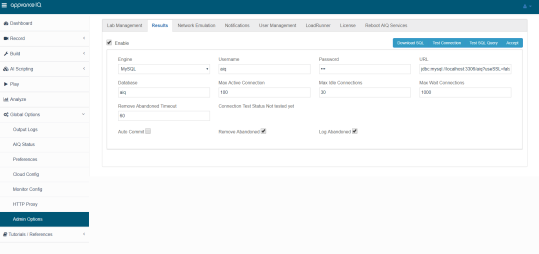
Navigate to the Global Options page (Should be logged in as Admin) > Go to Admin Options – Results, change the URL, and click Test Database Connection to see the "Connection Success" message
To enable functions, procedures, and triggers for my Amazon RDS MySQL instance
You can enable functions, procedures, and triggers when binary logging is enabled without the SUPER privilege by setting the log_bin_trust_function_creators parameter to true for the DB parameter group that you create for your MySQL instance.
Note: A default DB parameter group is created if you create a DB instance without specifying a DB parameter group that you create. For more information, see Working with DB Parameter Groups.
Create a DB Parameter Group (Check below on how to create a DB parameter)
Modify the DB parameter group as follows:log_bin_trust_function_creators=1
Choose Save Changes
Note: After you create or modify a DB parameter group, wait at least five minutes before creating your first DB instance that uses that DB parameter group
In the navigation pane, choose Instances
Choose the instance that you want to associate with the DB parameter group
Choose Instance Actions and choose Modify
Select the parameter group you want to associate with the DB instance
The parameter group name is changed immediately, but the parameter group changes aren't applied until you reboot the instance without failover
To create a DB parameter group
Sign in to the AWS Management Console and open the Amazon RDS console at https://console.aws.amazon.com/rds/
In the navigation pane, choose Parameter groups
Choose to Create a parameter group
The Create parameter group window appears
In the Parameter group family list, select a DB parameter group family
In the Group name box, type the name of the new DB parameter group
In the Description box, type a description for the new DB parameter group
Choose Create
Troubleshooting
Error Code: 1419. You do not have the SUPER privilege and binary logging is enabled
If you get the above error while running the MySQLAppvance.sql script on AWS RDS, make sure that the RDS parameter group has the value 1 (ON) for the log_bin_trust_function_creators parameter. The RDS database MUST be rebooted for parameter changes to take effect.
Last updated: September 18, 2024
If you have any feedback on this topic, please contact us at documentation@appvance.ai