
DPL Usage with Appvance Designer Script
How to work with DPL in Appvance Designer scripts?
-
Navigate to Appvance Designer
-
Click File > New
-
Click Record and provide a valid URL and start recording the desired use case where there are setValues involved in the script
-
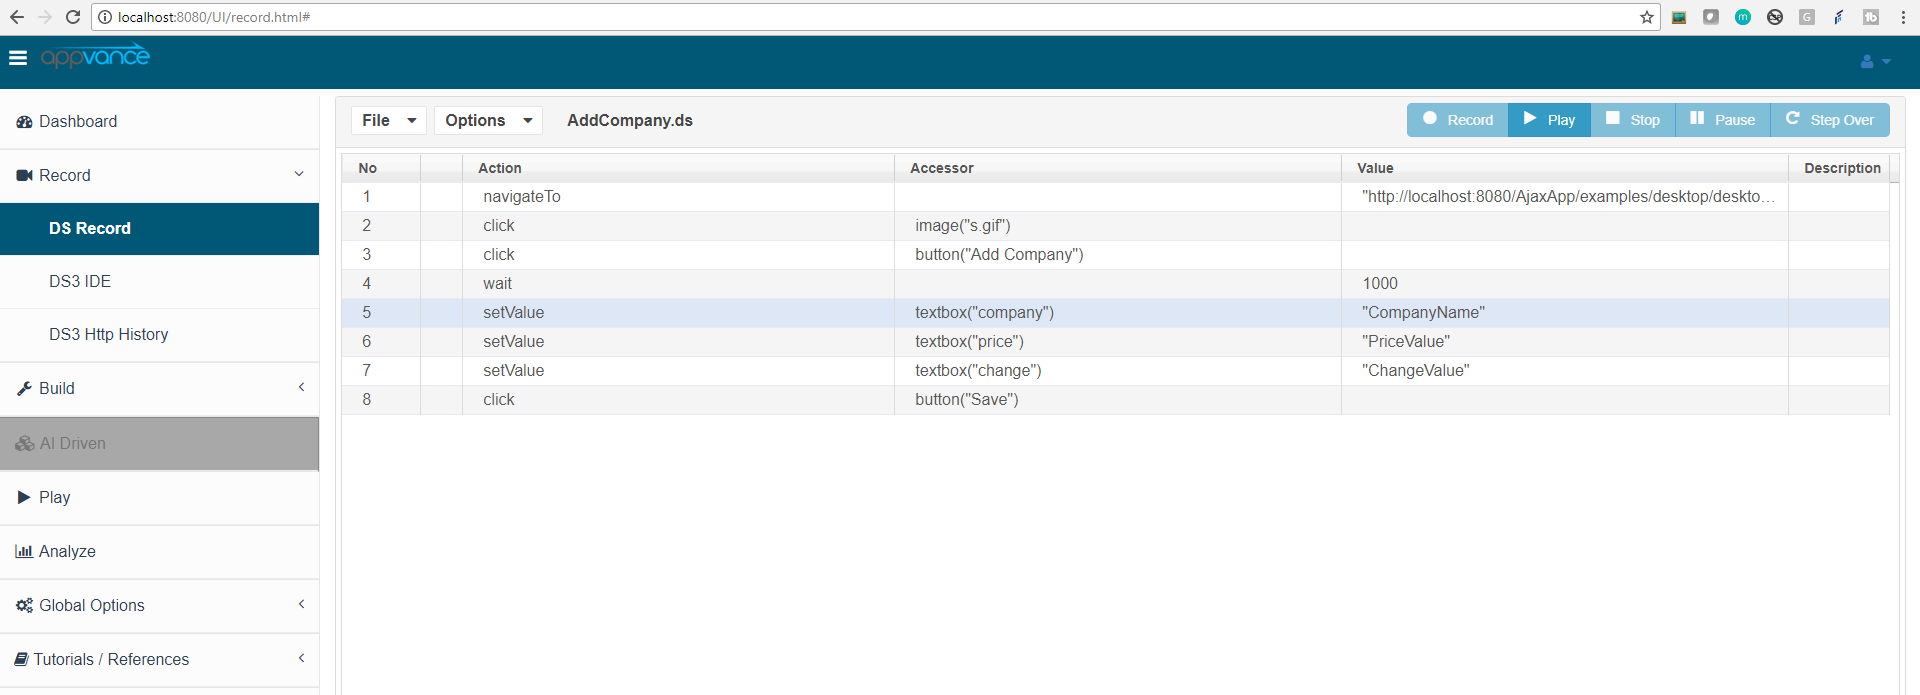
Once the recording of the script is complete something looks like the below
-
Assuming the user has to data enable Row 5, 6 and 7
-
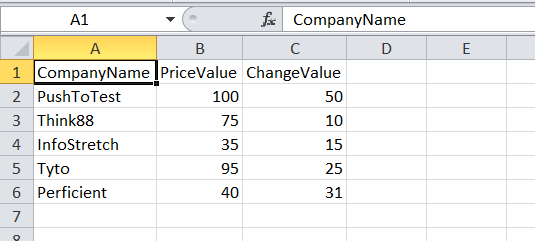
Create a data CSV sheet with 3 columns and have data for all those 3 columns, Example screenshot below
-
Now come back to Appvance Designer, click Options > DPL Options > and browse the CSV sheet that was created and Click OK
-
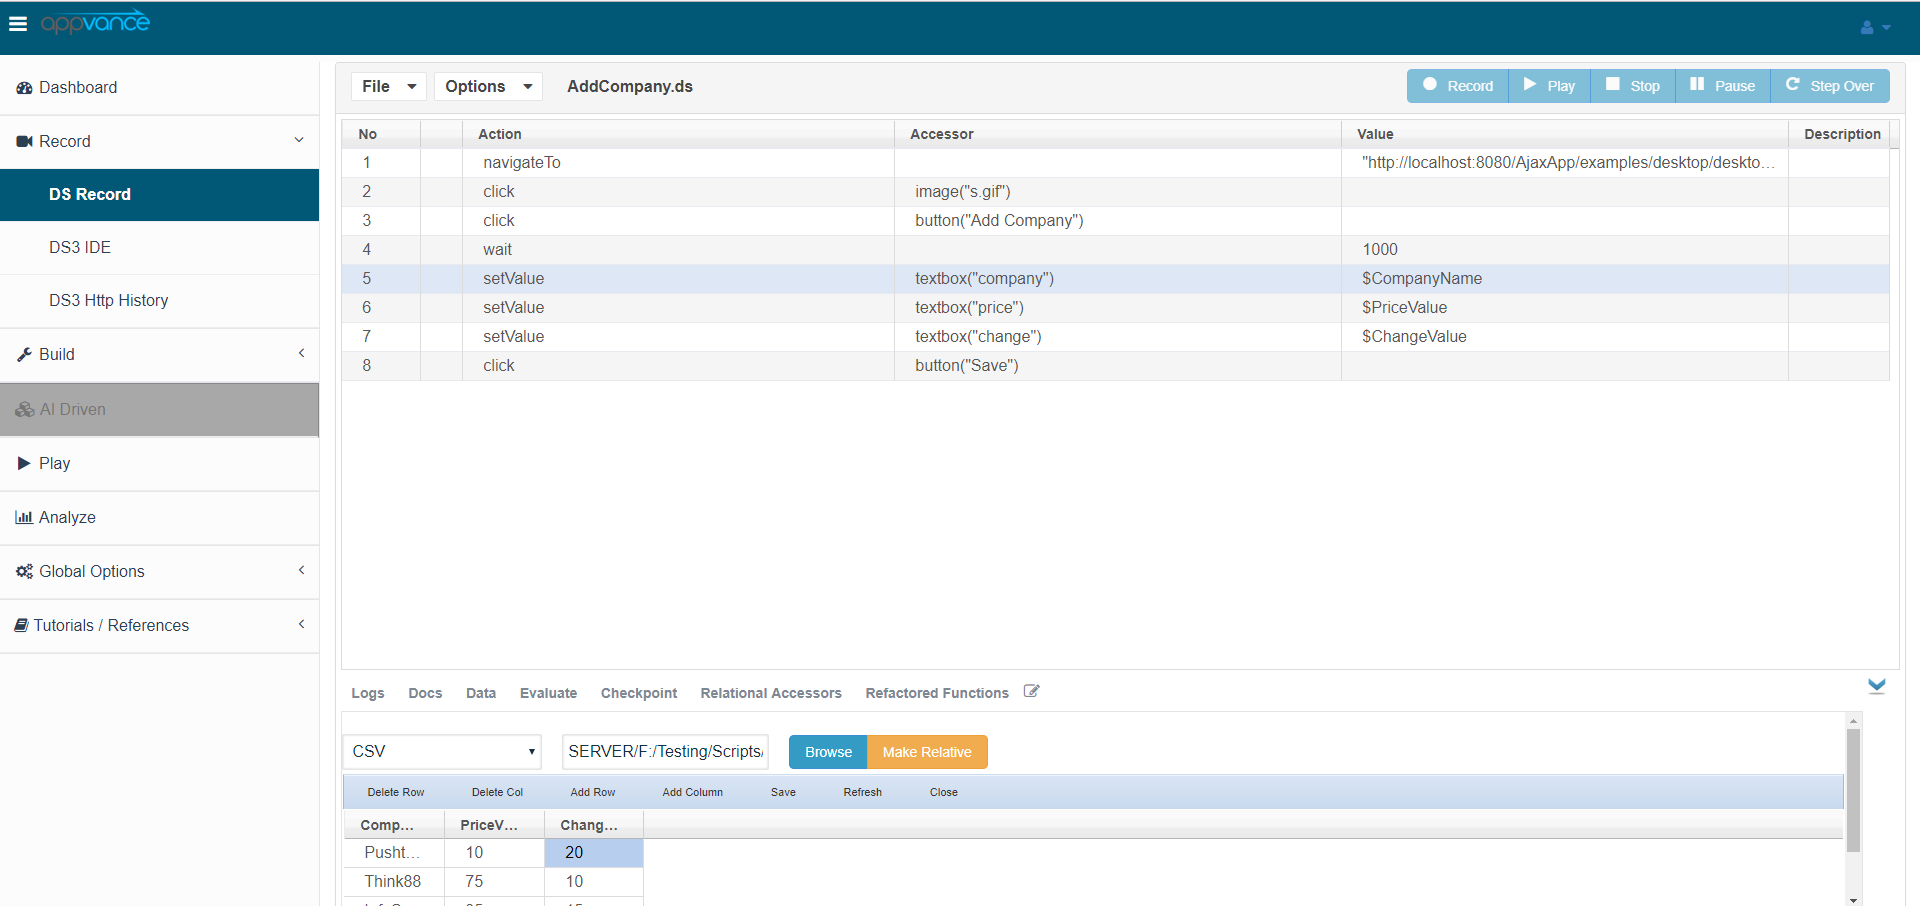
Go to the Data tab at the bottom, Drag the first value from column 1 and drop the same in the value filed of Row 3, the value should get changed to “$CompanyName”
Note: The column name can be anything specific
-
Similarly, drag and drop the same for Row 5 and 6
Below is the screenshot of how this should look
-
Click File > Save and save the Appvance Designer Script
-
Now go to Build and navigate to Scenario builder to create the data enabled scenario
-
Click File > New
-
Info Tab: Select a functional test or performance test based on the requirements
-
With the example below I am selecting functional test with Repeat this use case options set to 2 in the test management section, in the case of performance test user can provide the number of users and other completion criteria that can be used as per the requirements
-
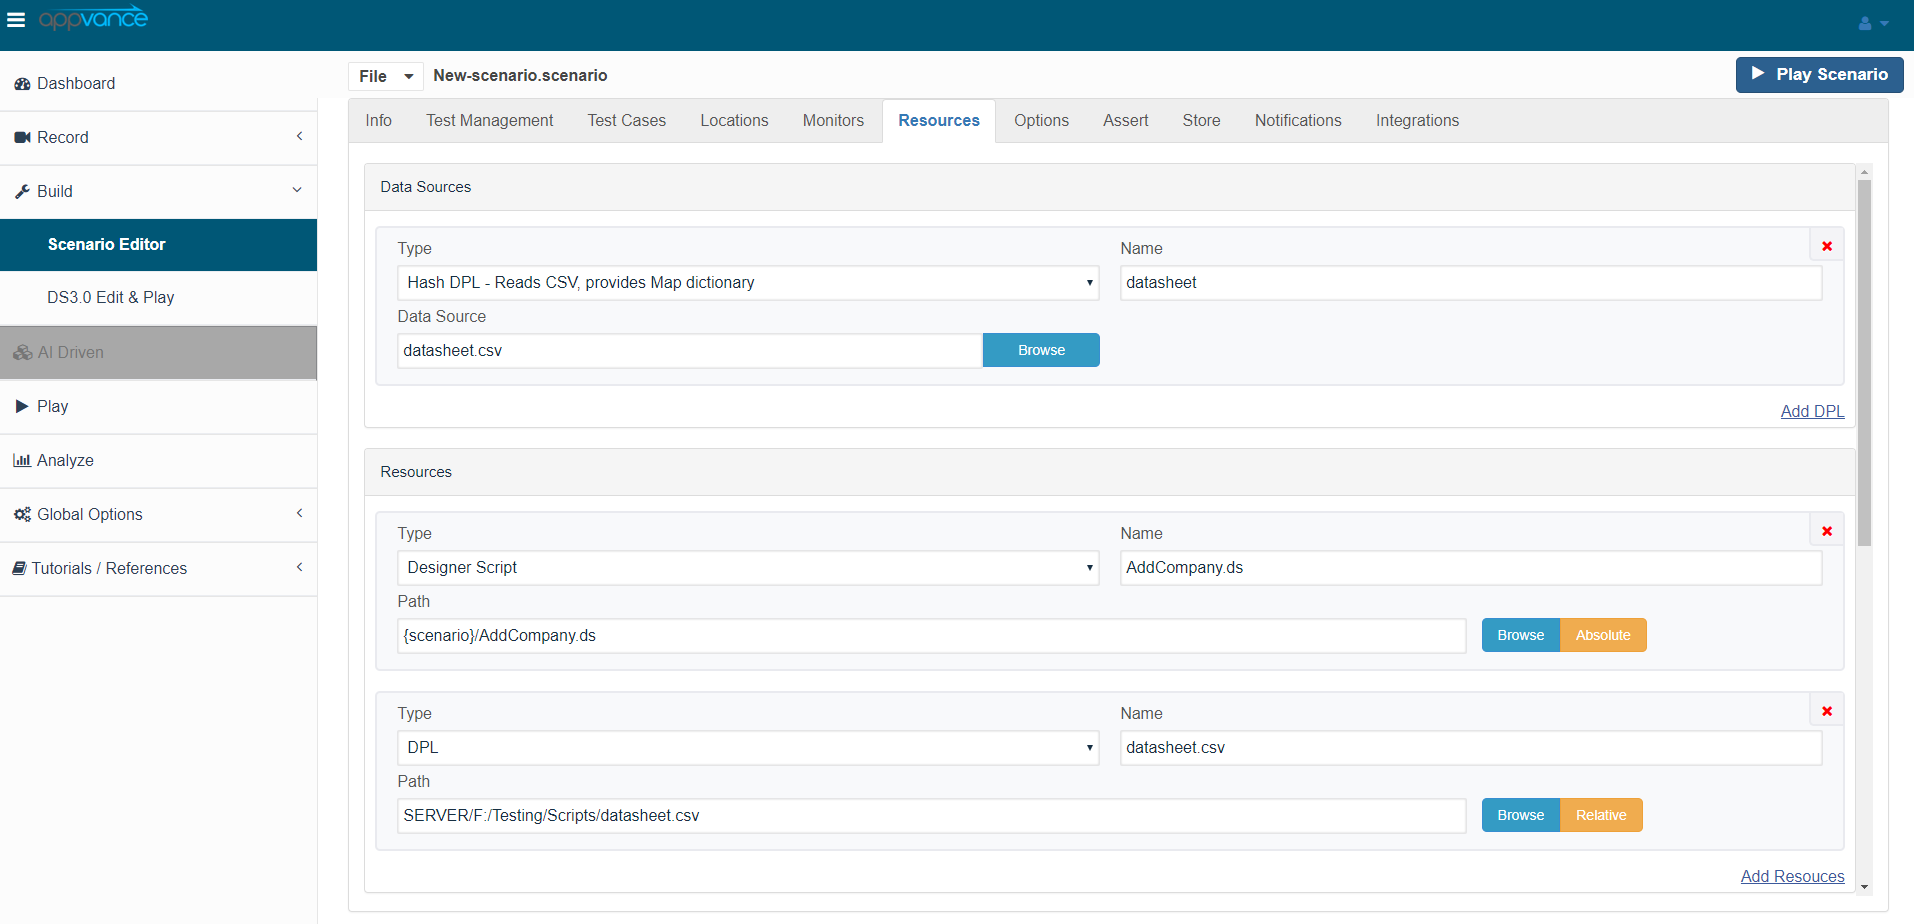
Navigate to the Resource panel: Select “HashDPL-Reads CSV” as the type and provide some valid DPL name, Browse and select the CSV file that we created while creating the Appvance Designer Script
-
Come back to the test case panel: Click ‘Add a test case execution’, Select ‘Appvance Designer script’ from the test type drop-down, Browse the Appvance Designer script that was created which was data-enabled, Leave other options to default
-
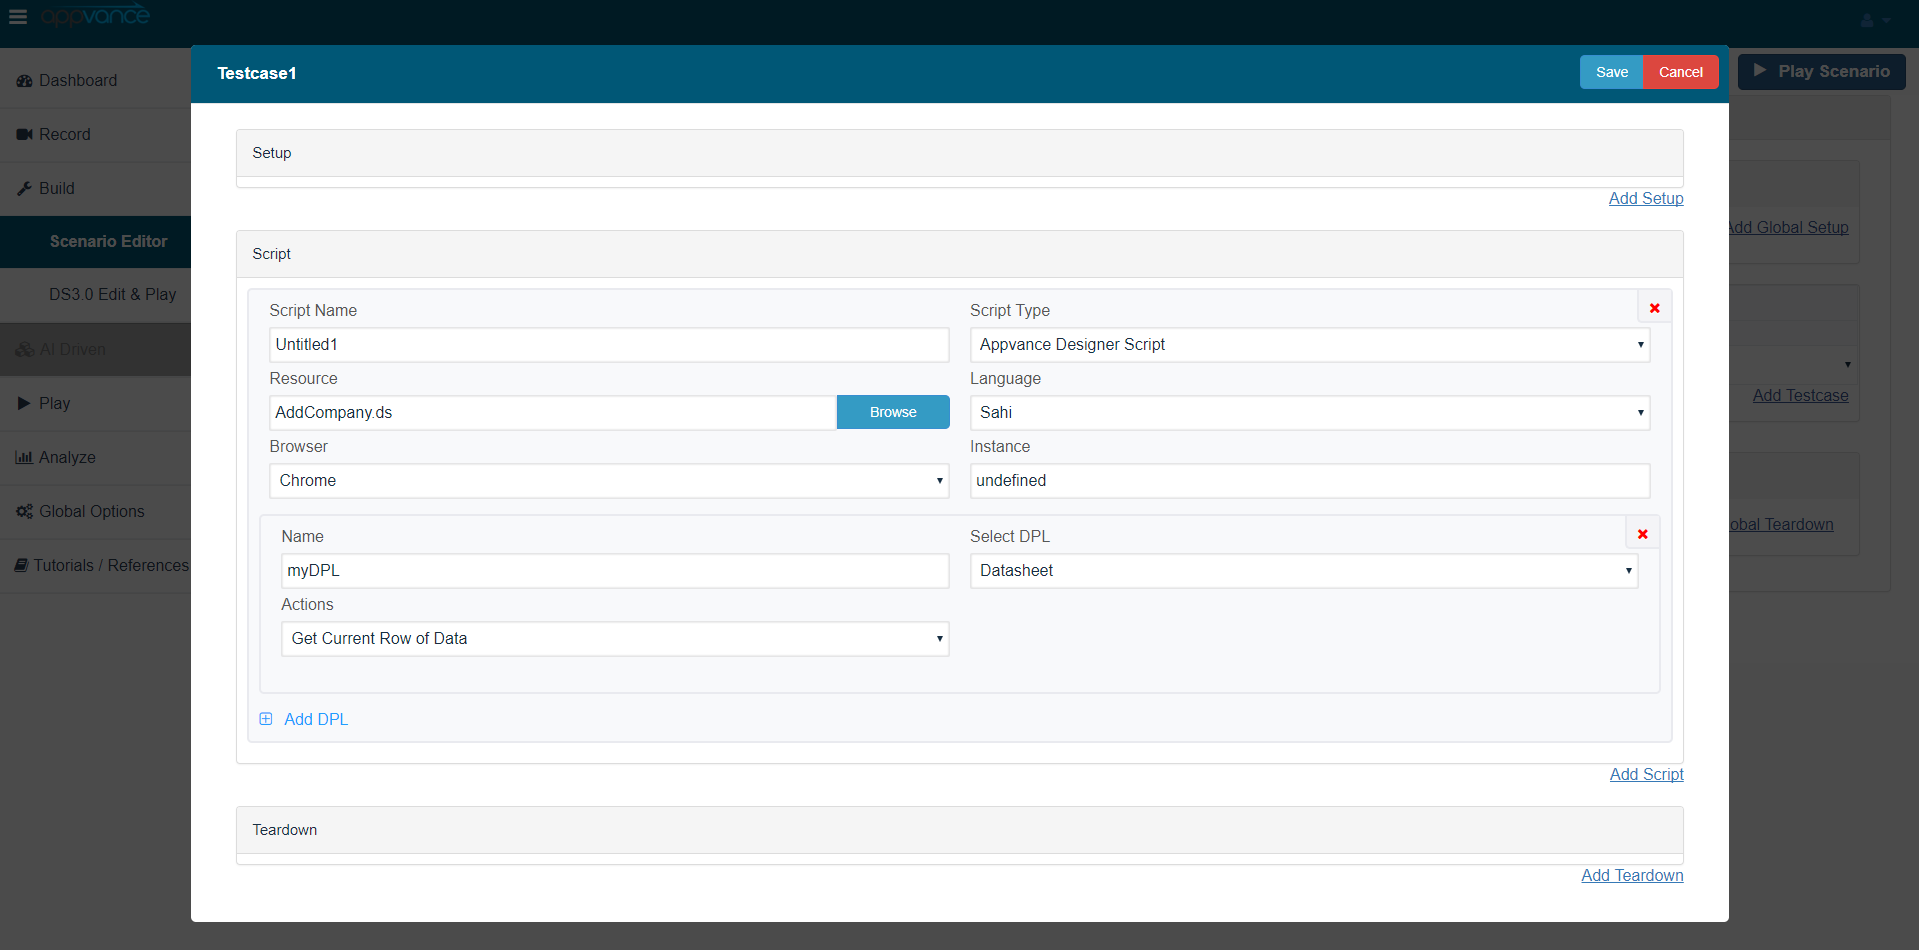
Click Add DPL, Provide any valid name, select the DPL that was created in the resource panel in the available drop-downs and select Action to be ‘Get Next row of Data’
-
Click Save
-
As this is a functional test with a repeat use case set to 2, the scenario will run the test case for a couple of iterations and pick 2 different values from the CSV sheet
-
Logs in the Options panel can be set to 100%
-
Click File > Save and save the scenario and click play Scenario
-
The test controller will open and run the test scenario that was set up, as mentioned this test will run for 2 iterations picking 2 different values from the CSV sheet
-
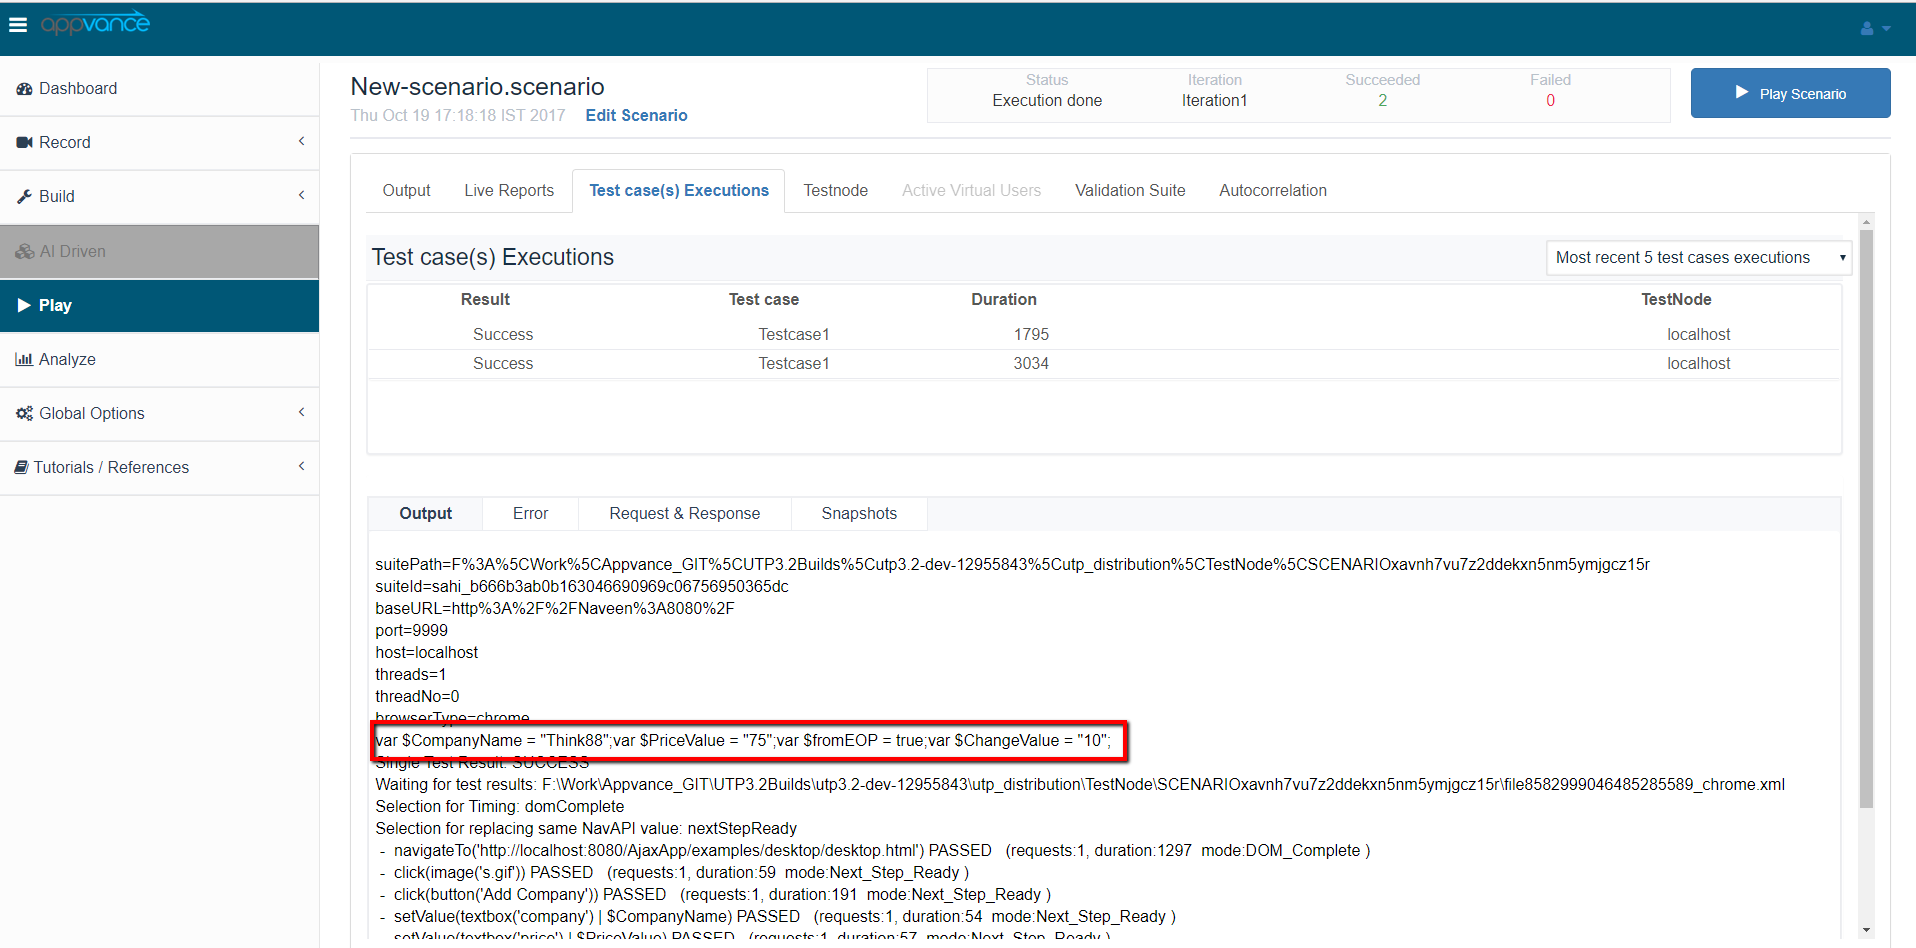
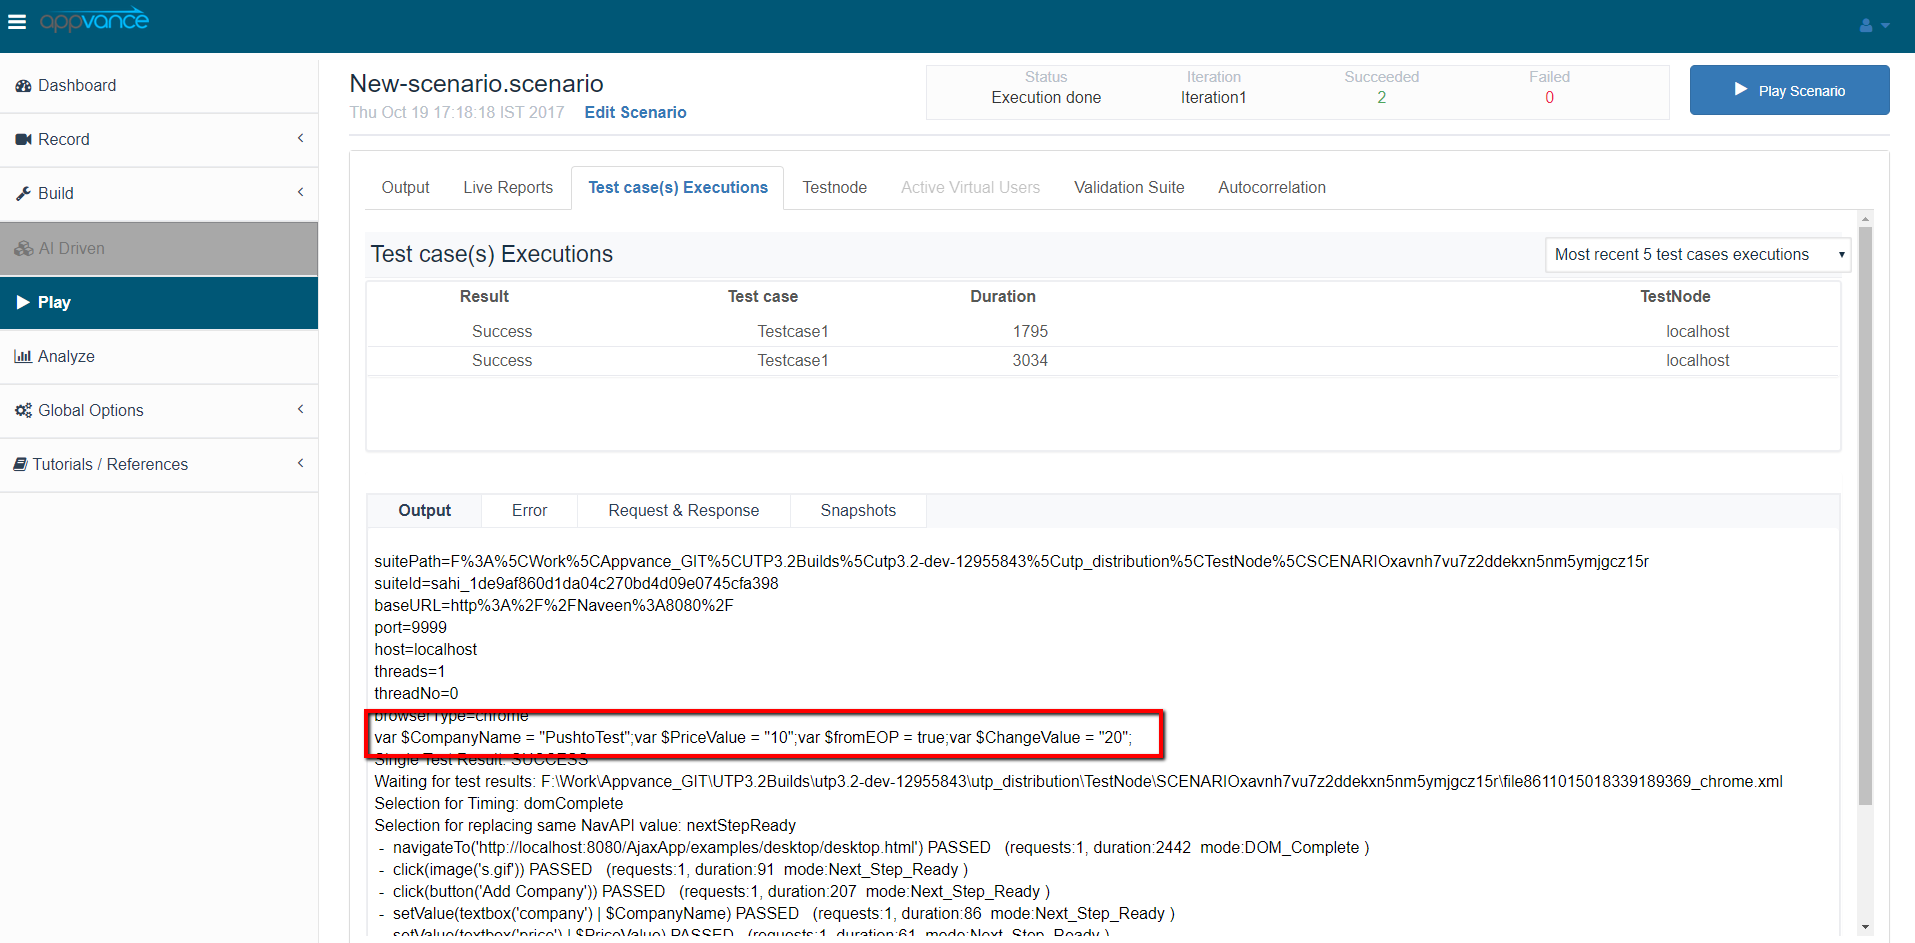
Once the test is complete, click test case execution on the test controller, you should notice 2 successful executions
-
Click each execution and notice the values that were picked as seen in the below screenshot
How to use RDBMSMapDPL in the Appvance Designer Script?
-
Navigate to Appvance Designer
-
Click File > New
-
Click Record and provide a valid URL and start recording the desired use case where there are setValues involved in the script.
-
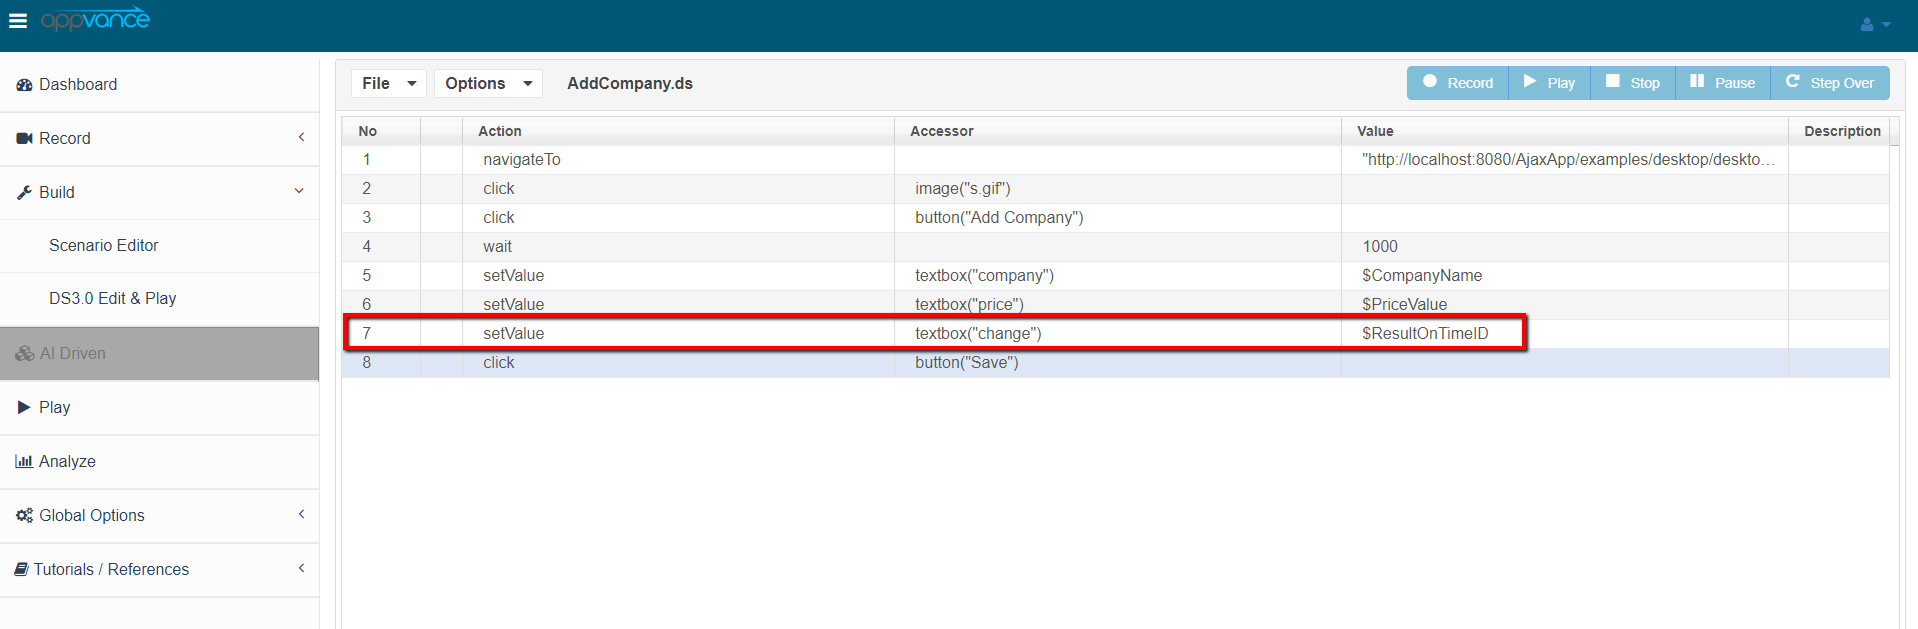
Assuming the user has to data enable Row 7
-
Now Data Enable value field, i.e Provide the column name of the table from which data will be retrieved
-
Click File > Save and save the Appvance Designer Script
-
Now go to Build and navigate to Scenario builder to create the data enabled scenario
-
Click File > New
-
Info Tab: Select a functional test or performance test based on the requirements
-
Navigate to the Resources panel and click Add Data source
-
Select RDBMSMapDPL from DPL drop-down
-
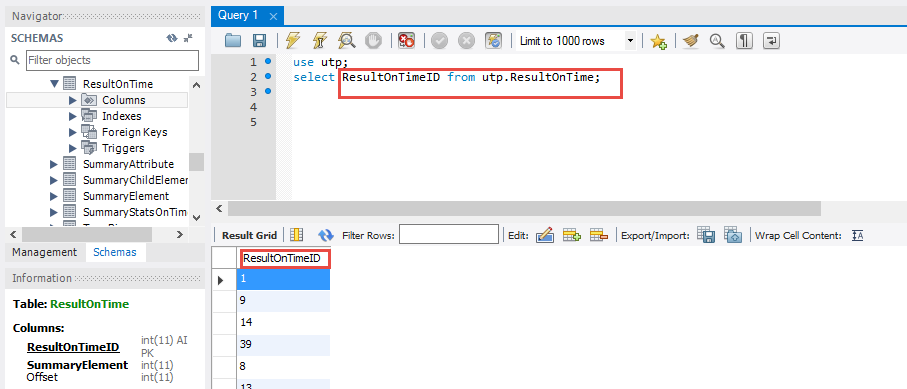
Enter valid inputs in SQL Server, Database URL, User, Password, and query fields
Example:
SQL Server- com.mysql.jdbc.Driver
Database URL- jdbc:mysql://localhost:3306/utp?useSSL
User- utp
Password- utp
Query- select ResultOnTimeID from utp.ResultOnTime
-
-
Come back to test case and select the DPL added from the drop-down
-
Save and play scenario
-
The test controller will open and run the test scenario that was set-up
-
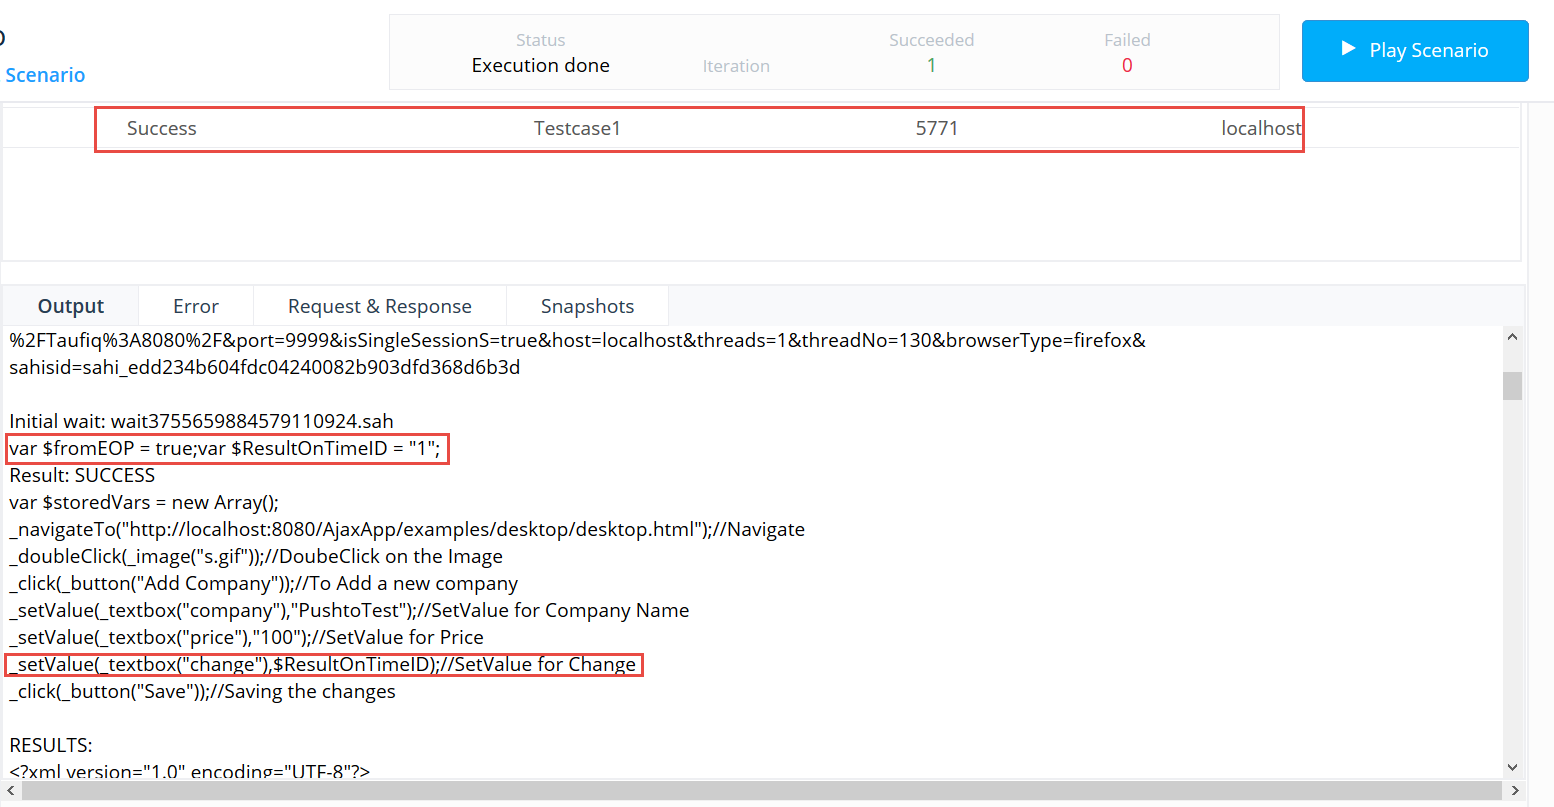
Once the test is complete, click test case execution on the test controller, Click each execution and notice the values that were picked
Last updated: June 26, 2023
If you have any feedback on this topic, please contact us at documentation@appvance.ai