
DPL Usage with Appvance Designer Script
How to work with DPL in Appvance Designer scripts?
Navigate to Appvance Designer
Click File > New
Click Record and provide a valid URL and start recording the desired use case where there are setValues involved in the script
Once the recording of the script is complete something looks like the below
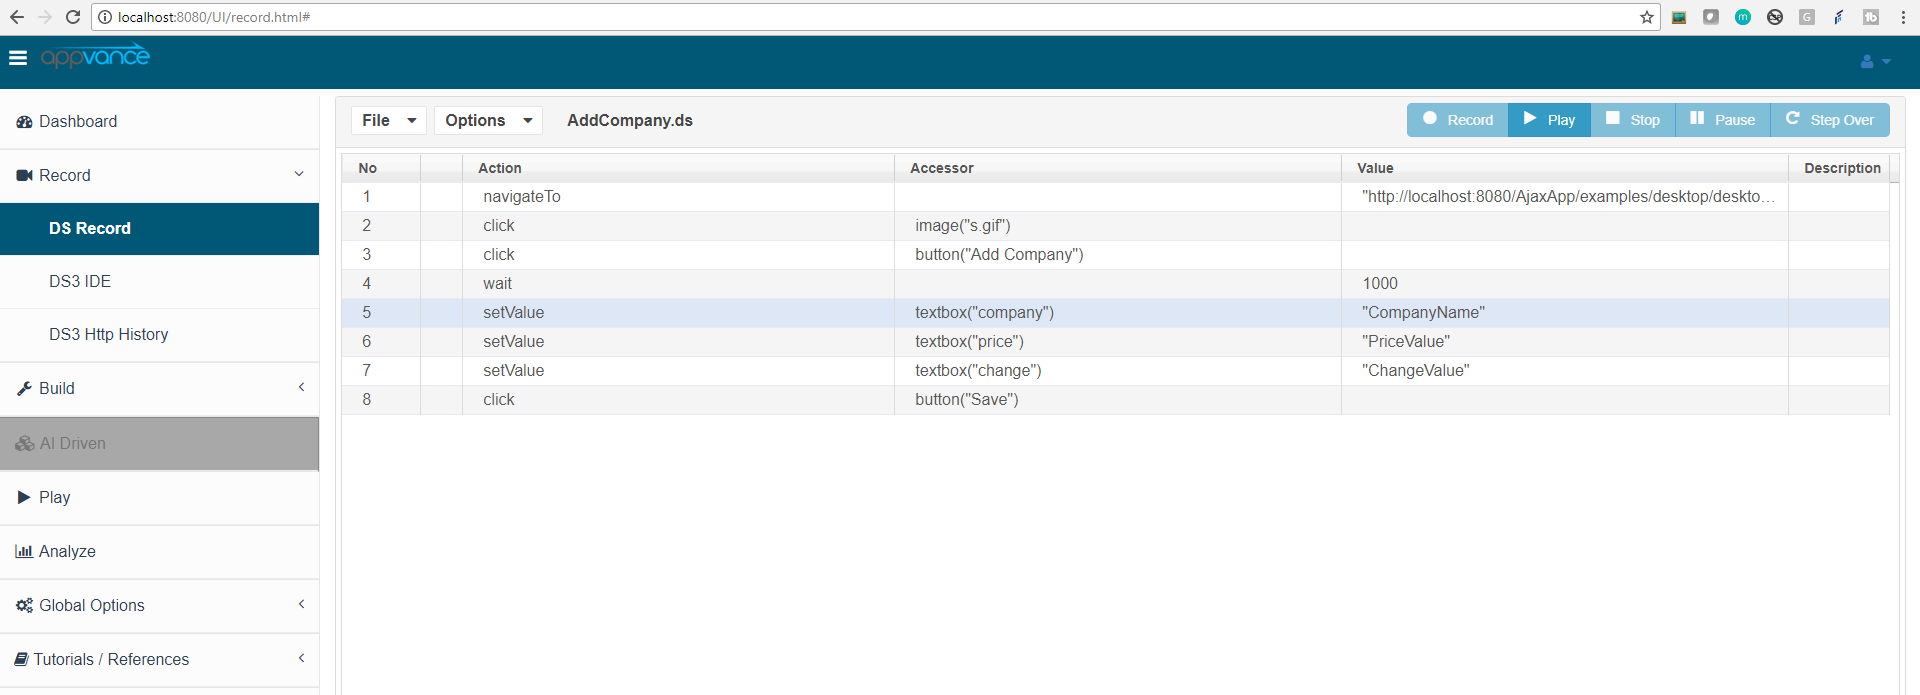
Assuming the user has to data enable Row 5, 6 and 7
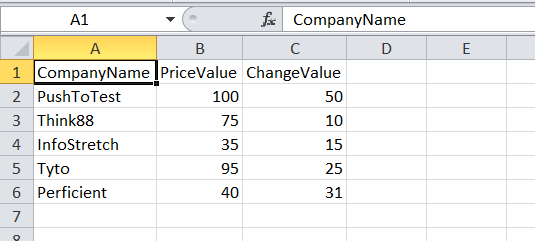
Create a data CSV sheet with 3 columns and have data for all those 3 columns, Example screenshot below
Now come back to Appvance Designer, click Options > DPL Options > and browse the CSV sheet that was created and Click OK
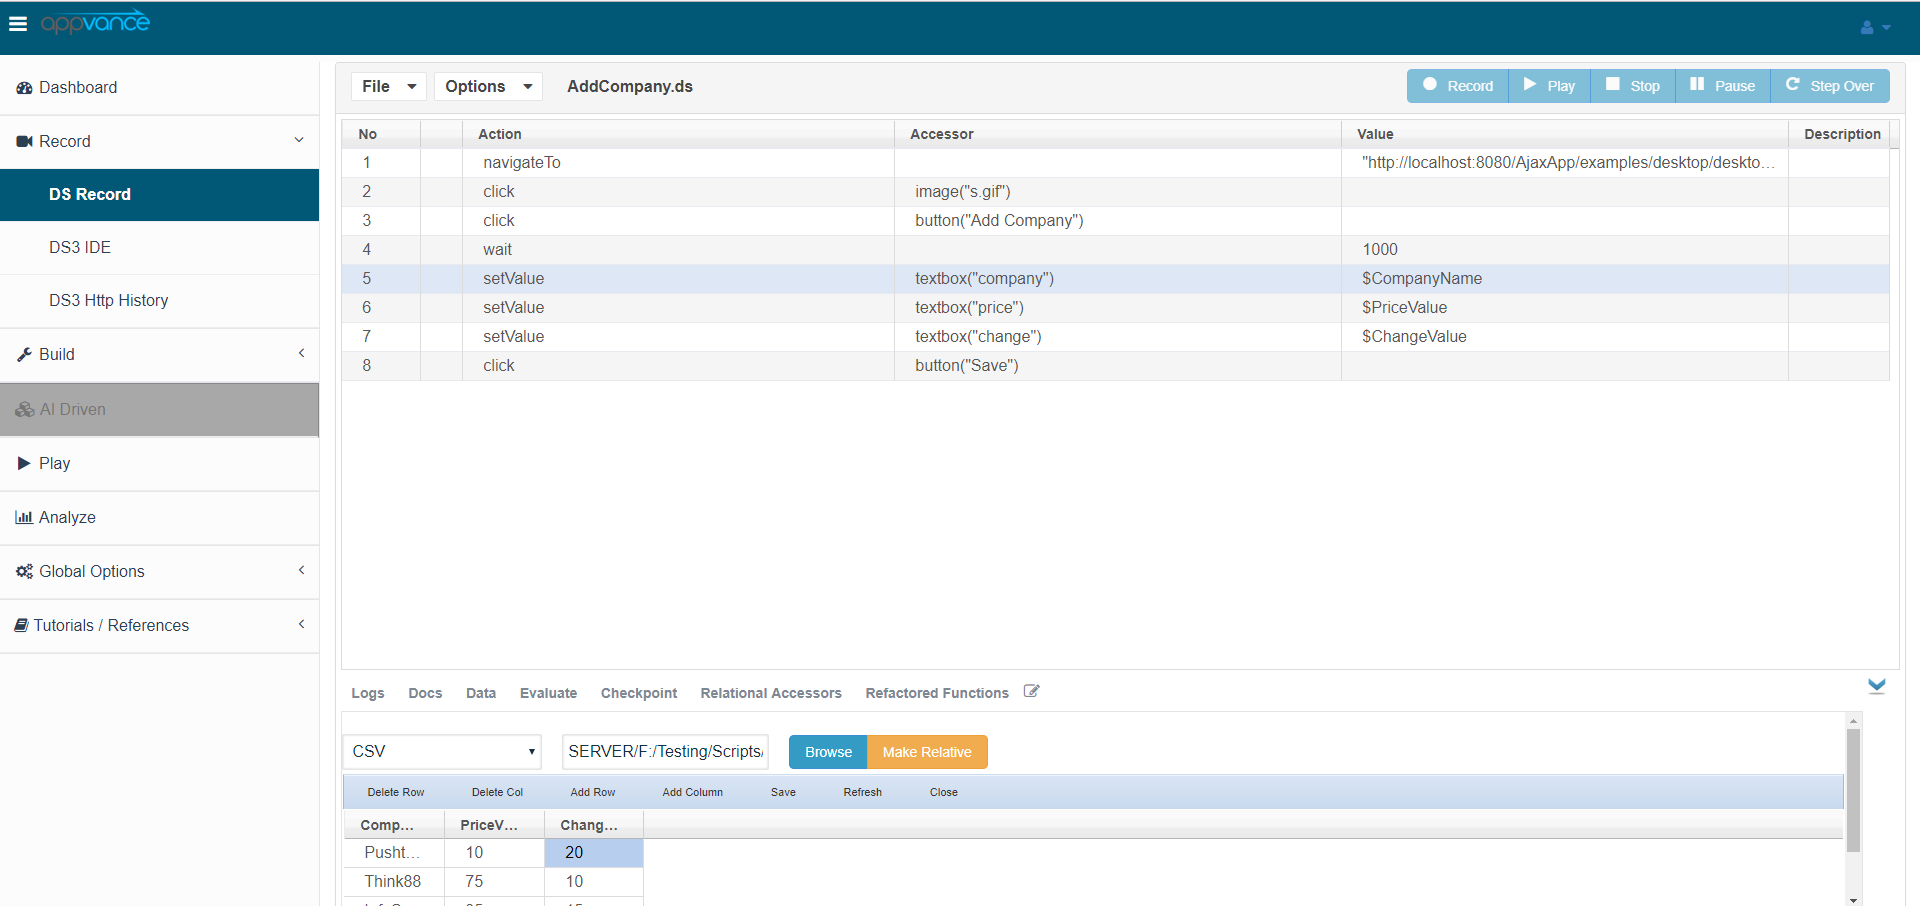
Go to the Data tab at the bottom, Drag the first value from column 1 and drop the same in the value filed of Row 3, the value should get changed to “$CompanyName”
Note: The column name can be anything specific
Similarly, drag and drop the same for Row 5 and 6
Below is the screenshot of how this should look
Click File > Save and save the Appvance Designer Script
Now go to Build and navigate to Scenario builder to create the data enabled scenario
Click File > New
Info Tab: Select a functional test or performance test based on the requirements
With the example below I am selecting functional test with Repeat this use case options set to 2 in the test management section, in the case of performance test user can provide the number of users and other completion criteria that can be used as per the requirements
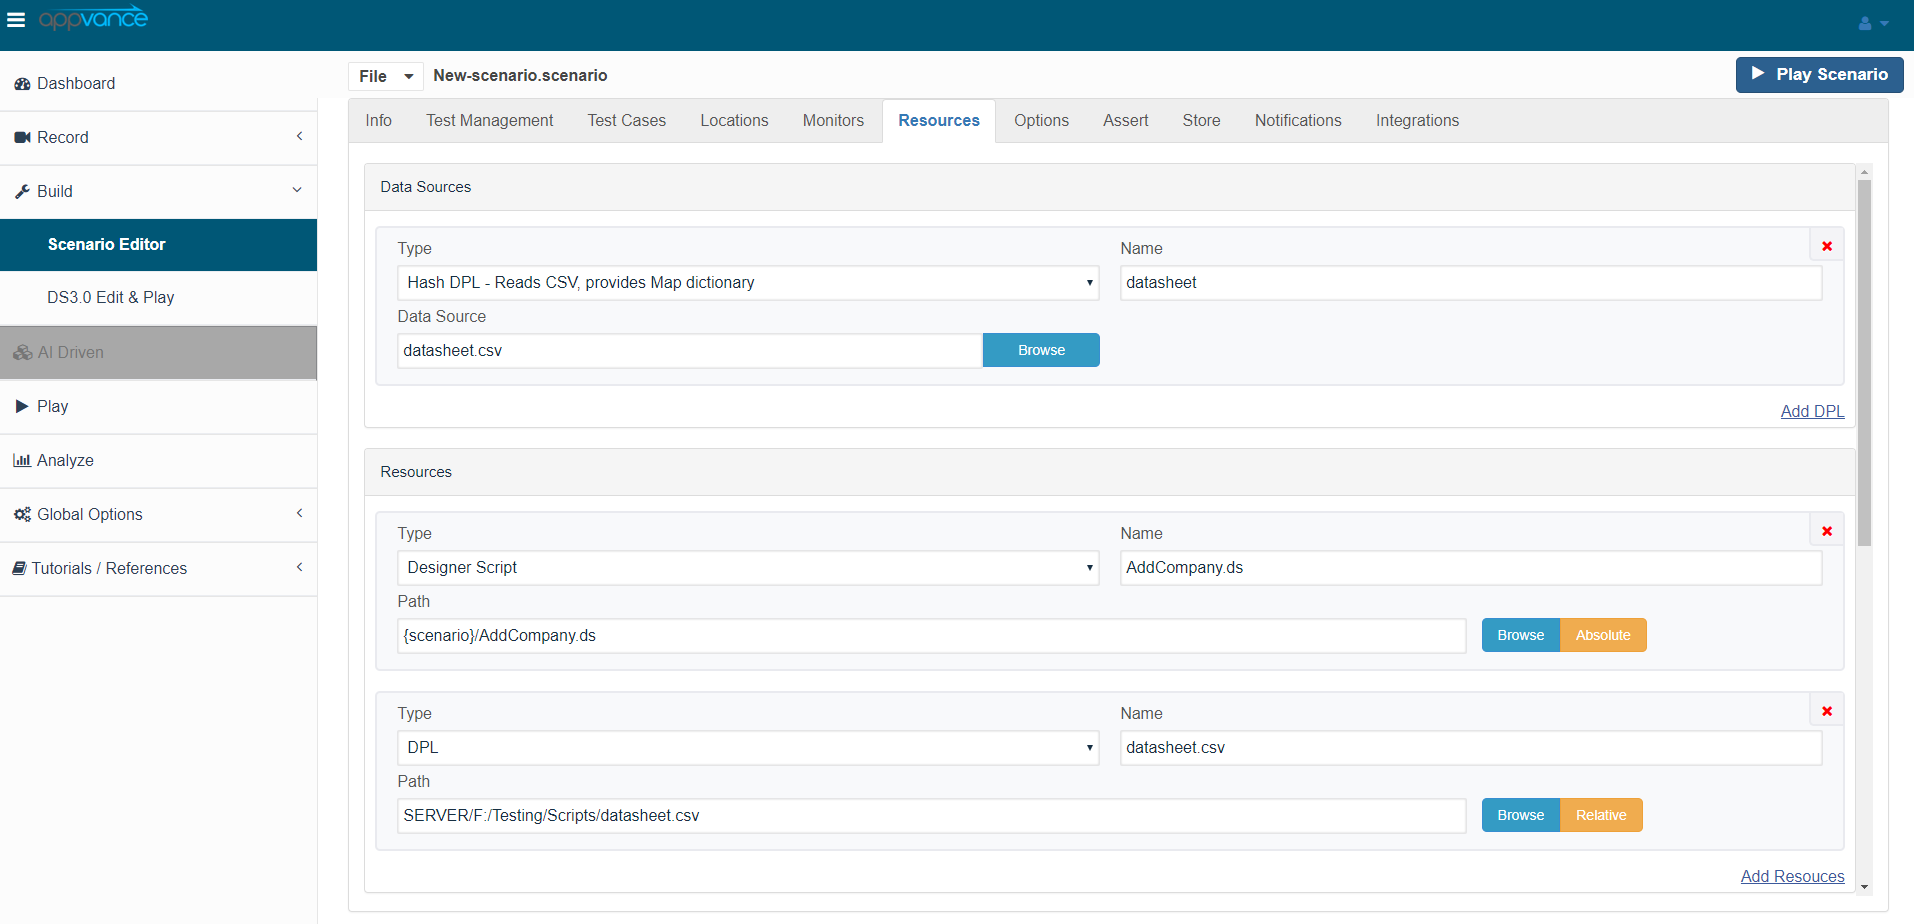
Navigate to the Resource panel: Select “HashDPL-Reads CSV” as the type and provide some valid DPL name, Browse and select the CSV file that we created while creating the Appvance Designer Script
Come back to the test case panel: Click ‘Add a test case execution’, Select ‘Appvance Designer script’ from the test type drop-down, Browse the Appvance Designer script that was created which was data-enabled, Leave other options to default
Click Add DPL, Provide any valid name, select the DPL that was created in the resource panel in the available drop-downs and select Action to be ‘Get Next row of Data’
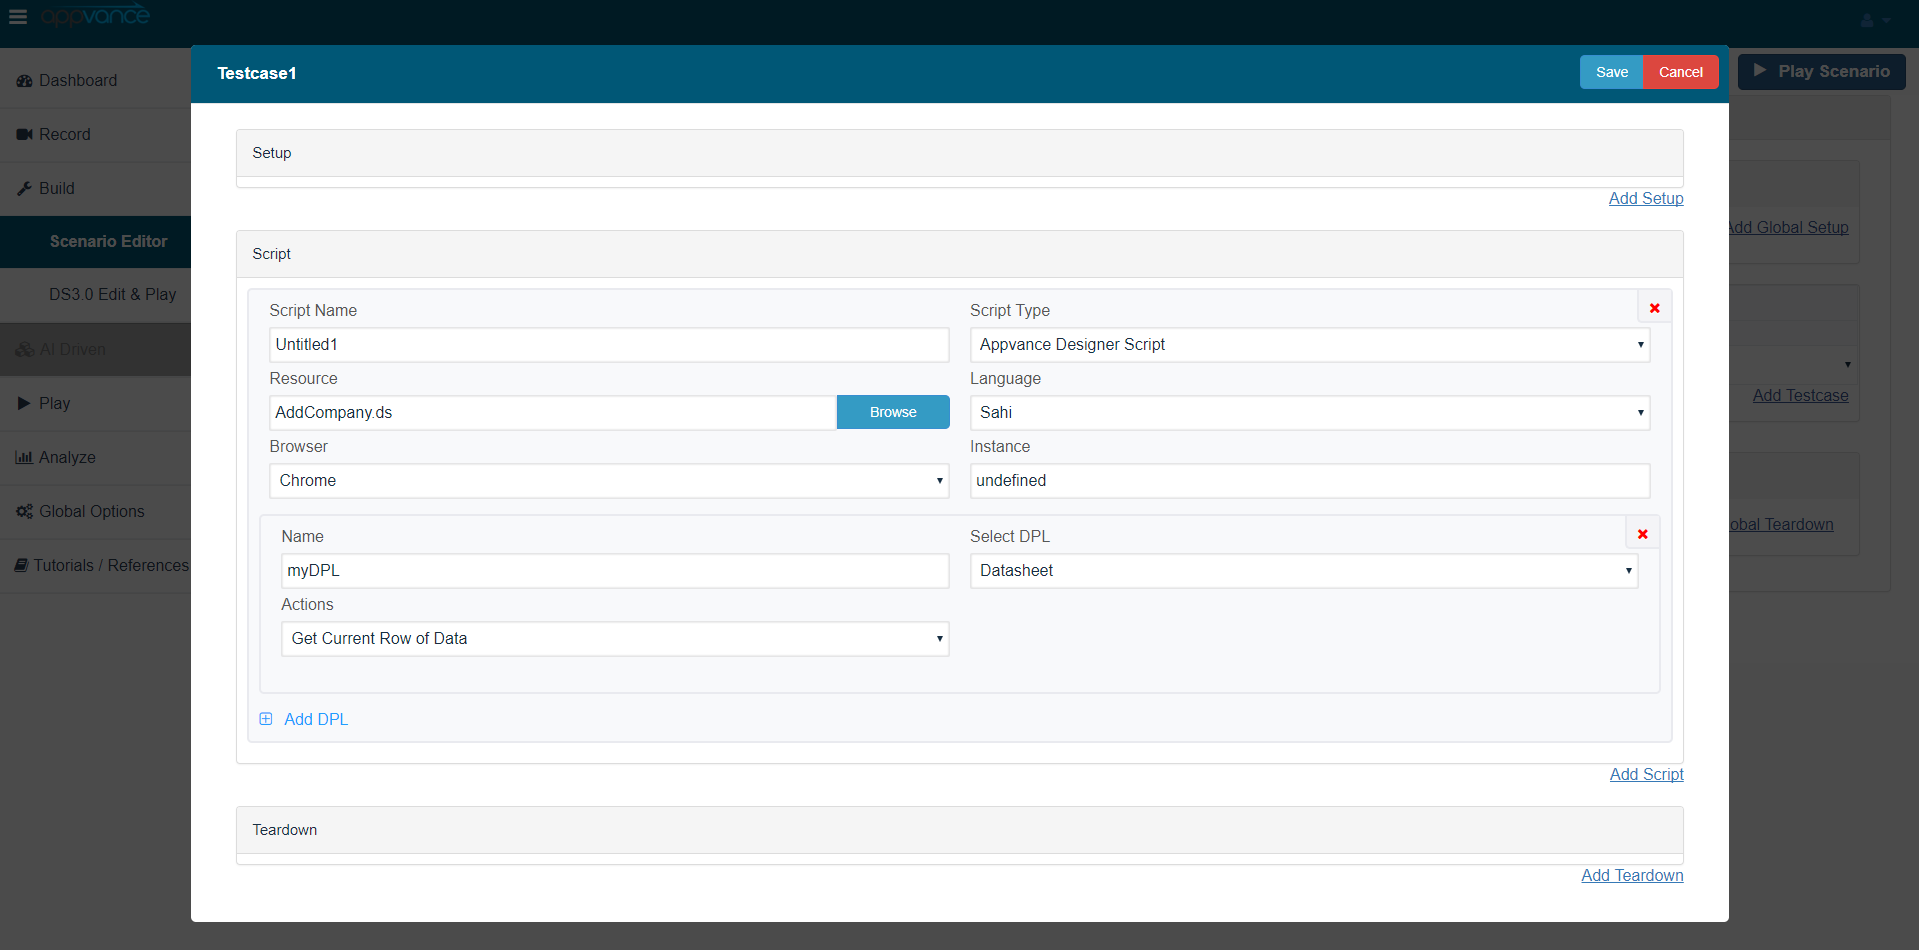
Click Save
As this is a functional test with a repeat use case set to 2, the scenario will run the test case for a couple of iterations and pick 2 different values from the CSV sheet
Logs in the Options panel can be set to 100%
Click File > Save and save the scenario and click play Scenario
The test controller will open and run the test scenario that was set up, as mentioned this test will run for 2 iterations picking 2 different values from the CSV sheet
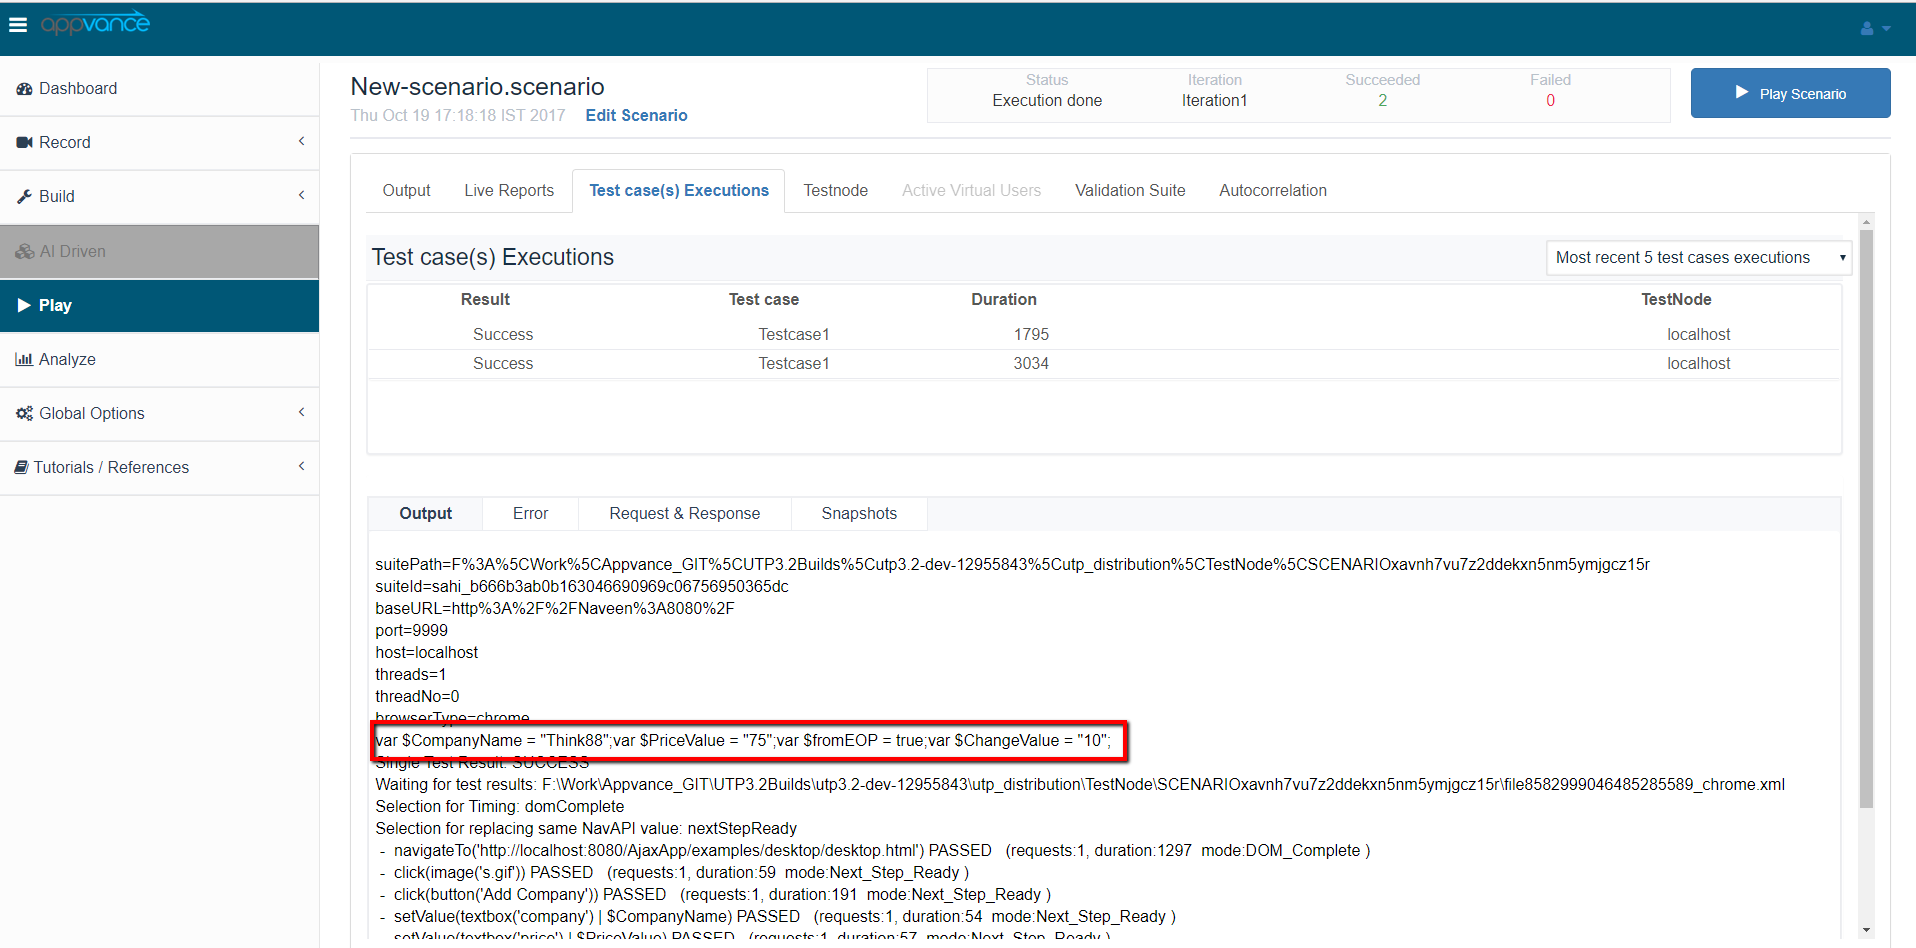
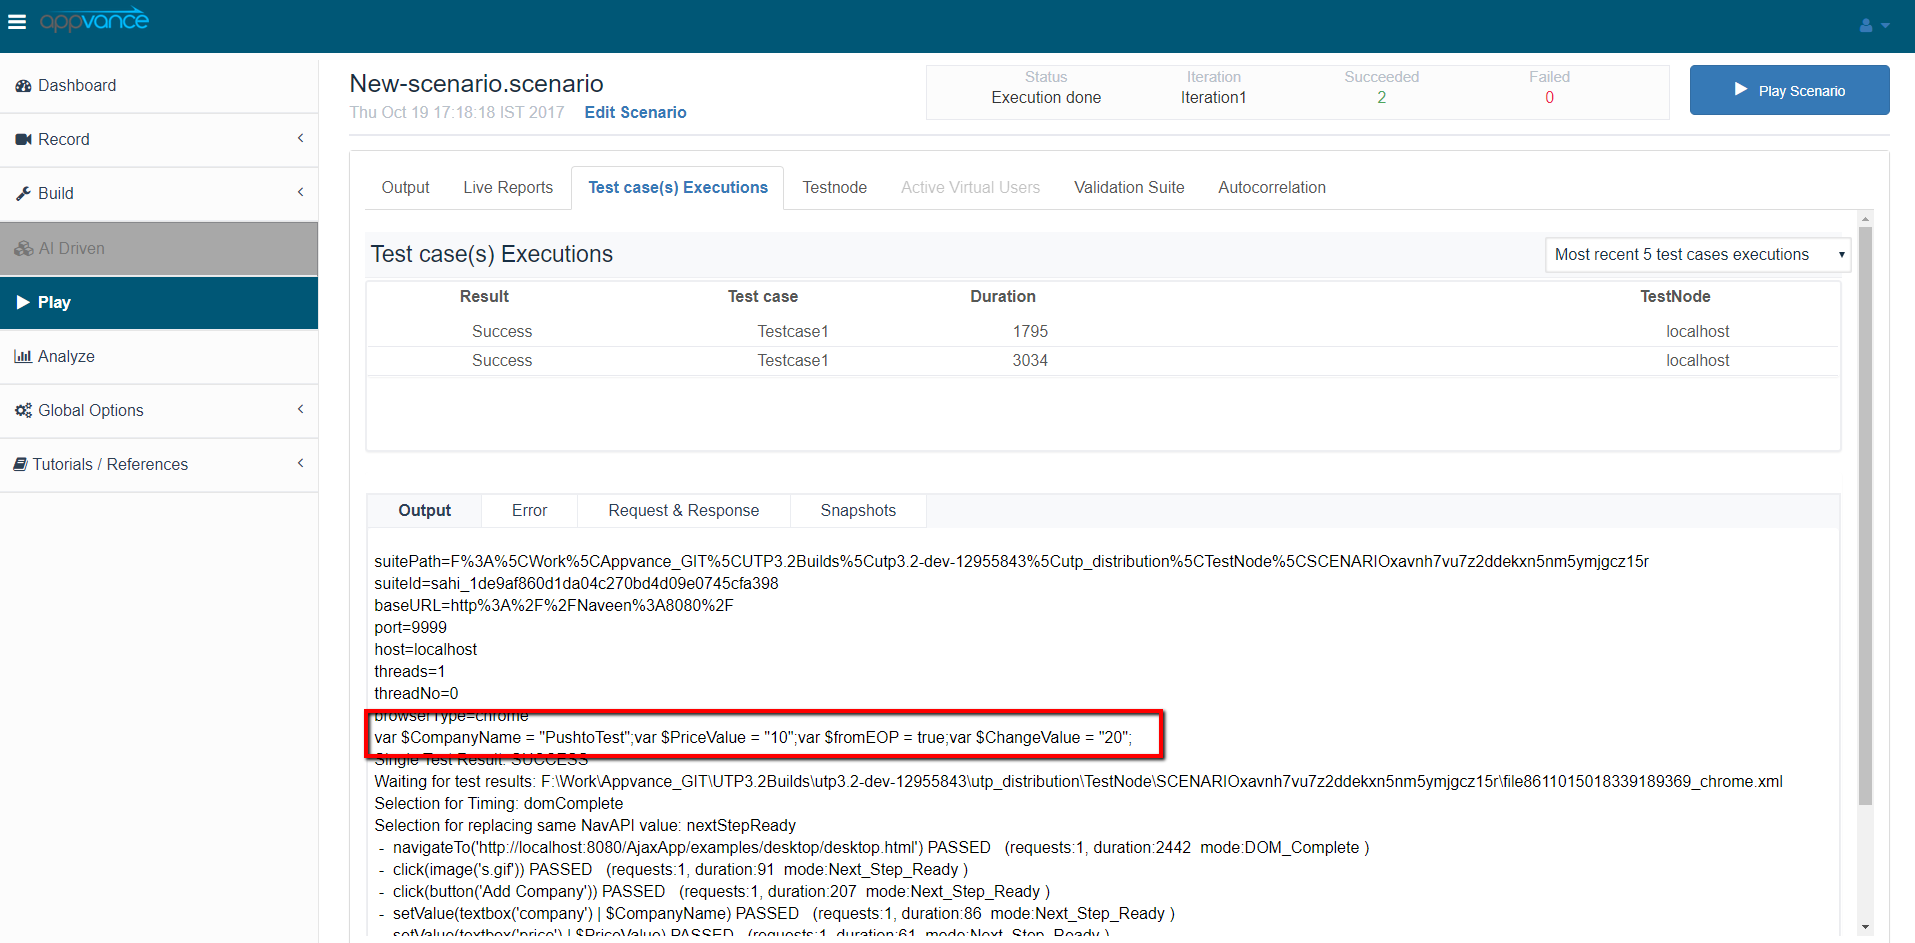
Once the test is complete, click test case execution on the test controller, you should notice 2 successful executions
Click each execution and notice the values that were picked as seen in the below screenshot
How to use RDBMSMapDPL in the Appvance Designer Script?
Navigate to Appvance Designer
Click File > New
Click Record and provide a valid URL and start recording the desired use case where there are setValues involved in the script.
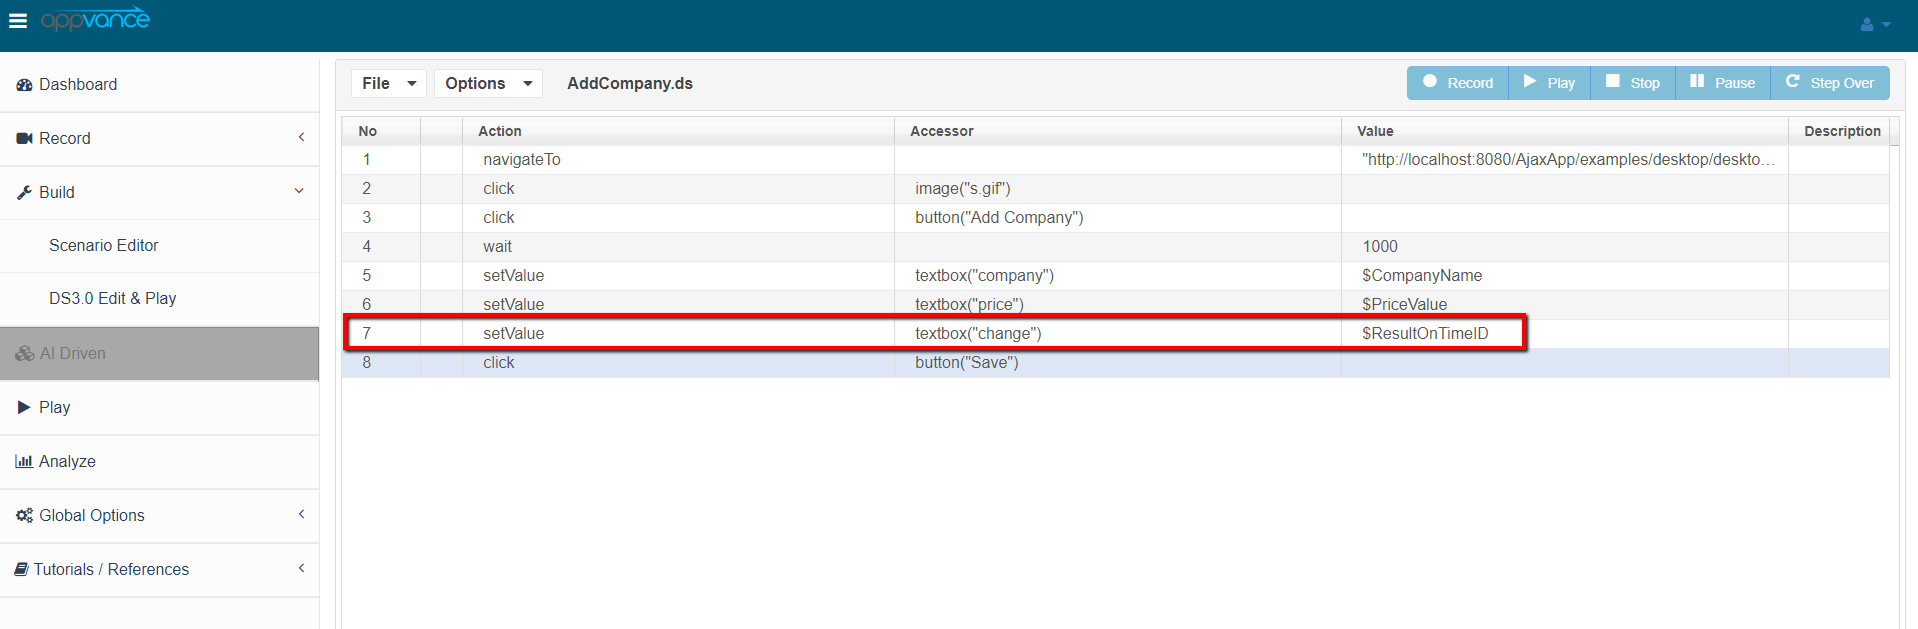
Assuming the user has to data enable Row 7
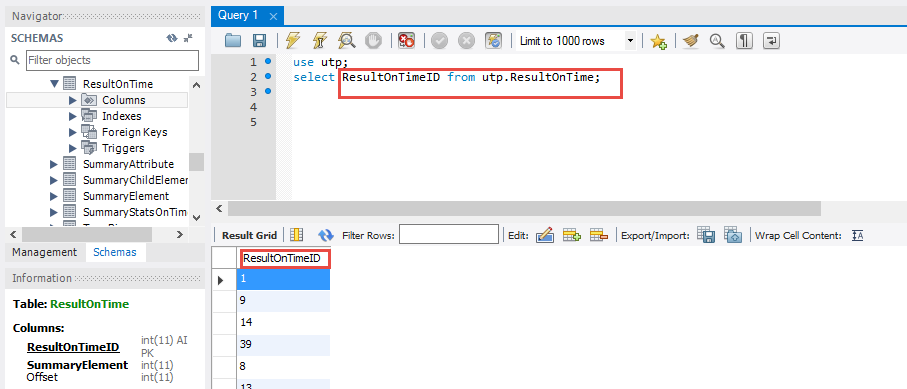
Now Data Enable value field, i.e Provide the column name of the table from which data will be retrieved
Click File > Save and save the Appvance Designer Script
Now go to Build and navigate to Scenario builder to create the data enabled scenario
Click File > New
Info Tab: Select a functional test or performance test based on the requirements
Navigate to the Resources panel and click Add Data source
Select RDBMSMapDPL from DPL drop-down
Enter valid inputs in SQL Server, Database URL, User, Password, and query fields
Example:
SQL Server- com.mysql.jdbc.Driver
Database URL- jdbc:mysql://localhost:3306/utp?useSSL
User- utp
Password- utp
Query- select ResultOnTimeID from utp.ResultOnTime
Come back to test case and select the DPL added from the drop-down
Save and play scenario
The test controller will open and run the test scenario that was set-up
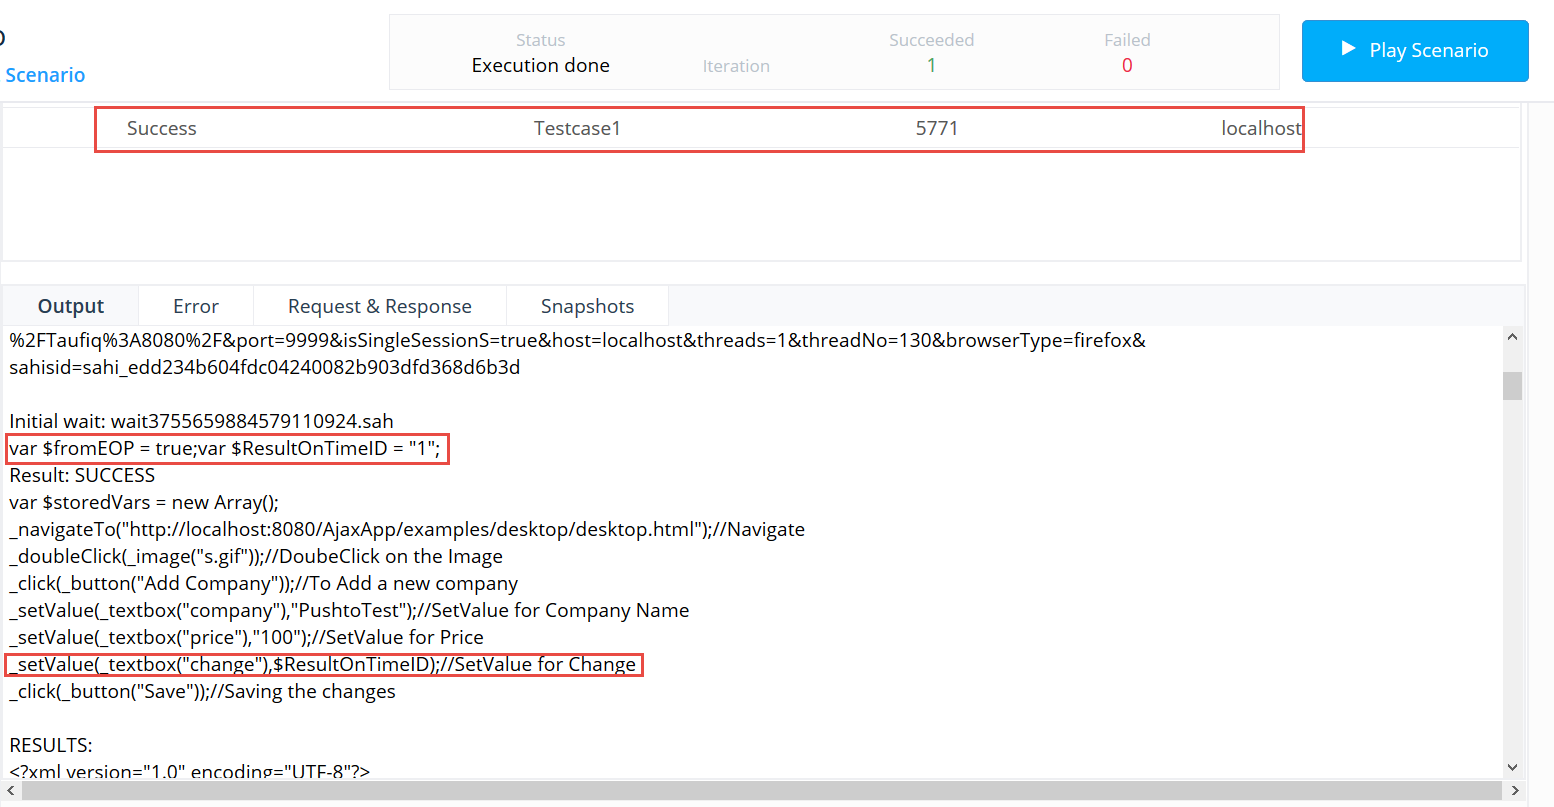
Once the test is complete, click test case execution on the test controller, Click each execution and notice the values that were picked
Last updated: June 26, 2023
If you have any feedback on this topic, please contact us at documentation@appvance.ai