
Auto Correlation Overview in AIQ
Contents
Last
Use this article to understand when AIQ Auto Correlation Works
used to detect and reuse dynamic values across requests or steps.
What changed in this article
- Expanded the short title into an overview of what Auto Correlation is
thefor. - Clarified
mostthatimportantcorrelationaspectis useful for dynamic session IDs, tokens, generated IDs, and request/response dependencies. - Added guidance to review suggested correlations instead of
scripting.acceptingIteverygenerallymatchincludesautomatically.
Validation workflow
- Identify failing requests or steps that depend on dynamic
datavalues. - Run
fromAutopreceding requests/callsCorrelation andposting it toreview thesubsequentextractedrequests.Let's take an example to find out why exactly we need correlationSuppose we have recorded a scenario in which: The user enters login detailssource andclicktargetthe OK button
The home page opens and the user take further actions
Now, if we just playback this script, the test will fail even for a single user. This is because of the authentication mechanism used. When we log in to a website, session variables are dynamically created. These session variables are passed to the subsequent requests and help validation and authentication of the actions performed. So, one cannot just record and playback the requests having these variables.
Here, we need to correlate the web requests with the dynamic variables. And for correlation, AIQ has the feature of Auto-correlation.
User Flow
Start creating the HAR functional scenario using the Scenario Builder, please refer to HTTP Proxy on how to create HAR scripts using Appvance HTTP Proxy.
Once created, Click play to run the scenario.
On the Controller page, Autocorrelation will be displayed as one of the options in the left navigation pane.
The user has to wait tillReplay the scenario executionand isconfirm completethe correlated value resolves the failure without matching unrelated data.
Review note: This page now explains when to workuse withAuto Autocorrelation,Correlation elsebefore userdiving willinto see a message telling "Please wait for the scenario execution to complete.
Once the scenario execution is Done, click Autocorrelation, Start Autocorrelation button will be enabled. If the tool is not able to generate any correlations,how it will display a message telling, "no correlations were available for this scenario"works.
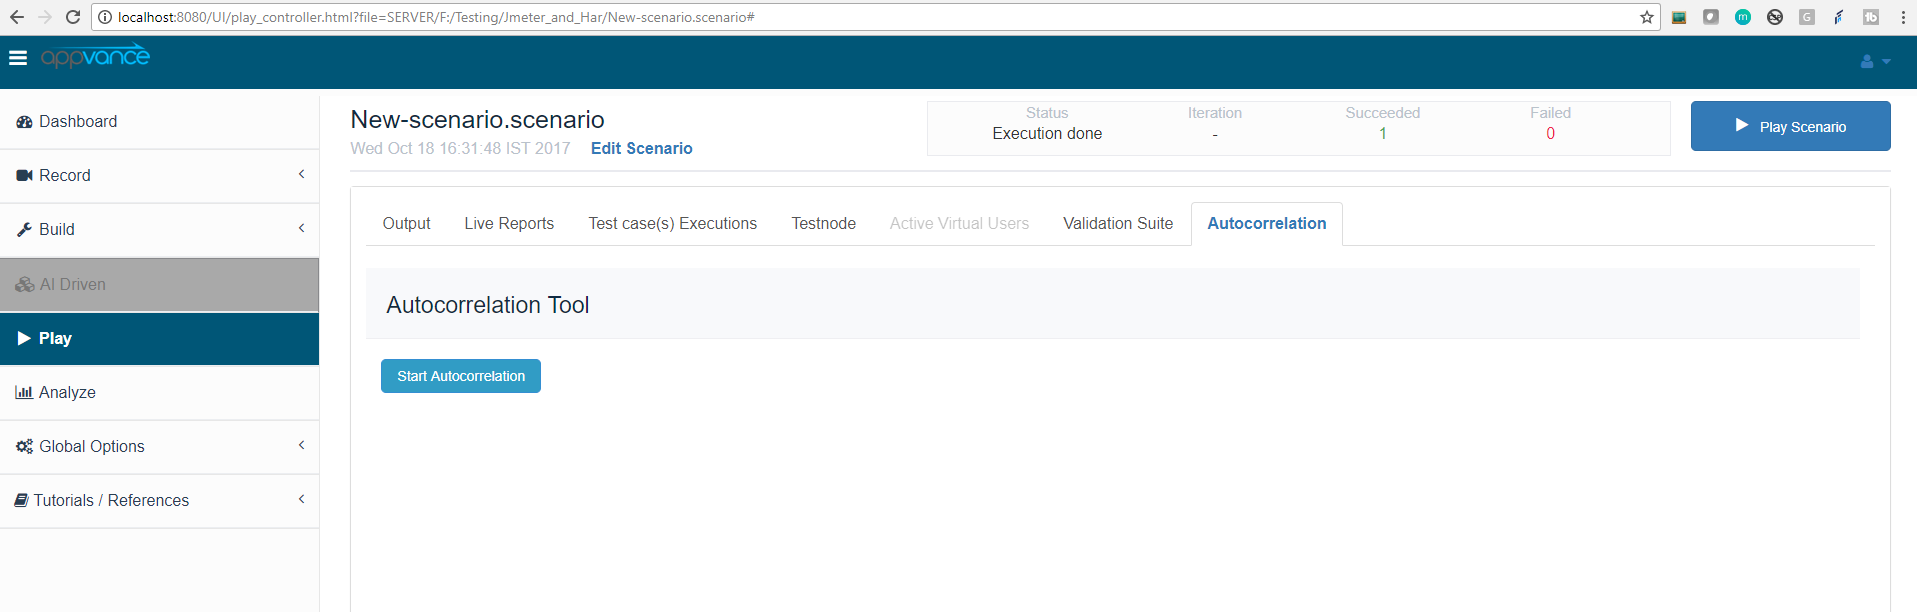
Click Start Autocorrelation, Depending on the number of correlations the tool generates, it might take some time to list all the correlations that are available
Once the autocorrelation tool identifies all the correlations, it will display the list of correlations as shown in the below screen-shot which shows Initial Request, Subsequent Request with Correlated Request with buttons to 'Accept All Autocorrelations', Accept individual Autocorrelation' and also user can 'Reject Autocorrelations'.
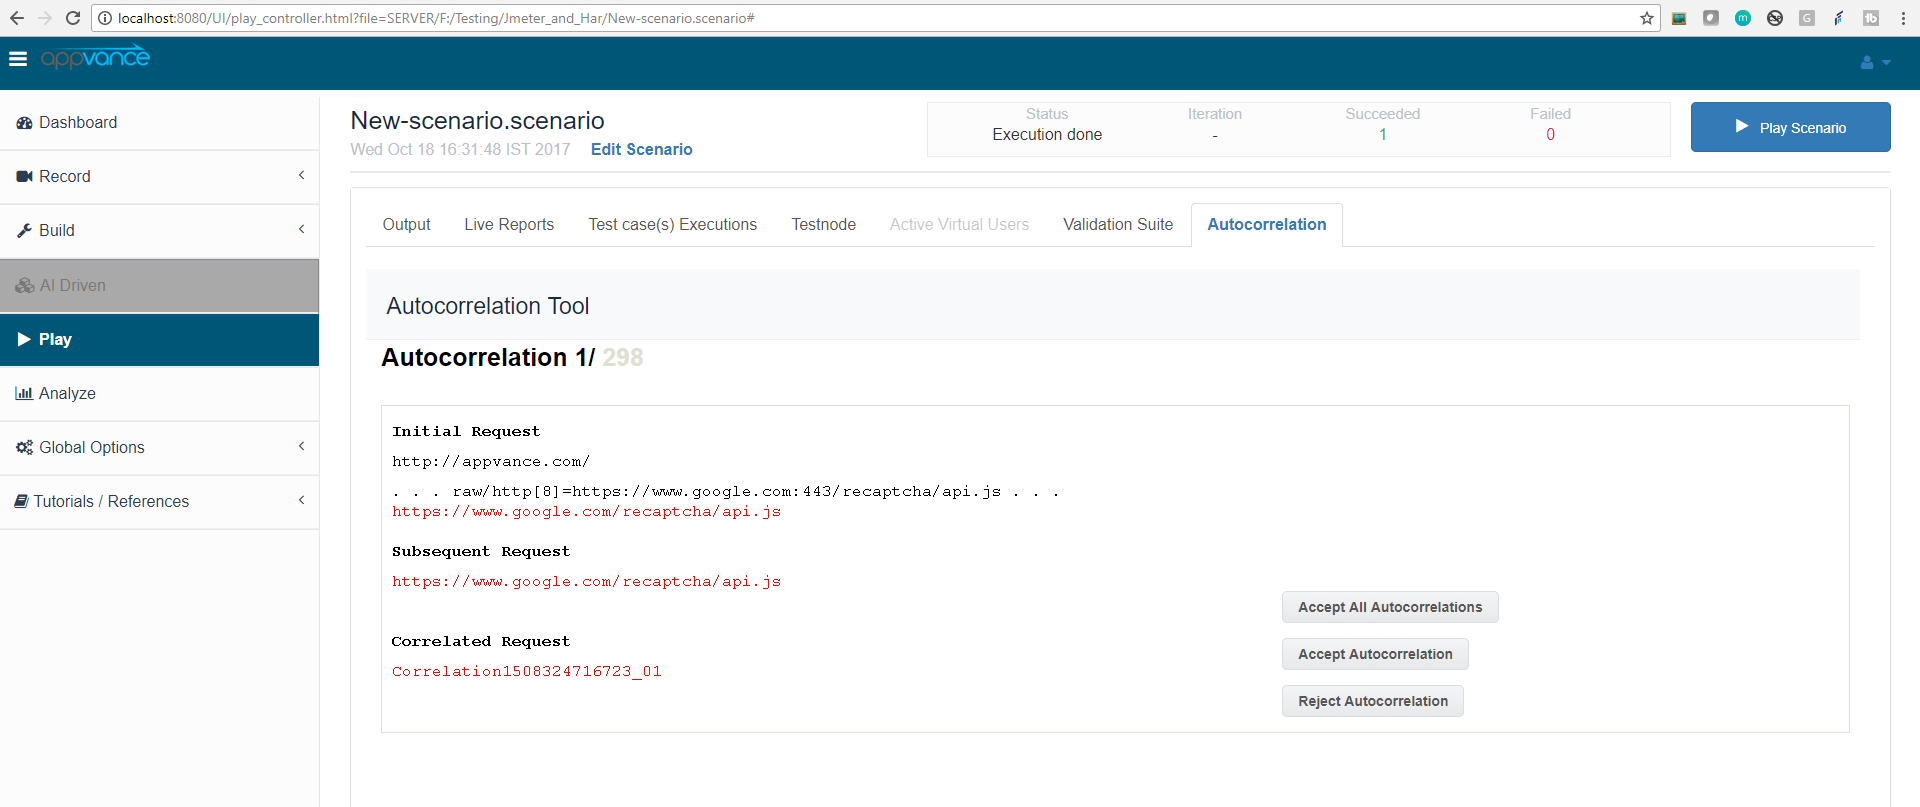
Users can click Accept All Autocorrelation to accept all the correlations, once clicked, it will display a message telling "All auto-correlations have been processed." with a 'Save Autocorrelated Scenario' button enabled.
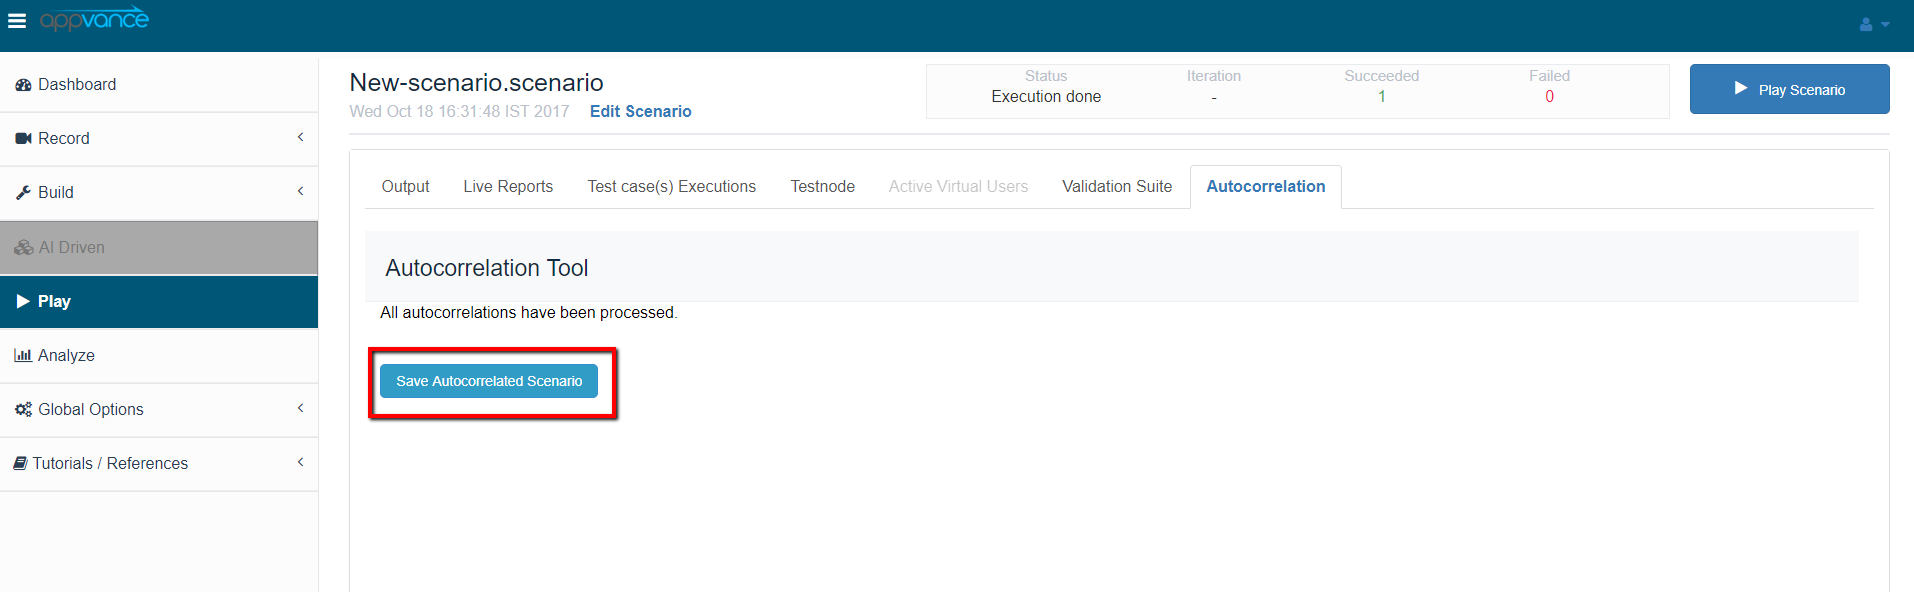
Click Save Autocorrelated Scenario which will open the save dialog, User can create a new folder to save the autocorrelated scenario (scenarioname.autocorrelated.scenario) that saves along with the har script
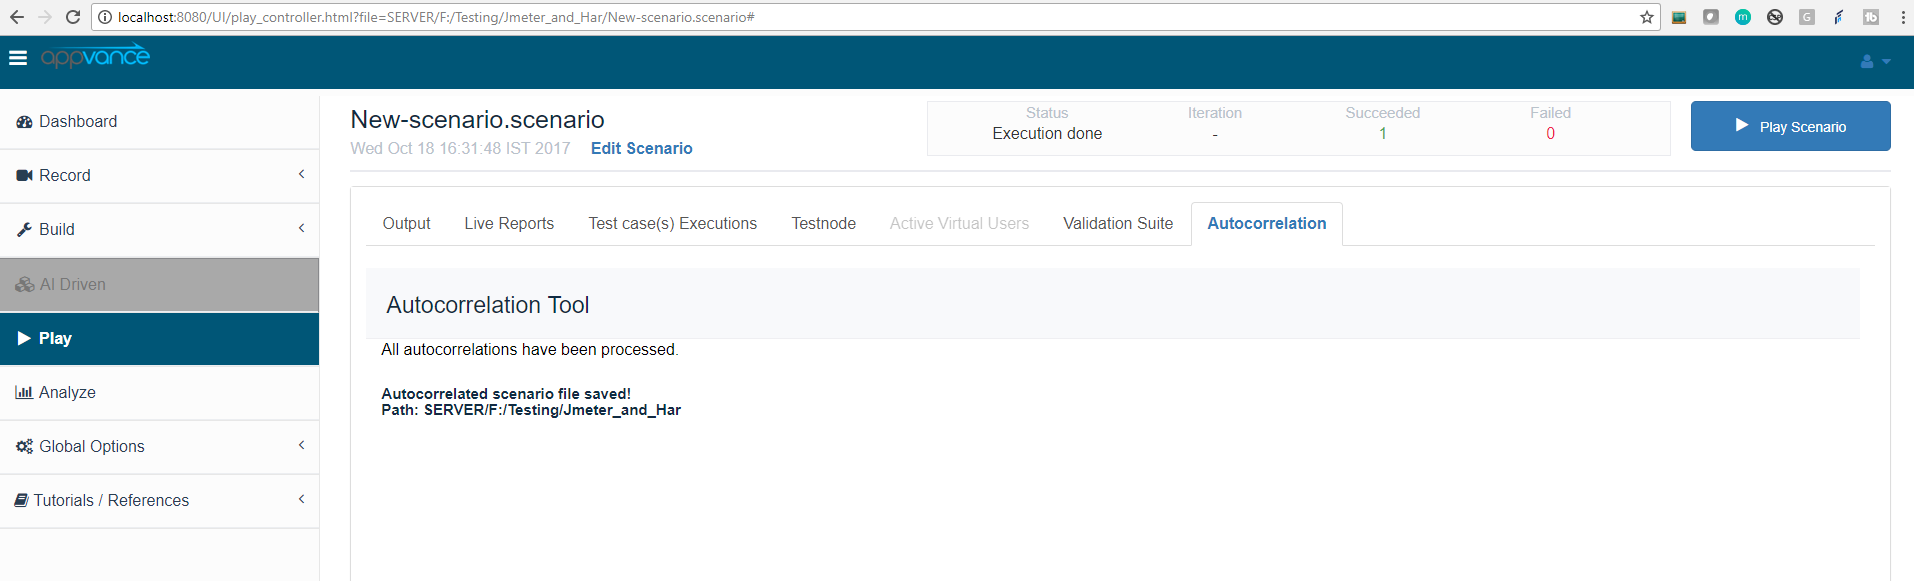
Go back to Scenario Builder and open the autocorrelated scenario that was created using the autocorrelation tool
Go to the Store panel in the left navigation pane as shown in the screen-shot below, you will notice that all the correlations will be saved
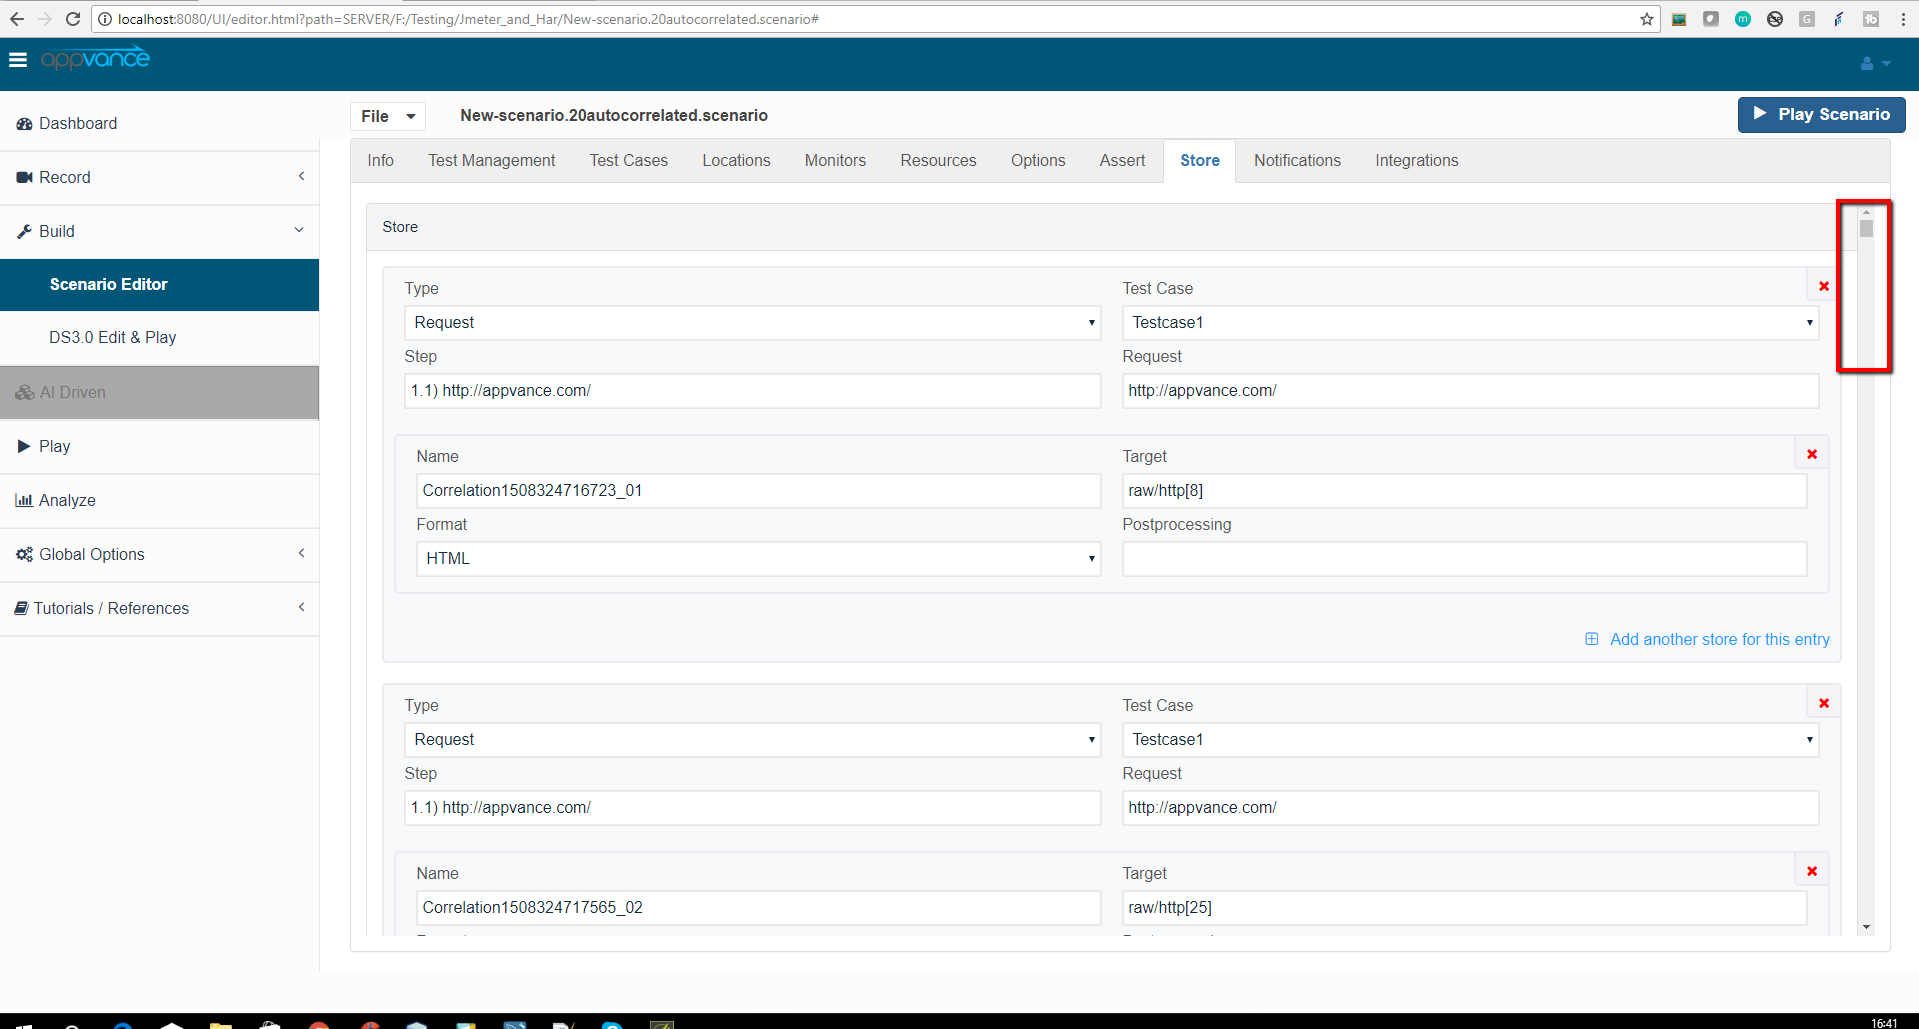
Re-run the autocorrelated scenario to see the successful results
Last updated: AugustSeptember 09,29, 20232026
If you have any feedback on this topic, please contact us at documentation@appvance.ai.