
Validate and Store HAR Content in AIQ
ThisLast featurereviewed: September 25, 2026
Use this article when a test needs to capture, validate, or store HAR network content for later analysis.
What changed in this article
- Updated the title to clarify that the page is
toaboutvalidateHAR content, not therequestwhole Validation and Store suite. - Added specific validation targets: request URLs, response
ofstatus, payload presence, and timing evidence. - Added caution to remove sensitive headers, cookies, tokens, and payloads before sharing HAR evidence.
Validation workflow
- Capture the HAR
and validateduring theresponsesscenariobystepaddingthatassertions.produces
Initially,the werequest/response willfields be taking 3 Servicesneeded for recordingthe test objective.
http://localhost:8080/AppvanceServices/rest/unique/getUniqueEntries
TheReview abovenote: service generates a unique ID every timeMade the serviceHAR isworkflow called.
http://localhost:8080/AppvanceServices/rest/unique/verifyUniqueData?data=1443081822217-data-safety The above will return true/false based on the values
http://localhost:8080/AppvanceServices/rest/unique/getUniqueEntries – This will return a JSON formatted response. Below is the screen-shotguidance for referenceexported network files.

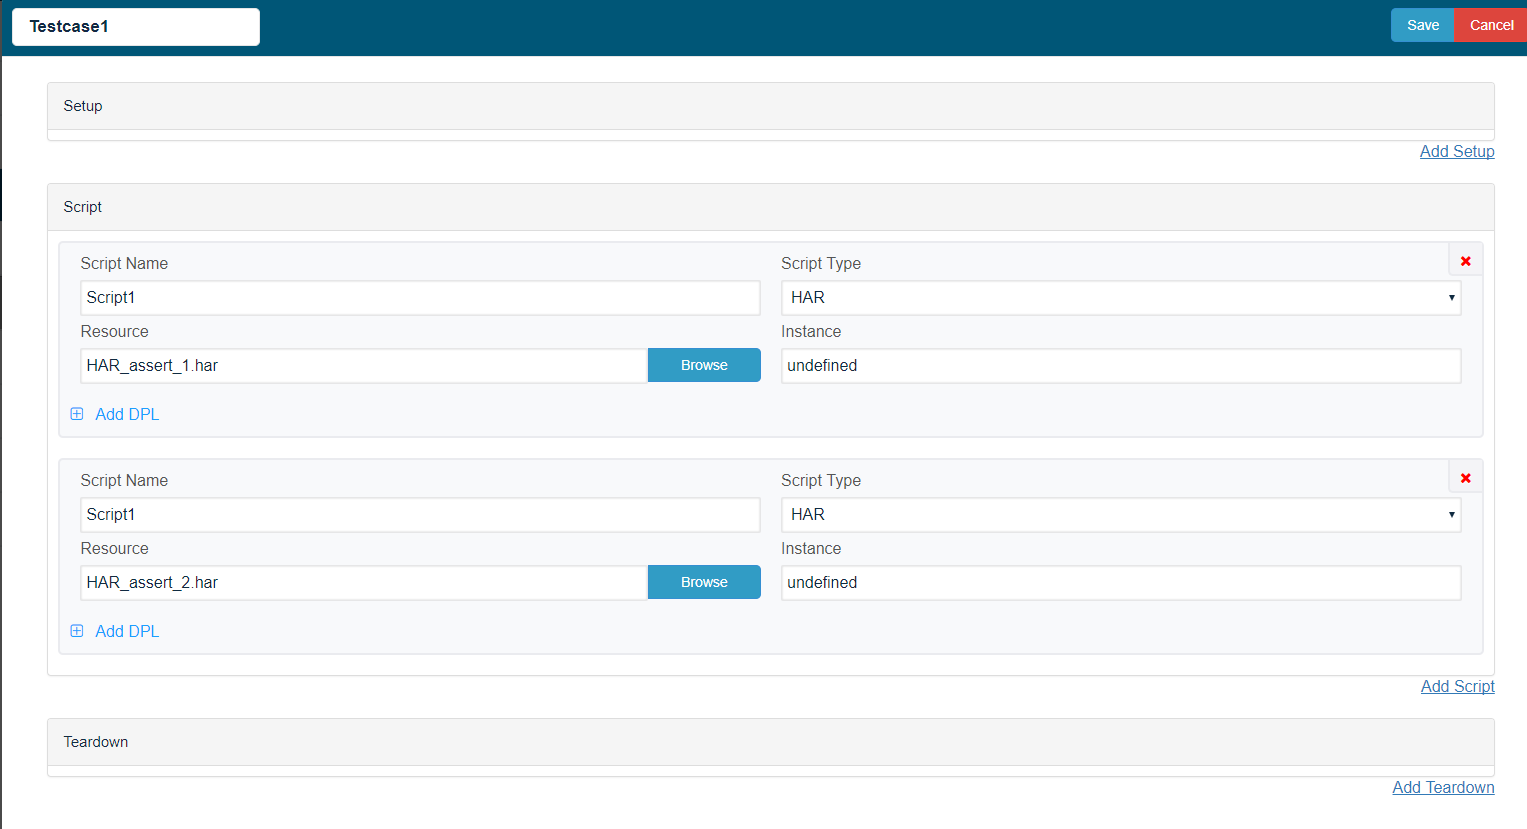
In our case, we will be creating 2 HAR scripts by using the above 2 URLs in the Google Chrome browser and recording the transactions, and saving the script as HAR
For the first URL we have saved the script as HAR_assert_1.har and for the second URL we have saved the script as HAR_assert_2.har
We will be creating a scenario using both the scripts in Appvance Scenario Builder. The screen-shot of the test case is given below:
We will save the scenario and play it as a functional test and the output from the controller will be as below
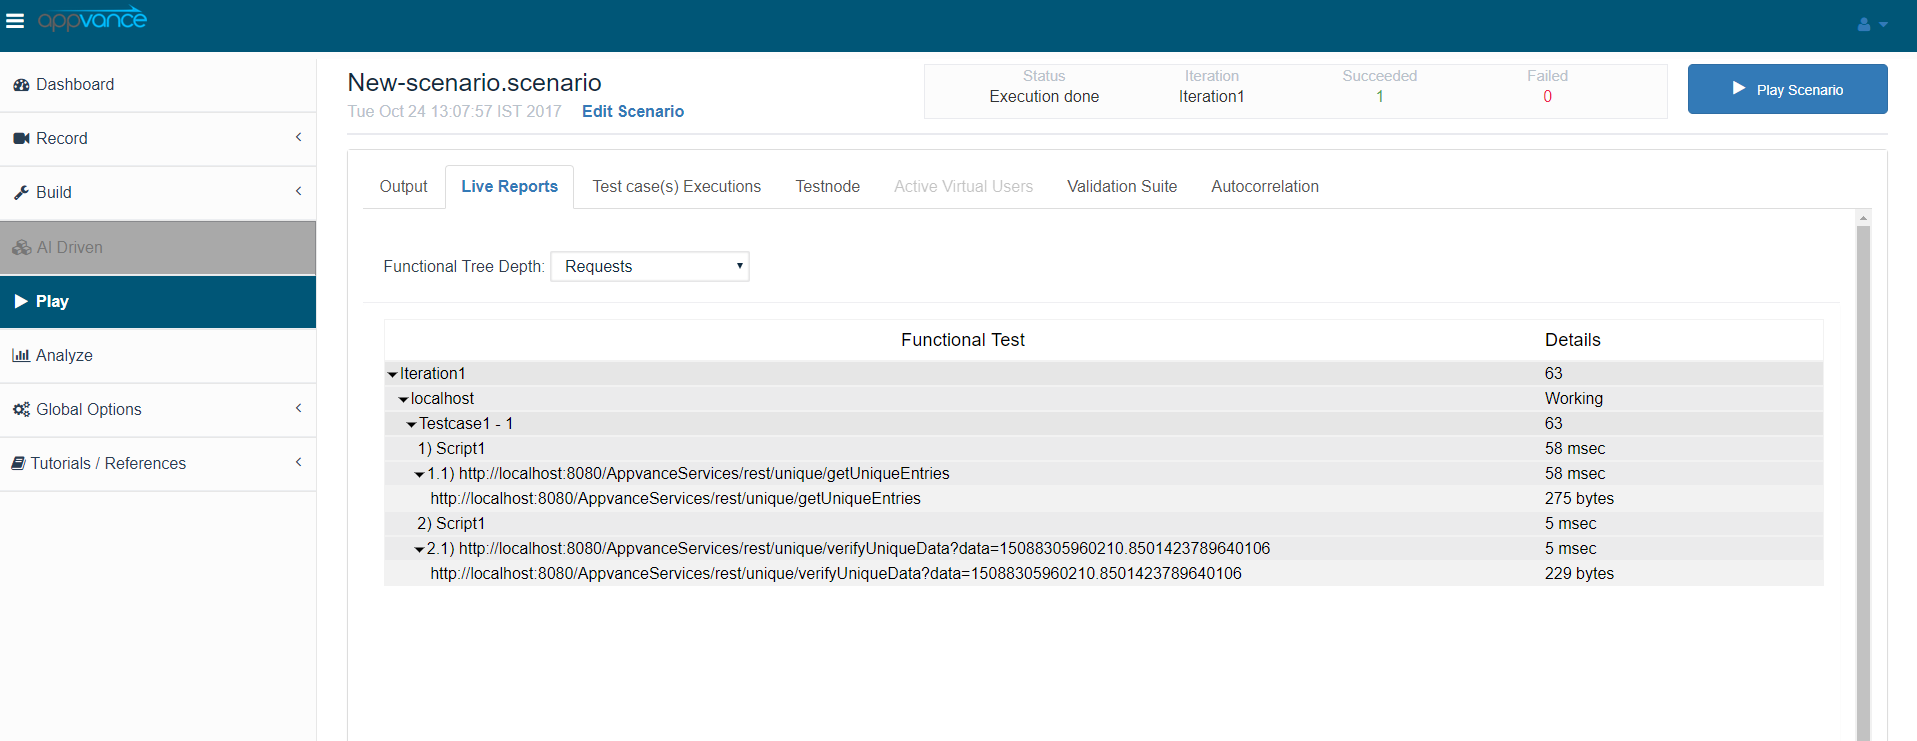
As mentioned the first script will generate a random unique number and the second URL just returns a true/false with that unique number.
Once the test is completed successfully, we can proceed to add assertions to the above test
Navigate to the Assert suite tab and the user can select any of the assertions that already exists in the drop-down
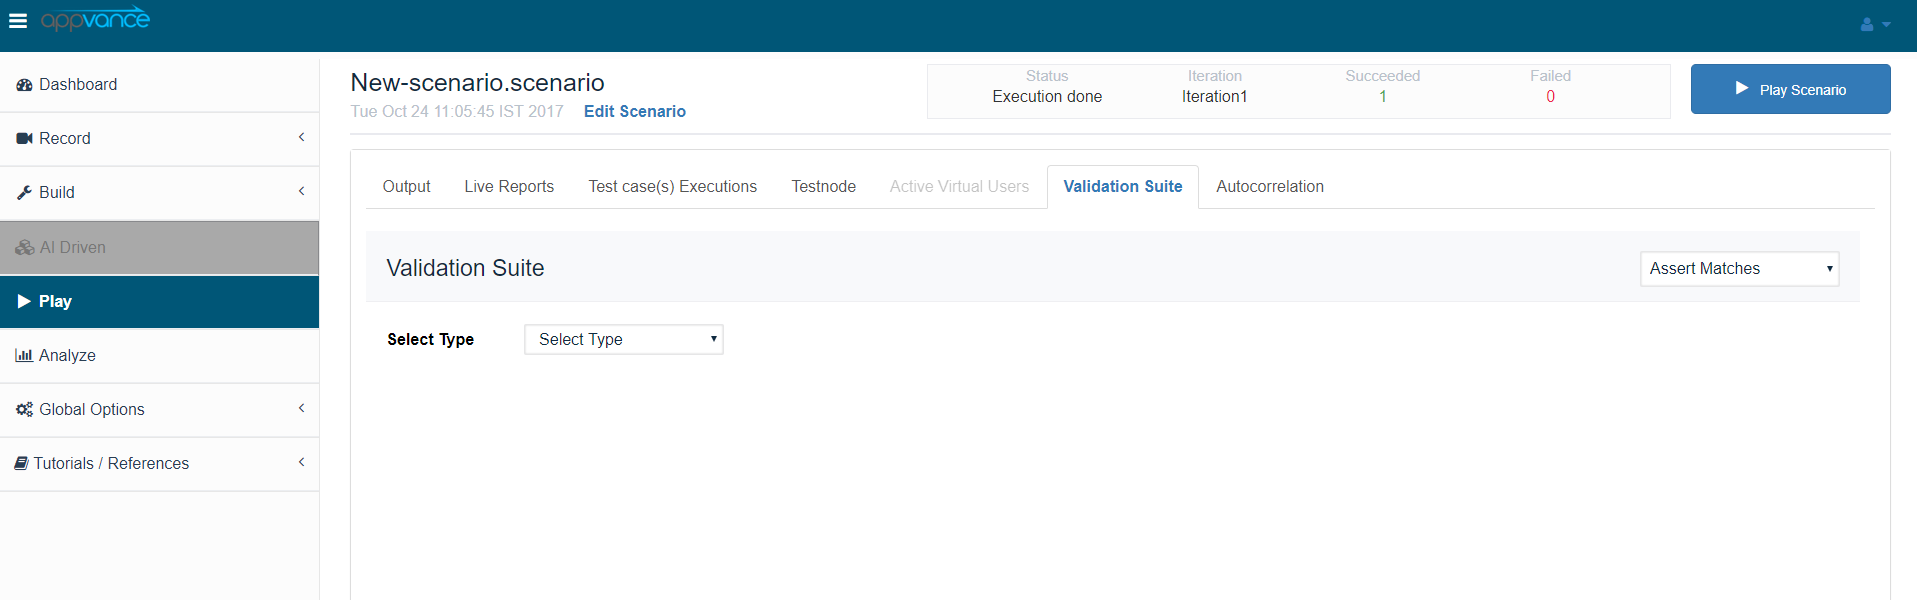
In the below, we will be using Assert Matches and adding the assertion accordingly as shown in the below screen-shot
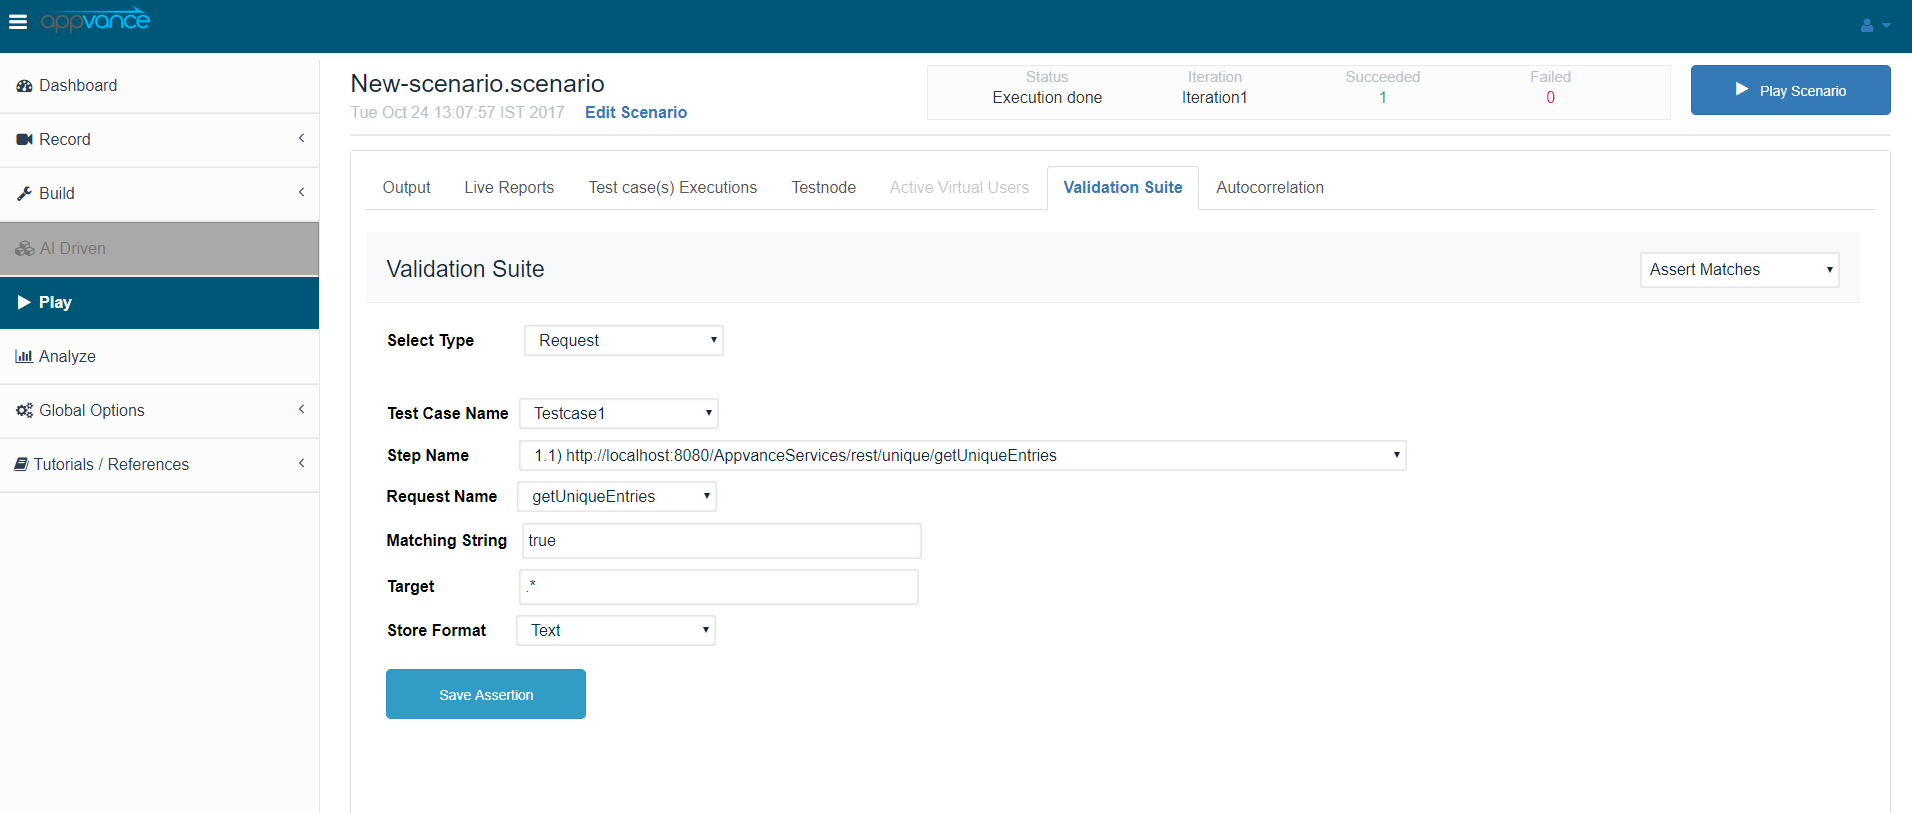
Where
The select type will allow the user to select from Testcase, Step, and Request.
Test case Name is the name of the Test case that is provided in the Scenario builder.Step Name is the name of the step under which we will add the assertionsRequest name is the name of the request for which we are adding an assertionThe matching string is the string we will be looking forTarget is the area in which assertions will be checked, * can be used for everything, Any regular expression can be used.
There are 3 types are targets
JSON: Target is the path
XML: Target is the Xpath
Text: Target is Regex
After we add the assertions in the test controller we can view the same in Scenario Builder (SB) by Clicking on Save assertion. Once the assertion is saved User needs to refresh the Scenario Builder page to see the changes. Users should navigate to the Assert suite tab of the Scenario Builder page. The screenshot of the below is shown below:
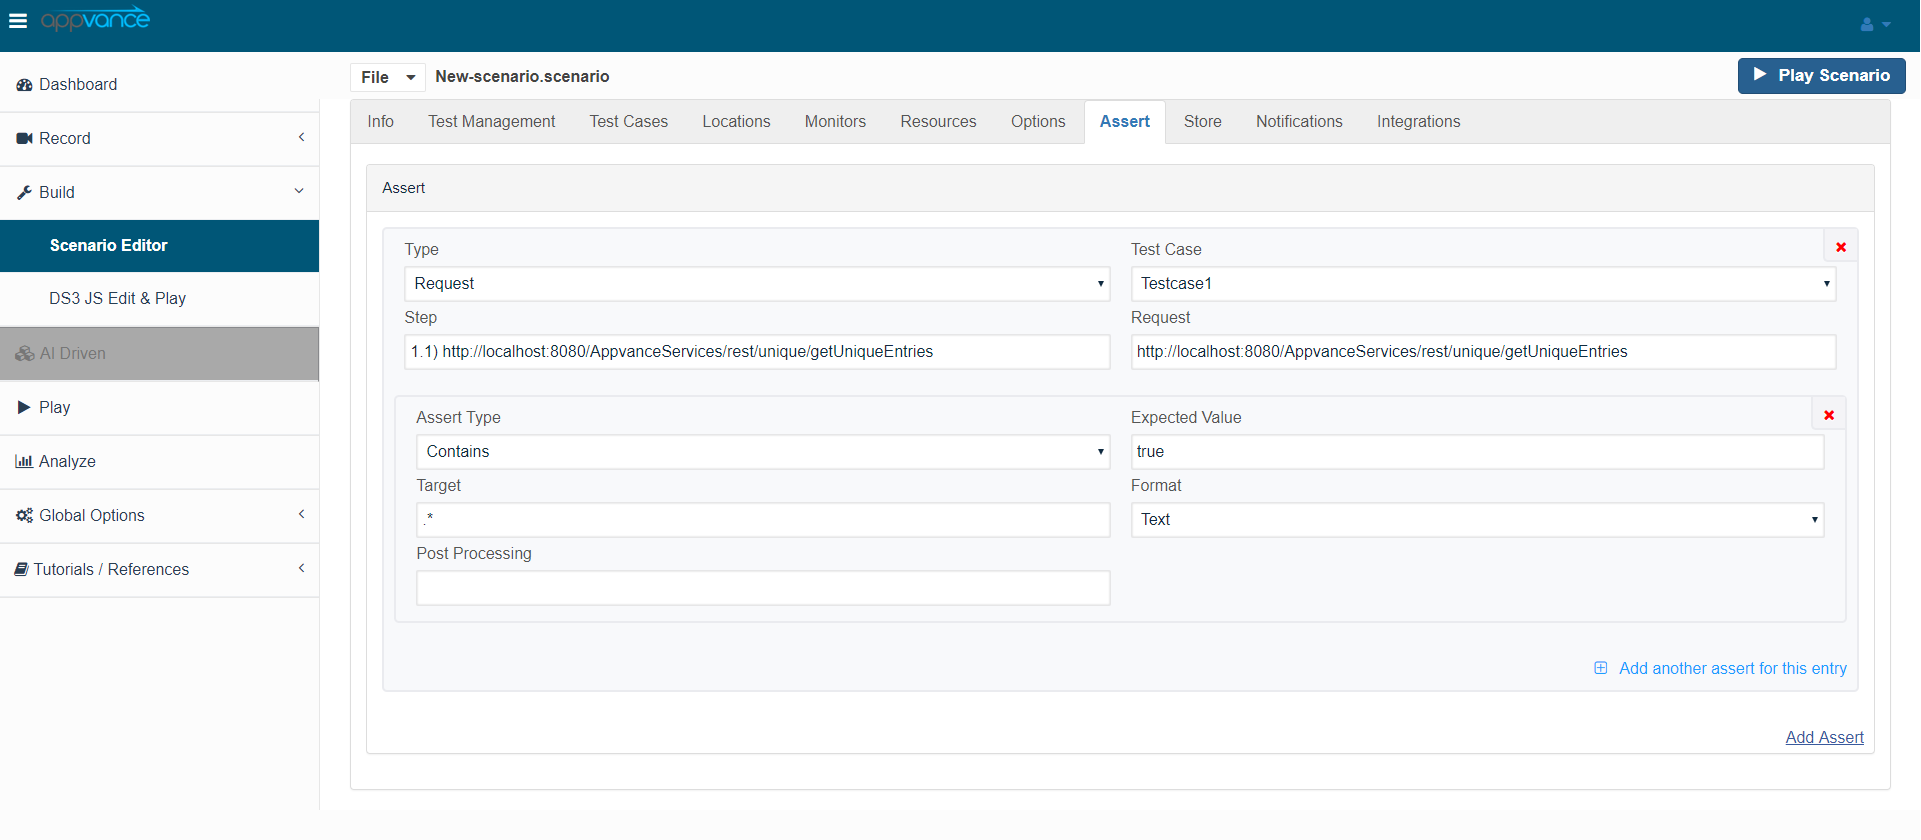
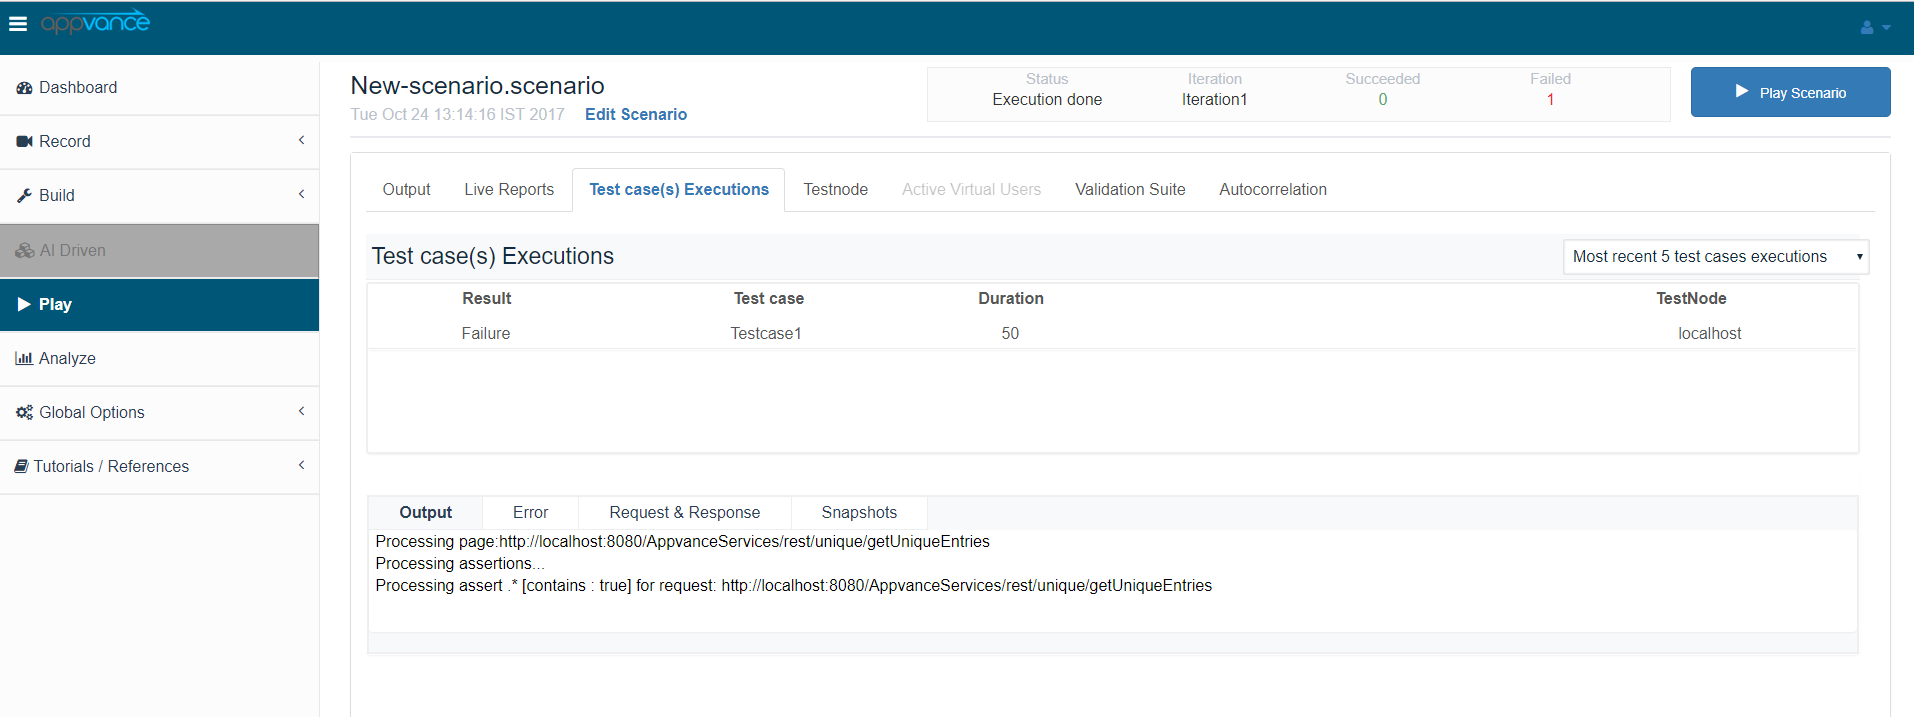
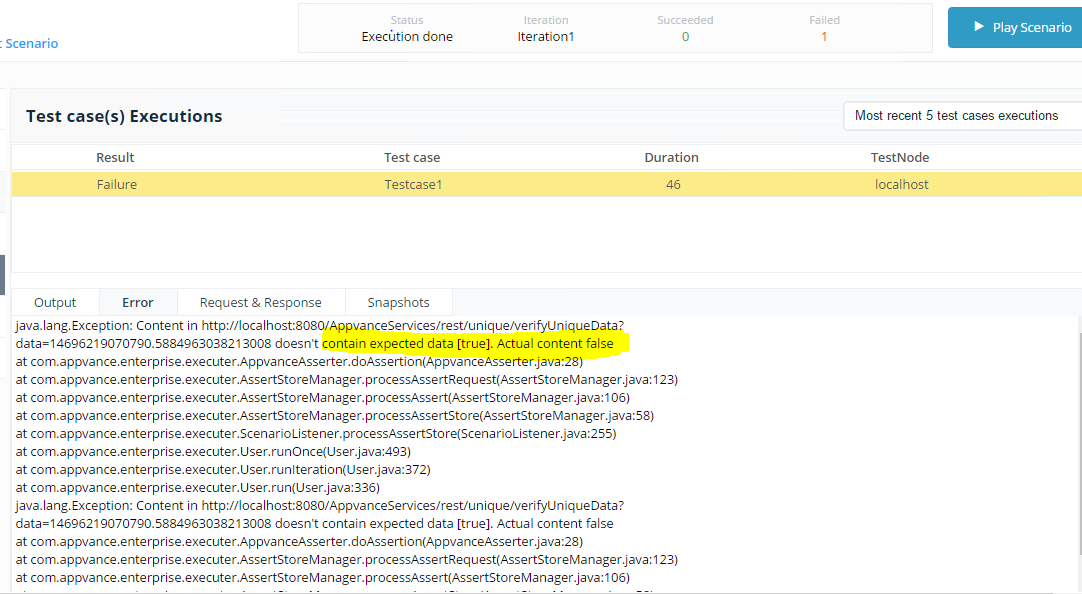
We will be saving the scenario and running it again and the test will fail since the 2nd request will have a false value and the expected value in our assertion is “true”.
The output from the controller is given below where it is failing.
Use Locker to Store Content and Reuse in Another Test Case
The first URL is generating a unique response and it is not being used in the second URL. We will be using a mechanism called "Store Content" which will store the response from the first URL and that value can be passed to another test case using Locker DPL functionality and that value can be asserted.
The Steps to add store content and use it in the second URL are shown below.
Go to the Assert suite tab of Controller and select store content
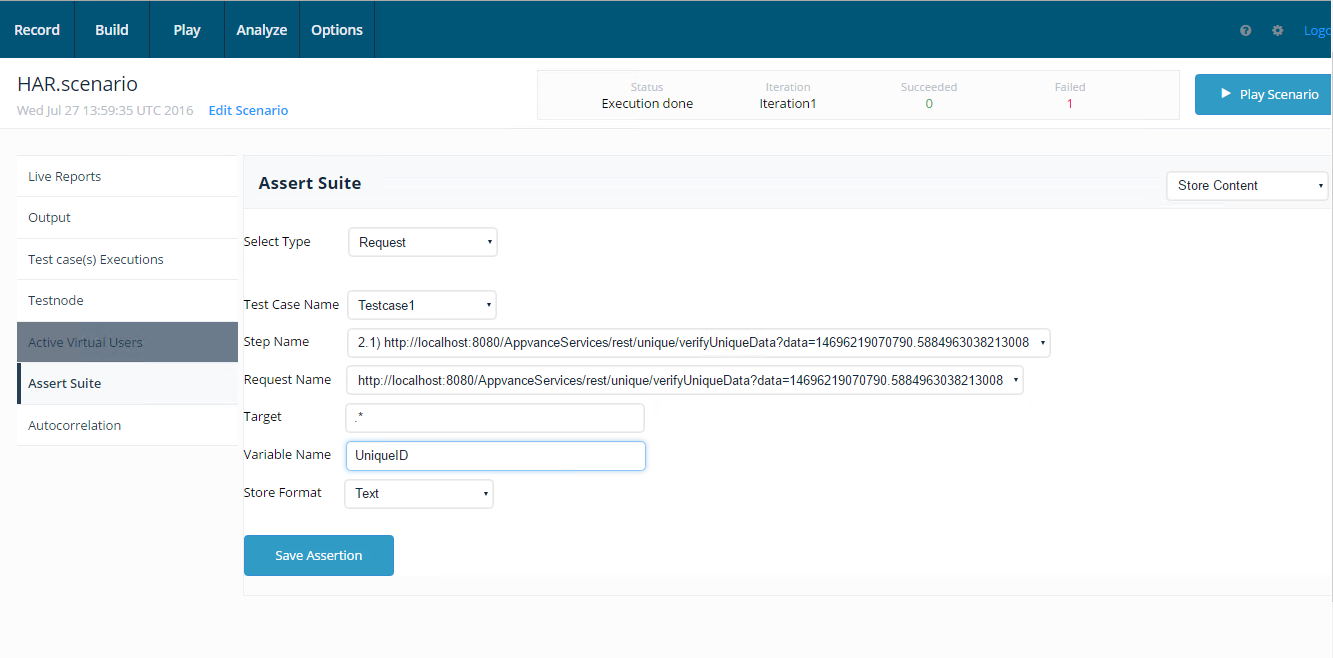
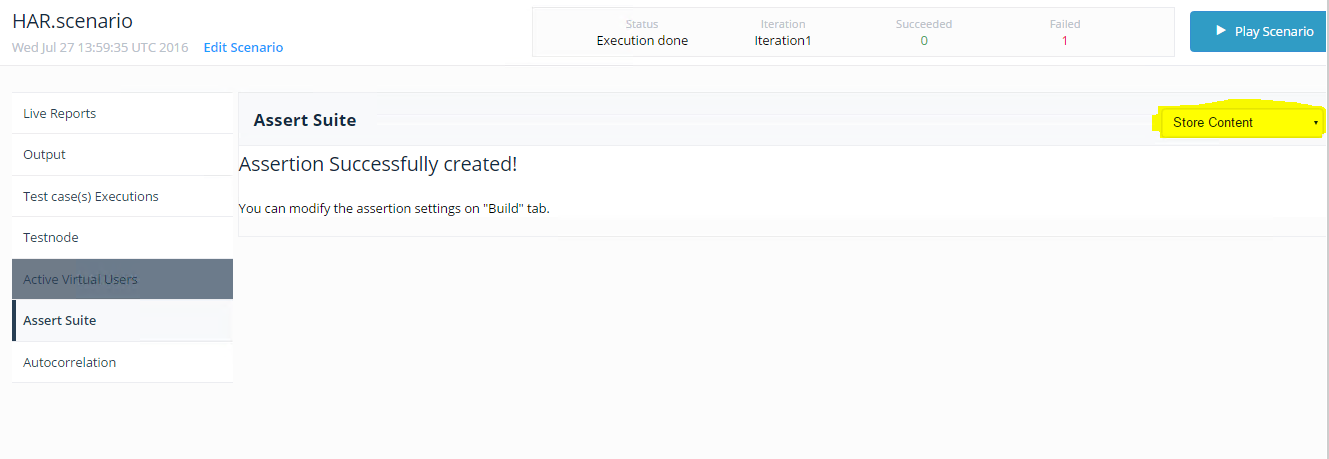
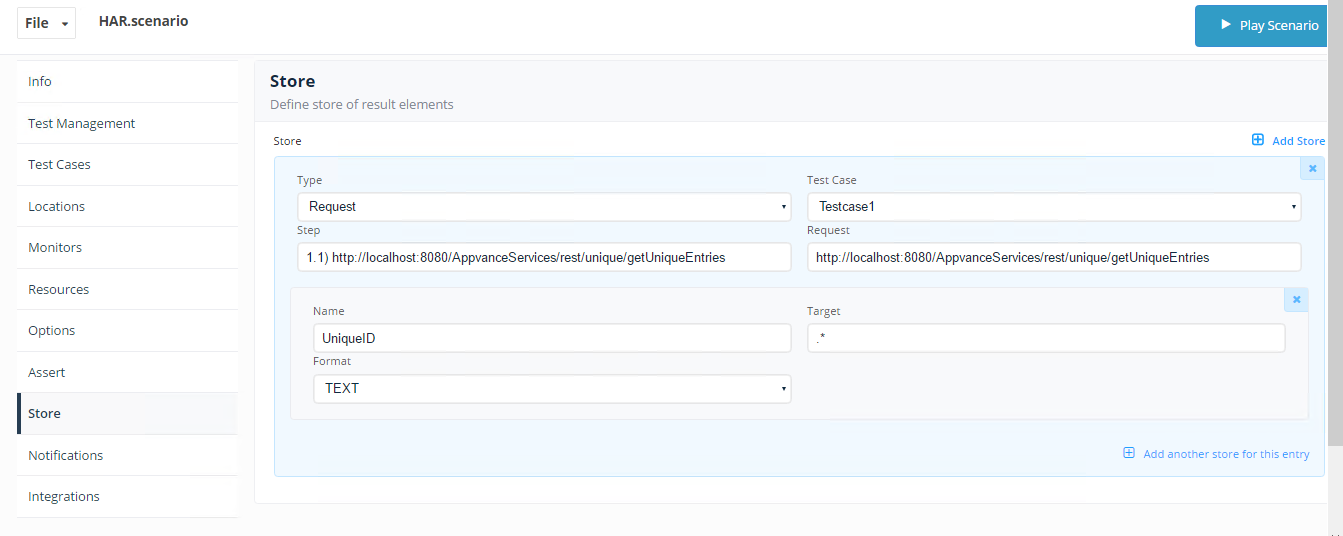
The process is similar to the way we add assertions. Go to the Assert suite tab and select Store content from the drop-down, select the first URL as the step name and the Request name
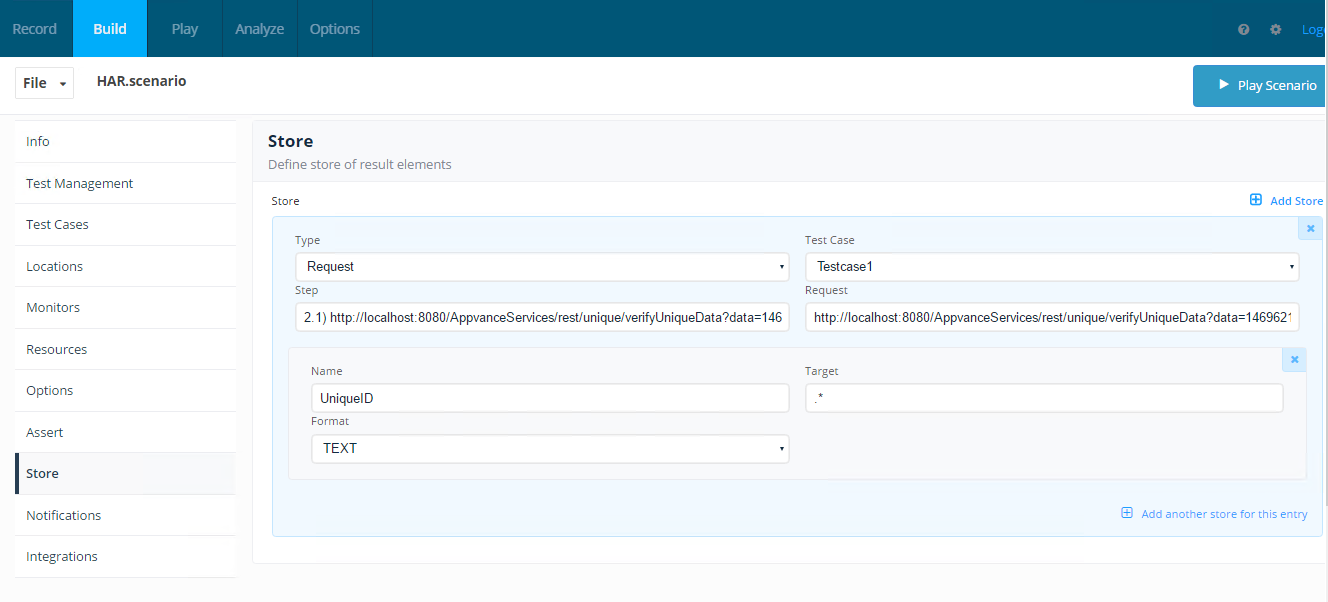
Target can be everything again
Variable Name can be a user-defined unique name; in our case, we will be naming it UniqueID
Once added, Go back to Scenario Builder and refresh the page, and navigate to Store suite to see the new entry been added. Save the Scenario
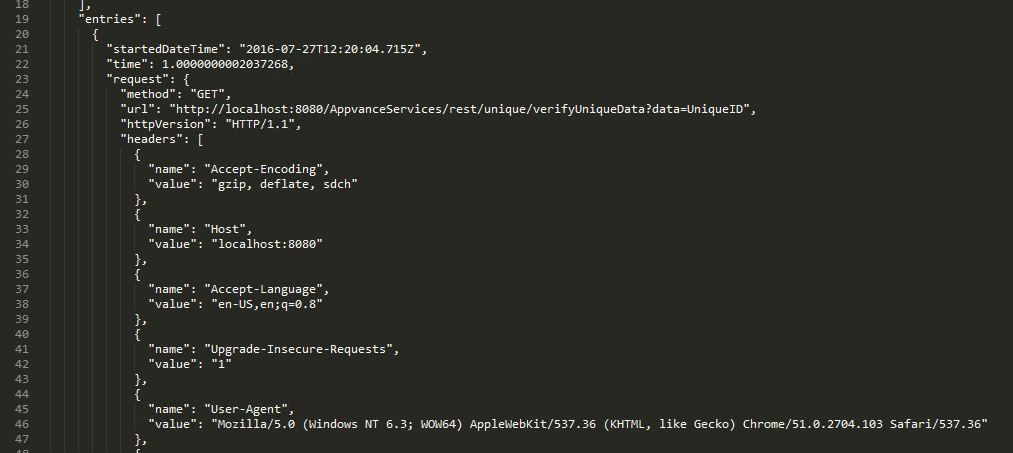
Few modifications need to be done for the script to use the variable name that we created. Open the script in your favorite editor and change the value to have UniqueID as shown below
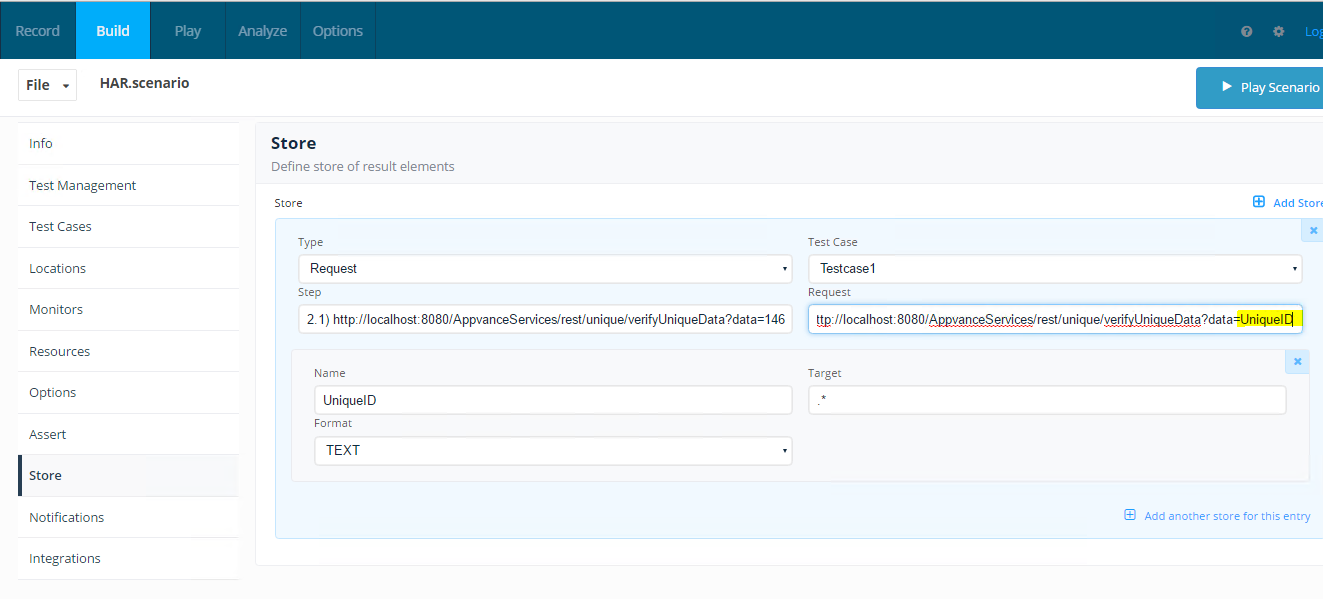
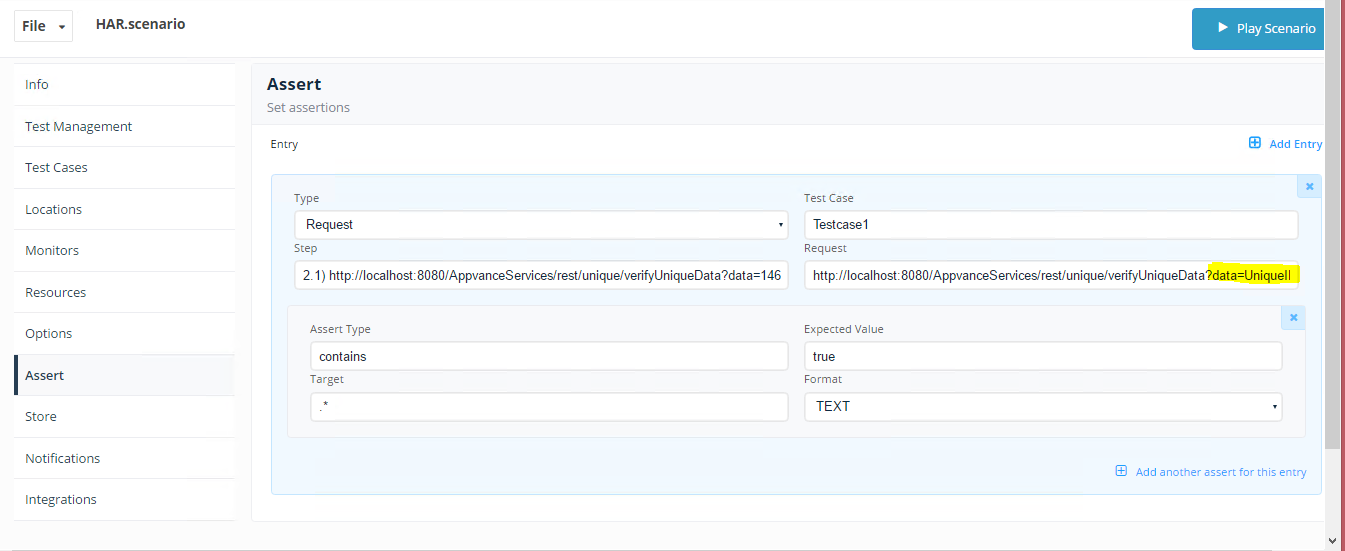
Once done, the request name in the Scenario builder – Assert Suite to be updated with the same name as seen below
http://localhost:8080/AppvanceServices/rest/unique/verifyUniqueData?data=14696219070790.5884963038213008
Note that "14696219070790.5884963038213008" will be generated uniquely for each run. So we are saving the unique number into a variable called "UniqueID" which we have declared in Store content. The URL will be modified as given below:
http://localhost:8080/AppvanceServices/rest/unique/verifyUniqueData?data=UniqueID
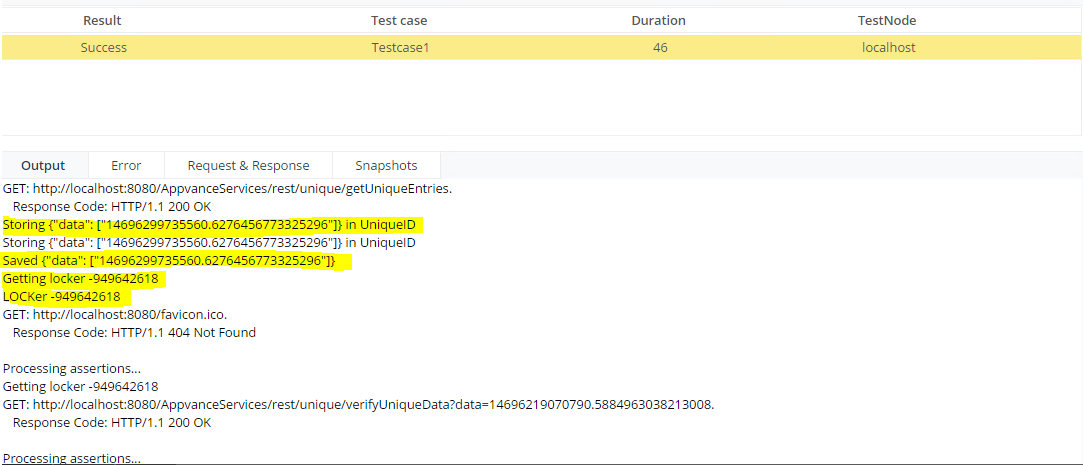
We will be using a mechanism called "The Locker" which will be used for transferring the data stored from the first script to be used in the second script
We have to add "The Locker" in the second script which will use the data from the Locker
The Test case module after we add the Locker is given below:
Once the changes are made we can save the script as well as the scenario and re-run it
As you can see below, we have a successful execution
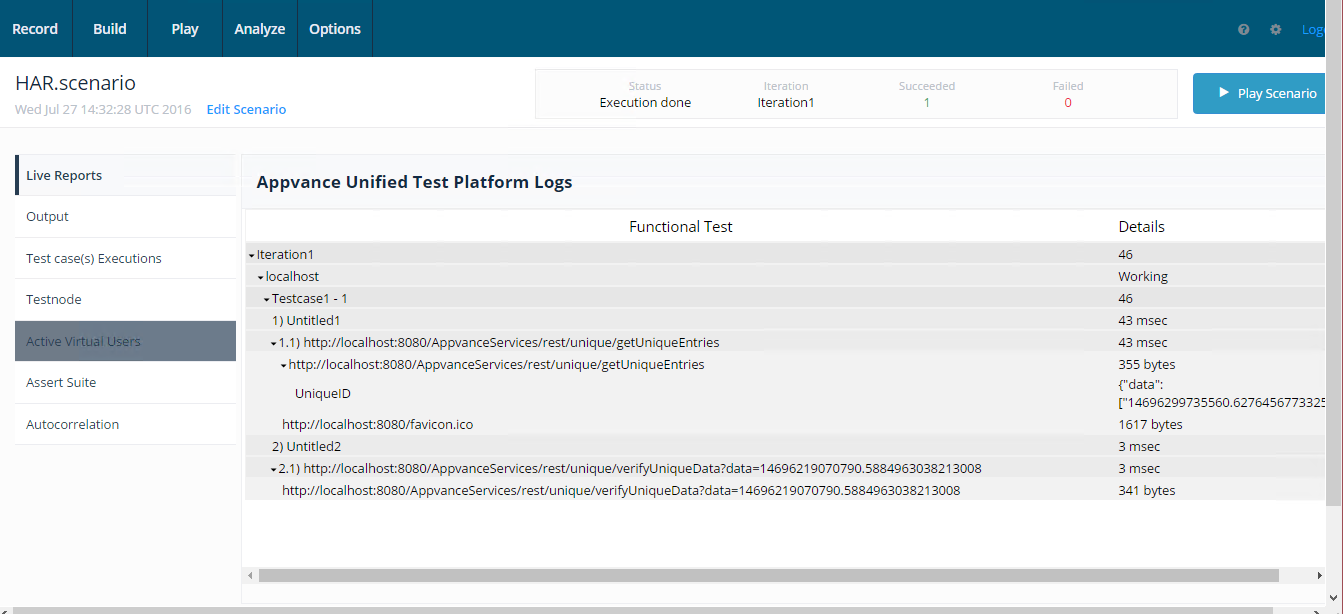
We are storing the value in the variable as seen below and passing that to the 2nd test-case
Different Formats and their targets:
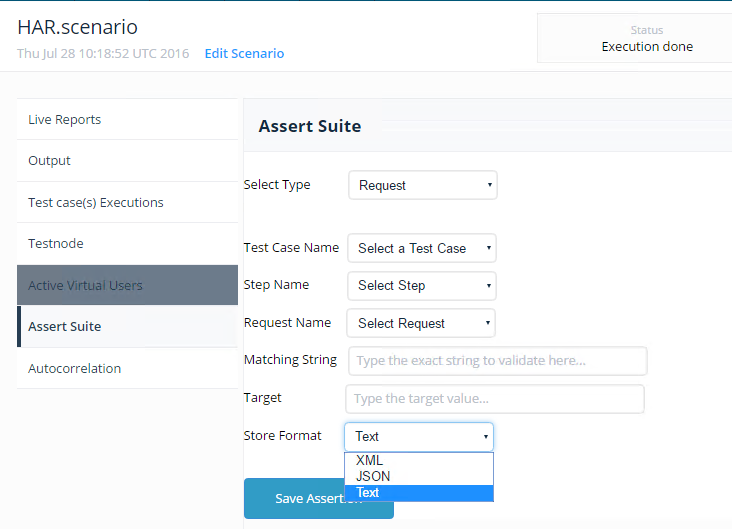
We have three different formats
XML
JSON
TEXT
For Text, we need to use regular expressions as the target
For XML, we need to use xpath as a target.
For JSON, we can use JSON as the target expression.
The below example shows how to deal with JSON responses and those assertions can be added in APC.
We can use the indexes as shown below:
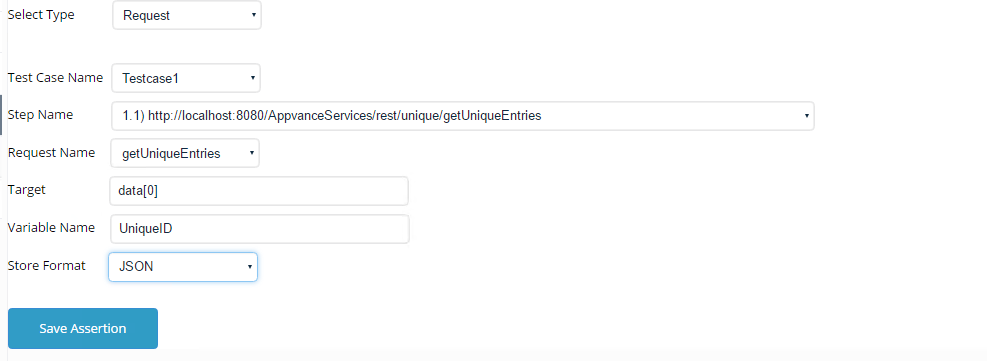
Make sure the Format is JSON for this particular test.
Similarly, we can do other assertions like
Assert Exist
Assert Size
Assert Duration
Assert Matches
Assert Checksum
Assert Response Codes
Last updated: JulySeptember 28,25, 20232026
If you have any feedback on this topic, please contact us at documentation@appvance.ai.