
Validation and Store Test Suite - Designer
This feature is to validate the request and response of the Appvance Designer script and validate the responses of the Appvance Designer script by adding assertions.
The steps to be followed to add assertions in Appvance Designer is given below:
Create an Appvance Designer script using Appvance Designer in IQ.
Create a Functional test scenario and save it.
Run the Functional test scenario.
Navigate to Controller and go to the Validation suite tab and Add assertions.
Refresh the scenario and check if the assertion added is reflected appropriately.
Re-run the same scenario with added assertion and validate if assertions are processed.
Create an Appvance Designer script using Appvance Designer in IQ
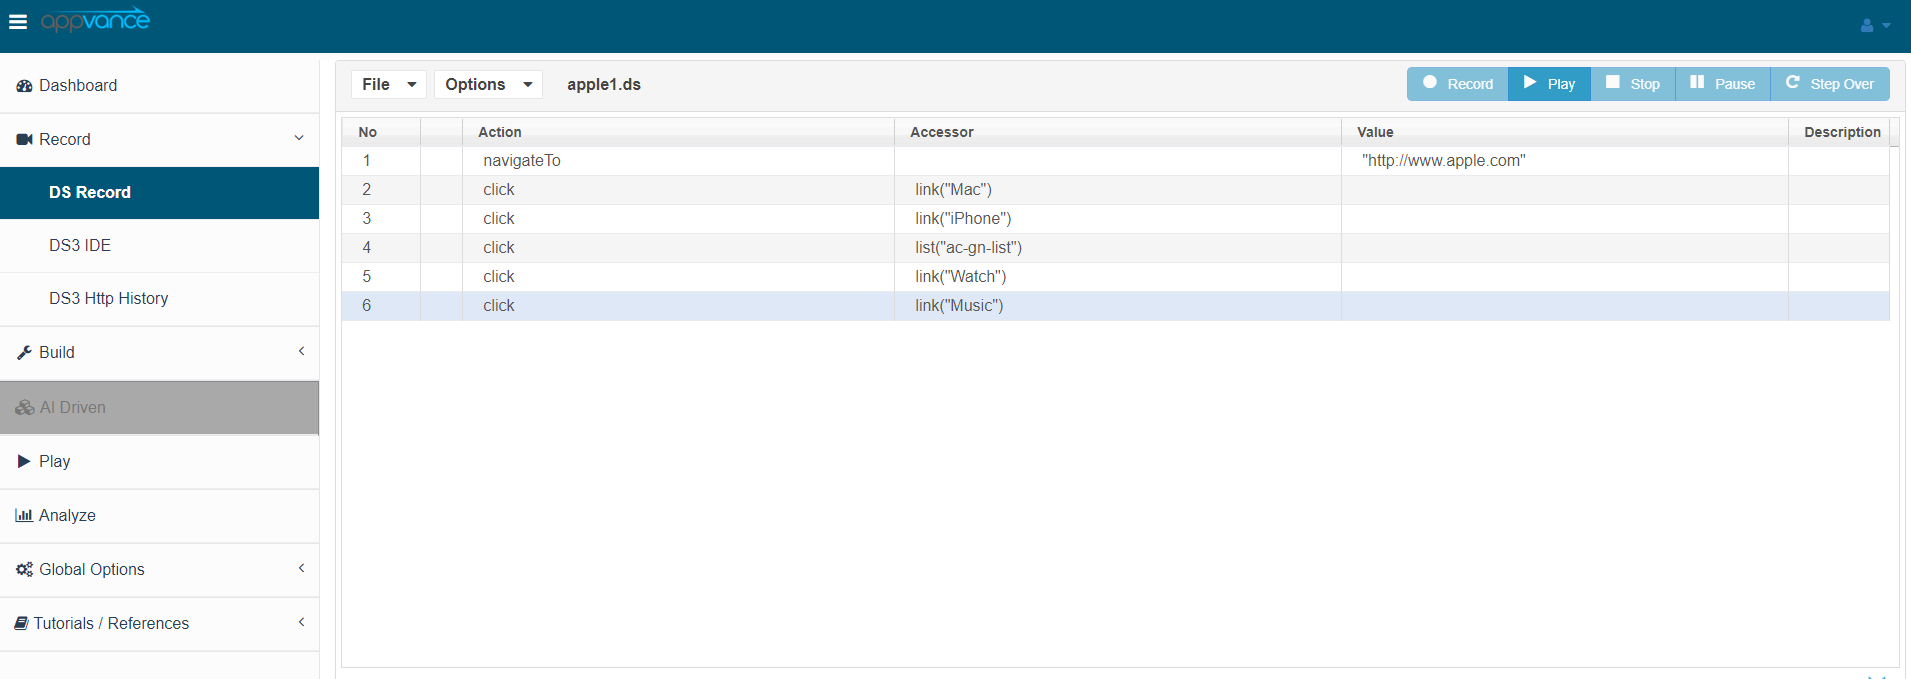
We will use the "Apple website" to create a sample Appvance Designer Script.
The Appvance Designer script with the recorded steps is shown below in the screenshot
Create a Functional test scenario and save it
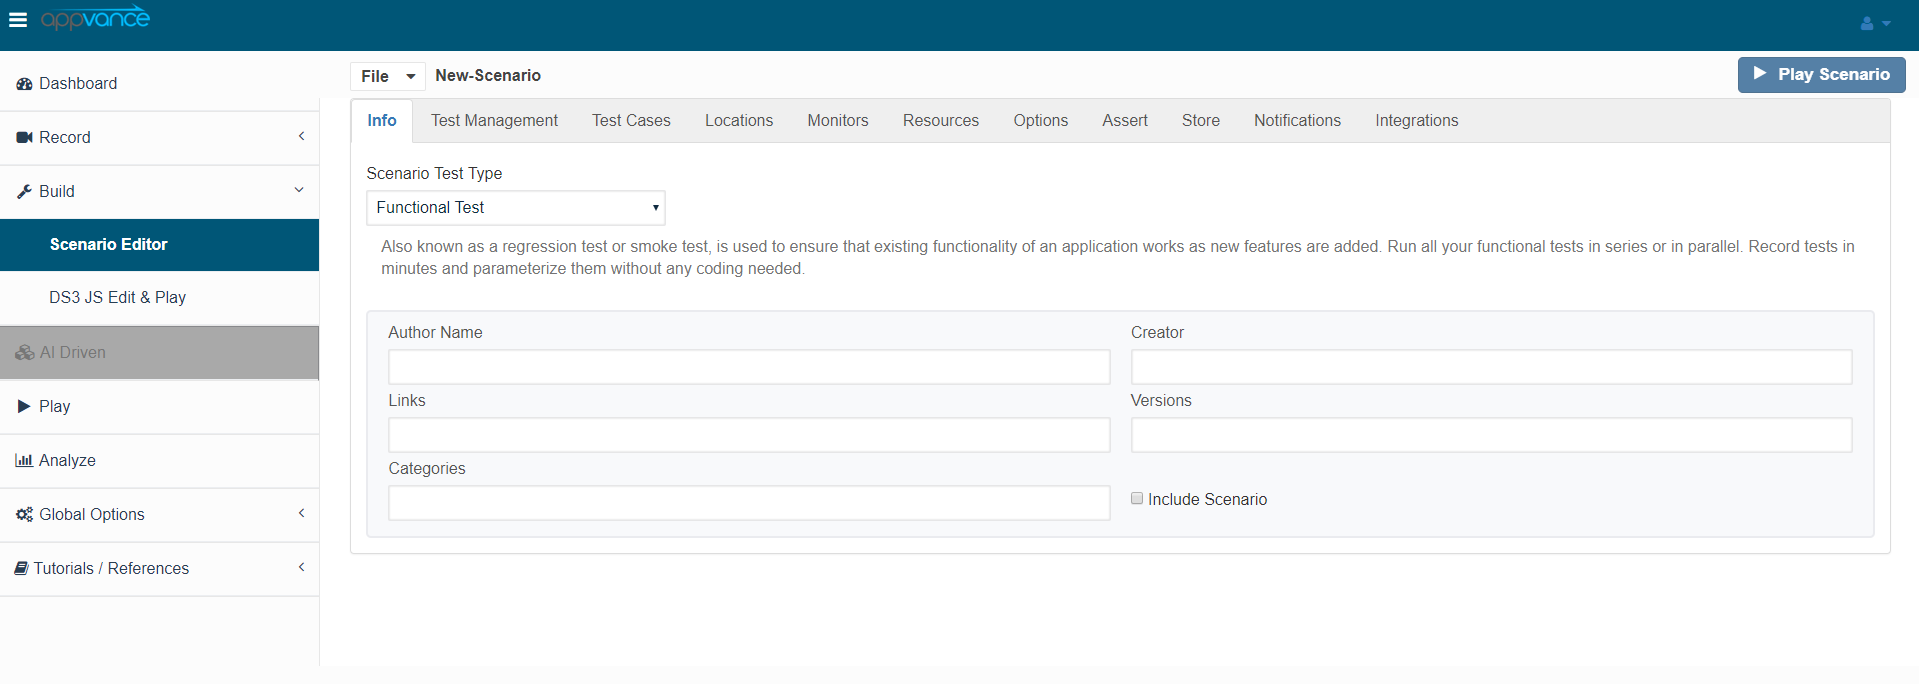
Create a functional test scenario using the Appvance Designer script created in the above step and save the scenario. The screenshot is given below.
Run the Functional test scenario
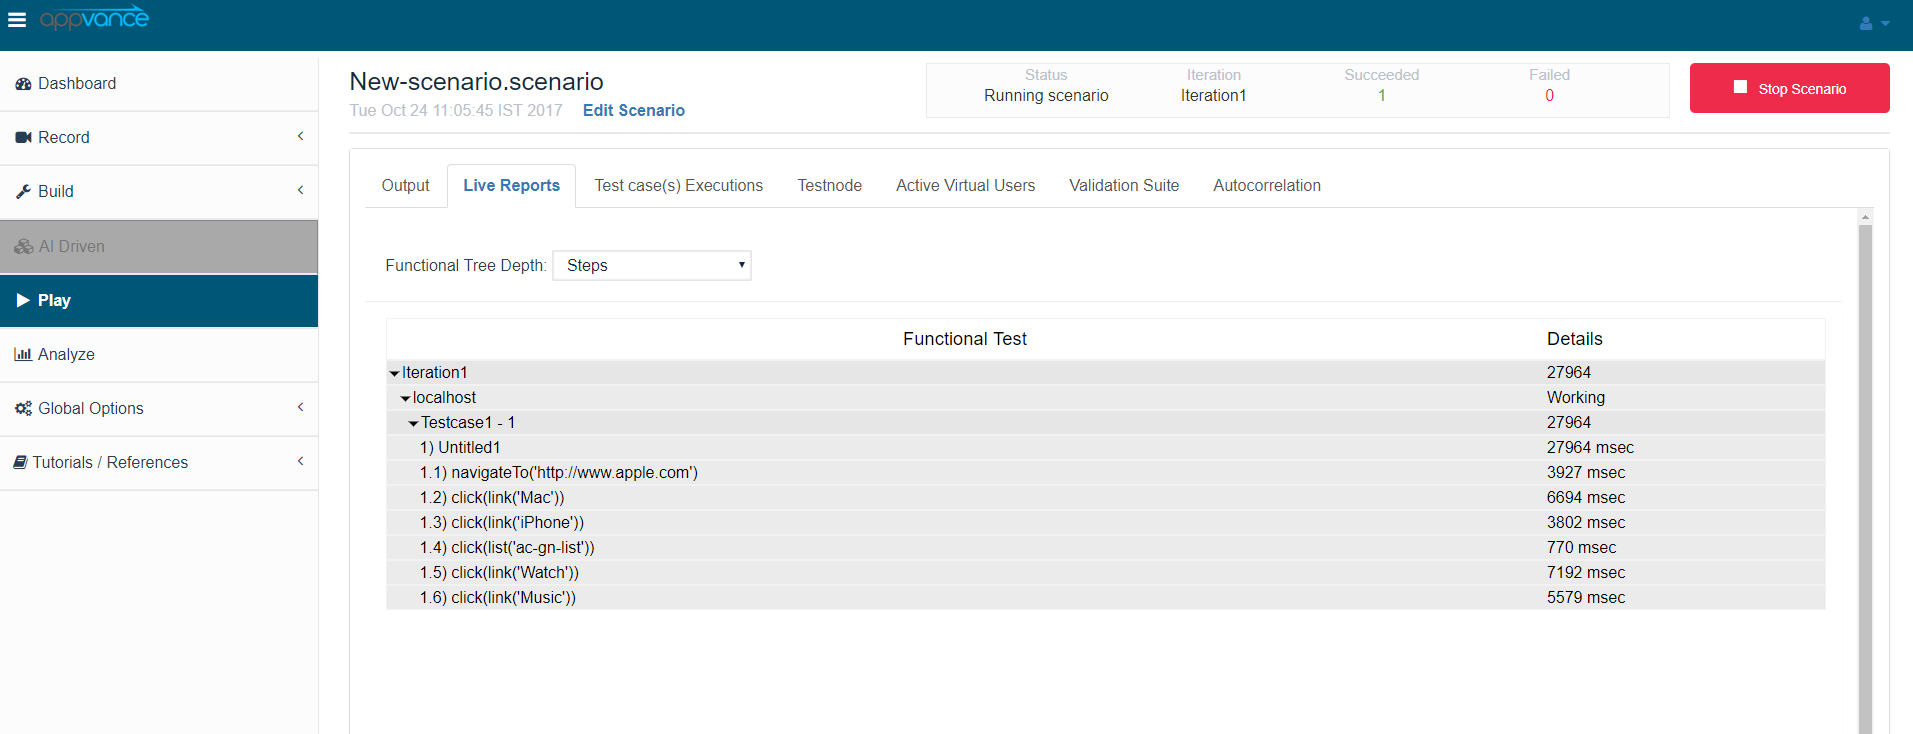
Click the "Play Scenario" button and the scenario should run successfully (with at least a few steps).
Navigate to Controller and go to Assert suite tab and Add assertions
Once the test is completed successfully. Click the Validation suite tab and from the drop-down select the assertion of our choice
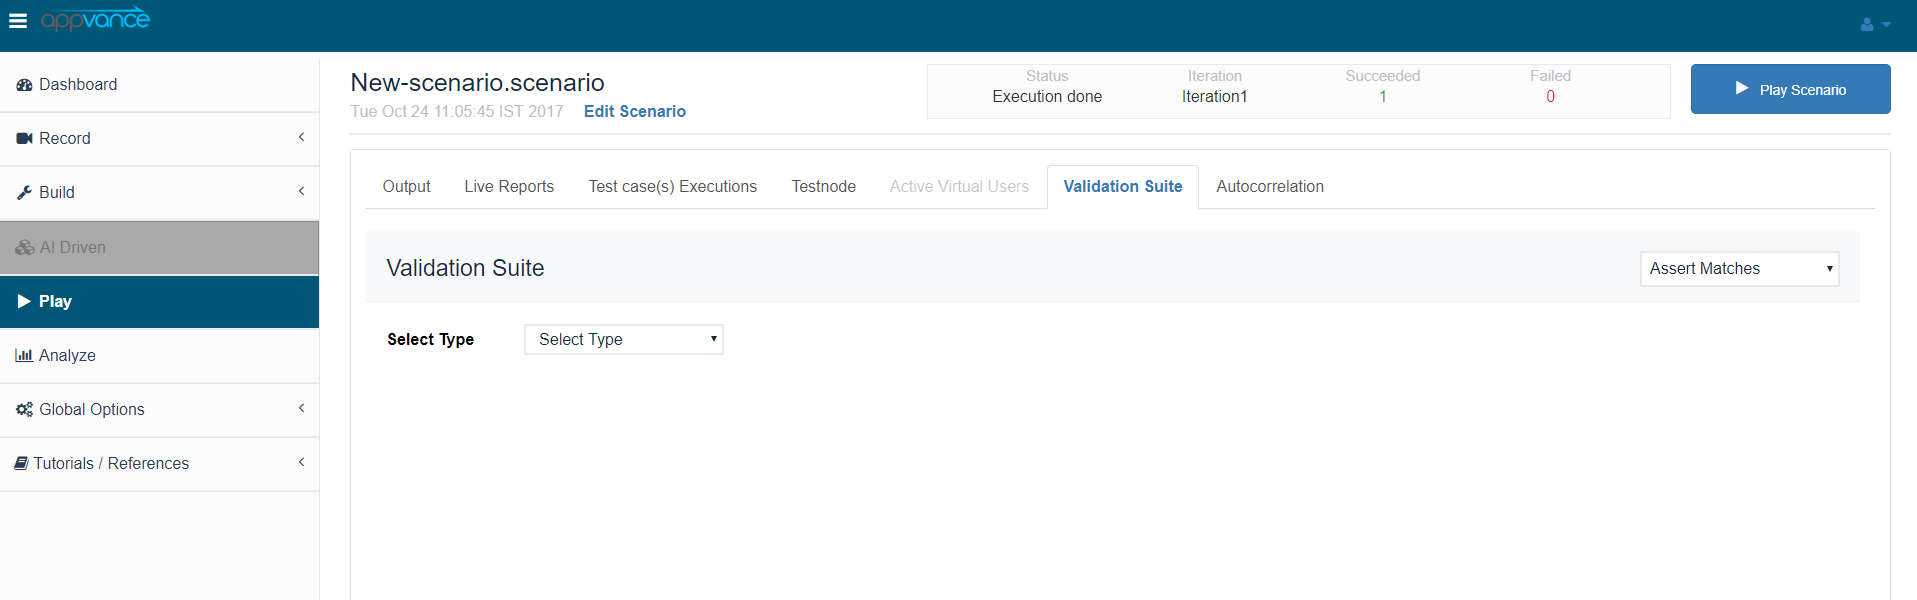
We will select the Assertion type as Assert Matches and add the assertion accordingly.
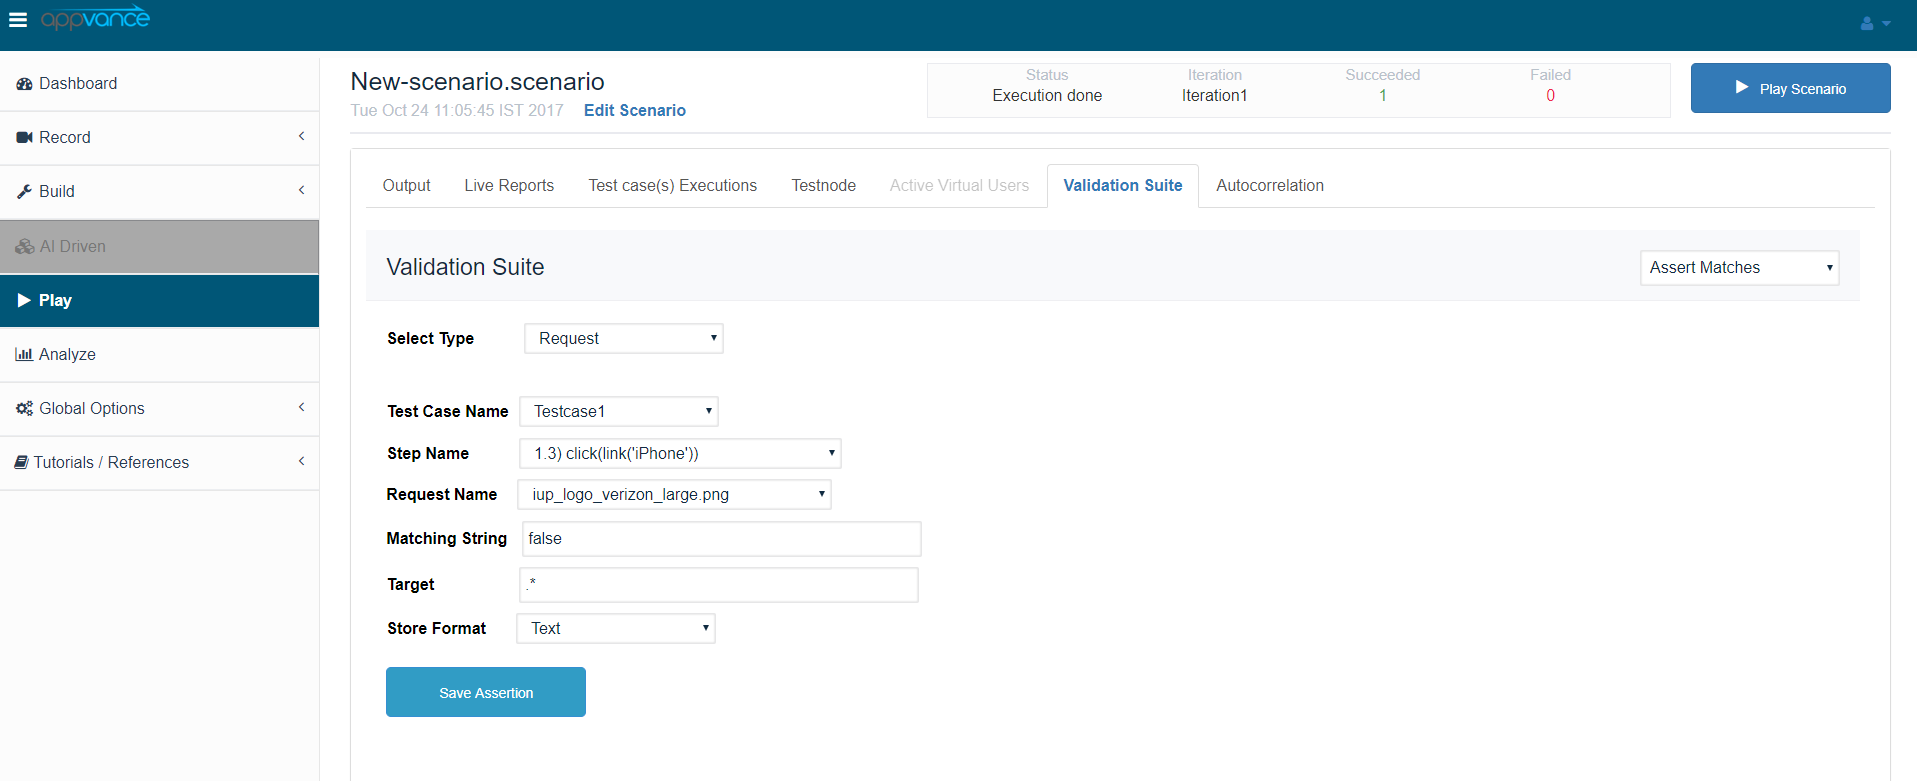
Where
The select type will allow the user to select from the Test case, Step and Request.
Test case Name is the name of the Test case that is provided in the Scenario builder.
Step Name is the name of the step under which we will add the assertions
Request name is the name of the request for which we are adding an assertion
The matching string is the string we will be looking for
Target is the area in which assertions will be checked, * can be used for everything, Any regular expression can be used.
There are 3 types are targets
JSON: Target is the path
XML: Target is the Xpath
Text: Target is Regex
Refresh the scenario and check if the assertion added is reflected appropriately
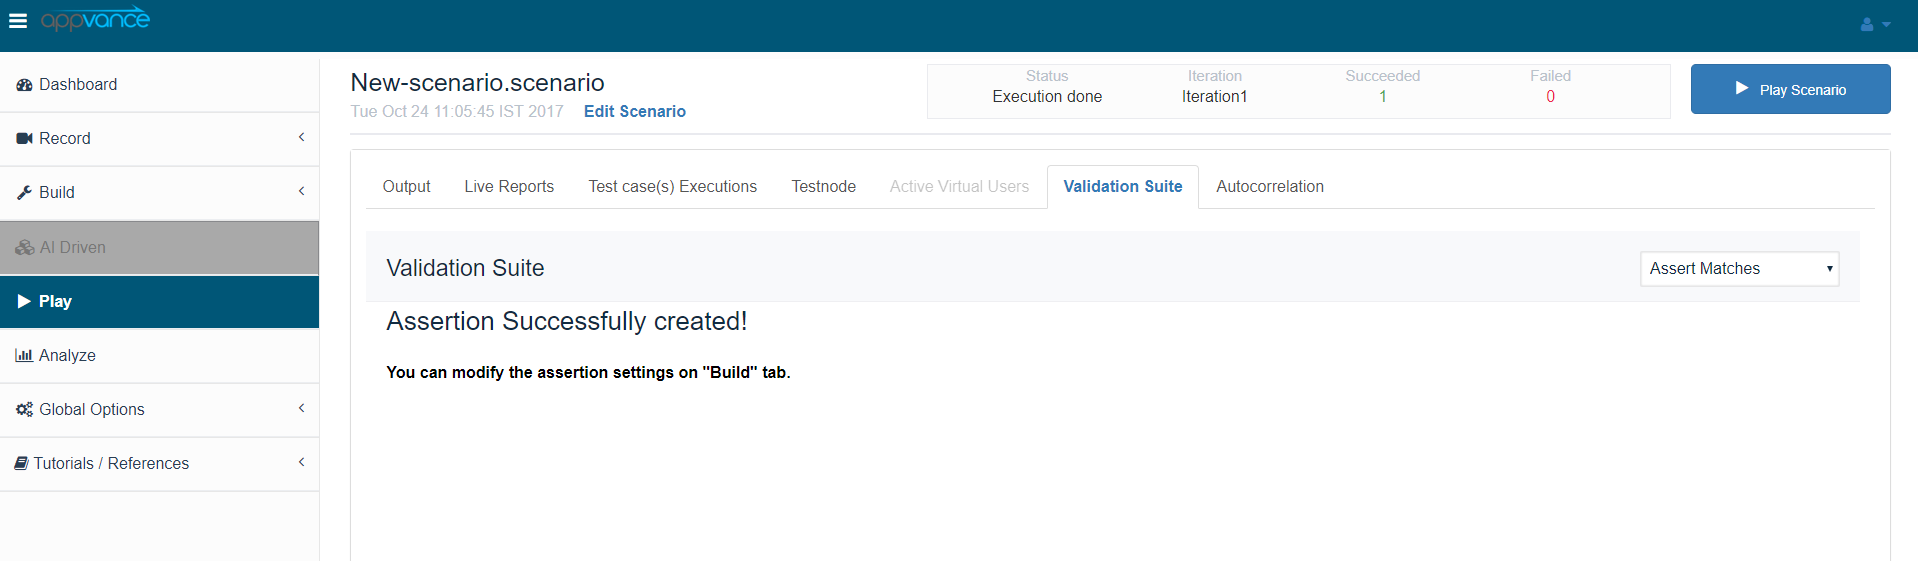
After we add the assertions in the test controller we can view the same in Scenario Builder (SB) by Clicking on Save assertion. Once the assertion is saved User needs to refresh the Scenario Builder page to see the changes. Users should navigate to the Assert suite tab of the Scenario Builder page. The screenshot of the below is shown below:
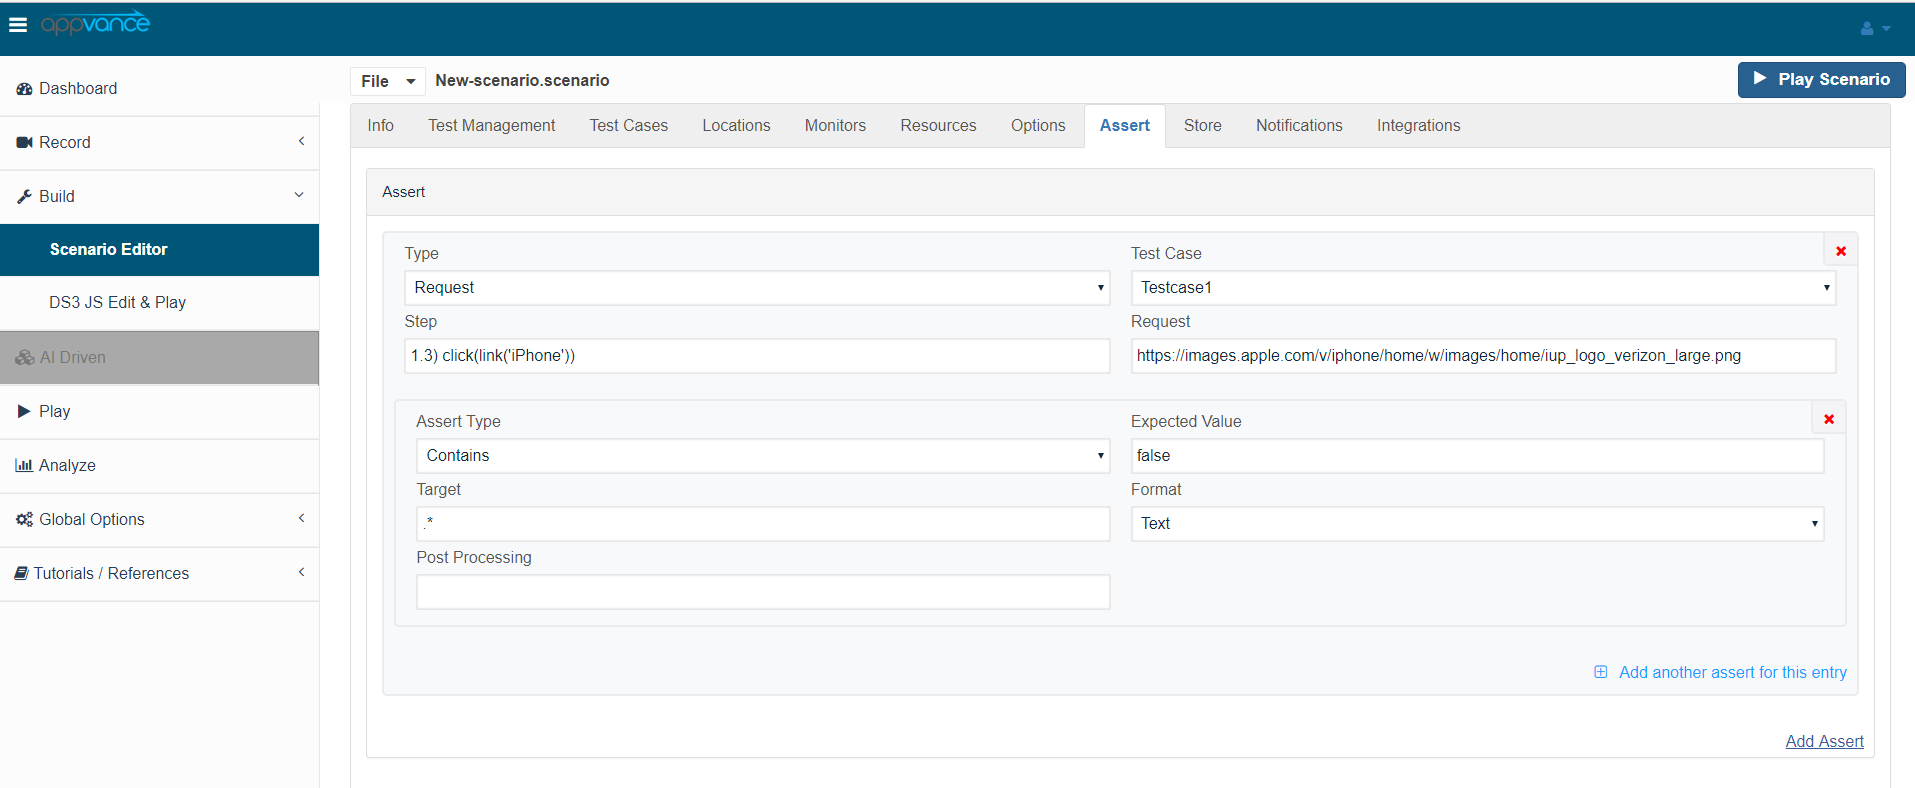
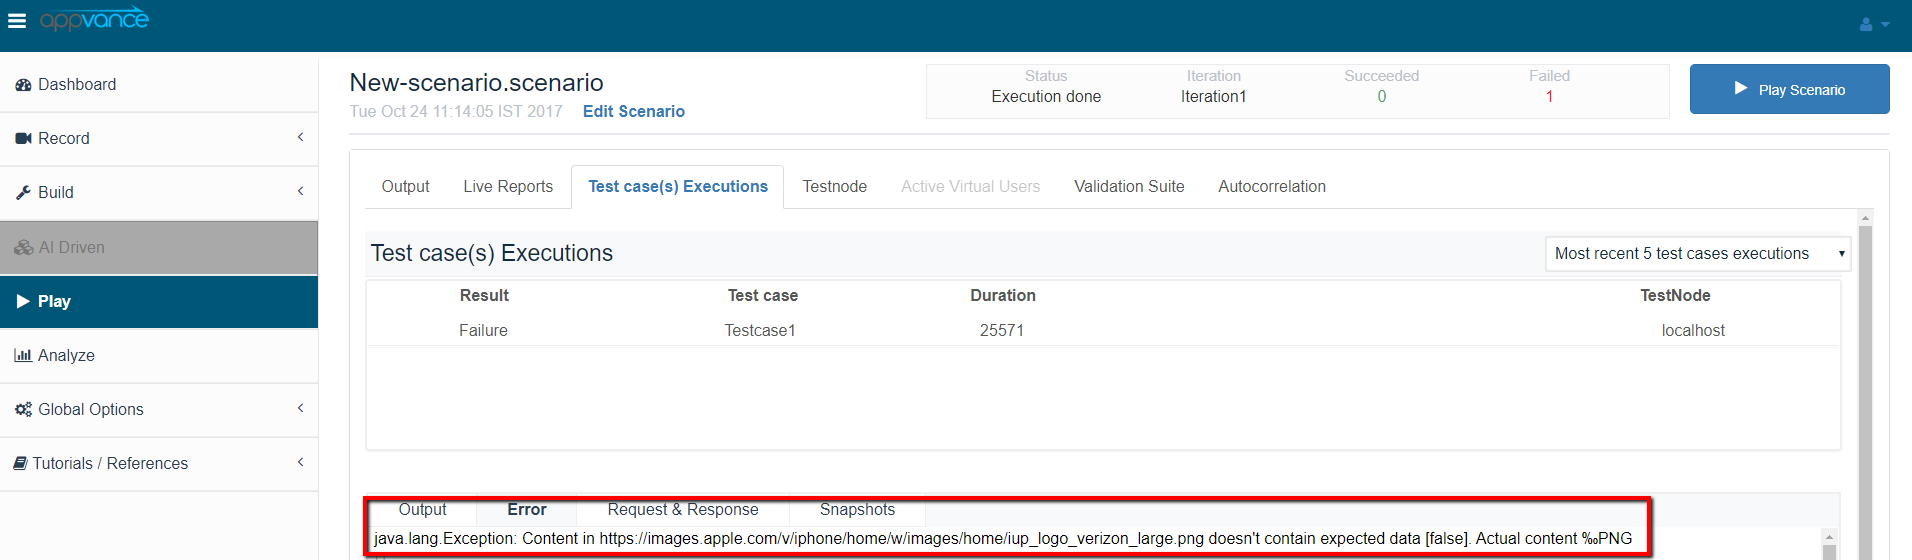
We will be saving the scenario and running it again and the test will fail since the request is set to false
The output from the controller is given below where it is failing.
Re-run the same scenario with added assertion and validate if assertions are processed
Now the user changes the assertions and makes sure the valid assertion is passed and re-runs the same scenario and the test should pass successfully since the valid assertion is passed. The screenshot of the controller with valid assertion processed as shown below
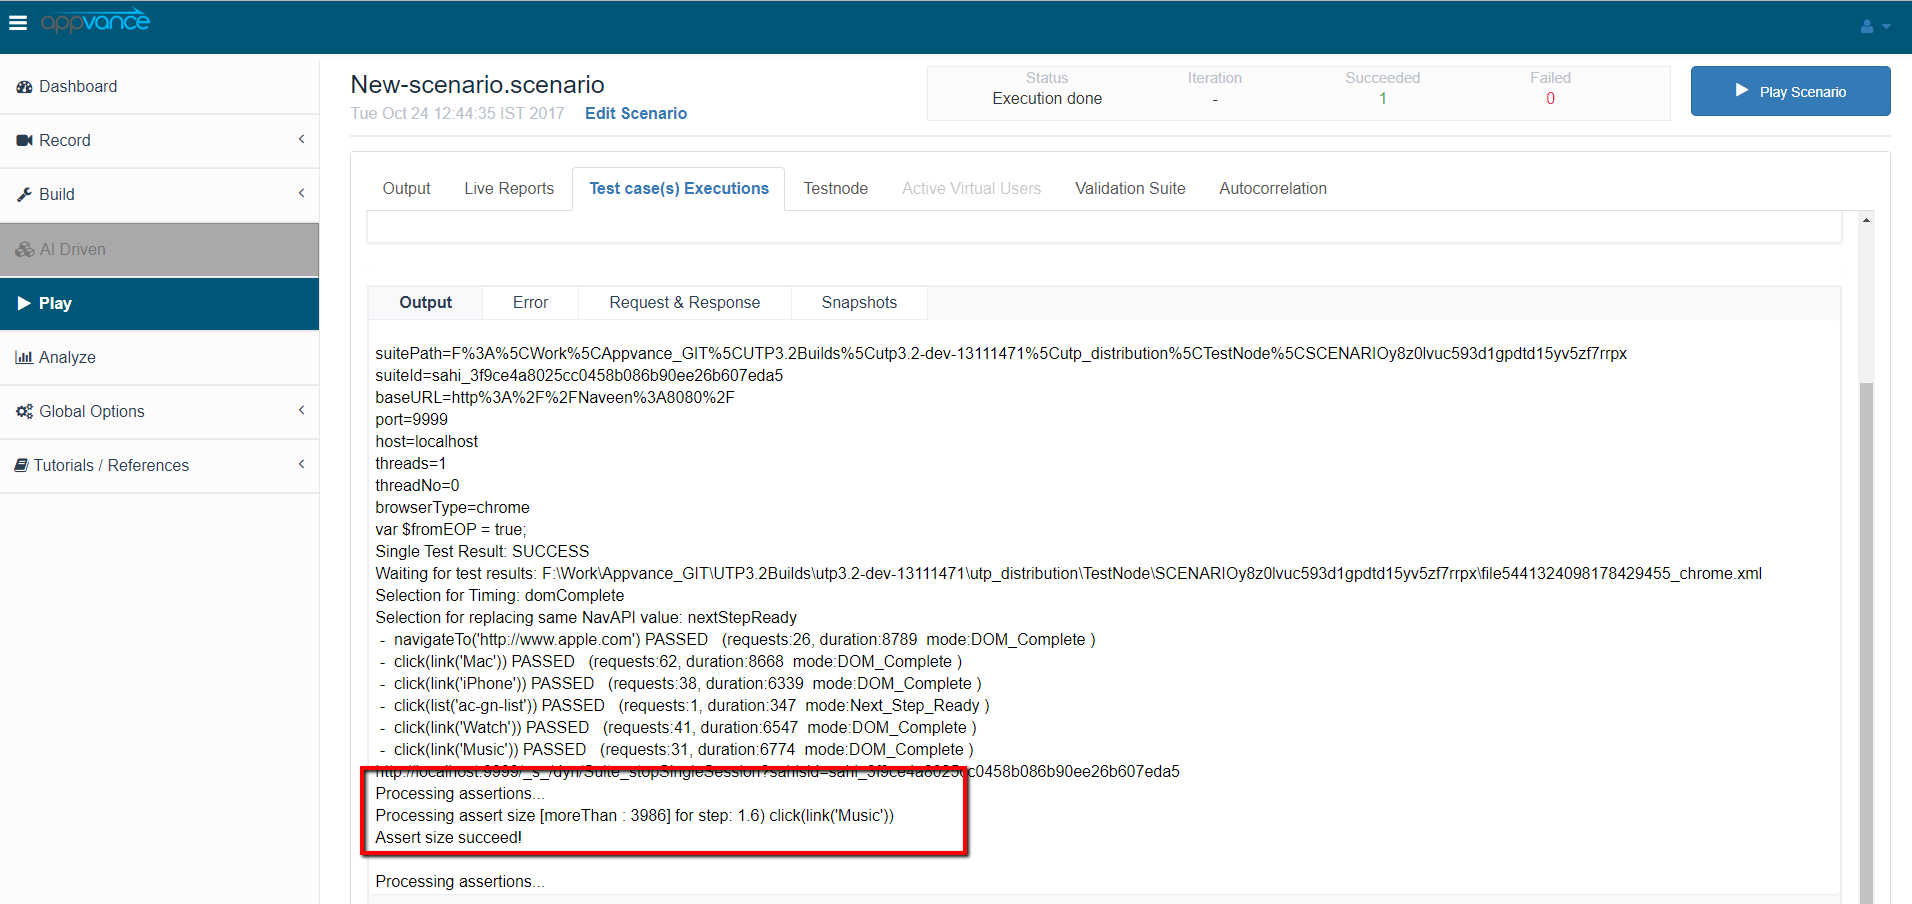
Different Formats and their targets:
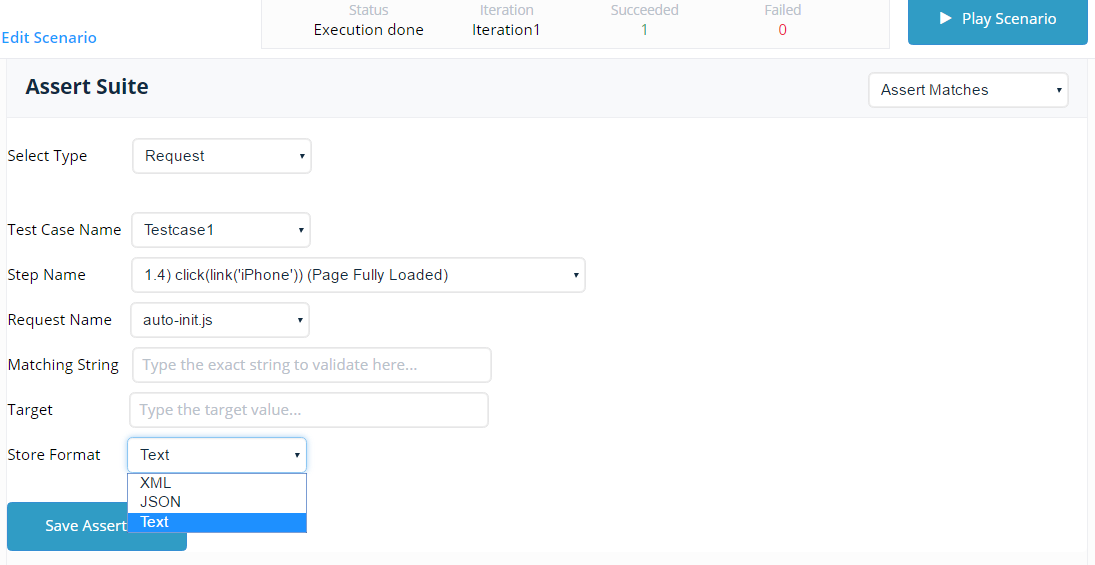
We have three different formats
XML
JSON
TEXT
For Text, we need to use regular expressions as the target
For XML, we need to use xpath as a target
For JSON, we can use JSON as the target expression
The below example shows how to deal with JSON responses and those assertions can be added to APC
We can use the indexes as shown below:
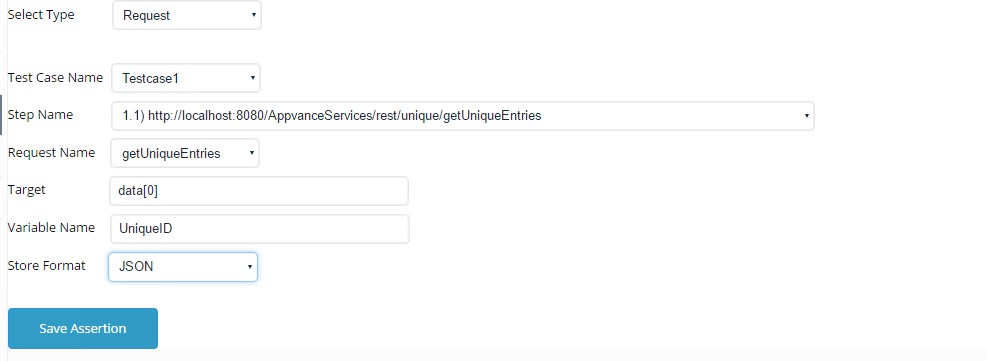
Make sure the Format is JSON for this particular test.
Similarly, we can do other assertions like:
Asset Exist
Assert Size
Assert Duration
Assert Checksum
Assert Response Codes
Last updated: June 26, 2023
If you have any feedback on this topic, please contact us at documentation@appvance.ai