
Getting Started with Android and AIQ
Setup
Configure Environment Variables
Set JAVA_HOME environment variable.
Add JAVA_HOME/bin to PATH environment variable.
Install and Setup Android Studio
Set ANDROID_HOME environment variable.
Add ANDROID_HOME/platform-tools and ANDROID_HOME/tools to PATH environment variable.
Download and install Android SDK Platforms.
Create Virtual Device (Android Emulator)
Start Android Studio
Click Configure
Click AVD Manager
Click Create Virtual Device
Select any Profile
Click Next
Select Any System Image
Click Next
If button is greyed out, download any System Image
Provide Name
Click Finish
Configure your Appium Server Emulator or physical Android phone file
The Appium Server configuration file must be updated for your specific environment and Application. This is a JSON file that contains an array of objects. Each object corrresponds to a machine which has Appium running and the Emulator installed or physical Android phone connected. The required keys and values of each object are:
{
  “serverURL”: “http:/example.com:4723/wd/hub, URL in which Appium runs”,
  “proxyURL”: “http://example.com:9090, optional, URL in which Test Designer runs”,
  “capabilities”: {
    “platformVersion”: “9, Appium seems to automatically detect the version”,
    “udid”: “some identifier, must be in list of adb devices command”,
    “systemPort”: “8200 - 8299, to automate multiple Emulators or physical Android phones”,
    “deviceName”: “Android 1, can be whatever name”
  },
  “app”: “Absolute path to where .apk file is in local file system or URL of .apk file, needed if value for appPackage is empty and value for appActivity is empty”,
  “appPackage”: “Package of AUT, needed if value for app is empty, otherwise is optional if value for app is not empty”,
  “appActivity”: “Main Activity of AUT, needed if value for app is empty, otherwise is optional if value for app is not empty”
}
Download the android-emulator-physical.json file and open it in an editor.
Download here: android-emulator-physical.json
Replace the udid value in the template with the Identifier number of the Emulator or physical Android phone after running adb devices command.
Update the appPackage to match your Application’s Package.
Update the appActivity to match your Application’s Main Activity.
Create Android Blueprint
Open Terminal
Enter appium and press Enter

Start AIQ services if not already running
Log into AIQ and go to AI Scripting > Create Blueprint
Click Mobile
If Mobile is disabled, request an updated AIQ license
Select Android in the Platform box
Select Package in the Source box
Select Tags in the Scan Type box (SmartTags not yet supported for Mobile)
Confirm Visual Hints are enabled
Click Browse in the Appium Servers box.
Select the Appium Server Simulator description file created earlier in the setup
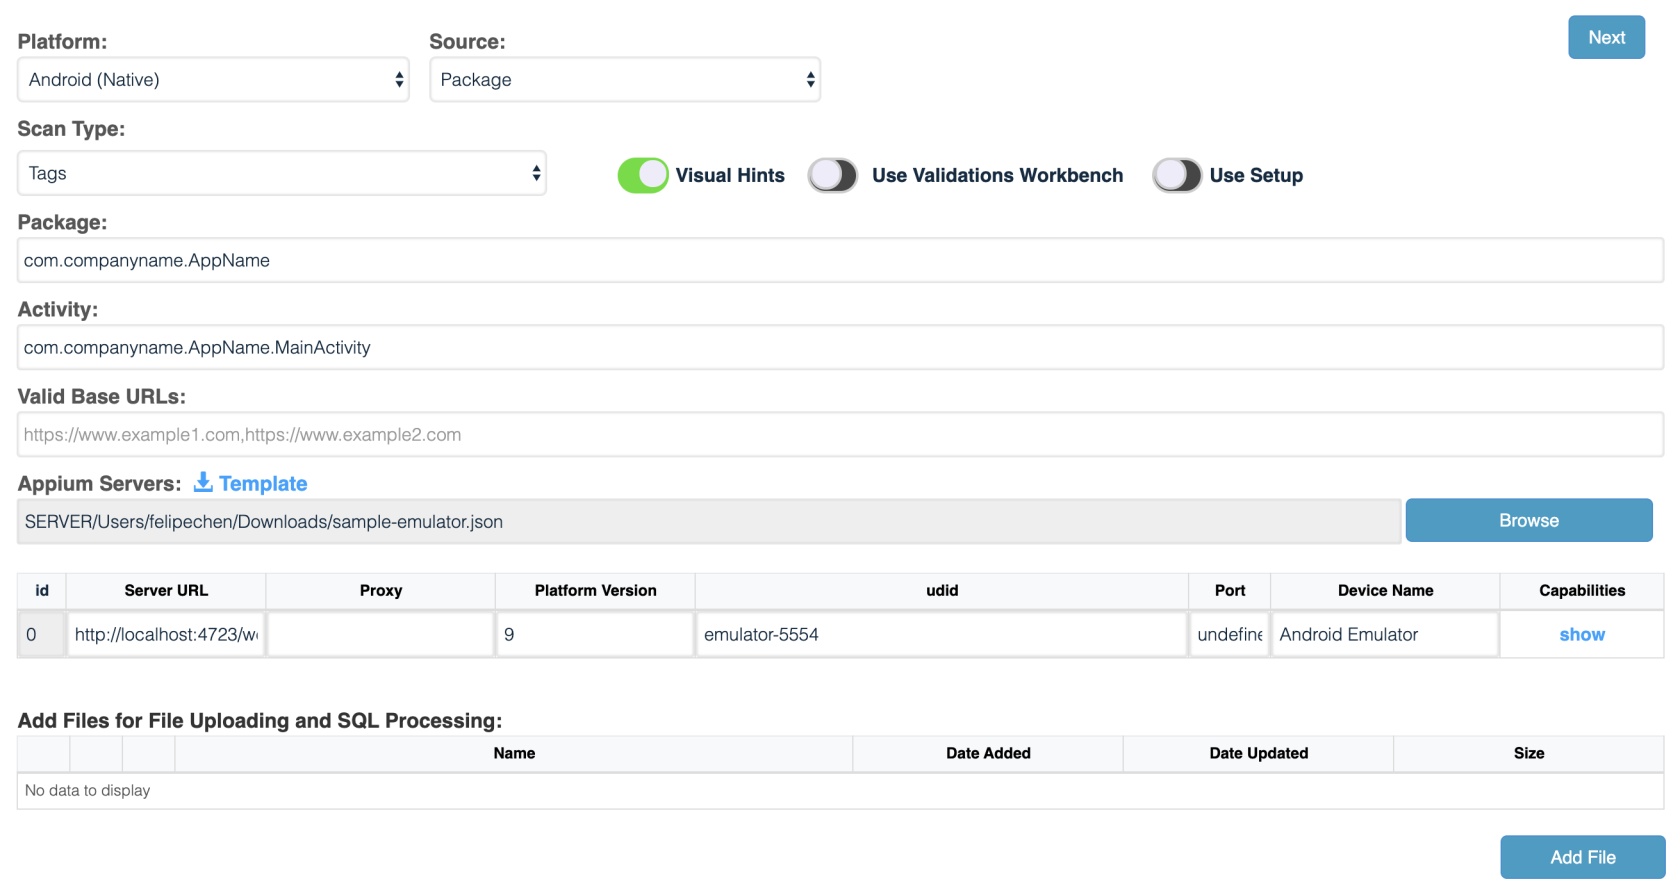
Click Next
Proceed with the Blueprint creation
Enter a name in Execution Name box
Click Load a Dataset from CSV file and check the Datasets in the list or check Default and enter variables and values
Click Create
Blueprint starts the Application and begins discovering its elements
As Inputs Found updates, map any Custom Actions until the desired end point is reached in the Application
If proxyURL is not empty in Appium Server configuration file, Appvance certificate installed in Emulator or physical Android phone, Application is compiled to use Appvance certificate and proxy settings of Simulator or physical iPhone configured to point to value of proxyURL
Click Requests tab to view captured Requests performed during Blueprint
Download Requests Report
If Validations Workbench file is supplied, click Validations tab to view successful and failed Validations
Download scripts in JS format (DS not yet supported for Mobile) to run in JS Edit & Play or in a Scenario
Notes
To run tests in Emulators, these must be already running since Appium won’t start them up. If capability “avd”: “name of Emulator” is provided, Appium will start only this Emulator.
If capability “app”: “absolute path or URL of .apk file” is provided, Appium will try to install Application if not installed.
After connecting physical Android phone to computer, Trust this computer dialog may show, click Accept button and checkbox to remember setting.
It is normal if Appium logs show many entries with ECONNRESET error.
If Appium logs show ECONNREFUSED or socket hangup errors, remove AUT from memory, shutdown Emulator or disconnect physical Android phone, restart Appium, restart Emulator or reconnect physical Android phone.
Last updated: June 26, 2023
If you have any feedback on this topic, please contact us at documentation@appvance.ai