
Configure Traffic Connect for AIQ Traffic Capture
AfterLast youreviewed: logOctober in,2, under2026
Use >this Goarticle towhen configuring Traffic
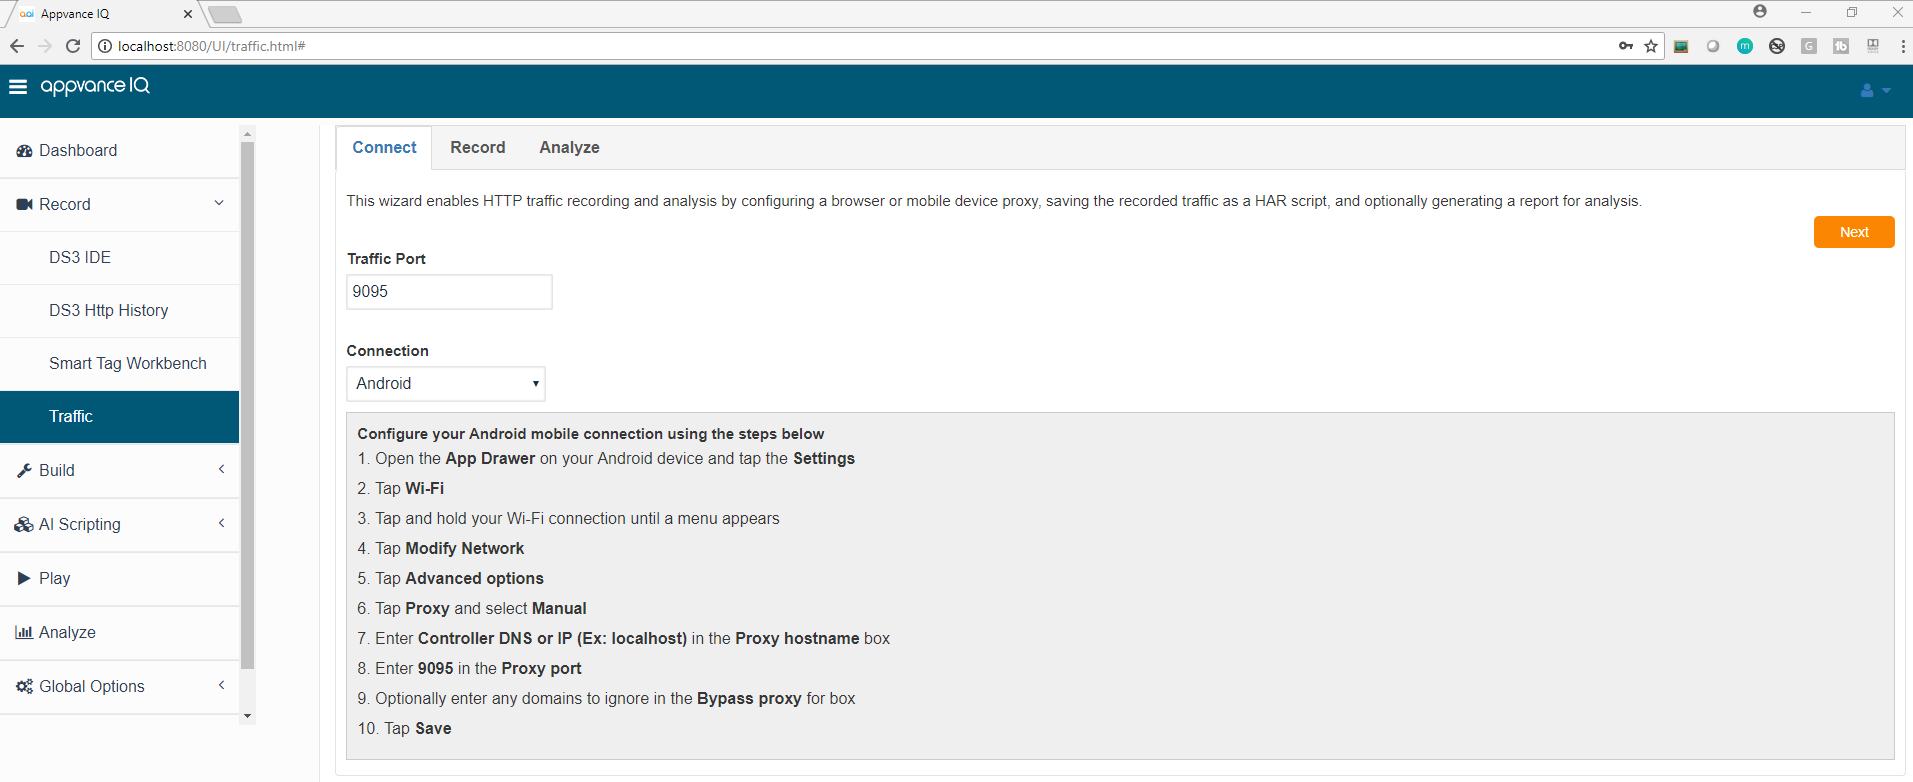
Thisso wizardAIQ enablescan HTTPcapture or route traffic recordingfor supported testing workflows.
What changed in this article
- Expanded the short title into a configuration-focused Traffic Connect article.
- Added checks for network route, proxy/certificate setup, target application reachability, device or host source, and
analysiscapturedbyevidence. - Added
configuringtroubleshooting guidance for no-traffic, partial-traffic, and certificate-related capture issues.
Validation workflow
- Confirm the traffic source, target application, network path, and certificate/proxy requirements.
- Start Traffic Connect and verify AIQ can see expected requests without capturing unrelated sensitive traffic.
- Run a
browsersmallor mobile device proxy, saving the recorded traffic as a HAR script,capture andoptionallyreviewgeneratingoutputa report for analysis.Proxy Port:Accepts only numerical characters. This is the port that the browser or device Wi-Fi settings will use to capture traffic (mobile devices, native apps, or browsers).Connection:Provides steps to configure for Browser, Android device, and for an IOS Device.Android:Configure your Android mobile connectionbefore using thestepsconfigurationbelow Open the App Drawer on your Android device and tap the Settings
Tap Wi-Fi
Tap and hold your Wi-Fi connection untilfor a menufull appears
Tap Modify Network
Tap Advanced options
Tap Proxy and select Manual
Enter Controller DNS or IP (Ex: localhost) in the Proxy hostname box
Enter 9095 in the Proxy port
Optionally enter any domains to ignore in the Bypass proxy for the box
Tap Save
iOS:
Configure your iOS mobile connection using the steps below
Open the App Drawer on your iOS device and tap the Settings
Tap Wi-Fi
Tap and hold your Wi-Fi connection until a menu appears
Connect to the same Wi-Fi network as the AIQ HTTP Proxy
Tap the info (i) button
Scroll down to the Proxy section and select Manual
Enter Controller DNS or IP (Ex: localhost) in the Proxy hostname box
Enter 9095 in the Proxy port
Browser:
Configure your Computer Browser connection using the steps below
Open the Browser
Go to Proxy Configuration
Edge: Click Internet Options Click Connections tab Click LAN Settings
Google Chrome: Go to Settings and click the Advanced tab Click Open Proxy Settings Click LAN settings
Firefox: Go to options and type proxy Click Network Proxy Settings
Enter Controller DNS or IP (Ex: localhost) in the IP Address box
Enter 9095 in the Proxy port
Click Ok
Click HTTP Proxy in the left Navigation Pane.
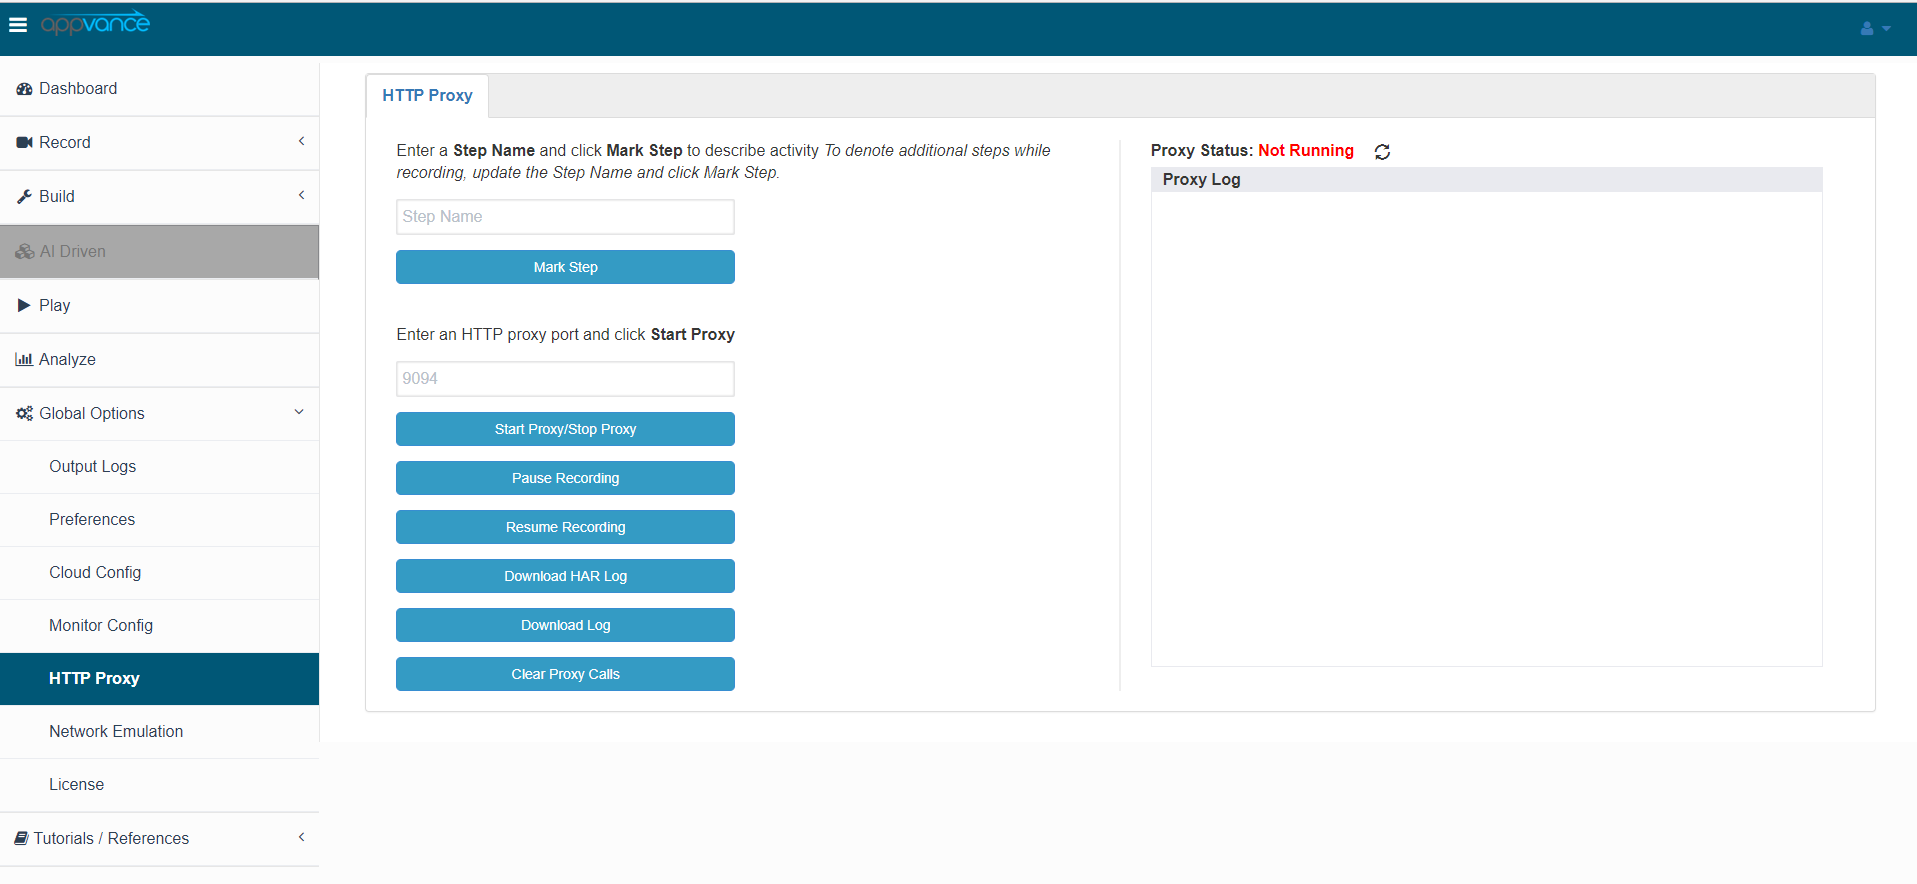
HTTP Proxy Optionsnote:
Controlpage tabnow
Markan Step:operational Beforesetup startingworkflow theinstead proxy, the user should mark the step by providingof a meaningful name to the set of requests the HTTP proxy is going to capture.
For example, the user can mark the step as login - the steps/requests that can be captured below the login would involve the following:
a. Click Log in to go to the login page
b. Set the user name and password
c. Click Log in to navigate inside the application
All thisvague traffic canfeature be captured below the log-in step, After marking the step and starting at the proxy, all the traffic mentioned in the above use case will be saved under Log in Step.label.
The next step would be to purchase.
a. After successful login, click some items
b. Add them to cart
c. Click purchase
All these can be marked as another step by providing the step name as Purchase and clicking on the Mark step, these can be validated using the status tab.
Start Proxy: Once after entering the proxy port and marking a step user can click the Start Proxy button, a confirmation message will be displayed informing that the proxy is starting on the provided port number.
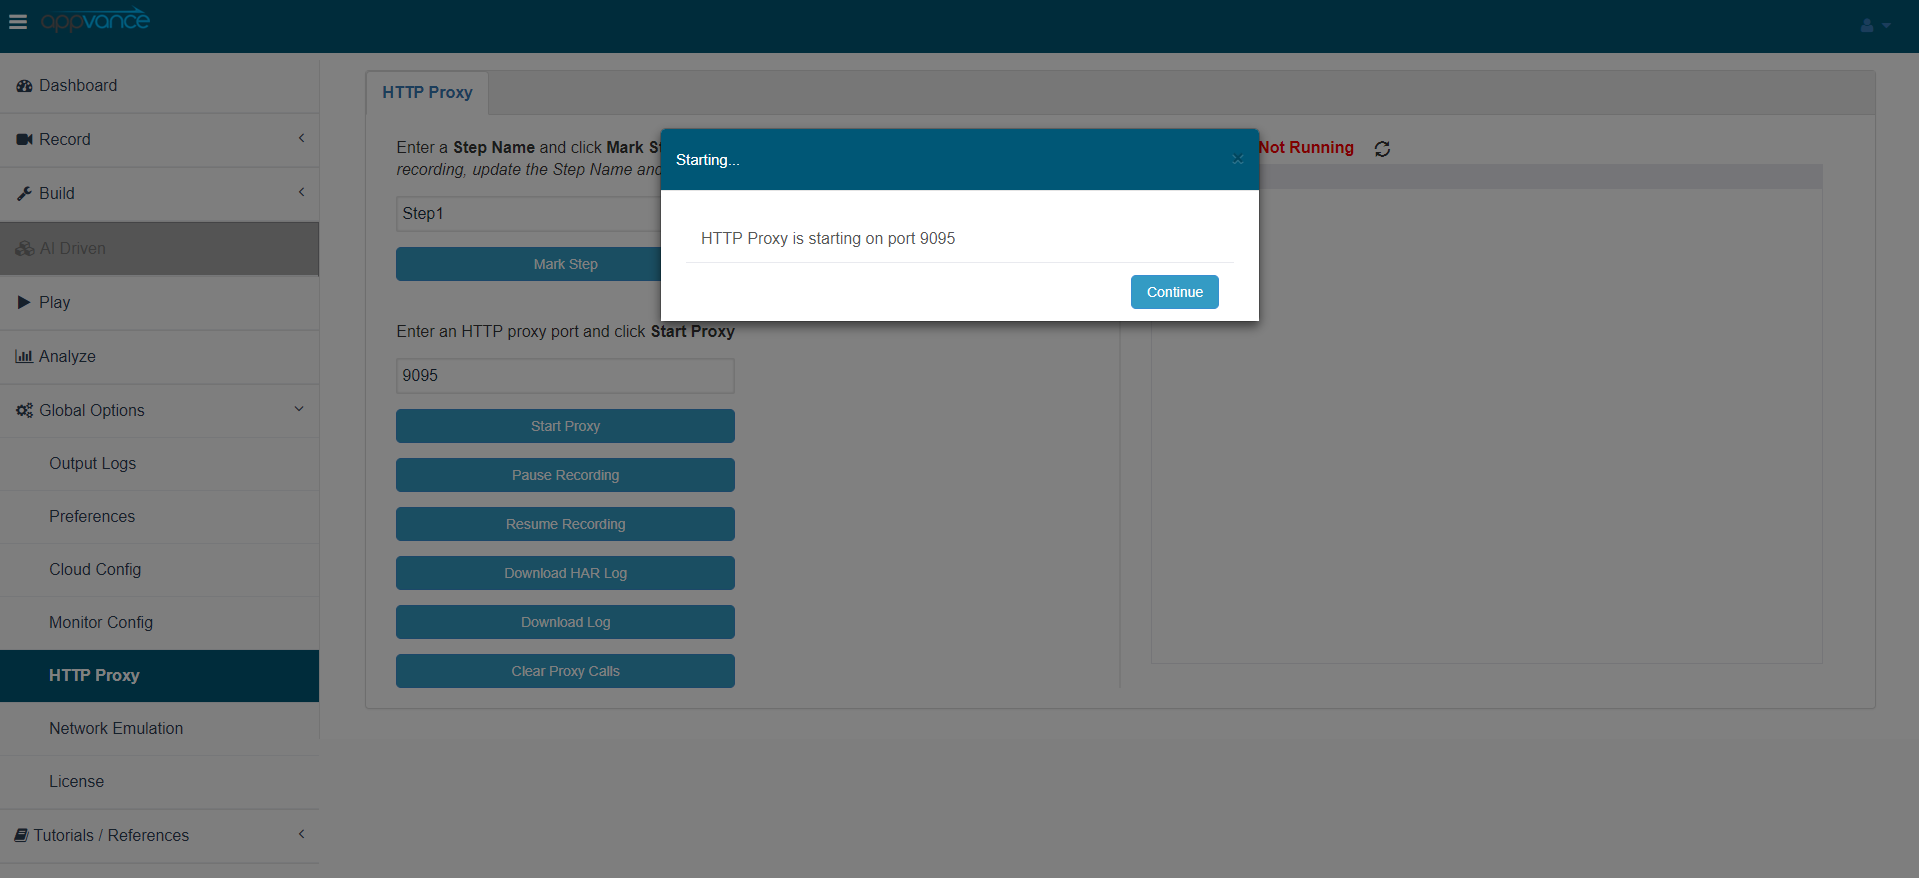
Pause Recording Request: At times it may be required to pause the ongoing recording of the traffic as the user might want to do some unwanted navigation which anyone would want not want to have in the recorded script, Pause Recording request can be used for this purpose. An alert would be displayed upon clicking 'Pause recording request'
Resume Recording Request: Once the Pause recording request has been chosen, the user would want to resume the recording after pausing the script.
Download HAR Log: Once the user is done with recording the traffic requests, the user can come back to this tab and click 'Download HAR Log' which downloads the script which will have the .har extension, this script is something similar to the script generated from using the network tab of Google Chrome browser and saving the content as HAR.
Download Log: Download Log will only download the URL calls made without the HAR contents in a text file.
Clear Proxy Calls: As the name suggests it just clears the recorded traffic requests, users can use this when creating new scripts.
Status
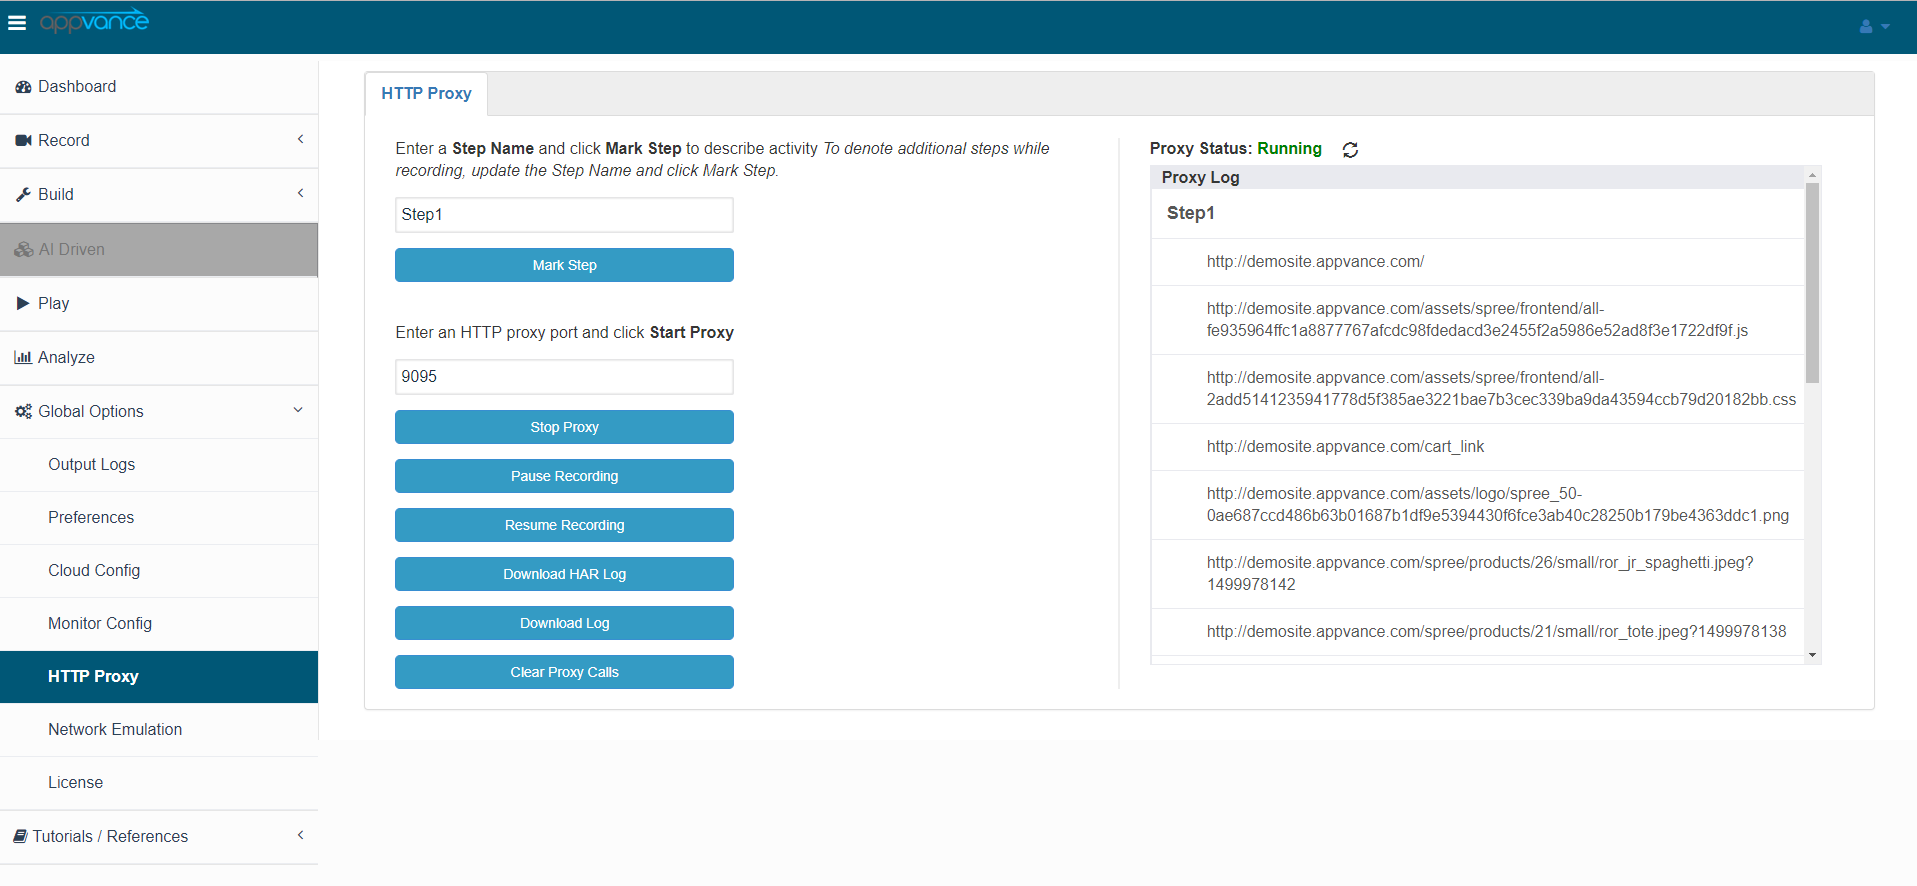
Displays the status of the proxy, either Running or Not.
and it displays all the traffic that was recorded along with the step names as shown in the above image.
Use the refresh button periodically to capture all the latest traffic logs before saving the HTTP file.
Last updated: October 25,2, 20232026
If you have any feedback on this topic, please contact us at documentation@appvance.ai.