
Lab Management in AIQ
Lab Management in AIQ
Lab Management ishelps one oforganize the importantenvironments, featuresdevices, ofbrowsers, Appvancenodes, IQand thatresources helpsused inby autoAIQ upgradingtests. Keep lab entries accurate so scheduled executions can find the AIQcorrect instancescapacity and environment details.
Recommended guidance
- Use clear names for labs, nodes, devices, and environment groups.
- Record ownership, location, access requirements, and maintenance windows for shared resources.
- Keep device and node availability current so teams do not schedule work against unavailable capacity.
- Separate production-like, staging, and experimental resources when possible.
- Review permissions so only authorized users can change shared lab configuration.
Operational workflow
- Create or update the lab entry with
a new release and also keeping allthechangescorrectmaderesource details. - Assign nodes, devices, or environment resources to the
existingrightreleasegroup. - Run
intacta(createdsmallusers,validationlicense,testpropertytochanges). This feature is an Admin-only option and not available for users.The following steps assume you have your upgraded Appvance IQ zip link and thatconfirm themachines to upgrade have internet access to download the link.How to Create a Grid Config File Steps to create a Grid Config file with a list of TestNodes
Browse to Appvance IQ and login
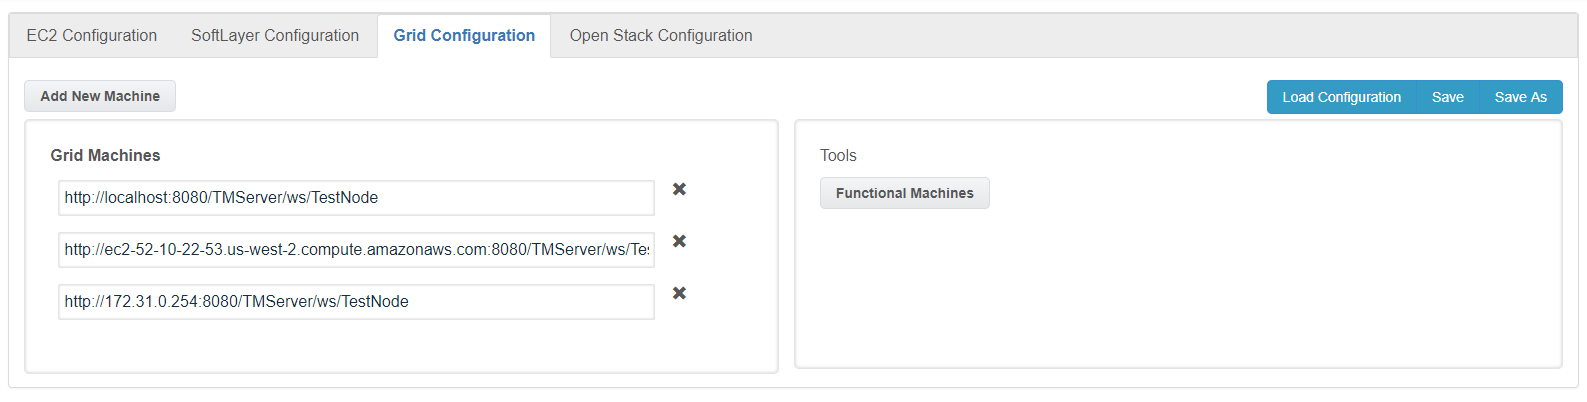
Click Global Options and select Cloud Config
Select the Grid Configuration tab
Enter a new or existing TestNode machine URL in the Grid Machines box using the following format: < test-node-dns>:8080/TMServer/ws/TestNode
Press Enter. Save and Save As buttons will now be enabled
To add additional machines, click Add Machine and enter subsequent TestNodes in the Grid Machines list using the format described above
Click Save As to save the configuration as a cloud-config file.
How to Create an AWS EC2 Config File
Please refer to Amazon EC2 Configuration Utility for AIQ for creating an EC2 cloud-config file.
How to Create an IBM Softlayer Config File
Please refer to IBM Softener Configuration Utility for AIQ for creating SoftLayer cloud-config files.
How to Configure Lab Management
The below steps uses an EC2 Config file to upgrade a list of TestNodes that matches the config file.
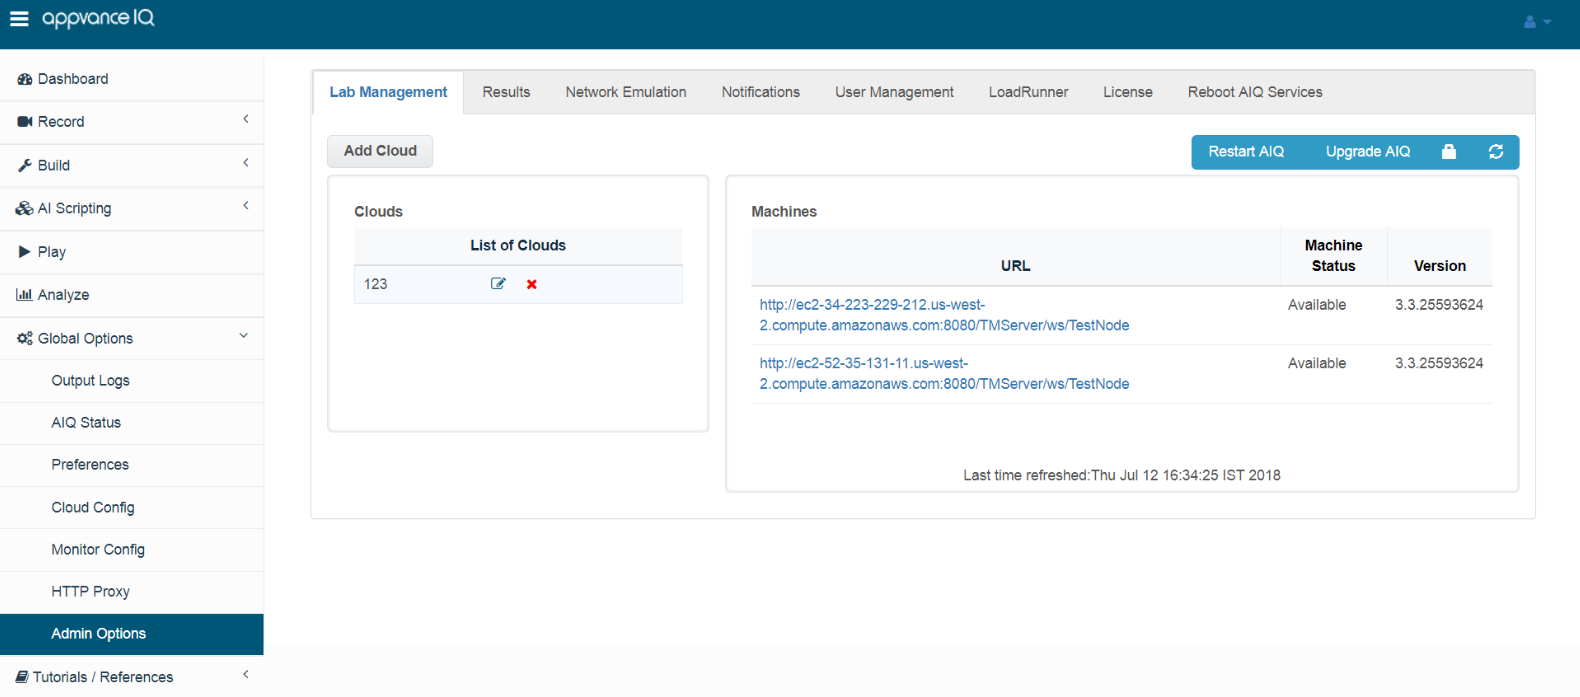
From Global Options > Cloud Config > Admin options > Select the Lab Management tab
Click Add Cloud
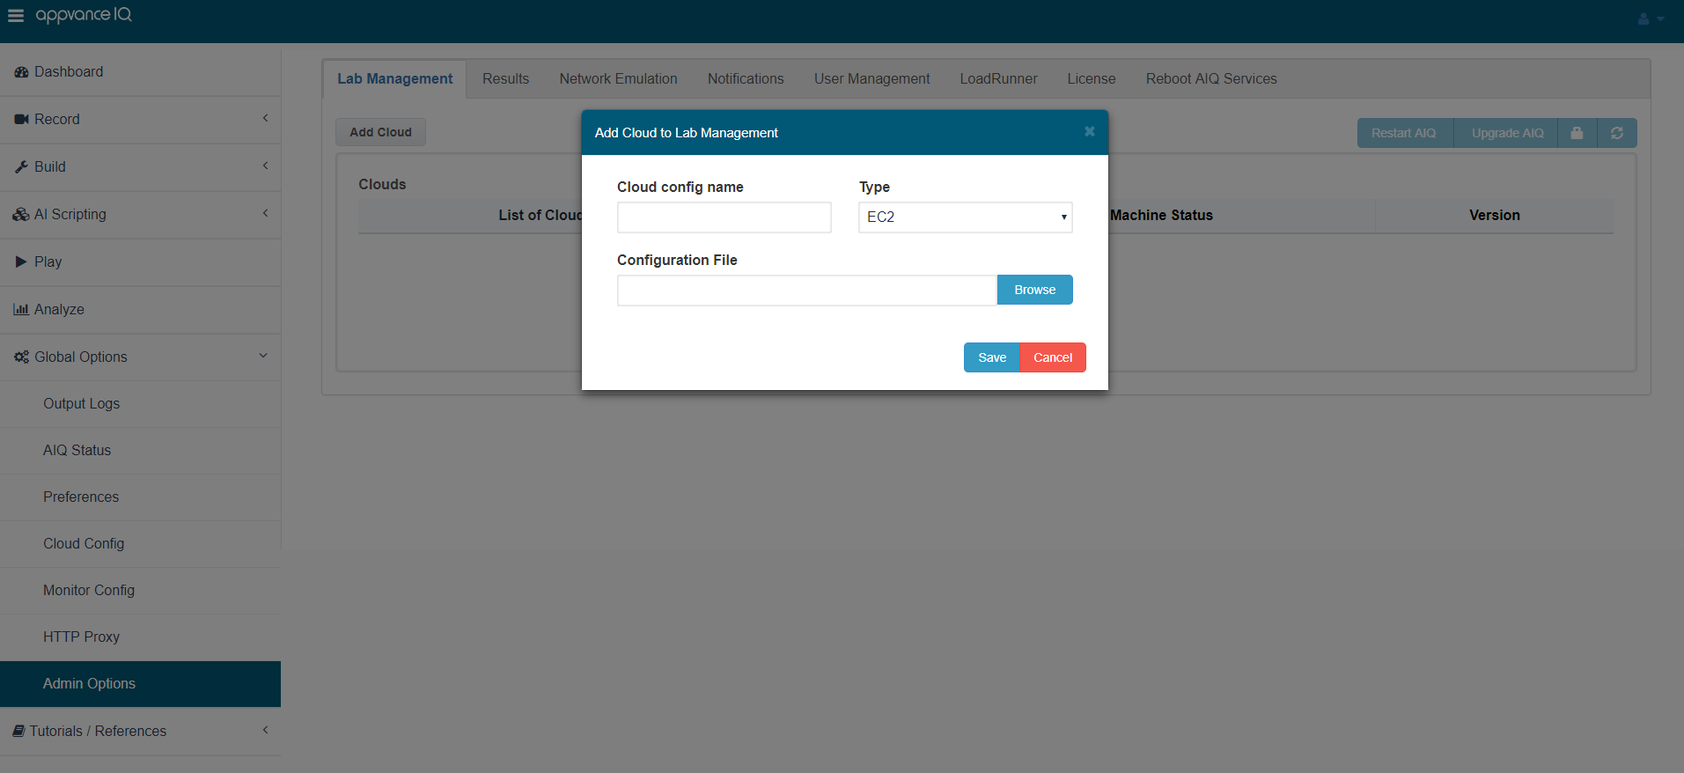
Enter a name in the Cloud config name box
Select EC2 in the Type box (Grid/Softlayer/OpenStack)resource can be chosenselected fromand theused.
or 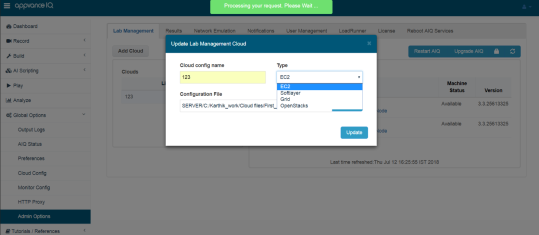
Click Browse, select the grid cloud-config file created (Refer to the sections above)
Click Save
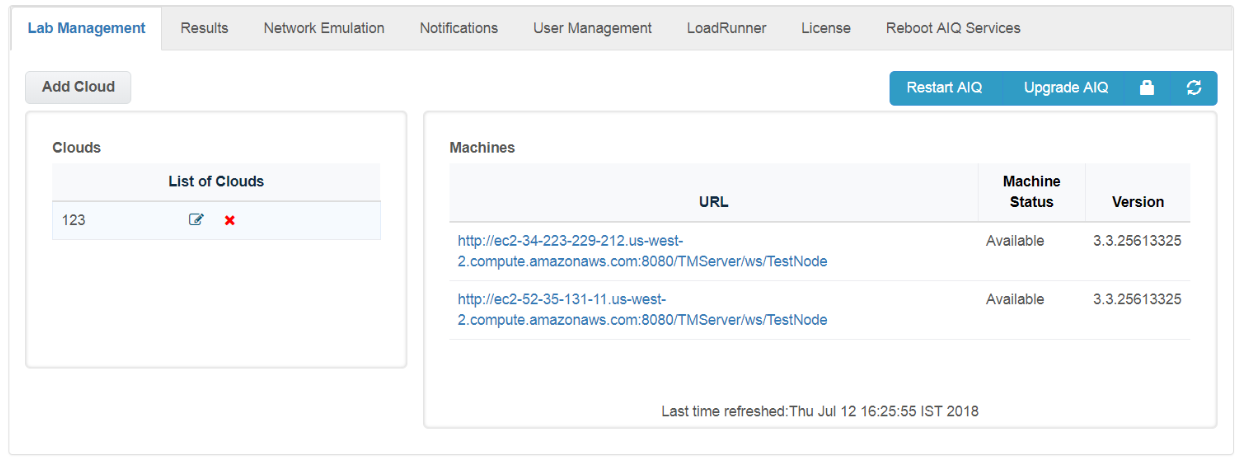
All currently running TestNodes appear in the Machines list and indicate the Machine Status and currently installed AIQ Version.
How to Upgrade using Lab Management
Steps to using an EC2 Config file to upgrade a list of TestNodes.
From Global Options > Cloud Config > Admin Options > select the Lab Management tab
Select a cloud location to upgrade in the List of Clouds
Confirm Machine Status displays Available and a valid Version displays for each listed URL
Troubleshooting:
If your Machine Status displays Invalid Login, click the lock icon and enter your Appvance credentials when prompted.
If your Machine Status displays Unreachable, confirm Appvance is running on the designation system and that the destination system is reachable from the Appvance controller you are currently using to perform the update.
If your Machine Status displays Available, however, the Version is Unreachable or Unknown, please contact support@appvance.ai
If your Machine Status displays Available, however, the Version is Unreachable or Unknown, please contact support@appvance.ai
Click Browse and enter in the new Appvance build zip file URL. Note: Each of the above machines must have access to the internet to download the distribution zip file
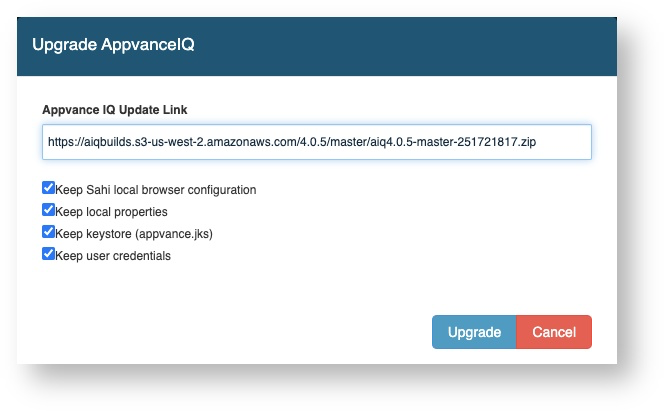
Keep Sahi Local Browser configuration: Copies the contents of 'browser_types.xml' file from the existing AIQ installation to the new version of AIQ
Keep Local Properties: This option preserves the 'appvance.properties' file, that contains data as repositories configured and others
Keep Keystore: Checking this option will preserve the 'appvance.jks' file from the TestNode/etc folder which is the valid certificate of that instance with the DNS
Keep user credentials: Checking this option will preserve all the users created
Click Upgrade. A green message shall say "Upgrade Started" under the list of grid machines
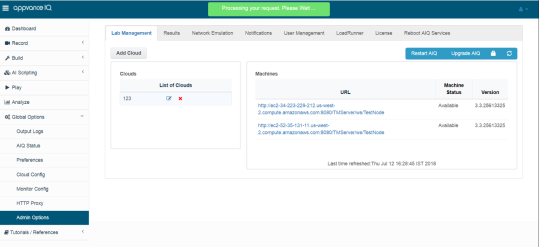
The upgrade lasts several minutes and varies based on how long each TestNode requires to download and unzip the AIQ .zip file (around 1.5 GB in size), as well as a few additional minutes for the actual installation.
You can click the refresh button occasionally to watch for an updated version number. During the installation process, the AIQ service on each machine becomes unavailable as the service is down when applying the upgrade.
After the successful upgrade:
See Lab Management Upgrade Issues for additional upgrade troubleshooting.
Last updated: October 08,8, 20242026
If you have any feedback on this topic, please contact us at documentation@appvance.ai