
Hudson Integration
The following topics will be covered:
Installing Hudson
-
Hudson comes as a war file. Download the Hudson war file from the link
-
Prerequisite to run Hudson: needs Java 6 or newer run-time. An internet connection will be required if you want to be able to install and auto-update plug-ins
-
After you download Hudson.war, you can launch it by executing java -jar Hudson.war
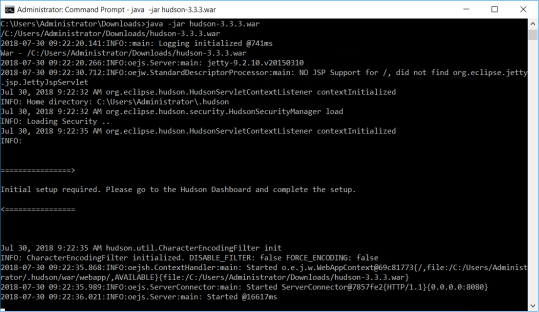
-
Once Hudson is running, navigate to http://localhost:8080 on your browser
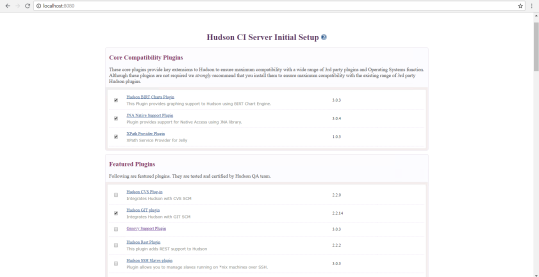
-
Select Hudson GIT Plugin from the featured Plugin
-
Click Install and Click Finish
Prerequisites Installations
-
Install ANT using the link, Download and install the appropriate file on your machine depending on the operating system used
-
Please make sure to download and install GIT on the machine where Hudson is installed. Download git from the link based on your operating system
Hudson System Configuration
-
On the main page, click Manage Hudson > Click Configure System
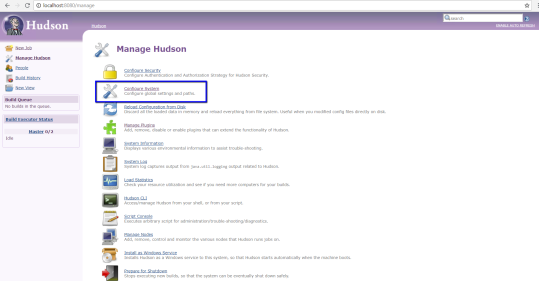
-
Look for global properties, create PATH variable and provide the executable paths for JAVA and APACHE

-
Look for GIT and provide the executable path of the git.exe file

-
Look for the GIT plugin and provide a valid username and the user email

-
Also, open a command prompt and run the following commands.
git config --global user.email "you@example.com"
git config --global user.name "Your Name"
Creating your job and creating ant task to run the scenario
-
Click New Job
-
Provide Job Name and select Build a free-style software job
-
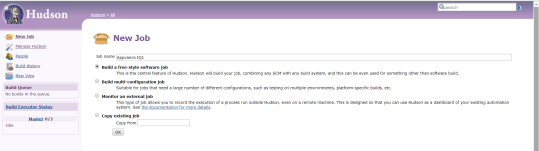
-
Click OK
-
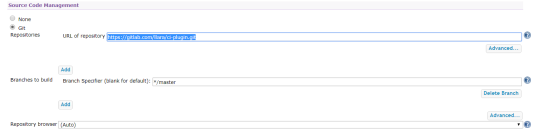
Under Source Code Management, Select Git
If hosted by Appvance, select Git and enter "https://gitlab.com/llara/ci-plugin.git " in the Repository URL box
-
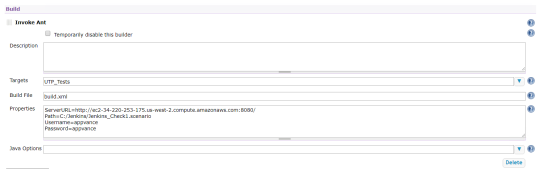
Locate Invoke Ant in the Build options
-
Enter UTP_Tests in the Targets box
-
Click Advanced
-
Enter CloudBees/build.xml or build.xml depending on where the file is located
in the Build File box (may vary if plug-in self-hosted)
-
Enter the following in the Properties box:
ServerURL=<URL_To_AppvanceIQ_Server_Including_Port> Path=REPOSITORY/<pathToScenarioFileIncludingScenarioNameAndFileExtension> Username=<appvanceUserName>
Password=<appvancePassword>
-
Click Save
-
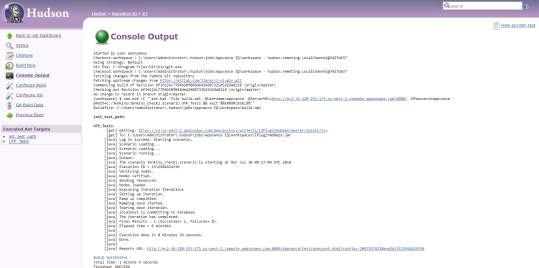
Click Build Now and once the build is run successfully > Click Console Output to check the Results and the link to the Appvance IQ Results of the test run
Last updated: June 28, 2023
If you have any feedback on this topic, please contact us at documentation@appvance.ai