
Hudson Integration
The following topics will be covered:
Creating a Job and an Ant Task to run the Scenario
Installing Hudson
Hudson comes as a war file. Download the Hudson war file from the link
Prerequisite to run Hudson: needs Java 6 or newer run-time. An internet connection will be required if you want to be able to install and auto-update plug-ins
After you download Hudson.war, you can launch it by executing java -jar Hudson.war
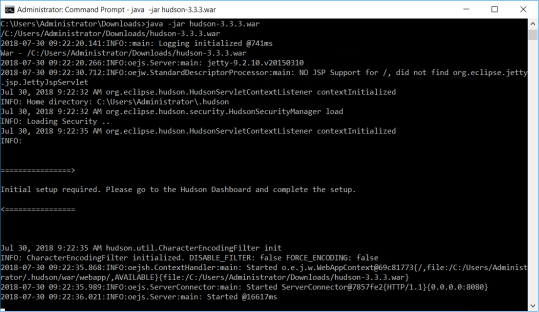
Once Hudson is running, navigate to http://localhost:8080 on your browser
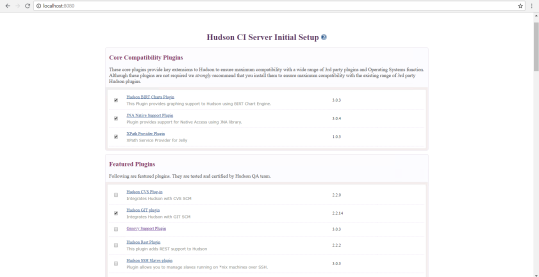
Select Hudson GIT Plugin from the featured Plugin
Click Install and Click Finish
Prerequisites Installations
Install ANT using the link, Download and install the appropriate file on your machine depending on the operating system used
Please make sure to download and install GIT on the machine where Hudson is installed. Download git from the link based on your operating system
Hudson System Configuration
On the main page, click Manage Hudson > Click Configure System
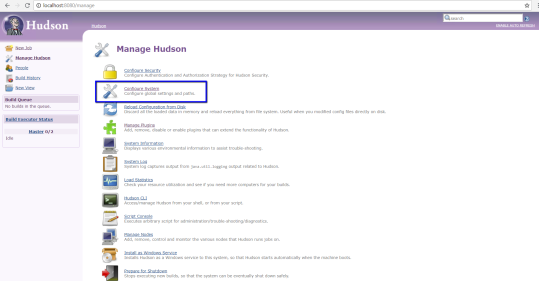
Look for global properties, create PATH variable and provide the executable paths for JAVA and APACHE

Look for GIT and provide the executable path of the git.exe file

Look for the GIT plugin and provide a valid username and the user email

Also, open a command prompt and run the following commands.
git config --global user.email "you@example.com"
git config --global user.name "Your Name"
Creating your job and creating ant task to run the scenario
Click New Job
Provide Job Name and select Build a free-style software job
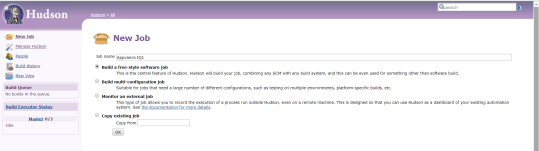
Click OK
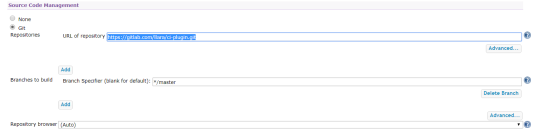
Under Source Code Management, Select Git
If hosted by Appvance, select Git and enter "https://gitlab.com/llara/ci-plugin.git " in the Repository URL box
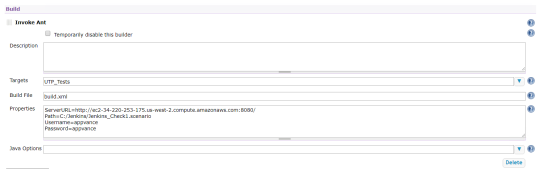
Locate Invoke Ant in the Build options
Enter UTP_Tests in the Targets box
Click Advanced
Enter CloudBees/build.xml or build.xml depending on where the file is located
in the Build File box (may vary if plug-in self-hosted)
Enter the following in the Properties box:
ServerURL=<URL_To_AppvanceIQ_Server_Including_Port> Path=REPOSITORY/<pathToScenarioFileIncludingScenarioNameAndFileExtension> Username=<appvanceUserName>
Password=<appvancePassword>
Click Save
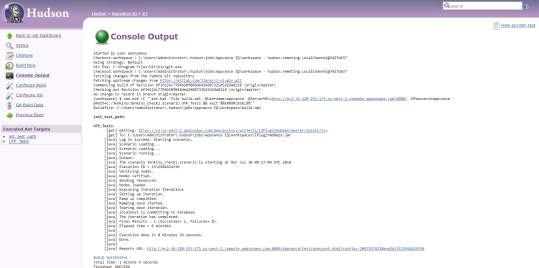
Click Build Now and once the build is run successfully > Click Console Output to check the Results and the link to the Appvance IQ Results of the test run
Last updated: June 28, 2023
If you have any feedback on this topic, please contact us at documentation@appvance.ai