
Run Data-Enabled SoapUI Tests in AIQ
SoapUI support was removed in release 5.2.0 of AIQ.
Make sure the SoapUI project created has the properties defined and the request is data enabled properly as shown below in the screenshot.
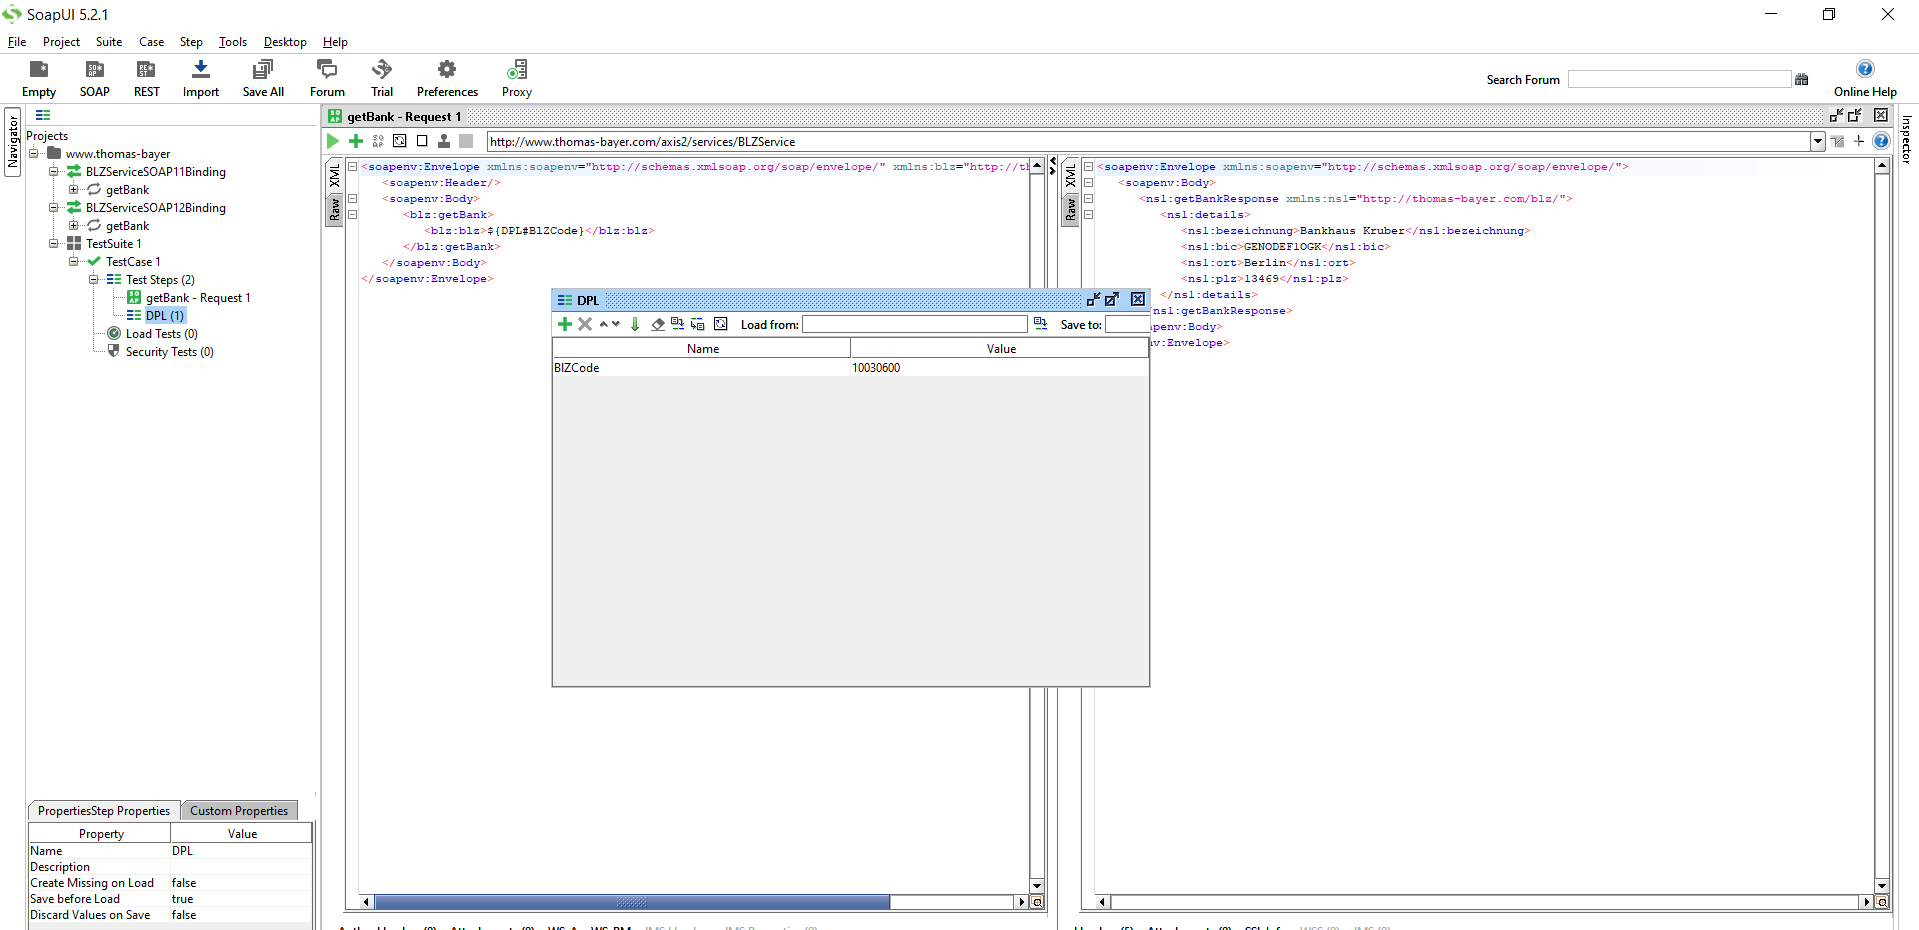
Save the project in SoapUI.
From Appvance IQ:
- Navigate to the Appvance IQ Home screen and click Build
- Click File ->New to create a new scenario
- Select Functional Test from the Scenario Test Type drop-down
- Click the Test Management tab and check: "Repeat scenario's test cases 2 times"
- Click the Test Cases tab and click the link for Add test case link
- Enter the Test case name and Script name
- Select "Service Suite-SoapUI" from the Script Type drop-down
- Click Browse and browse the Soap UI file and then the Test Suite and then the Test Case from the drop-down. Save the test case
- Click the Locations tab
- 10. Enter Name: localhost and URL: http://localhost:8080/TMServer/ws/TestNode (Should be added by default)
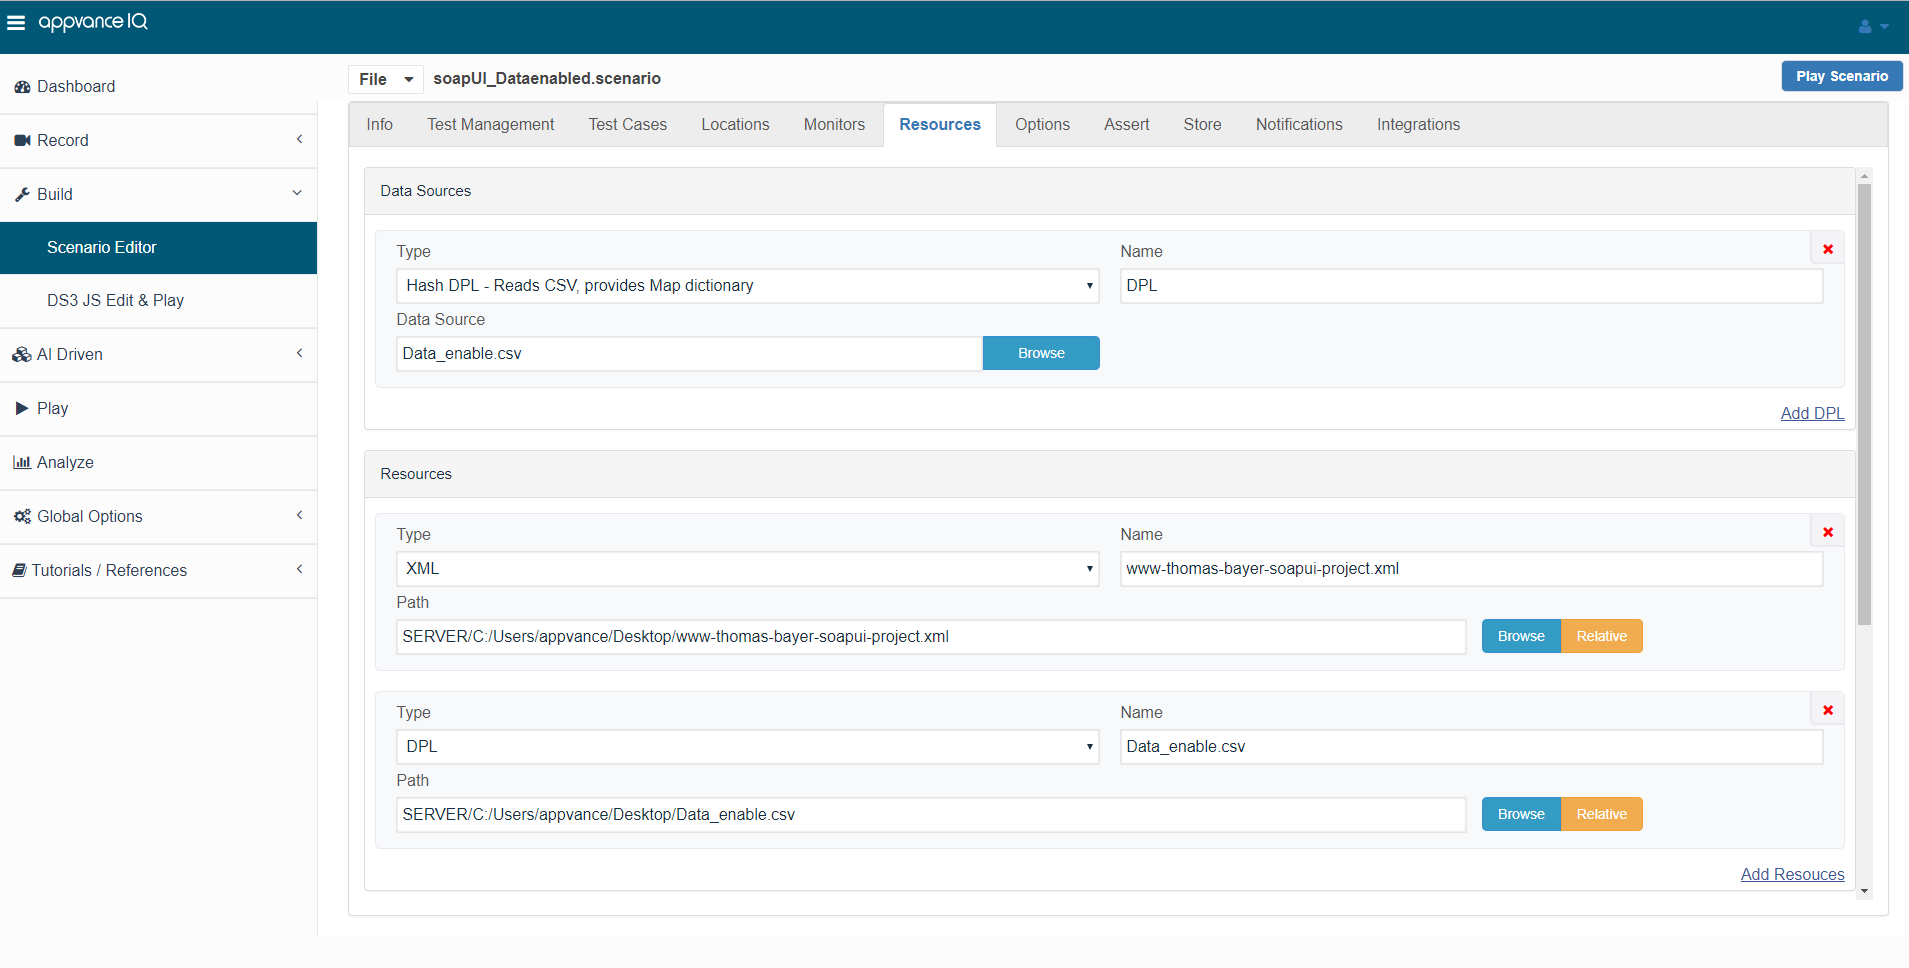
- Navigate to Resources and make sure SoapUI bundle with version 5.2.1 is added by default
- Also make sure the resources are added with Name, Type, and the correct path of the XML file
- 13. Go to the Resources tab, Click Add DPL, Select 'Hash DPL - Reads CSV, provides Map dictionary' from the Type drop-down, Provide Name (Important: Should be same as the property name provided in SoapUI), select the Data source (the CSV file with all the entries created)
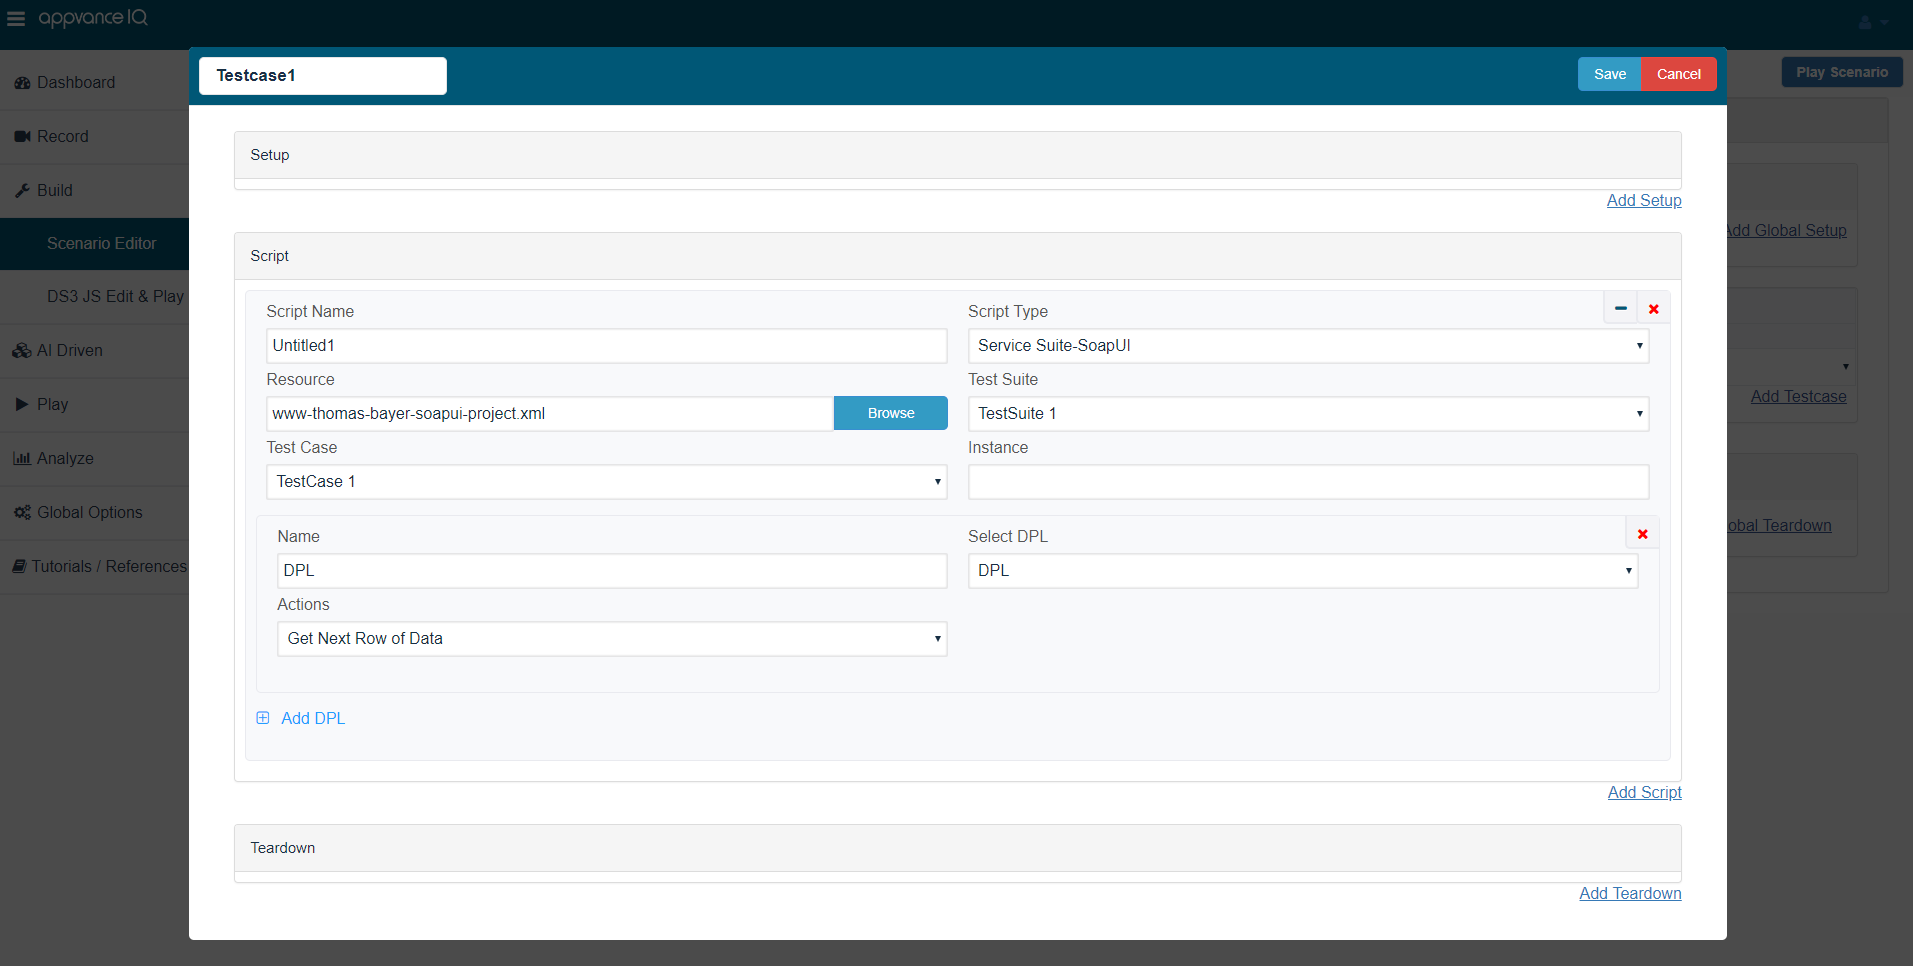
- Come back to the Test cases panel, click edit and click Add DPL, under Select DPL, select the DPL that we just added, provide the name (Important: Should be the same as the property name provided in SoapUI). Click Save
- Navigate to Options and make sure that Enable logging, Save logs on Failure are selected
- Click check box Custom Database Credentials (Database Logging) and make the following settings:
Database Type: MySQL
Driver: com.mysql.jdbc.Driver
URL: jdbc:mysql://localhost:3306/utp?useSSL=false
Default Schema: utp
Username: utp
Password: utp - Click File ->Save to save the new scenario
- Click Play Scenario from the top navigation bar
- The controller window will open in a new tab which displays the tests running and will display the pass / fail status of the tests upon the test completion
- The left part shows the steps and the duration in milliseconds and the right side shows the test run status under the Output tab
- On The transactions tab, we can find the request/response and an error tab to drill down further
- Click the Click here link to get to the list of Reports that Appvance IQ supports
Last updated: July 25, 2024
If you have any feedback on this topic, please contact us at documentation@appvance.ai