
Run Node.js npm Code from Service Suite
Run Node.js npm Code from Service Suite
ExistingUse workflowsthis oftenguidance involvewhen a Service Suite scenario needs to call Node.js code or an npm package. Keep package execution controlled, repeatable, and limited to approved dependencies.
Before execution
- Confirm the
abilitypackagetoisexecuteapprovedoperatingforsystemthecommandAIQlineenvironment. - Pin
programs,dependencywhichversionsyouthrough the approved package-management process. - Keep credentials, tokens, and environment-specific values out of source files and articles.
- Document expected input, output, exit code, stdout, and stderr behavior.
Validation workflow
- Run the Node.js code with a small local or non-production sample.
- Confirm Service Suite can
uselocate theexec()scriptcommandand dependencies. - Review output and failures before using the package in
servicea suitescripts.orThescheduledexec()run. - Record
commanddependencycanchangesbe used to trigger a node.js script execution assuming you have node.js installed in the test node that will executewith the scenariowithmaintenancethe service suite script containing the exec() command.notes.
exec(<working Folder>, <command>, <parameter1>, <parameter2>, …)
So assuming you have a folder called “folder-with-scripts“ you can execute a node.js script called “my-node-js-script“ using a command like:
result = exec('folder-with-scripts', 'npm',
              'run', 'my-node-js-script', 'param1', 'param2');
log("status: " + result.status);
log("output: " + result.output);
log("error: " + result.error);
For the above to work in a scenario/test node execution situation, you need to add several resources to the scenario and add some more steps to your service suite script to unzip the folder with the scripts, check if node.js is installed in the test node and execute a node update before running the node.js script. The following steps is assuming a Windows OS test node.
Step 1: Provide .zip with the node.js assets.
To provide the node-js-scripts zipped folder to the scenario as a resource, and then use an exec command to extract the folder in the test node.
var result = exec('', 'extract-powershell.bat', '');
In the above example, the extract-powereshell.bat is a file that must be also provided in the scenario resources with the following contents. Notice that the node-js-scripts.zip file name is hard coded in the .bat file, replace it with your actual zip file name.
@echo off
powershell.exe "Add-Type -A 'System.IO.Compression.FileSystem'; [IO.Compression.ZipFile]::ExtractToDirectory('./node-js-scripts.zip', '.');"
Step 2: Execute an npm update in the working folder
Once the folder with the node.js scripts is expanded, you should execute an npm update command in that folder with
log("NPM UPDATE");
result = exec('node-js-scripts', 'npm', 'update');
log("status: " + result.status);
log("output: " + result.output);
log("error: " + result.error);
Step 3: Execute your node.js script with npm
Once the folder with the node.js scripts is expanded, you should execute an npm update command in that folder with
result = exec('node-js-scripts', 'npm', 'run', 'my-node-js-script', 'param1', 'param2');
log("status: " + result.status);
log("output: " + result.output);
log("error: " + result.error);
Step 4: Saving the product of executing the node.js script into an S3 repository
If your node-js scripts generate a file that needs to be persistent in some way, you can use the git repository client or the AWS S3 client to upload the result file into any of those storages for later use.
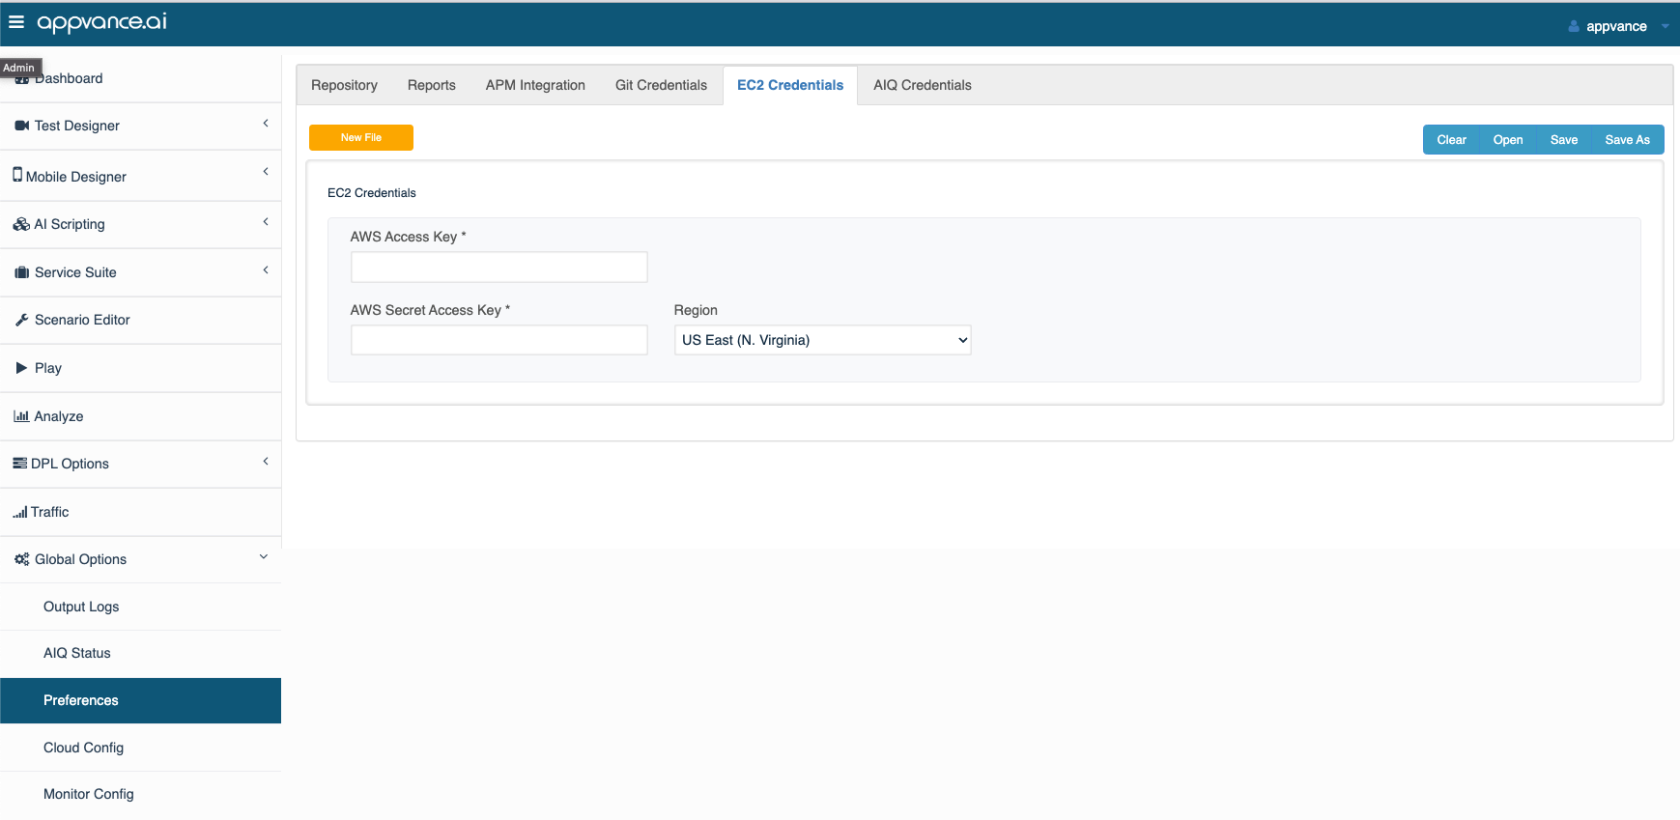
The S3 client needs an encrypted S3.creds file to be also added to scenario resources with a set of credentials with permissions to write to the provided S3 bucket. This credentials file can be created with the AIQ > Preference > EC2 Credentials
So assuming the previous step created a file called results/result.json then you can do
var content = readText("results/result.json");
log("Result:\n" + content);
content = readBytes("results/result.json");
wait(10000);
var client = createS3Client("{ds}/s3.creds", "results-bucket");
client.upload("results-bucket", content, "results.json");
All Together
LOG("CHECK NPM VERSION")
var result = exec('', 'npm', '-v');
log("status: " + result.status);
log("output: " + result.output);
log("error: " + result.error);
log("REMOVE PREVIOUS DIR")
var result = exec('', 'rd', '/s', '/q', 'node-js-scripts');
log("status: " + result.status);
log("output: " + result.output);
log("error: " + result.error);
log("EXTRACT FOLDER")
var result = exec('', 'extract-powershell.bat', '');
log("status: " + result.status);
log("output: " + result.output);
log("error: " + result.error);
log("NPM UPDATE");
result = exec('node-js-scripts', 'npm', 'update');
log("status: " + result.status);
log("output: " + result.output);
log("error: " + result.error);
log("NPM RUN NODE.JS SCRIPT");
result = exec('node-js-scripts', 'npm', 'run', 'my-node-js-script', 'param1', 'param2');
log("status: " + result.status);
log("output: " + result.output);
log("error: " + result.error);
log("RESULTS:")
var content = readText("node-js-scripts/results.json");
log(content);
content = readBytes("results/result.json");
wait(10000);
log("UPLOAD TO AWS S3")
var client = createS3Client("{ds}/s3.creds", "results-bucket");
client.upload("results-bucket", content, "results.json");
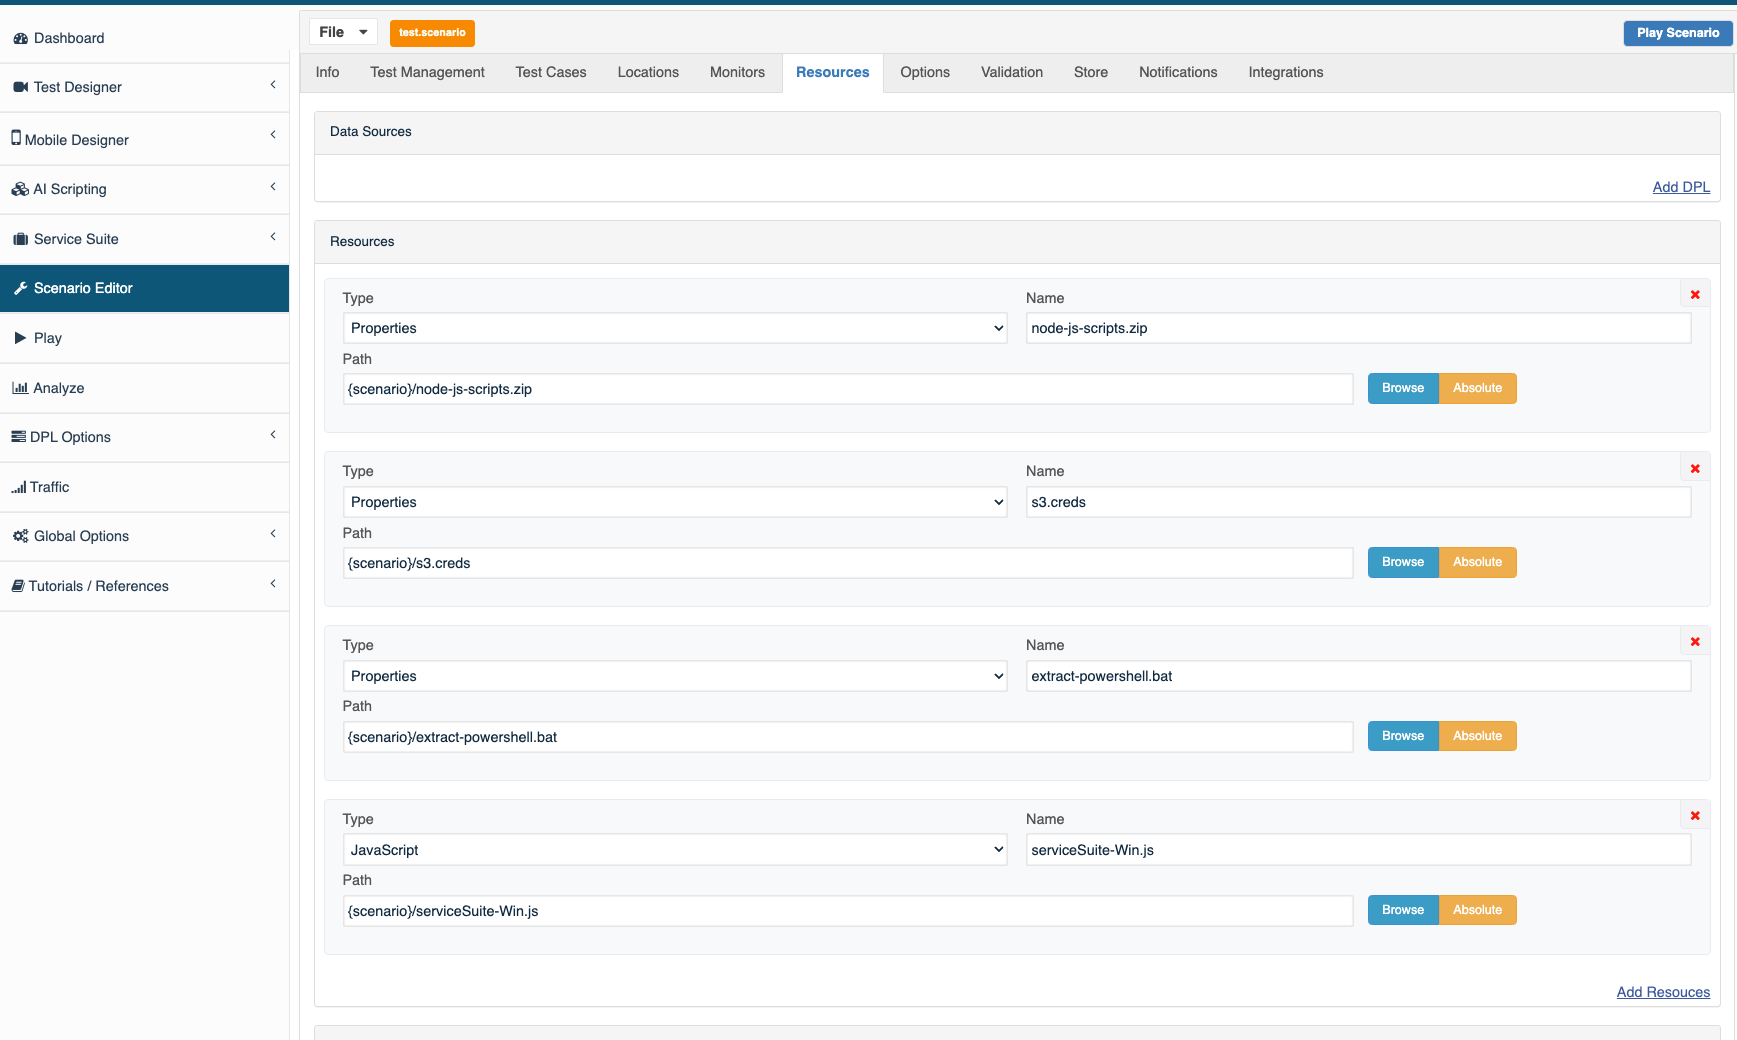
The scenario resources should look like this:
Download: Exract Powershell Batch File
Last updated: JuneSeptember 26,8, 20232026
If you have any feedback on this topic, please contact us at documentation@appvance.ai