
Appvance IQ Jenkins plugin configuration example
About Jenkins plugin configuration example
Information within illustrates how to configure and run scenarios from Jenkins
Applicable for both Jenkins installed locally as well as in the cloud, such as using Cloudbees-JenkinsLocal Jenkins Install Prerequisites
For example: -Xrs -Xmx256m -Dhudson.lifecycle=hudson.lifecycle.WindowsServiceLifecycle -jar "%BASE%\jenkins.war" --httpPort=8081
Restart Jenkins
From a Windows Server machine, go to Server Configuration and select Restart Jenkins Service
 Click Save (Changes)
Configure Project to Point to Plugin
- If hosted by Appvance, select Git and enter https://gitlab.com/Appvance-Public/Jenkins-Plugin.git in the Repository URL box
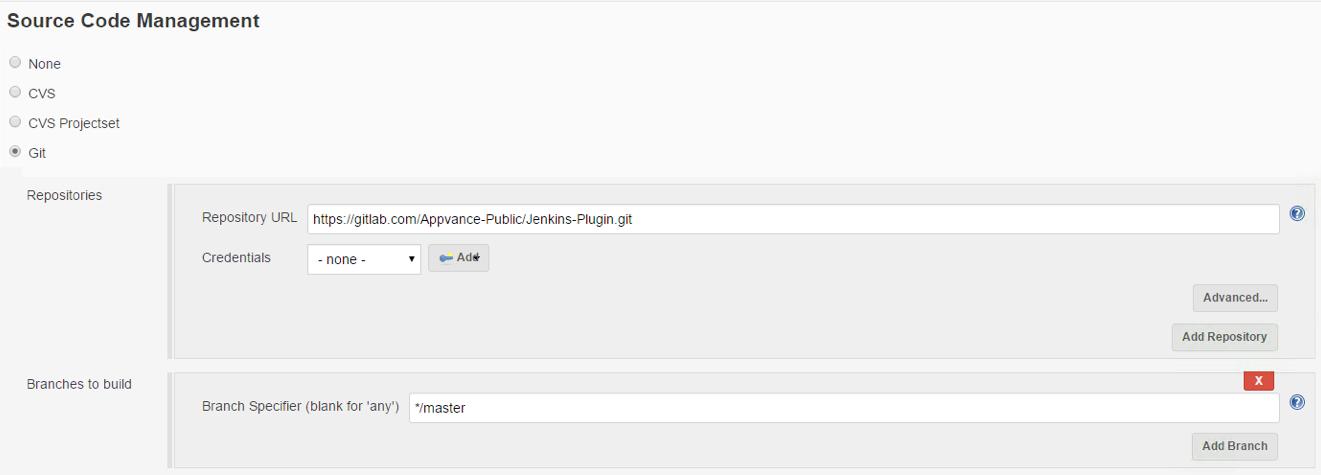
NOTE: Please make sure to install git on the machine where Jenkins is installed, once installed please restart Jenkins service.
Download git from https://git-scm.com/downloads based on your operation system.
- If self-hosted
- Select your source code management provider and enter the URL to your hosted plugin in the Repository URL box
Configure Scenario to Run
ServerURL=<urlToAppvanceUTPServerIncludingPort>
Path=REPOSITORY/<pathToScenarioFileIncludingScenarioNameAndFileExtension>
Username=<appvanceUserName>
Password=<appvancePassword>
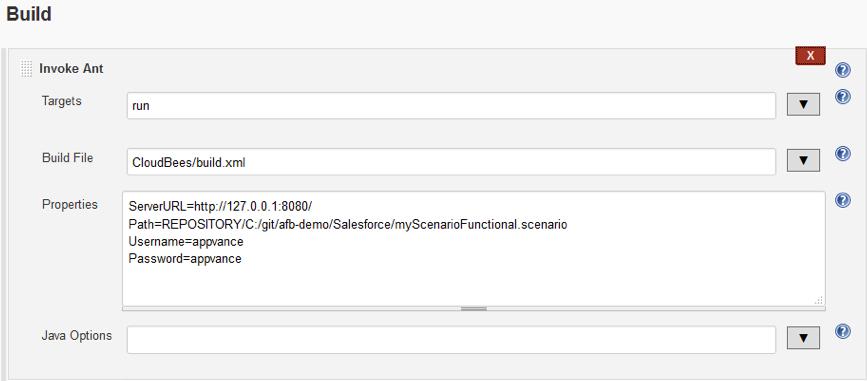
Notice the Path value contains REPOSITORY. Using the cloud version of Jenkins, users should specify scenarios available from a repository (i.e. SVN or GIT)
To run scenarios using local files, Jenkins must be installed on a local machine, after which local paths can be specified in place of REPOSITORY paths using SERVER.
Click Save
Running a Scenario
Appvance IQ logging, and a URL to further results, appear in Console Output as part of the project build logs.
Last updated: June 26, 2023
If you have any feedback on this topic, please contact us at documentation@appvance.ai