
Appvance CICD
Appvance AI – CI Integration
Abstract
The purpose of this document is to give an initial guide about the implementation of Appvance IQ scenarios and blueprints in a CI tool.
Introduction
Appvance IQ can provide integrated smoke-test testing for any web-based application’s builds. All manual and AI-generated UX scripts are written in Test Designer. Test Designer is our technology in UX automation, that includes "state of the art" features like codeless mode, accessor fallback, accessor self-healing, auto-validation with SmartTags, support for all major browsers, and platforms, and support for major frameworks like Angular, KendoJS, ViewJS and others.
The solution involves three main components:
SOLUTION
Our technology is completely restful, so in order to trigger a build, you can use any CI tool able to trigger an HTTP call. We can provide an ANT-based solution to easily integrate with TeamCity to launch builds, tests, and upload results to an online set of Dashboards showing the results. To easily launch Appvance IQ processes you will need the AppvanceRestClient.
Appvance Rest Client
The Appvance Rest Client enables any CI tool to connect to Appvance. It can be used from any CI Engines that support ANT tasks like GitLab, Jenkins, TeamCity, Circle CI, Bamboo, etc. The Appvance Rest Client is a .jar that is located here https://s3-us-west-2.amazonaws.com/appvanceivy/projects/AppvanceCIClientWithDeps/master/latest/ivy
You can use the following line inside abuild.xmlfile (sample included in a .zip below) target to download and name it as AppvanceRestClientWithDeps.jar:
<get src="https://[aiq-controller-domain]:8443/UI/container/AppvanceCIClientWithDeps.jar" dest="${lib}/RestClient.jar"/>Find in the next section a zip with a complete setup including the build.xml file.
Triggering AppvanceIQ pipelines using Apache ANT Targets
Providing a CI tool with support for Ant tasks, like Jenkins, whole integration can be accomplished by Ant jobs. The only requirement is to set up a repository with a build.xml that has the targets and that also downloads our RestClient.jar. We currently can provide this data as a starting point, assuming some changes will be requested to adjust to any required workflow.
Here is a.zip that includes all required files, including a sample documented build.xml: CICD_Pipeline_demo.zip
Setting the CI Tool (Jenkins used as example)
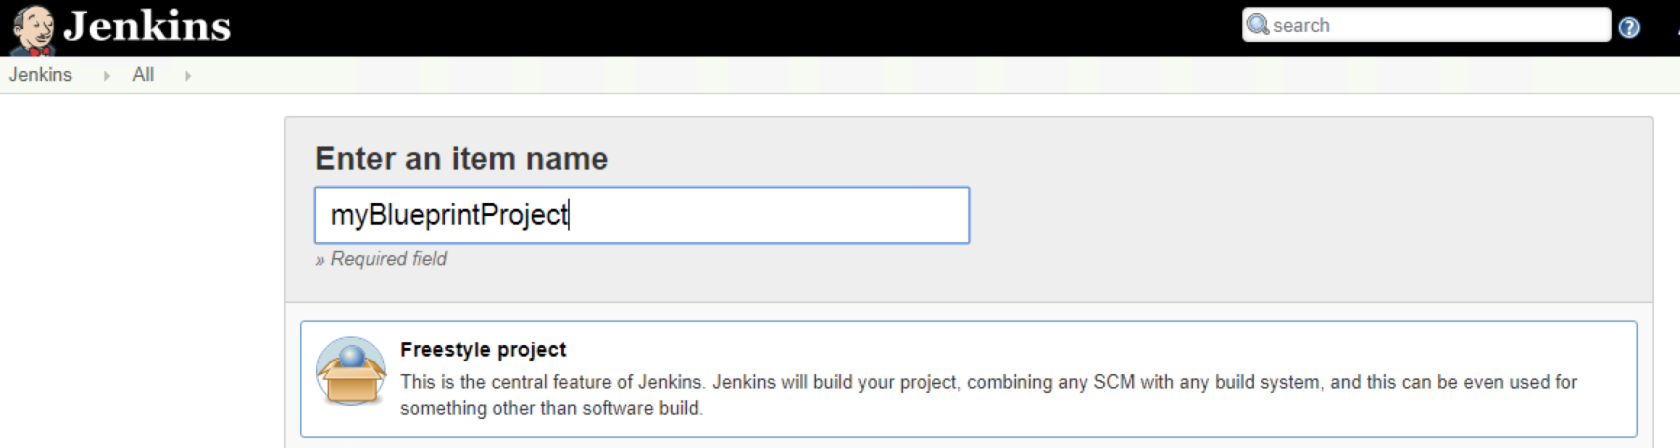
Create a free style project in Jenkins. Make sure ANT_HOME is properly set in the system as this is required:
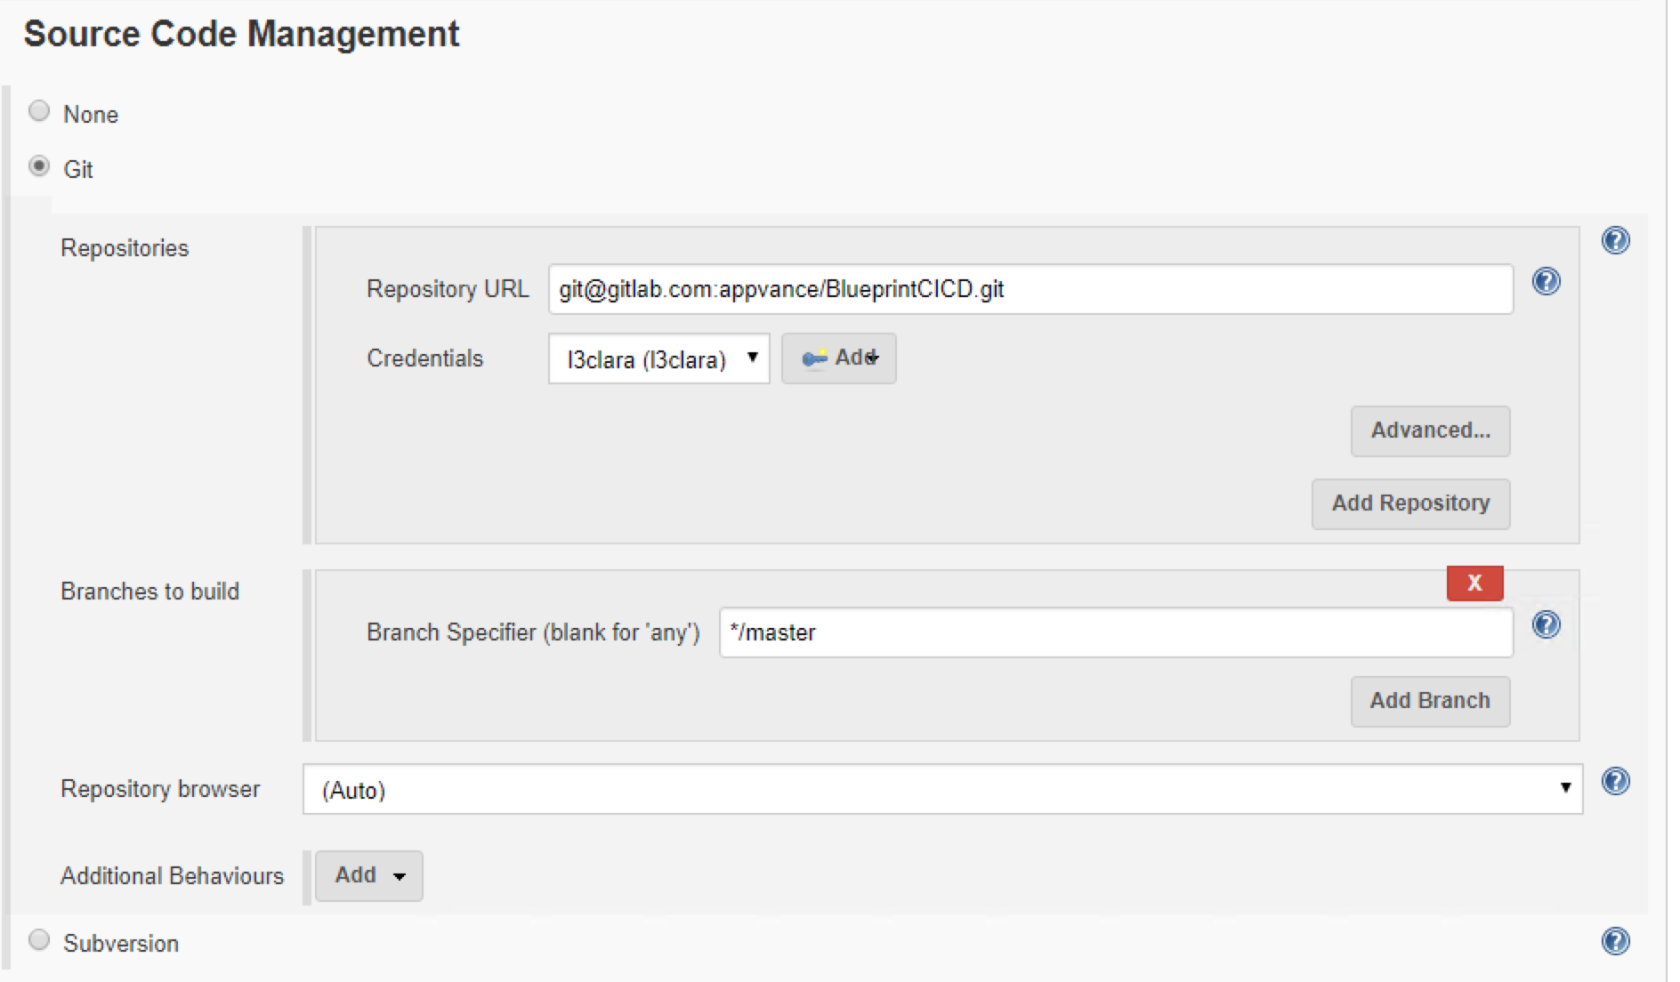
Configure the repository that has the required files (4.3.1) in the project:
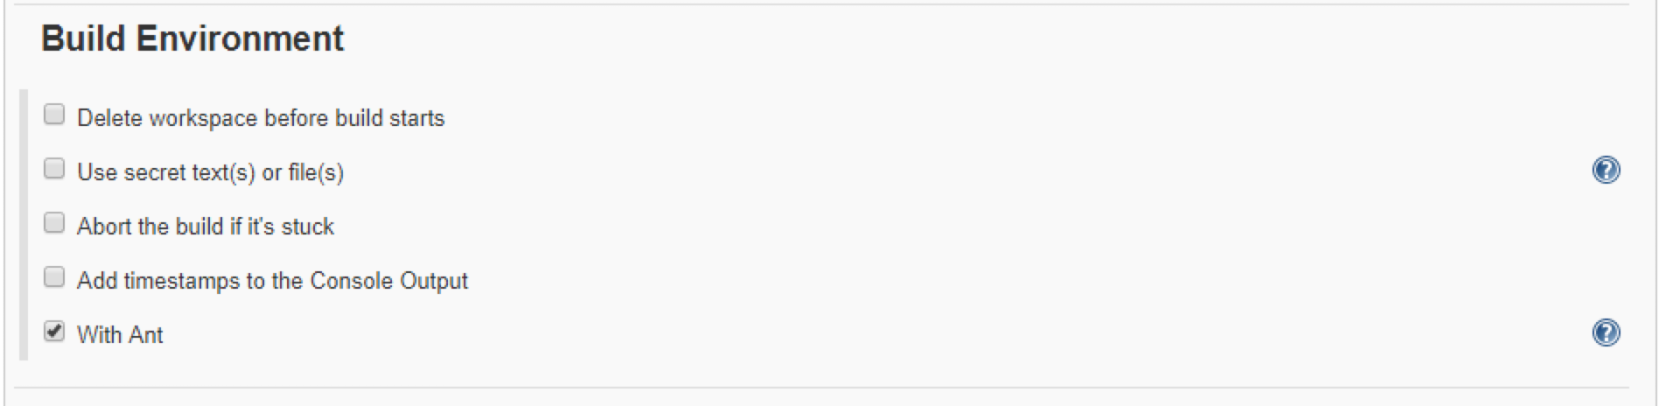
Set the Build Environment to use Ant targets:
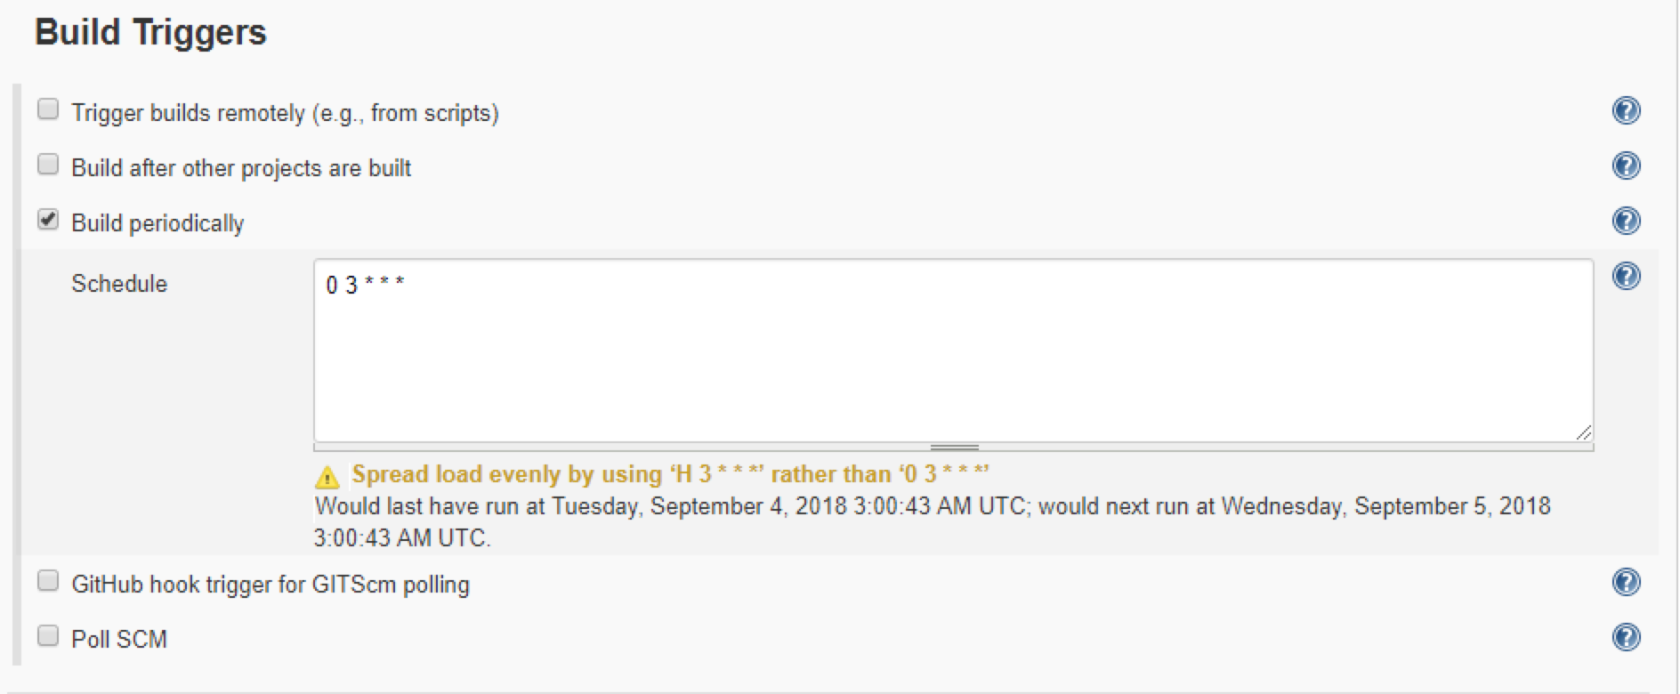
Set the trigger configuration as you want. In the image, the trigger is set to run once daily, but you can set the Poll SCM option to configure the trigger to happen once the polling of a given repository detects new commits.
Next step is to add an Ant Job in the Build section:
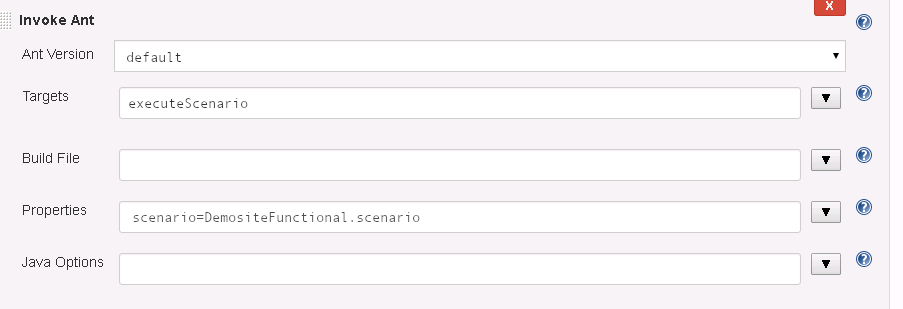
Some available Target Descriptions
Ant Task
Description
Parameters
createBlueprint
Takes as main input a Template file that contains the smartTag library information, the custom actions, URL, number of browsers. This template was defined in the initial AI setup. With this template, the AI system is able to create a fresh blueprint of the AUT on each triggered execution. The blueprint is saved in a provided output folder.
templateaiqCreds
dataset
buildVersion
outputFolder
elementName
requestMaxDurationconsoleDetails
reportStatusCode
consoleDetails
forceNewScan createScenariosDashboard Create the scenario HTML and configuration files
(needs executeScenario target to be executed first) elementName (name of scenario)
resultsFolder
reportFolder
environment
product ("Name of product")
executionType ("scenarios")
buildVersion
consoleDetails
bucketBase
aiqCreds startNode It starts an AWS EC2 instance to be used as an Appvance IQ test node. Writes the consoleDetails file with the information of the started node stopNode Stops an AWS EC2 instance used as an Appvance IQ test node. Gets the data from the consoleDetails file.
checkScenarioResults
Verifies if there were more than a user-defined number of request returning status error codes greater or equal to the requestMaxDuration (specified in CreateBlueprint)
Add -1 as parameter value to ignore that metric.
maxFailures
minSuccessPercentage
reports (destination folder)
maxFailingRequests
maxValidationFailures
minValidationRatio
reportUpload
Uploads to the Dashboard all the reports gathered from the Blueprint creation process.
(called by createScenariosDashboard and blueprintDashboard calls)
credentials
bucketBase
reportFolder
executionType ("blueprints" or "scenarios")
environment ( "QA1", "QA2", "QAn", "Production")product ( i.e.: CustormerSite.com to test )
executeScenario
Ant Task used to execute an Appvance IQ scenario. Use this to run your must-have validation scripts.
scenario
aiqCreds
consoleDetails
dir
blueprintDashboard
Creates the Blueprint HTML dashboard with the blueprint execution results
(needs createBlueprint target to be executed first)
customer
bucketBase
executionType ("blueprints" or "scenarios")
environment ( "QA1", "QA2", "QAn", "Production")product ( i.e.: CustormerSite.com to test )
generateRegressionScenario
Uses server access logs and the blueprint to create AI-generated scripts in a ready to run regression scenario. (This scenario can then be executed with the executeScenario build target)
projectName
fileConfig
aiqCreds
logsRemoteFolder
outputFolder
jiraCreds
reportFolder
ticketId
maxFailures
minSuccessPercentage
jiraApiVersion
projectName;
buildNumber;
branch;
reportFolder; FetchScenarioResults Save scenario results in a JUnit format, using the resultFolder parameter
aiqCreds
scenario
scenarioDir
consoleDetails
resultsFolder
stopOnFailure
credentials
bucketBase
localFolder
remoteFolder
REPORTING AND DASHBOARDS
We will have several levels of Summary Dashboard.
Show global summarized data at environment (stage) level (alpha, beta, staging, qa4, etc) and per product (web player, IOS player, Android Player)
Product A
Environment A
LastExecution "Scenarios", Link to history dashboard and link to execution report
LastExecution "Blueprints", Link to history dashboard and link to execution report
Environment B
LastExecution "Scenarios", Link to history dashboard and link to execution report
LastExecution "Blueprints", Link to history dashboard and link to execution report
History Dashboard
This shows all the latest tests and blueprints ran per each environment per product, like this one:
below will be other environments (stages) if available. Execution Historic Dashboard
If you click one of the above rows, it will show the historical summaries for results on that specific test/blueprint. Single execution Details
Clicking on an individual execution in the previous Execution Historical Dashboard we will see specific details on that test successes and failures.
Sample AI Main dashboard report:
In the following link you will be able to see a sample dashboard for an AI Blueprint scanning.
https://appvance-dev-cicd.s3-us-west-2.amazonaws.com/products/main.html
A triggering system using CURL using Appvance Gitlab and Amazon AWS IT
This section is added as an example of other possible ways to interact with Appvance IQ. Currently, some clients do prefer us to manage this integrationusing our Gitlab and Amazon AWS ITand they use CURL to trigger builds when they want. So, to trigger a build in Linux/Windows using CURL the command line would be
curl -X POST -F token=TOKEN \
     -F ref=ENVIRONMENT \
     https://gitlab.com/api/v4/projects/PROJECT_ID/trigger/pipeline
Clearly replacing TOKEN, and PROJECT_ID with values to be defined. The ENVIRONMENT can be QA4, Alpha, Staging, etc.
To trigger the first Smoke Test group, you can call
curl -X POST \
     -F token=TOKEN \
     -F ref=Staging \
     https://gitlab.com/api/v4/projects/9504048/trigger/pipeline
The result of the call is a JSON that looks like
{
   “id”: 39791847,
   “sha”: “c656bbbbc5844f342a677d28c3b21c1ad3c6e10ad”,
   “ref”: “QA4”,
   …
}
The important element is the “id”. Extract theidfrom the JSON file and use it to get the summary about successes and failures after the test ends, with this general format URL:
https://s3-us-west-2.amazonaws.com/ACCOUNT/projects/PROJECT_NAME/ENVIRONMENT/BUILD_ID/report.json
WhereACCOUNTis the client name,PROJECT_NAMEis the Project Name,ENVIRONMENTcan be for example QA4, Alpha, Staging, etc., andBUILD_IDcomes from above JSON response.
So for example, in the case of the above response, the results URL would be
https://s3-us-west-2.amazonaws.com/ACCOUNT/projects/Scenario_01to10/Staging/39789664/report.json
The result of thecall if the scenario has not yet finished executingis an HTTP 403. Forbidden Response
The result of the call when the scenario has already finished is a valid JSON file that indicates the count and name of successes and failures like:
{
   “nottested”: 1,
   “workingClasses”: [“MyAccont_1_QA4_DeepLinkTest”],
   “failures”: 0,
   “successes”: 1,
   “skippedClasses”: [],
   “failingClasses”: [],
   “project”: “MyAccount_Validations”,
   “buildNumber”: “40791847”,
   “branch”: “QA4”,
   “hash”: “2be843acd5622293087a32496c67d1bb”,
   “skipped”: 0
}
Accessing the HTML Dashboards from AWS S3
Fully detailed results about each project can be accessed using this URL
For blueprints: https:/BUCKET/s3-us-west-2.amazonaws.com//products/PRODUCT/ENVIRONMENT/EXECUTIONTYPE/BUILD_ID/blueprintExecution.html
For scenarios: https:/BUCKET.s3-us-west-2.amazonaws.com/products/PRODUCT/ENVIRONMENT/EXECUTIONTYPE/ELEMENTNAME/BUILD_ID/report.html
Last updated: March 13, 2024
If you have any feedback on this topic, please contact us at documentation@appvance.ai