
Run AIQ Tests with GitHub Actions CI/CD
Prerequisite:Last Attachedreviewed: file,September GITRepo.zip22, should2026
Use presentGitHub Actions to trigger AIQ executions from a repository workflow and publish the result back to the pipeline.
Recommended guidance
- Store AIQ tokens and environment values in GitHub Actions secrets.
- Pass scenario, project, dataset, and environment parameters explicitly.
- Use quality gates so failed AIQ executions fail the
GitHubworkflowrepowhen appropriate.
Validation workflow
- Create or update a workflow YAML file for the target branch or release event.
- Add a step that authenticates to AIQ using approved secrets.
- Trigger the AIQ execution through the supported CLI or API for your version.
- Capture execution ID, report URL, and result status as
shownworkflowinoutput. - Fail or pass the
firstjobsnapshot
The following files are available in the folder. The following information details the configuration changes need to be made.
Build.xml
controller.json
ec2.creds
Build.xml
Build.xml files hold the configuration settings and also all the defined ANT tags.
deps - Downloads the required AppvanceRestClientWithDeps.jar
startNode - Starts the mentioned EC2 instance using the file ec2.creds and controller.json files which holds details about account and instance details.setupEnvironment - Dependingbased on the parameters,agreed we could use this to set up the environment.
executeScenarioNote: -Do Executesnot theprint mentionedcredentials scenarios.
stopNode - Stops the instance once the execution is done.
createScenariosDashboard - This tag will create the Scenario Dashboard once execution is complete.
createScenariosDashboard - This tag will create the Scenario Dashboard once execution is complete.
AISG Related Targets
blueprintCreation - Starts the creation of the AISG.
reportUpload - uploads the smoke test report, timing report and a BlueprintReport.html which is a human-readable report.uploads the smoke test report, timing report and a BlueprintReport.html which is a human-readable report.
blueprintDashboard: this target generates an HTML report that includes the history of all previous build reports and uploads it to an S3 bucket.
checkResult: this target checks the AISG generated report and it will fail the build if the number of failures surpases a user defined parameter.
generateRegressionScenario - Generates the Regression scenarios.
Details about all the ant targets can be foundtokens in CICD- AntTags.
controller.json
Basically has details about the controller machine and the credentials. Above can be used when we have the EC2 set-up.
When we are running AIQ local builds, instances in the 2nd line could be replaced with "url" and full URL of the AIQ controller could be provided.
{
"controller": {
"url": "<http://<replace_IP>:8080",>
"instances": ["<replace_instanceID>"],
"ec2Creds": "ec2.creds",
"timeOut": 180,
"username": "<replace_username>",
"password": "<replace_password>",
"workFolder": "<replace_path/to/AIQ/resources>"
}
}
ec2.creds
ec2.creds will have details of the AWS account: This can be used when we are using AIQ Controller on the EC2 machine and when yours tests are run in the AWS cloud.
AWS_ACCESS_KEY_ID=<replace_awsKEYIDE>
AWS_SECRET_ACCESS_KEY=<replace_awsSecretAccessKey>
Required File Changes
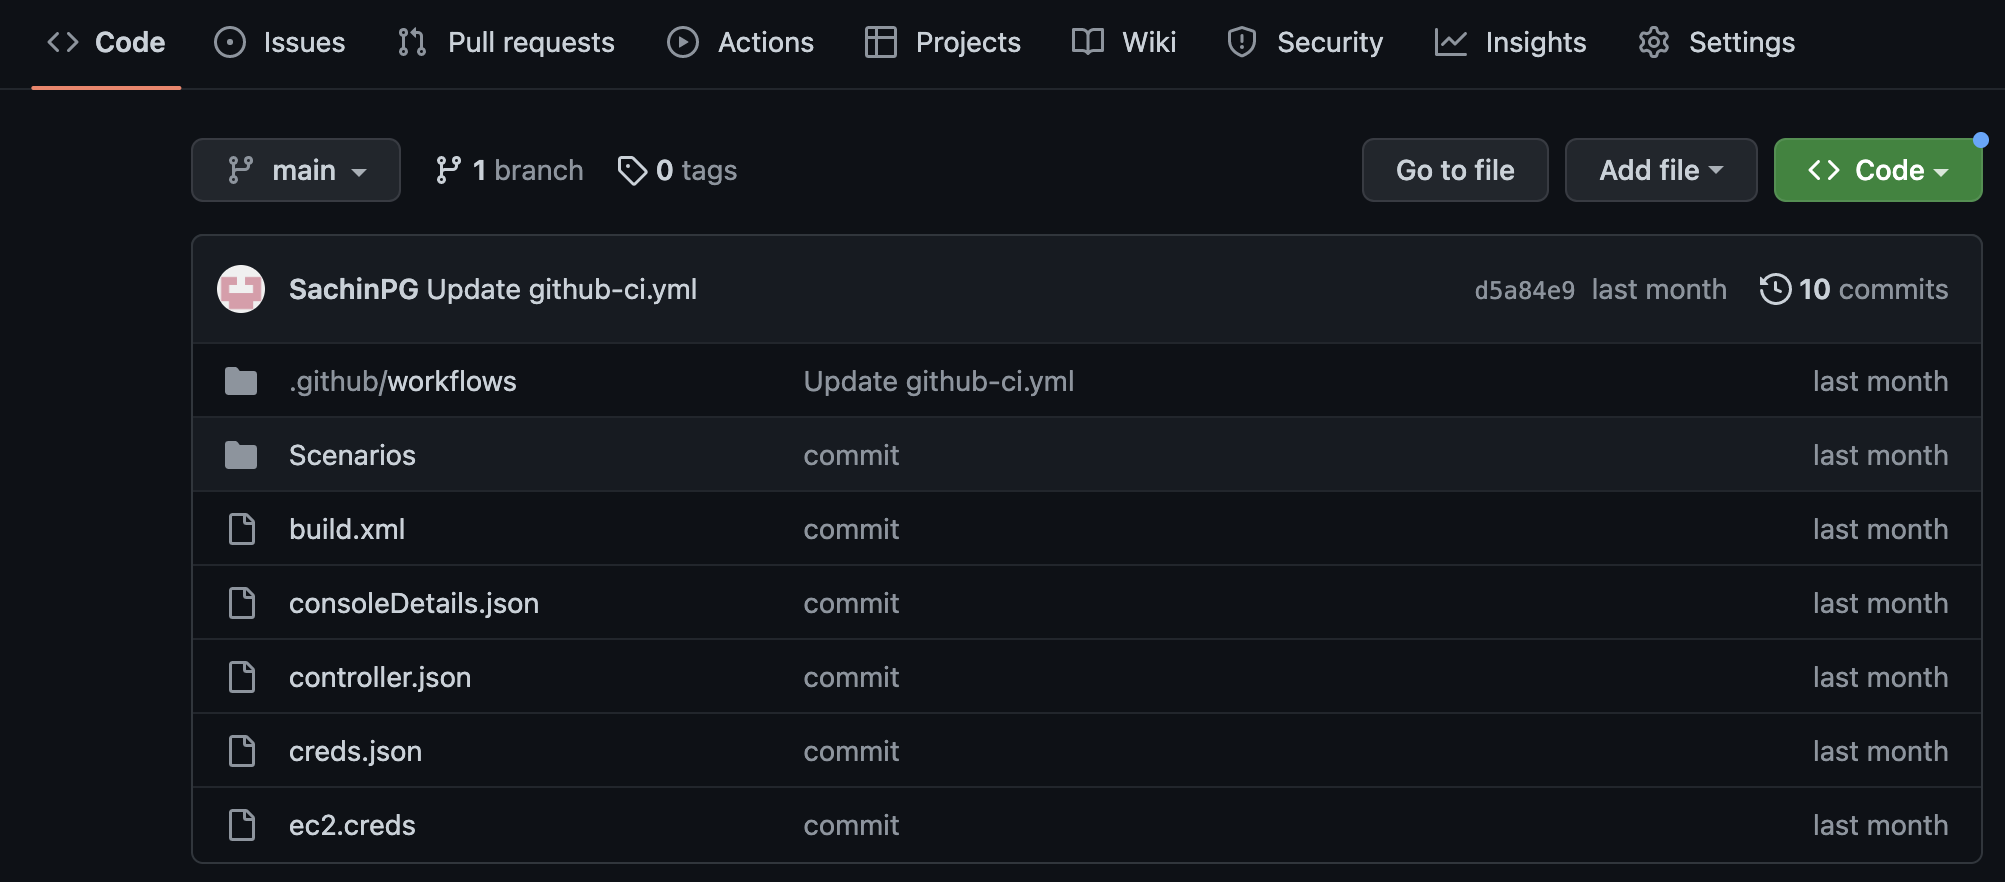
Once we login to GitHub click the Actions tabs and click New Workflowlogs.

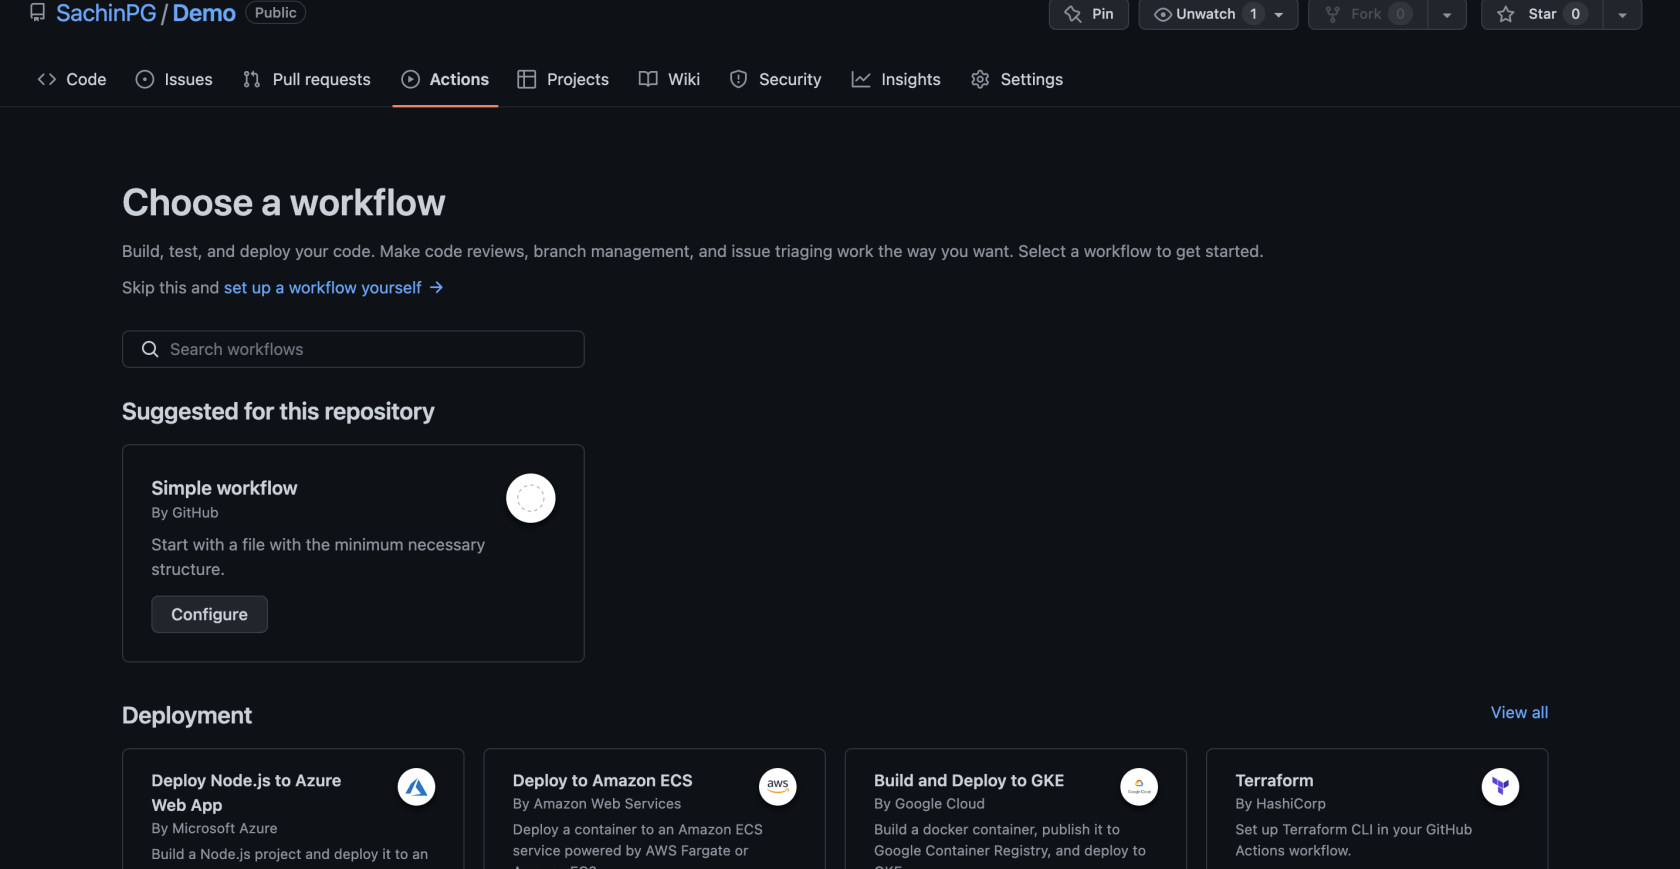
Click Simple Workflow by Github and paste the below code into the .yml Text Editor
name: CI-Create-Dashboard

on:
  push:
    branches:
      - master
  workflow_dispatch:

env:
  REGISTRY: <name of registry>jobs:
  lint:
    runs-on: ubuntu-latest
    name: Lint Code Base
    steps:
      - name: Checkout Code
        uses: actions/checkout@v3
        with:
          fetch-depth: 0
      - name: Lint Code Base
        uses: github/super-linter@v4
        env:
          VALIDATE_ALL_CODEBASE: false
          DEFAULT_BRANCH: master
          GITHUB_TOKEN: ${{ secrets.GITHUB_TOKEN }}

  build_and_push:
    runs-on: ubuntu-latest
    name: Build and push docker image
    needs: lint
    outputs:
      commit_hash: ${{ steps.commit_hash.outputs.commit_hash }}
    steps:
      - uses: actions/checkout@v3
      - name: Set up JDK 11
        uses: actions/setup-java@v3
        with:
          java-version: '11'
          distribution: 'adopt'
      - name: Build with Ant
        run: ant -noinput -buildfile build.xml

      - id: commit_hash
        run: echo "::set-output name=commit_hash::${GITHUB_SHA::7}"      - name: Login to <registry>        uses: docker/login-action@v2
        with:
          username: ${{ secrets.DOCKER_USER }}
          password: ${{ secrets.DOCKER_TOKEN }}

      - name: Build and push
        uses: docker/build-push-action@v3
        with:
          context: .
          push: true
          tags: |
            ${{ env.REGISTRY }}:${{ steps.commit_hash.outputs.commit_hash }}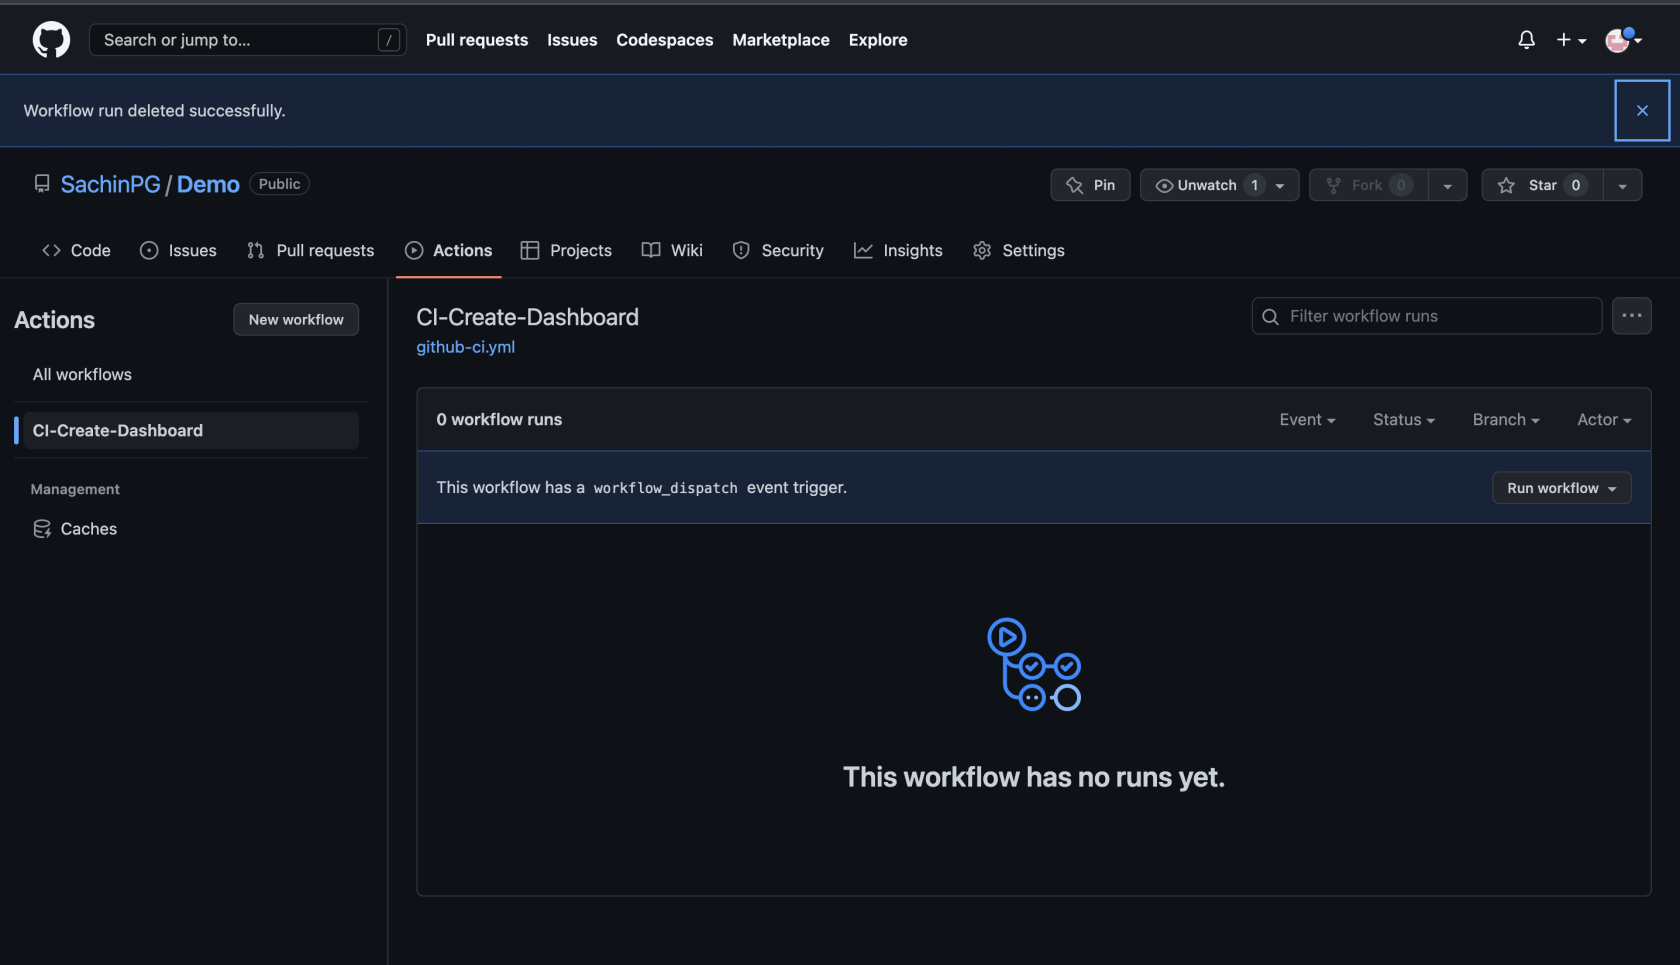
Click Run Workflow
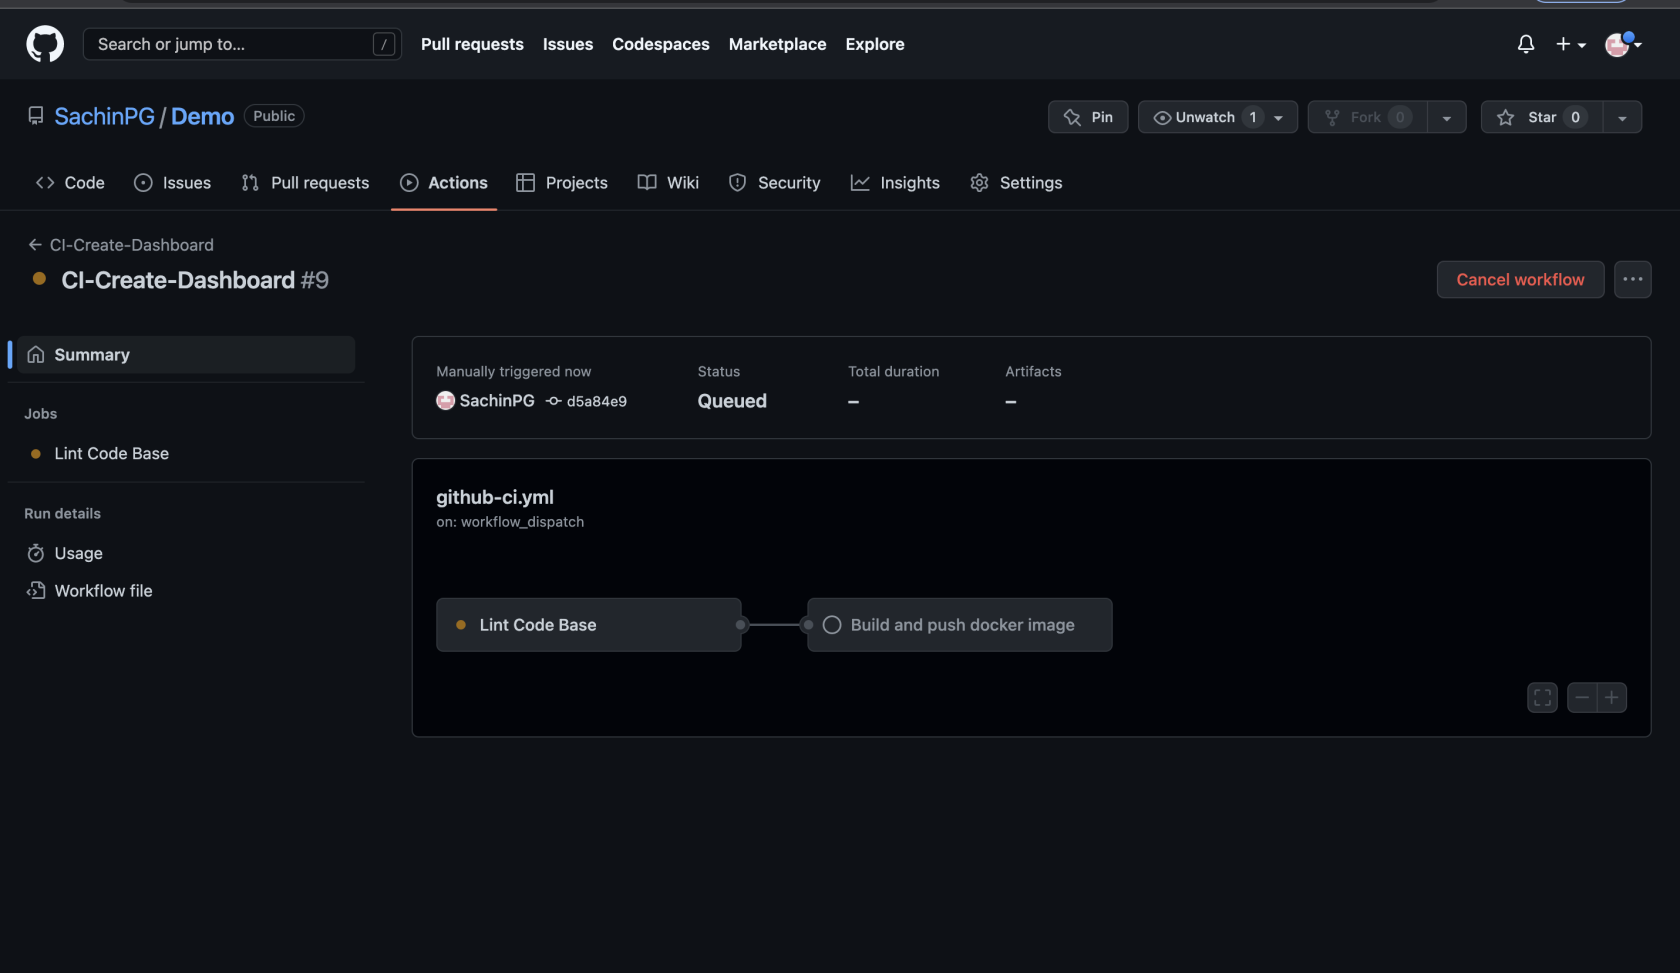
Last updated: JulySeptember 03,22, 20232026
If you have any feedback on this topic, please contact us at documentation@appvance.ai.