
How to run Jmeter DB script in AIQ
JMETER DB TESTING:
We assume that the reader has fair knowledge on how to run tests on Jmeter. This document is intended to explain how Jmeter DB testing works and provide the reader with the basic knowledge about the configuration needed in order to successfully configure and run a Jmeter DB test. We will be using the same Jmeter Db script to run in AIQ.
Steps to be followed are given below
1) Executing the script in Jmeter
Add Users
To create a Thread group,
Right-click Test Plan.
Select Add > Threads (Users) > Thread Group.
Thus, thread group gets added under the Test Plan node.
Rename this Thread Group as JDBC Users.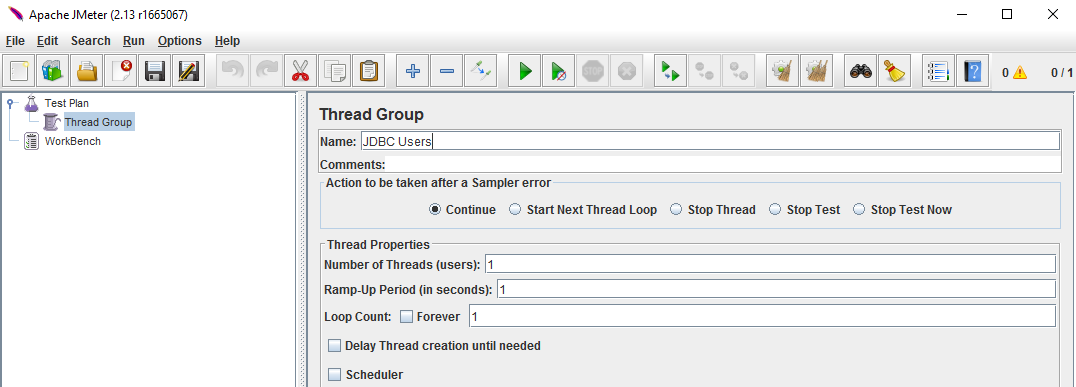
Adding JDBC Requests
Now that we defined our users, it is time to define the tasks that they will be performing. In this section, specify the JDBC requests to perform.
Right-click the JDBC Users element.
Select Add > Config Element > JDBC Connection Configuration.
Set up the following fields −
- Variable name bound to pool. This needs to identify the configuration uniquely. It is used by the JDBC Sampler to identify the configuration to be used. We have named it as DBPool.
- Database URL − jdbc:mysql://localhost:3306/utp.
- JDBC Driver class: com.mysql.jdbc.Driver.
- Username: utp.
- Password: password for utp.
The other fields on the screen are left as defaults as shown below −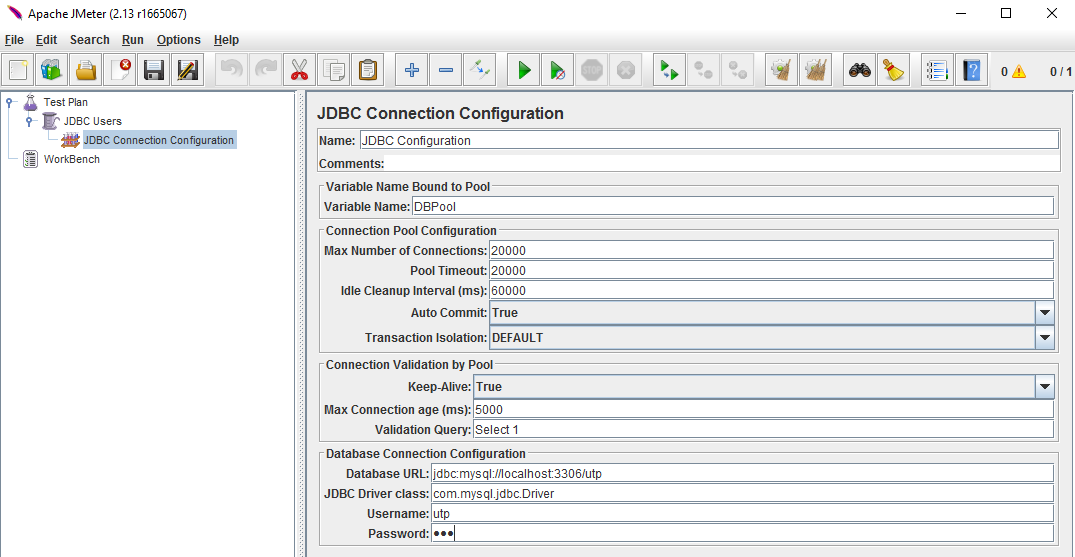
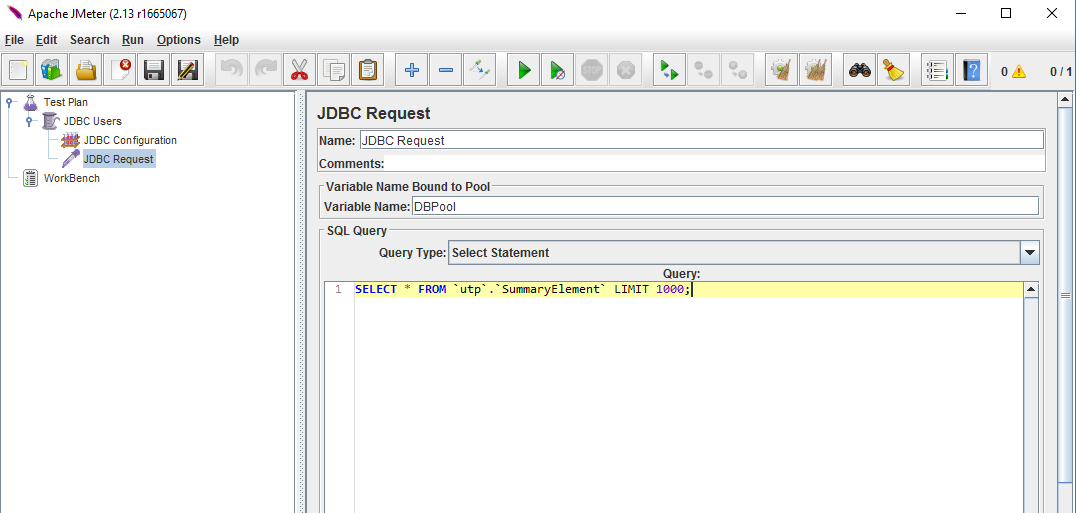
Now add a JDBC Request which refers to the JDBC Configuration pool defined above. Select JDBC Users element.
Click your right mouse button to get the Add menu
Select Add > Sampler > JDBC Request.
Select this new element to view its Control Panel.
Edit the properties as shown below −
- Variable name bound to pool. This needs to uniquely identify the configuration. It is used by the JDBC Sampler to identify the configuration to be used. Named it as DBPool.
- Name − JDBC Transaction.
- Enter the Pool Name − DBPool (same as in the configuration element).
- Query Type − Select statement. Enter the SQL Query String field.
Create Listener
Now add the Listener element. This element is responsible for storing all of the results of your JDBC requests in a file and presenting a visual model of the data
- Select the JDBC Users element
- Add a View Results Tree listener (Add > Listener > View Results Tree).
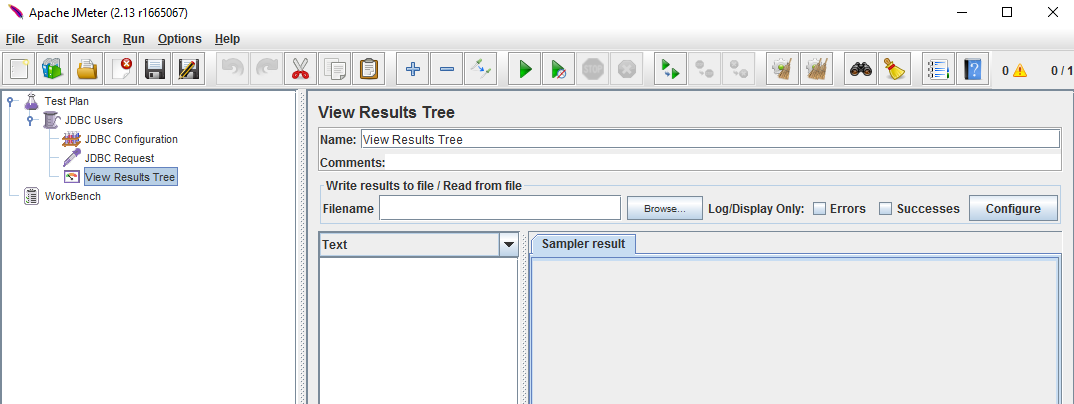
Now save the above test plan as db_test.jmx. Execute this test plan using Run > Start option. Once the test is completed you can go ahead and verify the output by clicking on "View Results Tree" shown below.
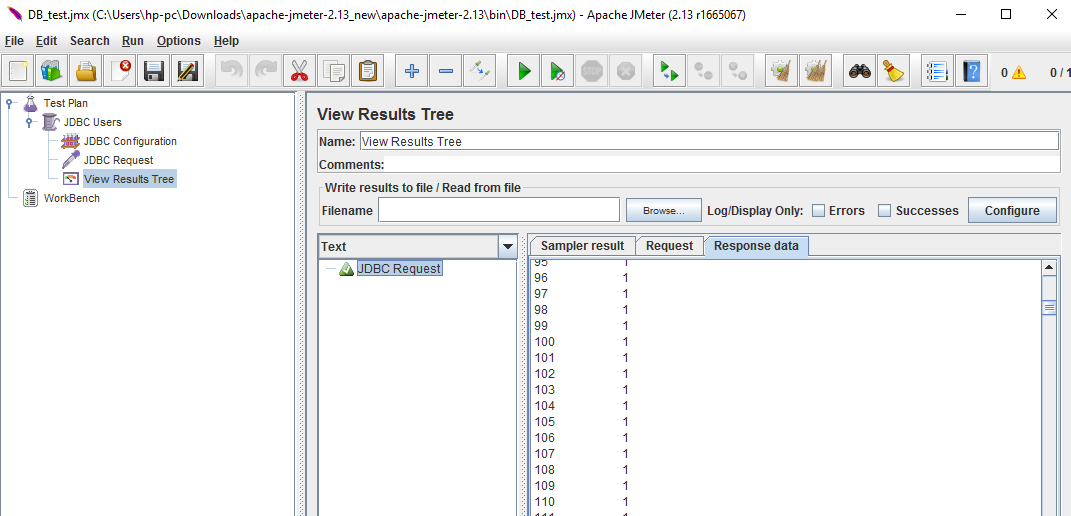
2) Run the Saved Jmeter script in AIQ
We assume that the reader has knowledge on how to create scenario and run the test in AIQ
User creates a new scenario and selects a functional test
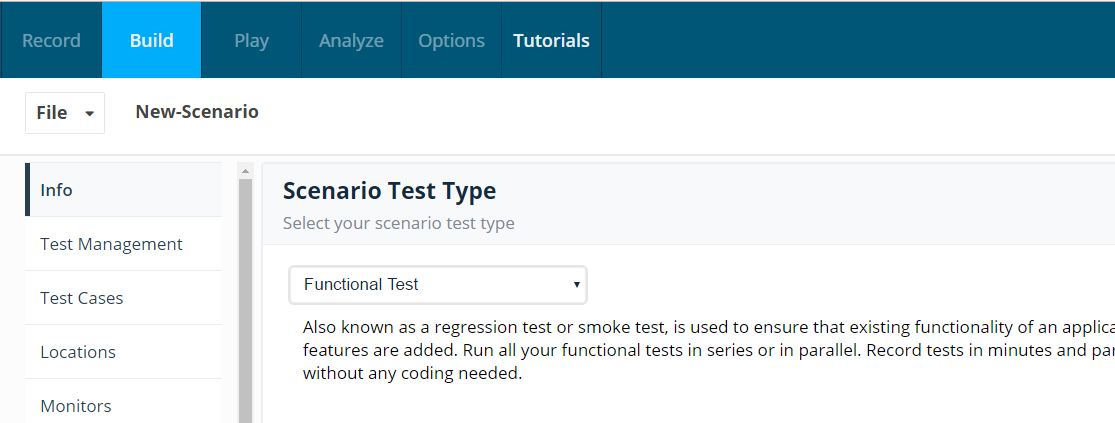
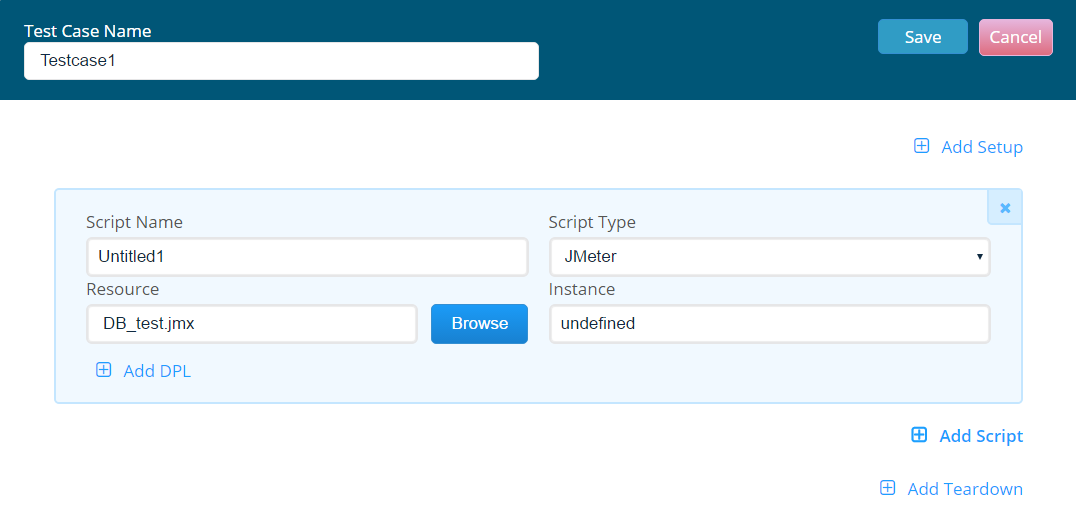
User now saves the scenario and runs the tests and navigates to Test Controller screen and verifies the output
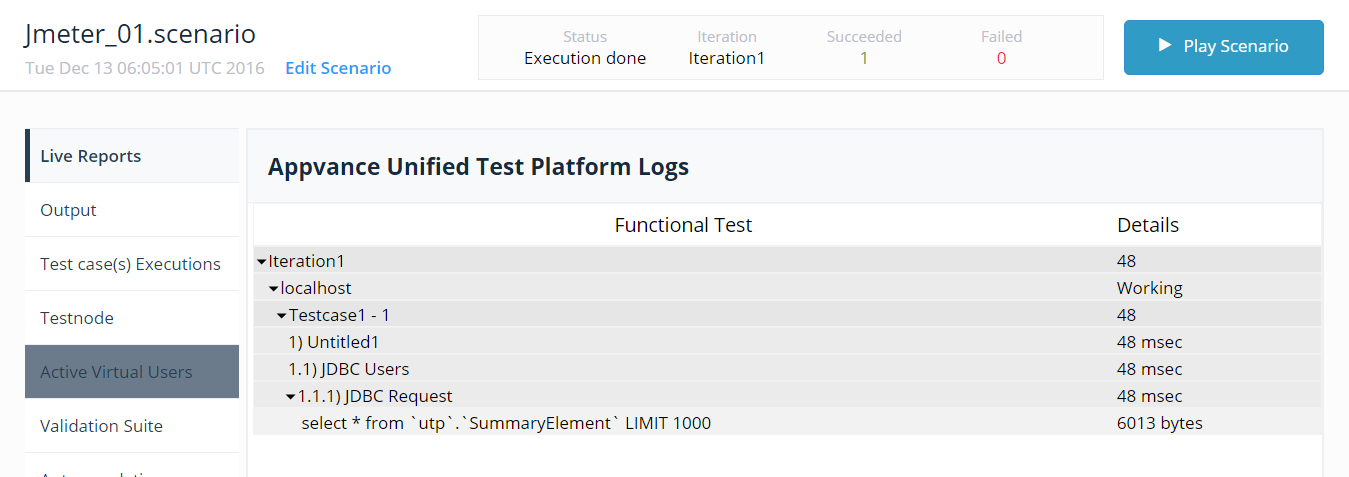
In the above scenario we are running a simple functional test in AIQ. However if the user wants to run a Load test we will have to make some changes in the Jmeter script. The below screenshot highlights the changes that needs to be done to run the Load test in APC
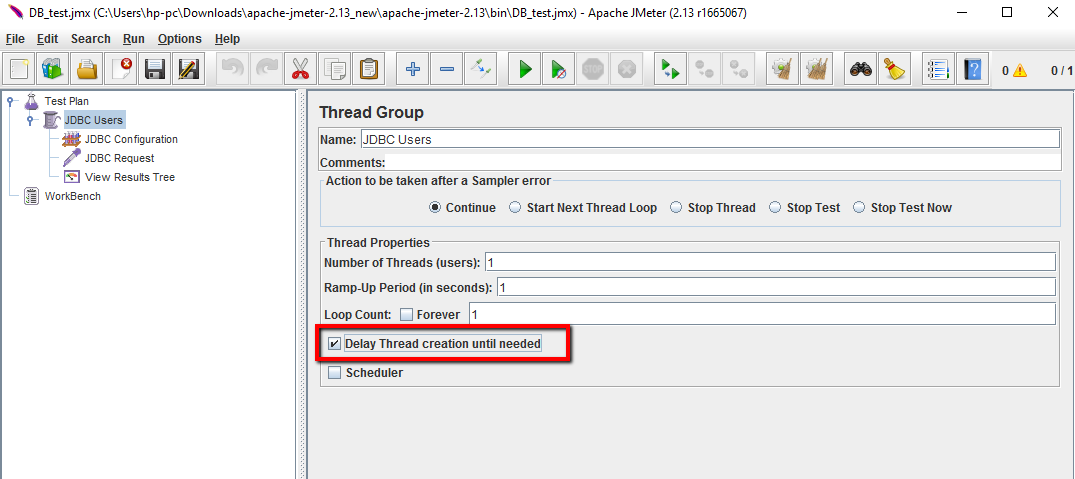
need to check in the Thread Group the option Delay Thread Creation Until Needed. Once the changes is made we can go ahead and save the script.
User creates a Load test scenario with 5 users and 100 executions
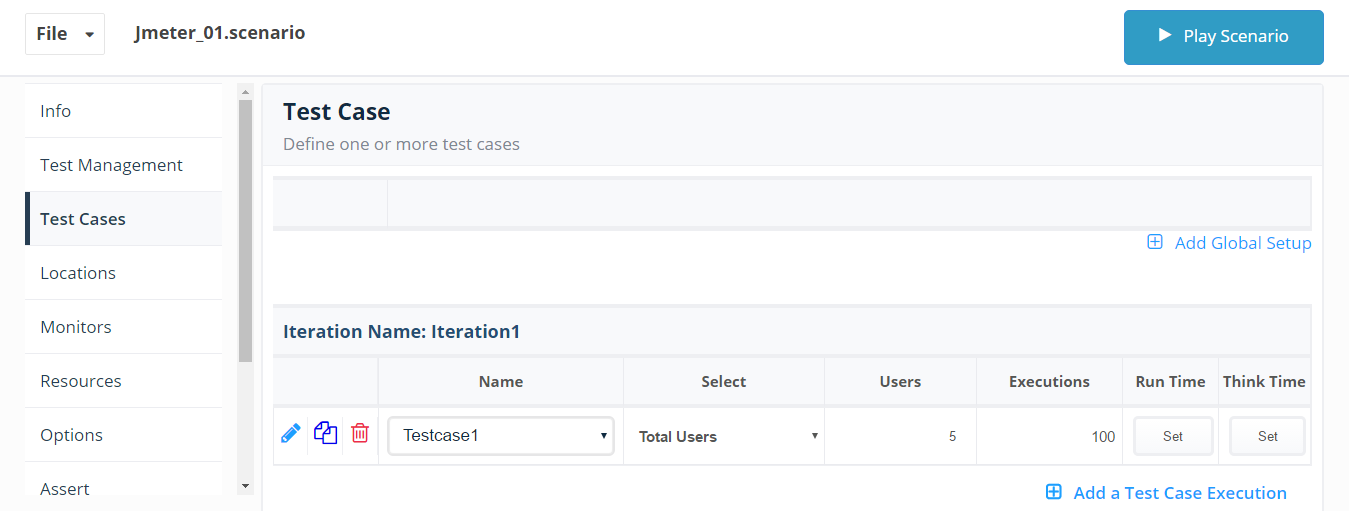
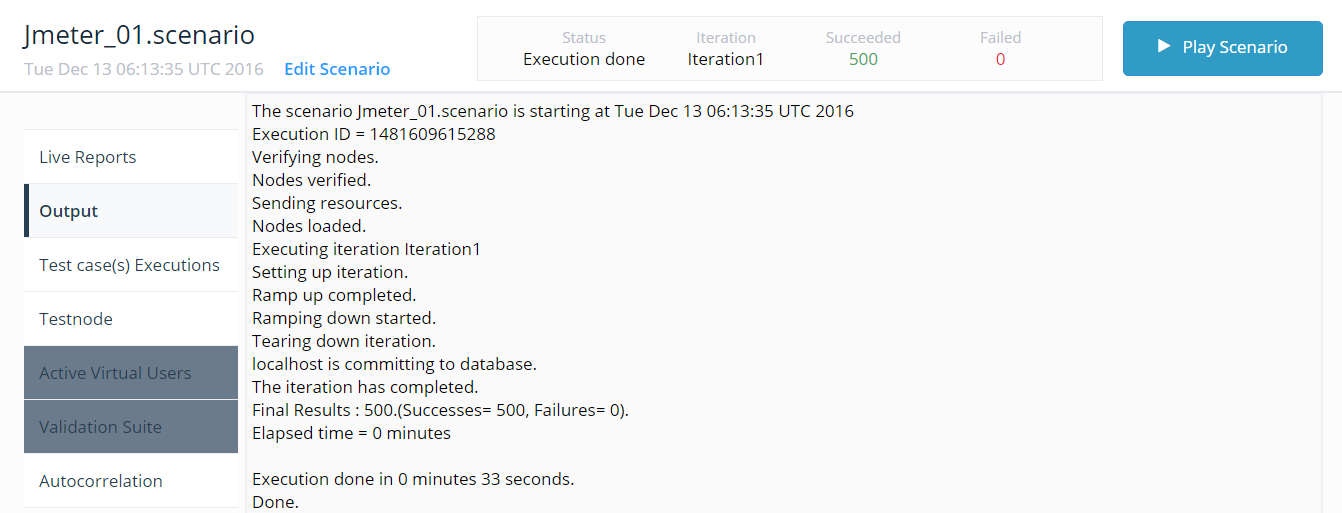
User now saves the scenario and runs the tests and navigates to Test Controller screen and verifies the output
Last updated: June 26, 2023
If you have any feedback on this topic, please contact us at documentation@appvance.ai