Visual Accessors in AISG
Visual Accessors will be automatically captured when elements have fewer than four fallback accessors. In addition to the automatically captured Visual Accessors you have the option to manually create Visual Accessors for any element. You can also manually create them from scratch if needed.
Support for Visual Accessors in AISG was added in AIQ release 5.2.0.
For general guidelines on using Visual Accessors see When to use Visual Accessors?
Enabling Visual Accessors in AISG
Enable the Visual Accessors toggle in the Advanced Setup in the AI Script Generation configuration for the AI execution.
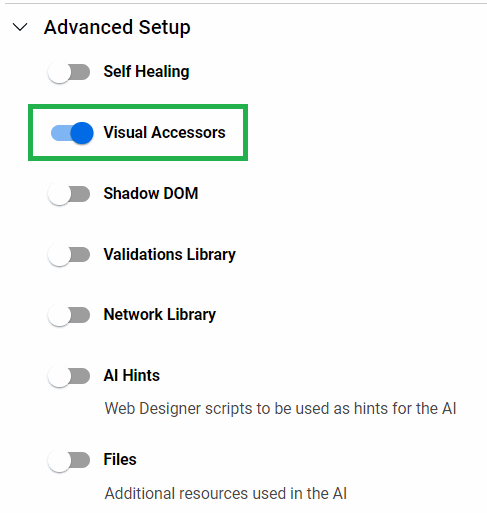
See the Advanced Setup Options section for more information on the available options.
Example
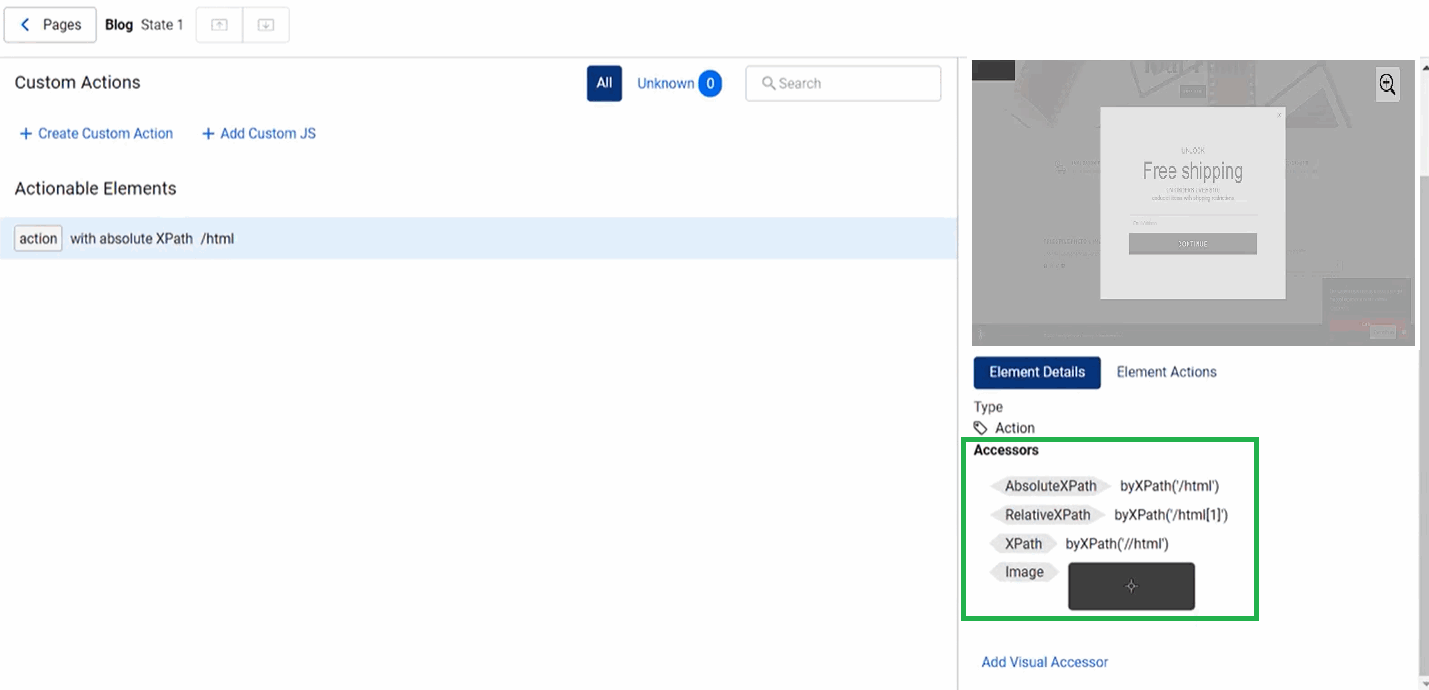
This example shows a situation where only three fallback accessors were identified, so a Visual Accessor was automatically added by the AI.
Visual Accessors are added at the end of the list of fallback accessors. This is for performance reasons. If AISG is able to match an element ID, it prefers to use that over a Visual Accessor. Using a Visual Accessor will slow down AISG, so it is used as a fallback accessor not as a primary accessor.
Manually Adding a Visual Accessor
Visual Accessors can be manually added. Here is a basic example of the process.
-
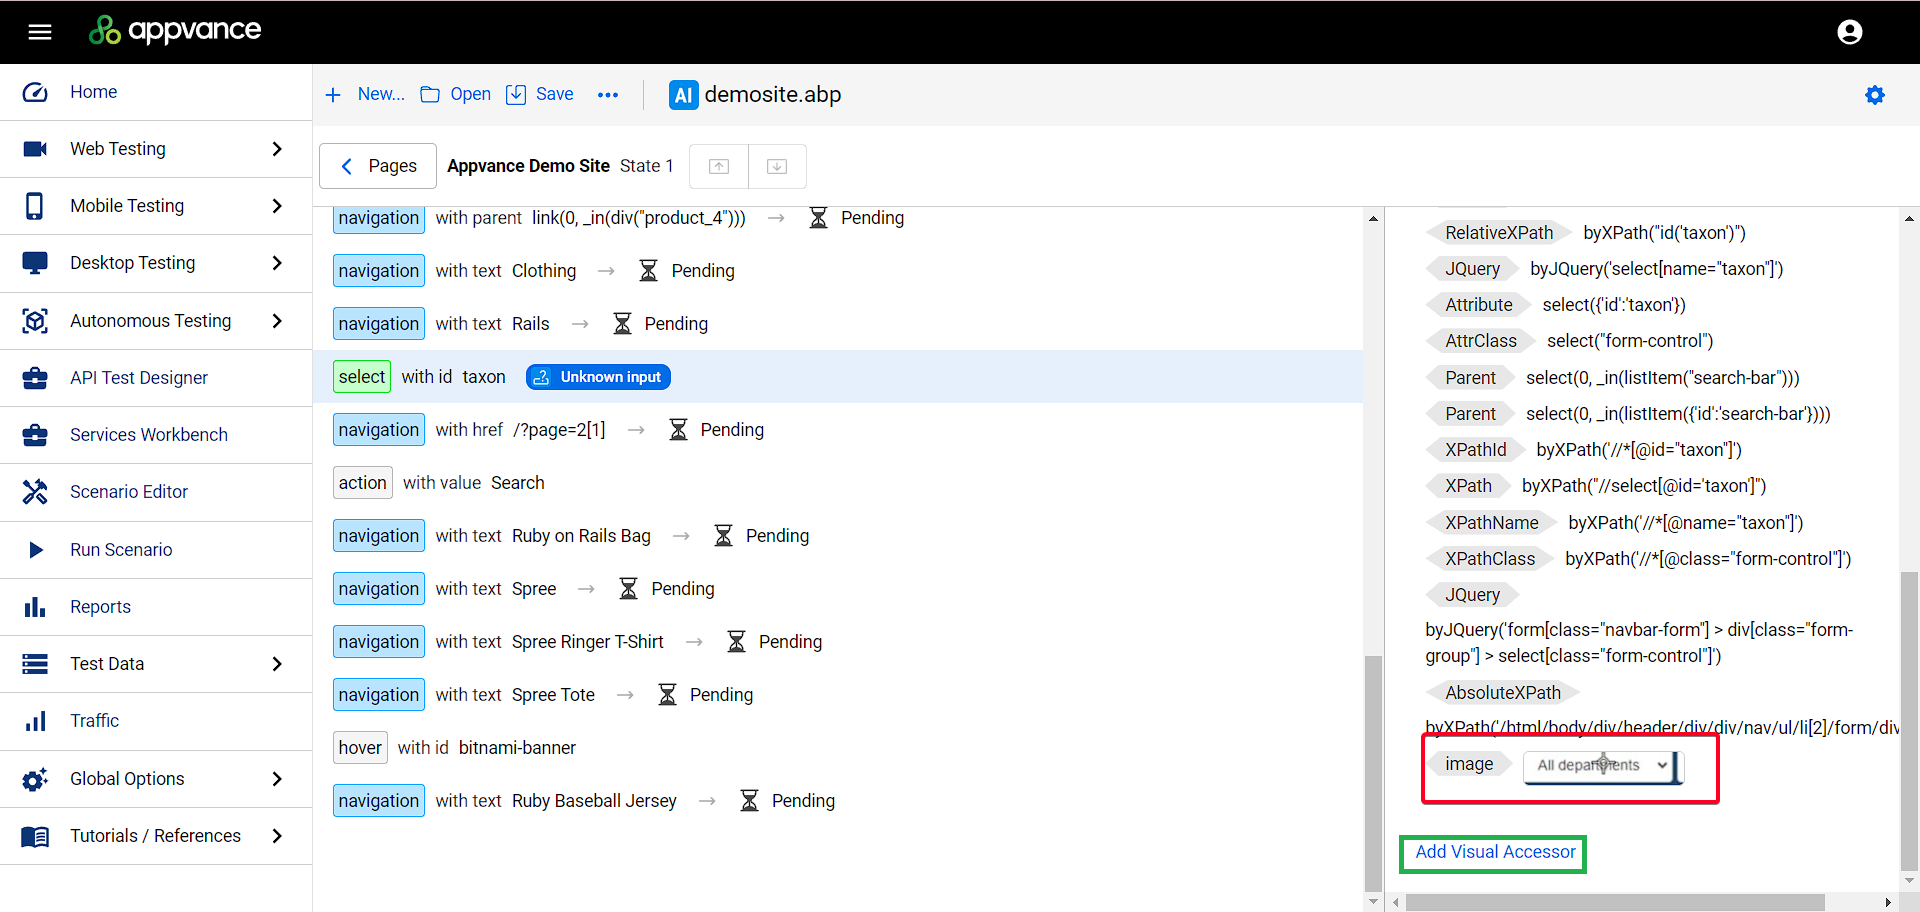
Navigate to a page state and select the element for which you want to add a Visual Accessor.
-
Click Add Visual Accessor.
-
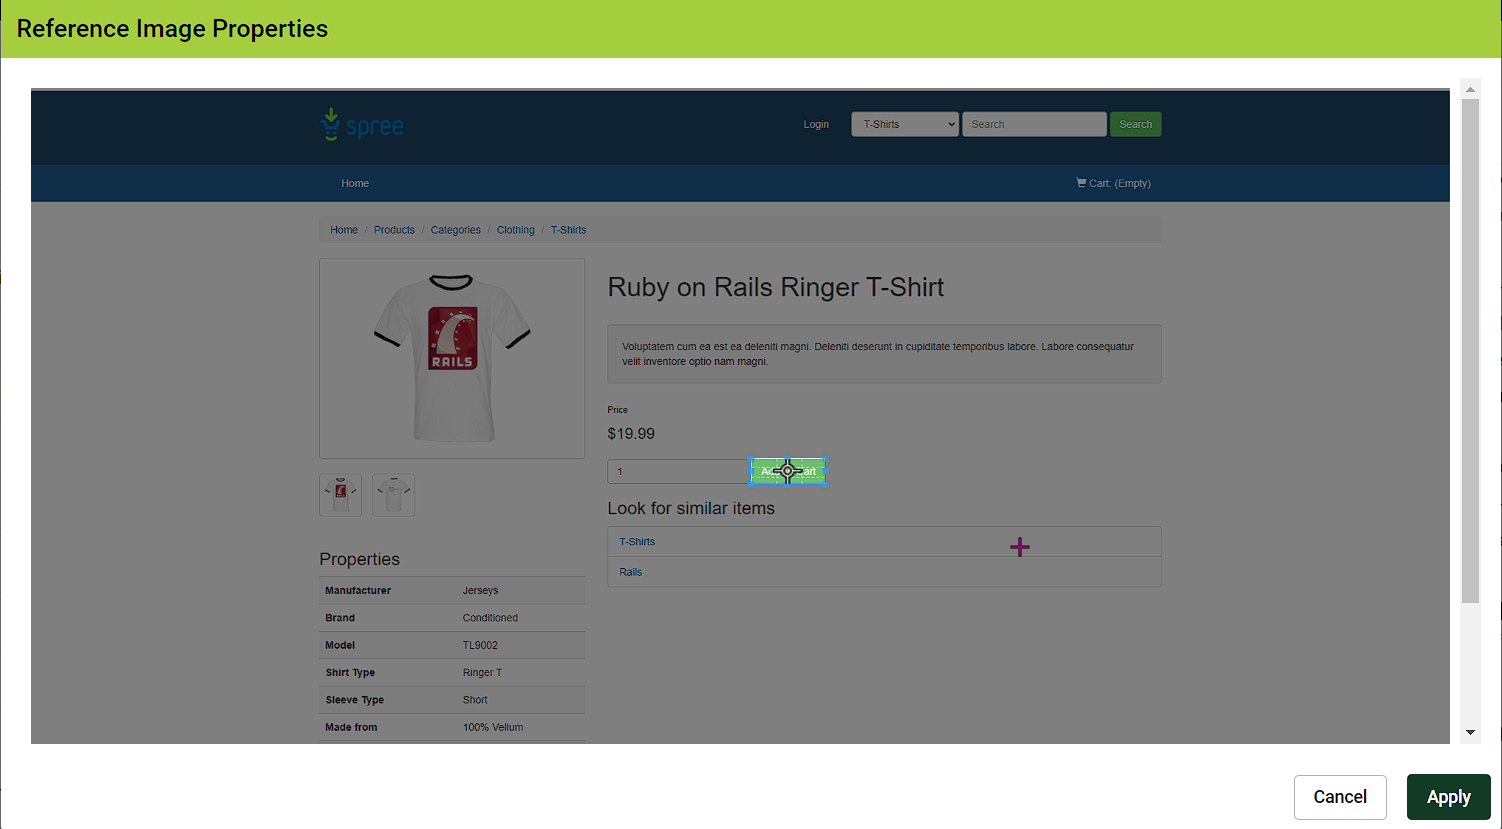
The Reference Image Properties window opens. From here, use the cursor to select your Visual Accessor.
-
Click Apply when you are done. The Visual Accessor is added.
Adding a Visual Accessor to a Custom Action
Visual Accessors can be added to Custom Actions. This is for situations where If you want to create a Visual Accessor for an element that was not identified by AISG.
Here is a basic example of the process.
See Creating Custom Actions for general information on adding Custom Actions to resolved failed actions in AISG executions.
-
Navigate to the Page State for which you want to create a Custom Action.
-
Click Create Custom Action.
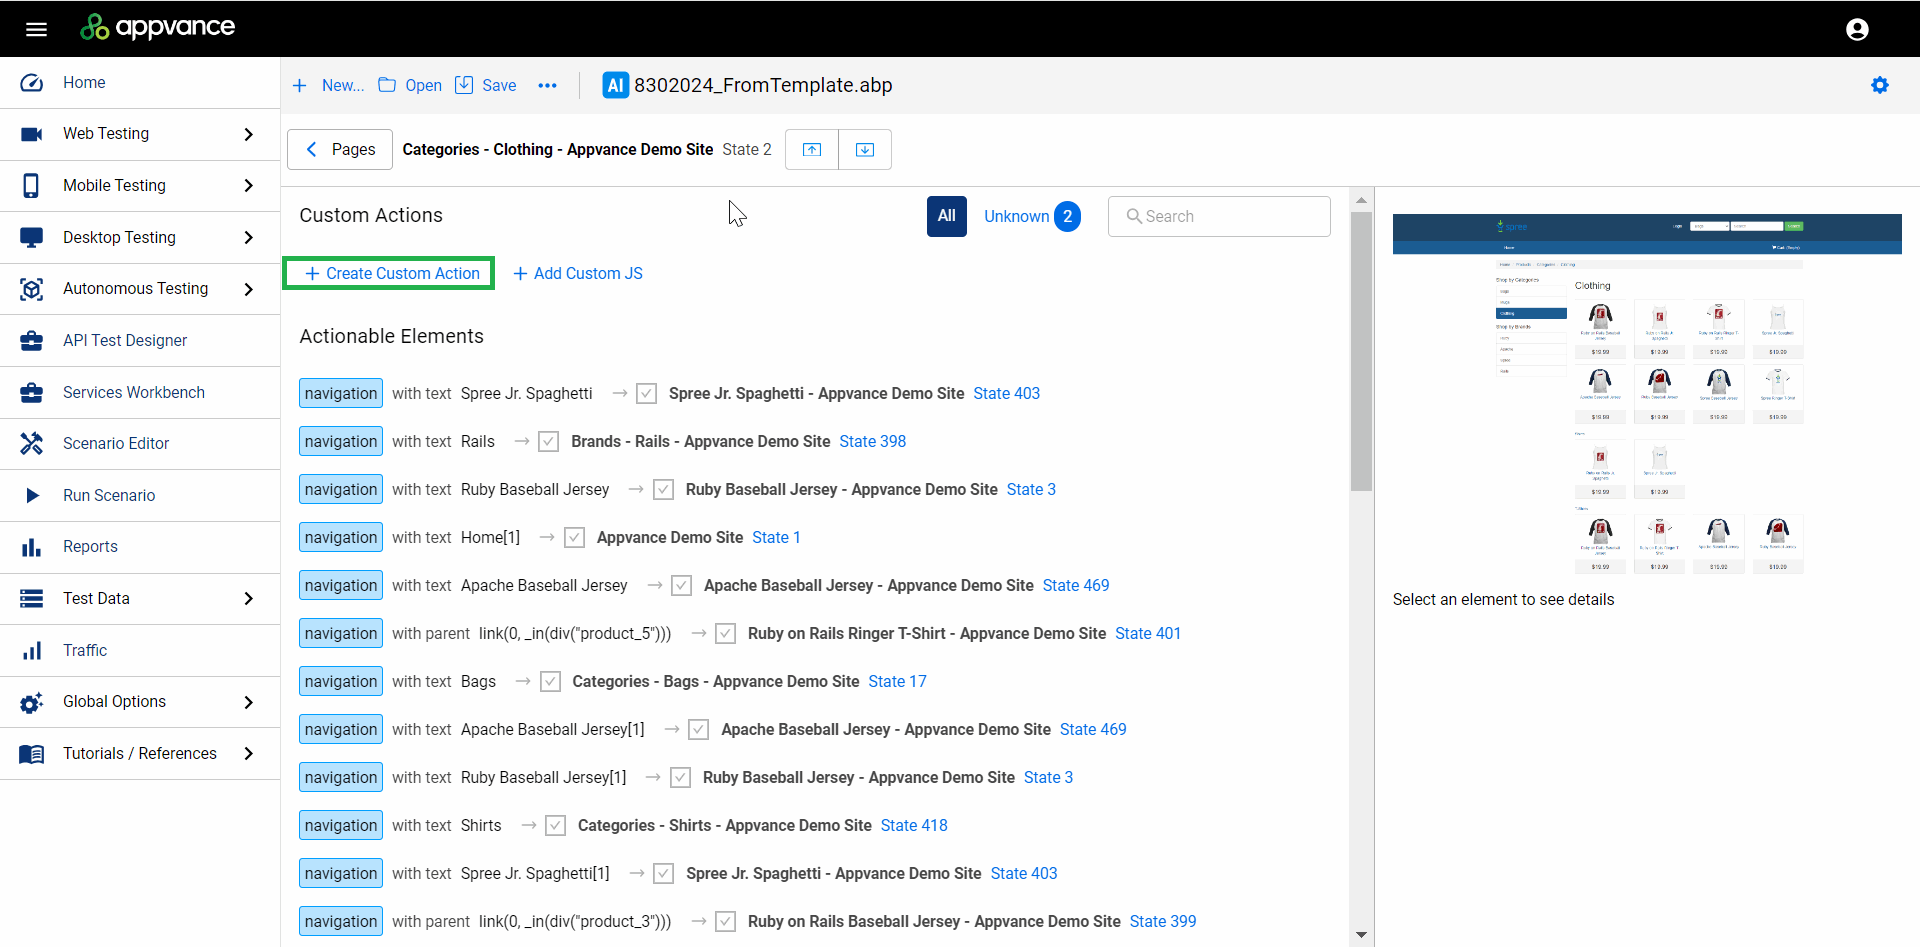
-
Select Visual Accessor and click Next.
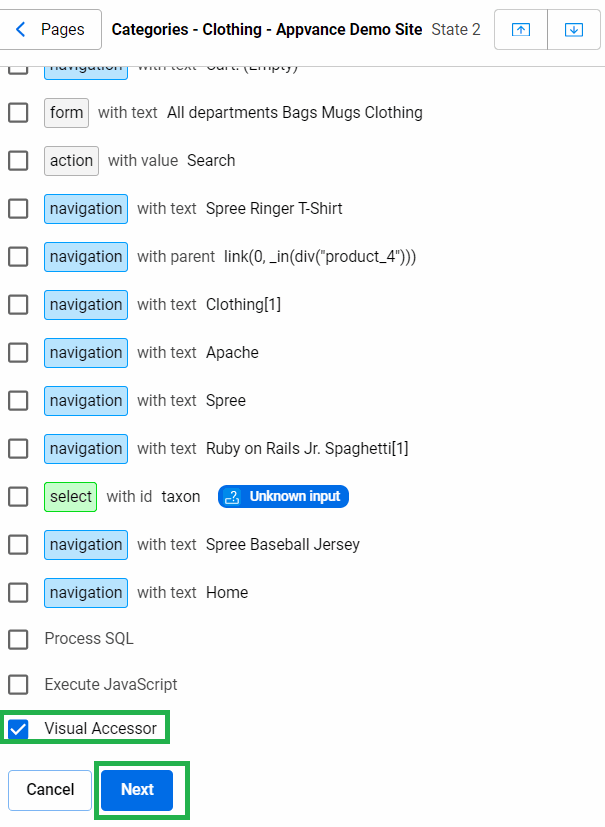
-
Click Select Visual Accesor.

-
The Reference Image Properties window opens. From here, use the cursor to select your Visual Accessor.
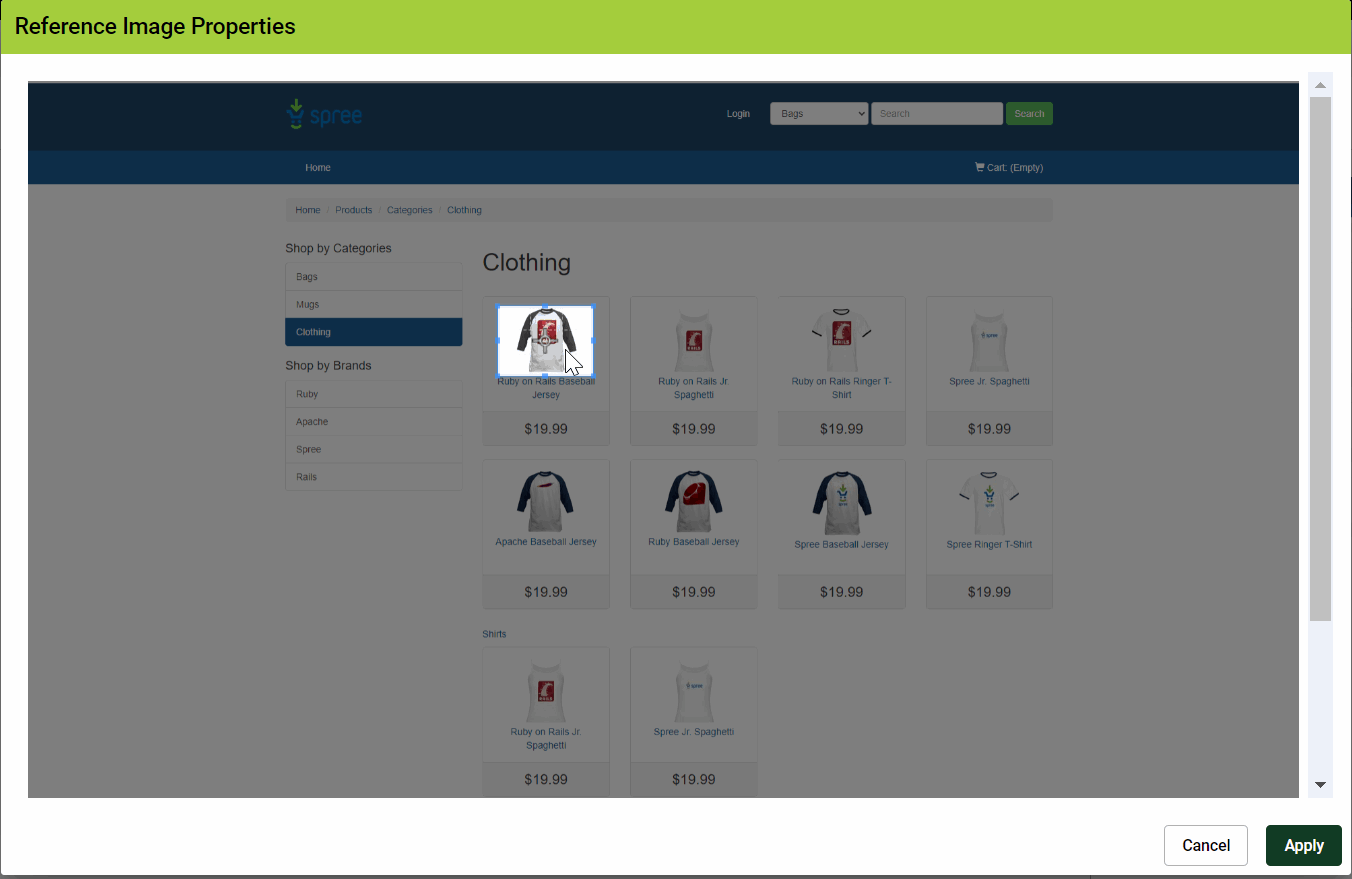 Click Apply when you are done.
 -
In the Set Value drop down, select Click.
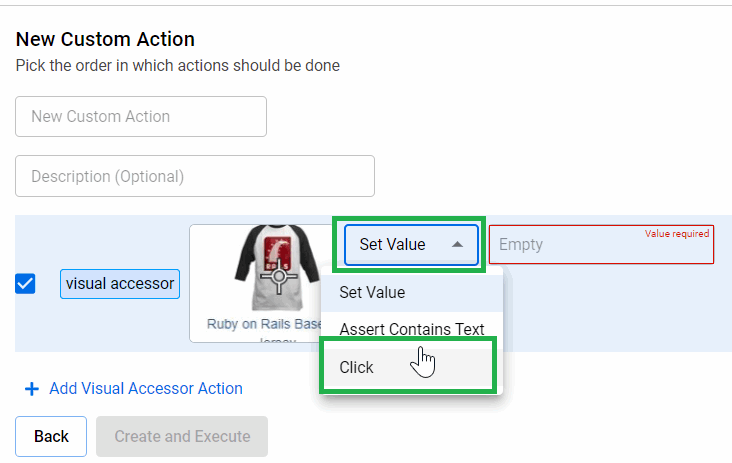
-
Enter a name for the new Custom Action.

-
Click Create and Execute.