
Jenkins Configuration
Setup a build in Jenkins: Configuration and pre-requisite:
Download Links for the following are available at “>CI Jenkins”
After installation, Jenkins automatically launches using port 8080. To change the port number, locate Jenkins/jenkins.xml and modify the --httpPort argument.
For example: -Xrs -Xmx256m -Dhudson.lifecycle=hudson.lifecycle.WindowsServiceLifecycle -jar "%BASE%\jenkins.war" --httpPort=8081
Install ANT using >http://ant.apache.org/bindownload.cgi
Download and install the appropriate file on your machine depending on the operating system used
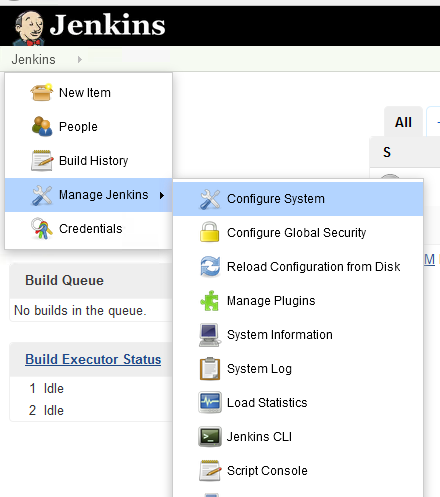
Click Manage Jenkins
Click Configure System
Scroll to Global Properties
Check Environment variables
Enter PATH in the Name box
Enter the Java and Ant paths in the Value box as illustrated below
Click Save (Changes)
Configure Project to Point to Plugin

Please make sure to install GIT on the machine where Jenkins is installed, once installed please restart the Jenkins service.
Download git from >https://git-scm.com/downloads based on your operating system.
Configuration validation
- Verify that Jenkins can start on the configured HTTP port and that the service account can access the AIQ installation and ANT executable.
- After saving the Jenkins system configuration, run a small test job and review the console output before scheduling larger executions.
- Keep the AIQ controller URL, credentials, and workspace paths aligned with the environment used by the job.
Last updated: AprilOctober 28,15, 20232026
If you have any feedback on this topic, please contact us at documentation@appvance.ai