
Jenkins Configuration
Setup a build in Jenkins: Configuration and pre-requisite:
- Download Links for the following are available at “>CI Jenkins”
- After installation, Jenkins automatically launches using port 8080. To change the port number, locate Jenkins/jenkins.xml and modify the --httpPort argument.
For example: -Xrs -Xmx256m -Dhudson.lifecycle=hudson.lifecycle.WindowsServiceLifecycle -jar "%BASE%\jenkins.war" --httpPort=8081 - Install ANT using >http://ant.apache.org/bindownload.cgi
- Download and install the appropriate file on your machine depending on the operating system used
- Click Manage Jenkins
- Click Configure System
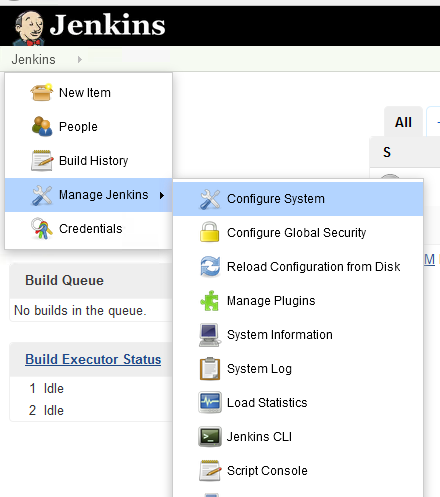
- Scroll to Global Properties
- Check Environment variables
- Enter PATH in the Name box
- Enter the Java and Ant paths in the Value box as illustrated below
- Click Save (Changes)
- Configure Project to Point to Plugin

- Please make sure to install GIT on the machine where Jenkins is installed, once installed please restart the Jenkins service.
Download git from >https://git-scm.com/downloads based on your operating system.
Configuration validation
- Verify that Jenkins can start on the configured HTTP port and that the service account can access the AIQ installation and ANT executable.
- After saving the Jenkins system configuration, run a small test job and review the console output before scheduling larger executions.
- Keep the AIQ controller URL, credentials, and workspace paths aligned with the environment used by the job.
Last updated: October 15, 2026
If you have any feedback on this topic, please contact us at documentation@appvance.ai