
Jenkins Email Notification
-
Login to Jenkins.
-
Navigate to Manage Jenkins.
-
Navigate to “Go to plugin manager”
-
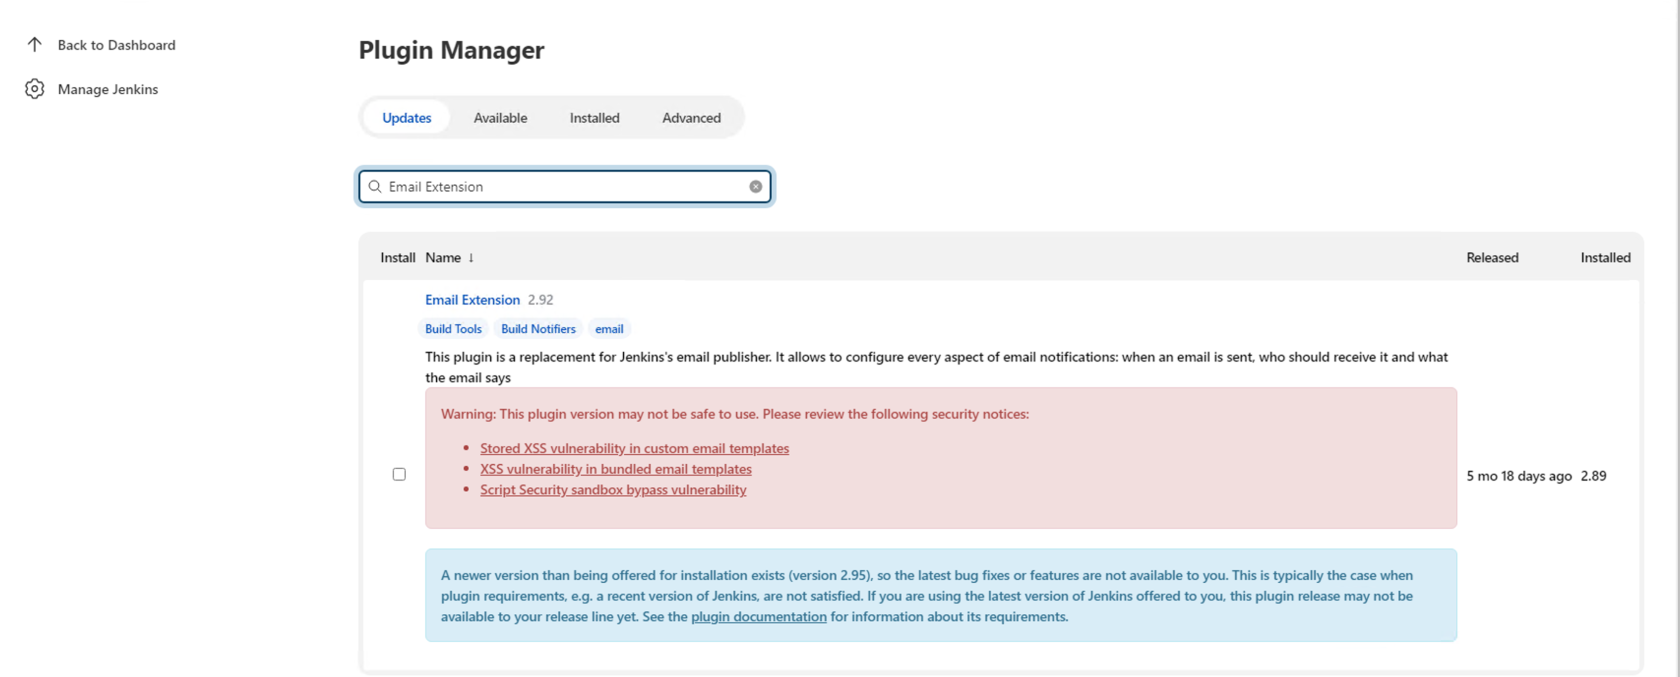
Search for “Email Extension” under filter section in plugin manager
-
Download and Install the Email Extension
-
Create APP Password for GMAIL account - Follow below steps to create App Password
-
If you configure Jenkins e-mail please you should follow the below steps:
-
first enable two step verification for reference click here
-
generate an app password
-
add the app password instead of your password
-
-
After successfully creation of APP Password for GMAIL
-
Go to Configure System in Manage Jenkins.
-
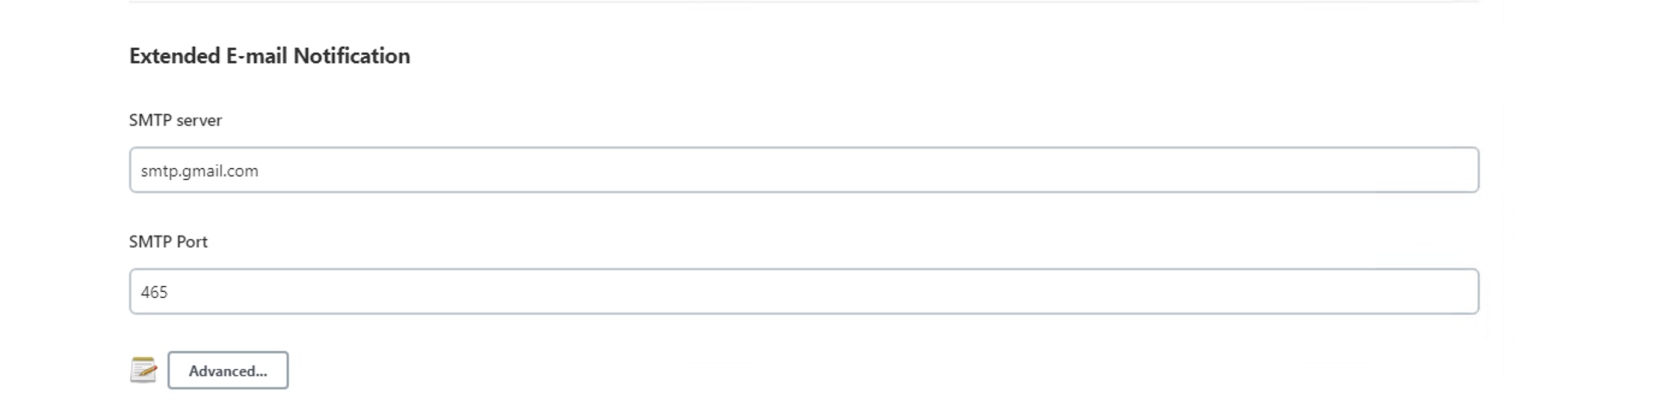
Under Configure system go to “Extended Email Notification and add
-
SMTP Server field - smtp.gmail.com
-
SMTP Port - 465
-
-
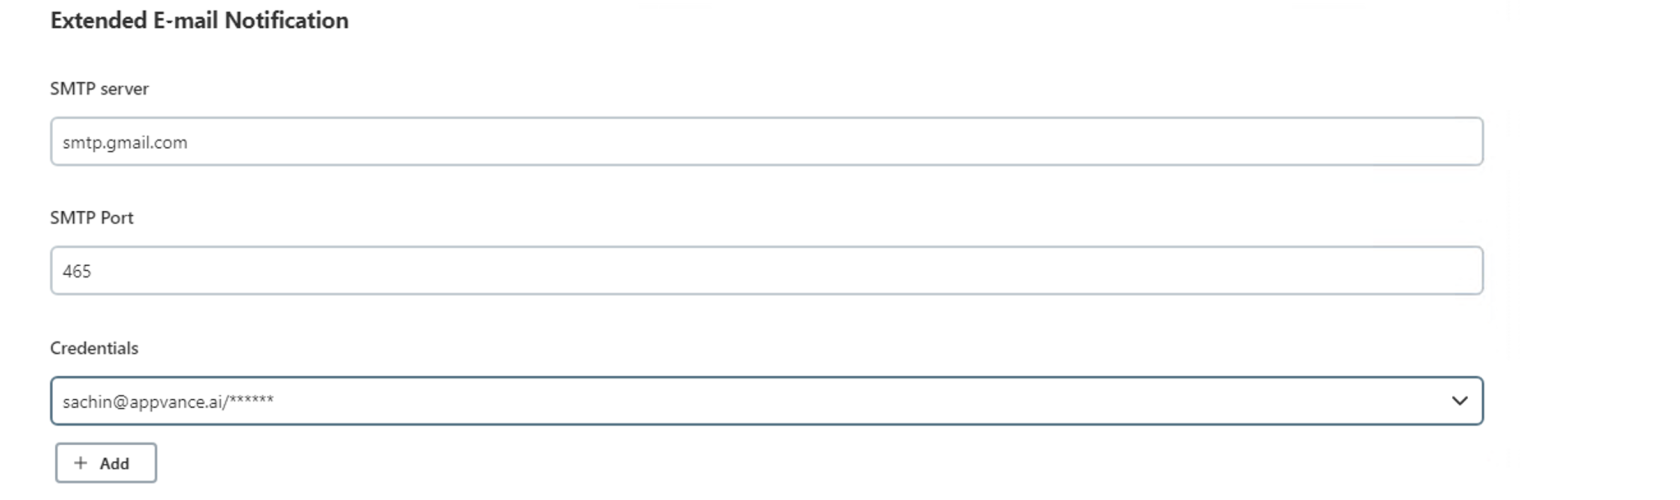
Click Advanced button below SMTP Port
-
Click Add button
-
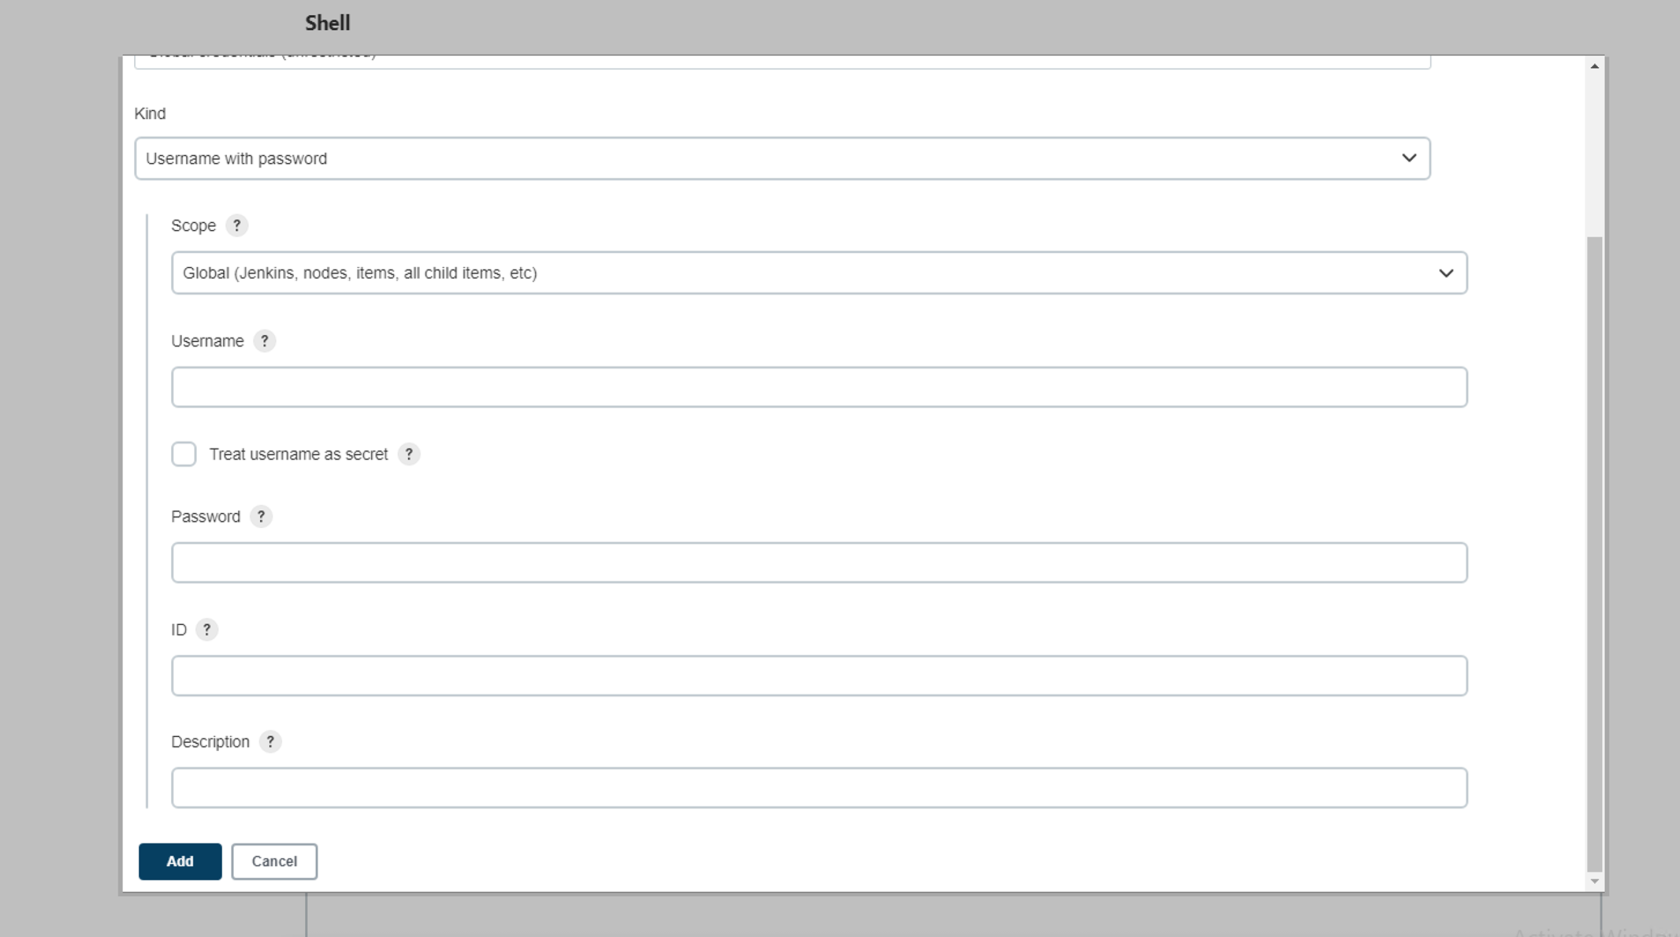
Go to Jenkins credentials provider and add the Username and APP Password ( Which was created on Step 6) and click Add button.
-
Click save button in Configure system
-
Go to the project and click configure
-
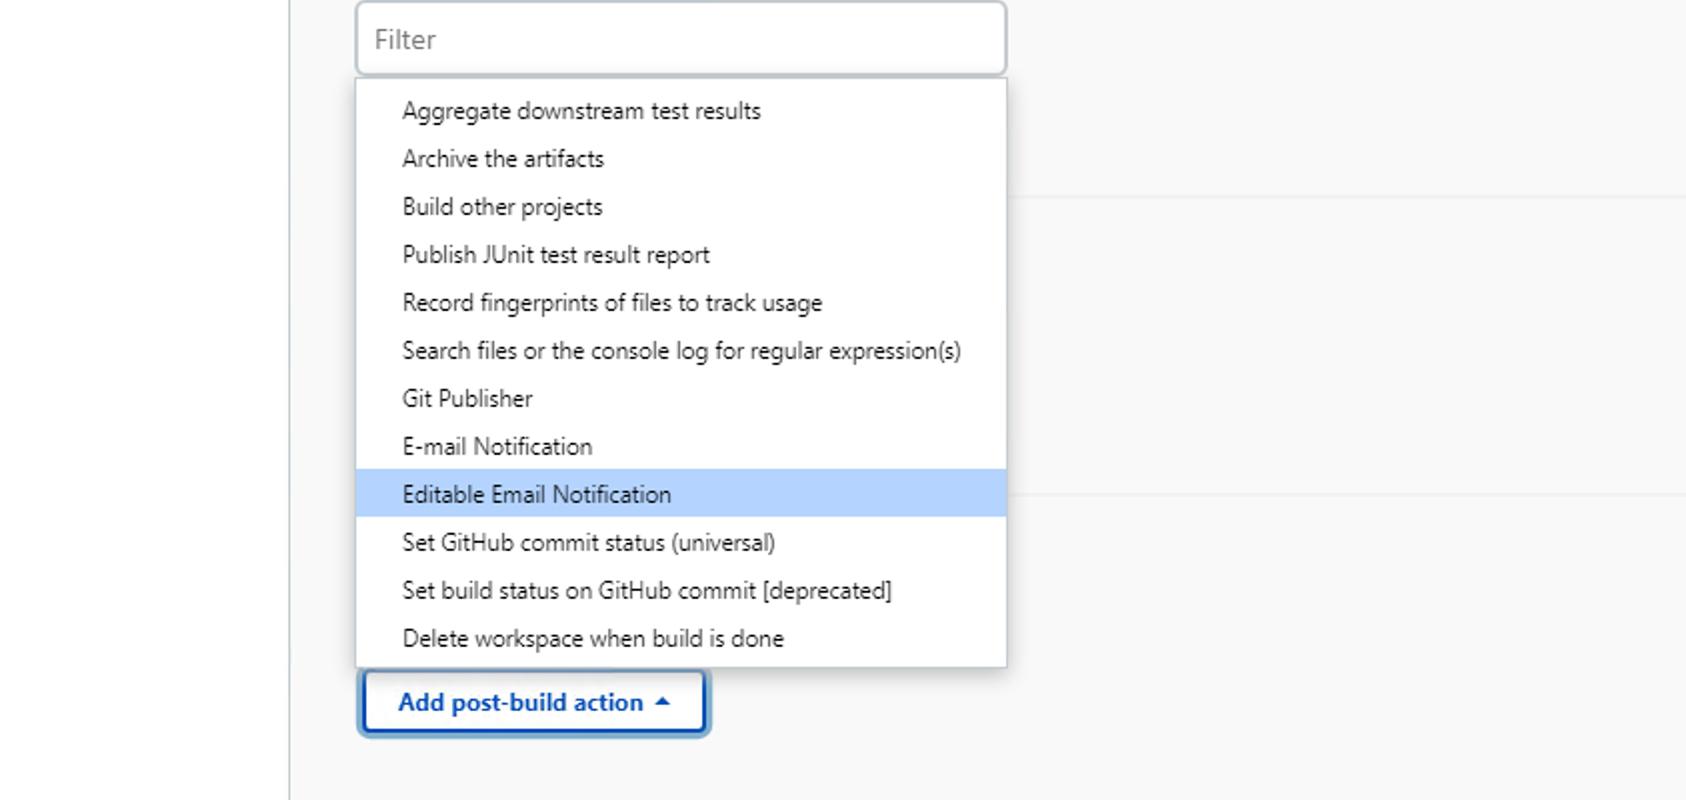
Under post-build Actions Choose Editable Email notification under Build

-
Under Editable Email notification add
-
“Email id” under Project From
-
Other field are by-default filled
-
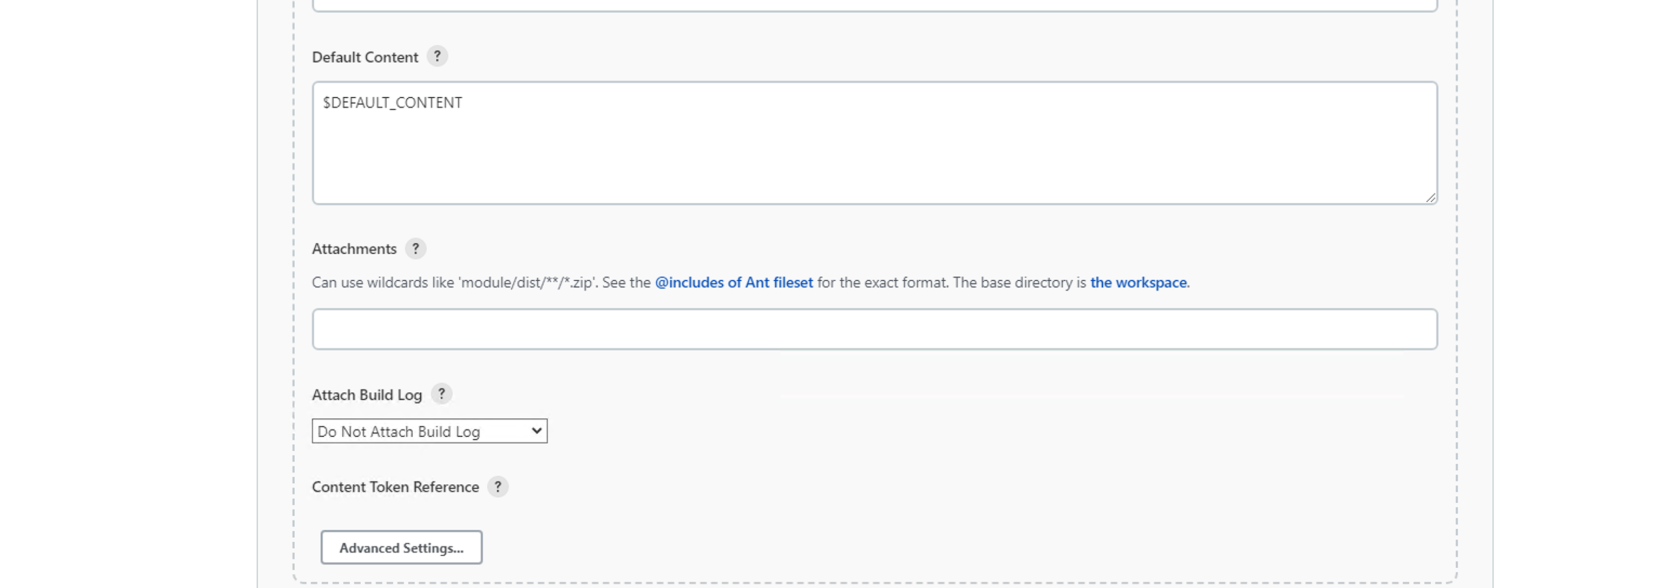
Click Advance settings
-
All the field are are by-default filled
-
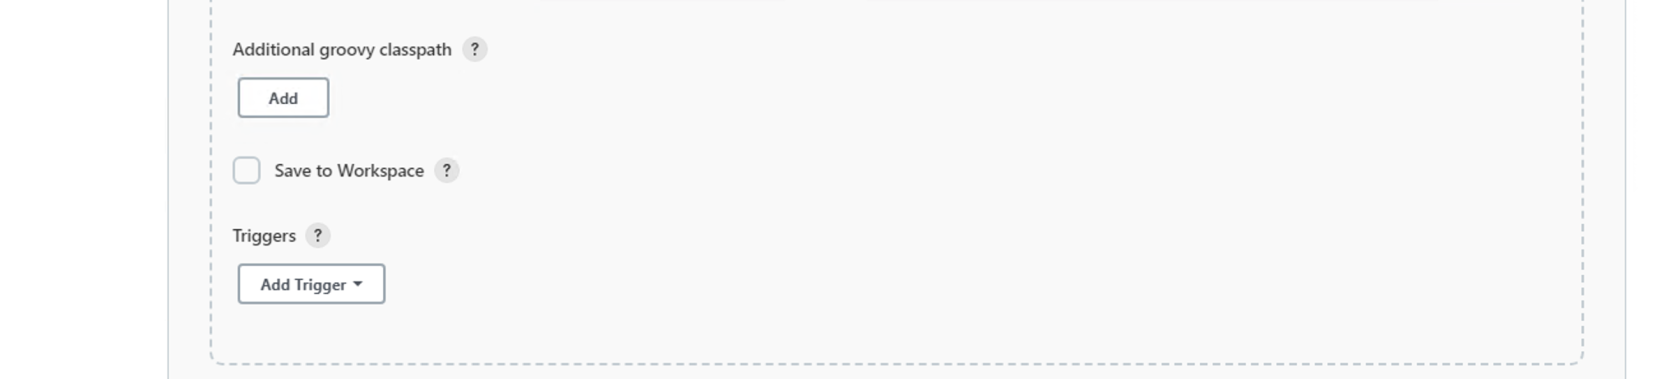
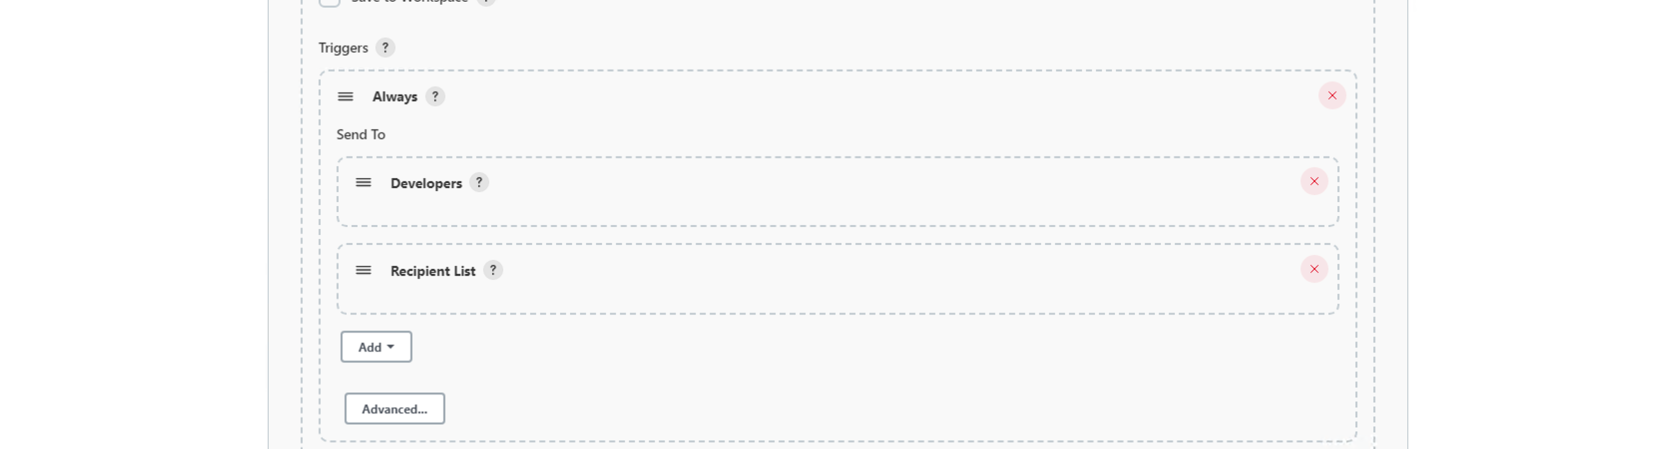
Click Add trigger under Triggers
-
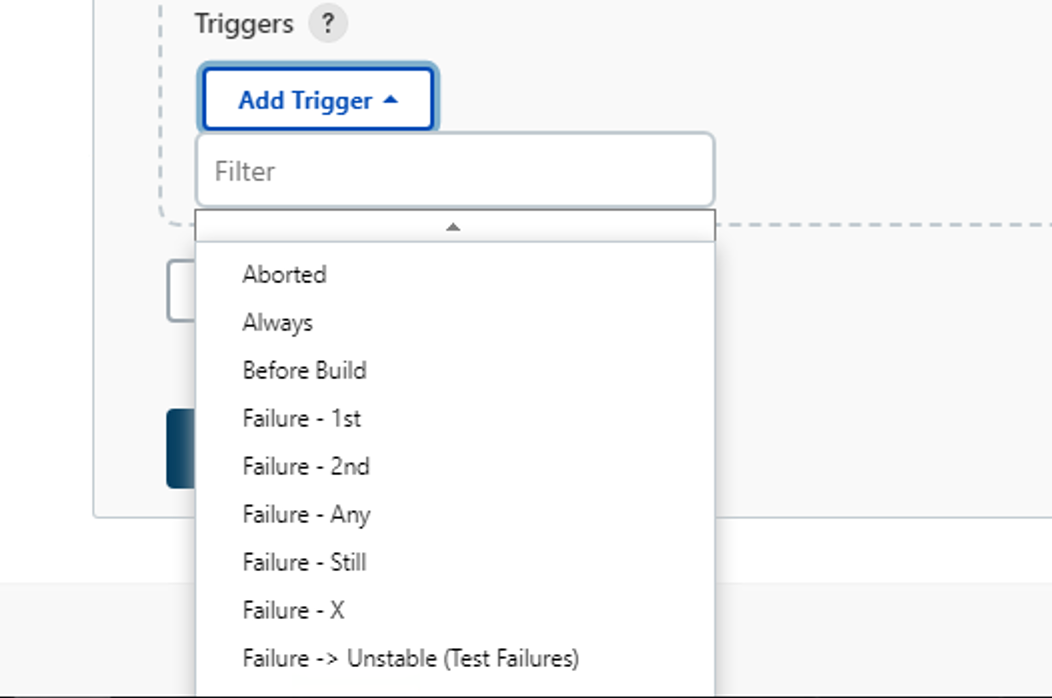
Select Always (User can change as per requirement)
-
Click Advanced under Triggers
-
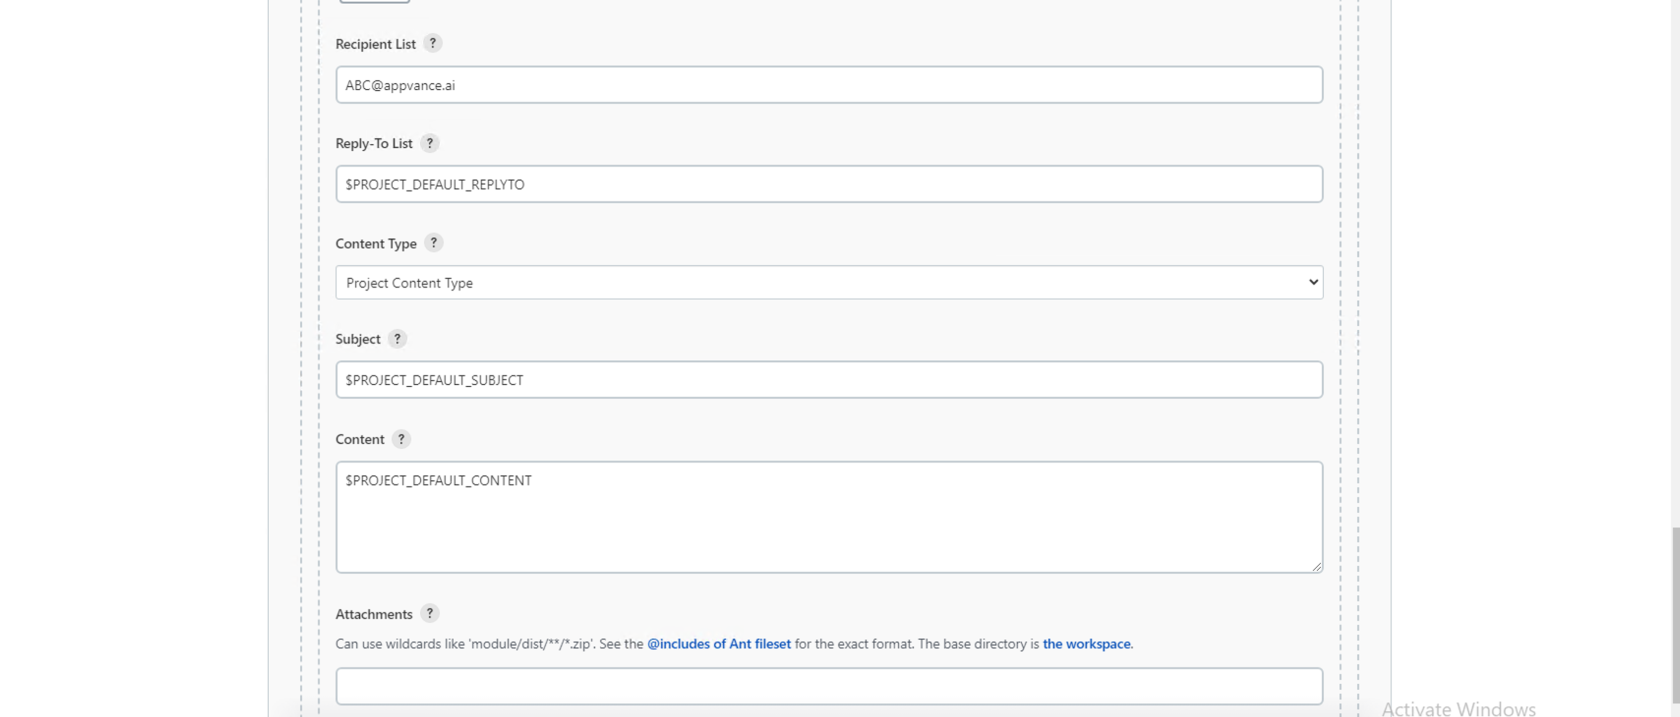
Add Recipient Mail id under Recipient List
-
Click Save and Apply
-
Recipient user will start getting Email Notifications
Last updated: June 02, 2023
If you have any feedback on this topic, please contact us at documentation@appvance.ai