
macOS Required Configurations for AIQ - Duplicate Review
The
Recommended following steps are necessary to improve AIQ compatibility with macOS systems.
Java 8 Related Configurationguidance
This page duplicates the macOS required configuration addressestopic. aKeep knownone issueauthoritative macOS configuration article and consolidate any unique current details into that causespage.
Consolidation inchecklist
- Compare
8thisapplicationsarticle with the install-guide macOSSierraconfiguration page. - Move unique supported content into the authoritative article.
- Remove old screenshots, old product names, and unsupported security-bypass wording.
- Delete or
newer.redirect this duplicate after content owner review.
Current recommendation
SeeUse StackOverflowthe primary macOS configuration guide for morecurrent information.
Thissetup. configuration is required for macOS Sierra (10.12), High Sierra (10.13) Mojave (10.14), and earlier versions of Catalina (10.15.1 through 10.15.4).
Type "hostname" in a terminal window to get your system's canonical name. This <system canonical name> should look similar to Joe-MacBook-Pro.local.
Enter the hostname obtained in the first step into your /etc/hosts text file.
Open the nano text editor to edit the/etc/hostsfile by typing in a terminal:sudo nano /etc/hostsAssuming your hostname is "Joe-MacBook-Pro.local", then you should add two lines similar toRetain thisonespageto the/etc/hostsfile.127.0.0.1 Joe-MacBook-Pro.local::1 Joe-MacBook-Pro.localPress Ctrl+O to write changes to the hosts file, and Ctrl-X to exit the nano text editor. Make sure to replaceJoe-MacBook-Pro.localwith your actual hostname returned by the command in the first step. Save your file, and retry executing your script in test designer.This change is NOT needed for recent Catalina OS releases (10.15.5+).
System Preferences
This configuration is necessary to be able to record and playback using Test Designer IDE using a Safari browser.
In the Security & Privacy preference, select the Privacy section, for Accessibility and Full Disk Access: add the Java app to the list of apps that are allowed to control your computer. (Mojave requires the Accessibility permissions to control your computer to the Terminal App instead of the Java App)
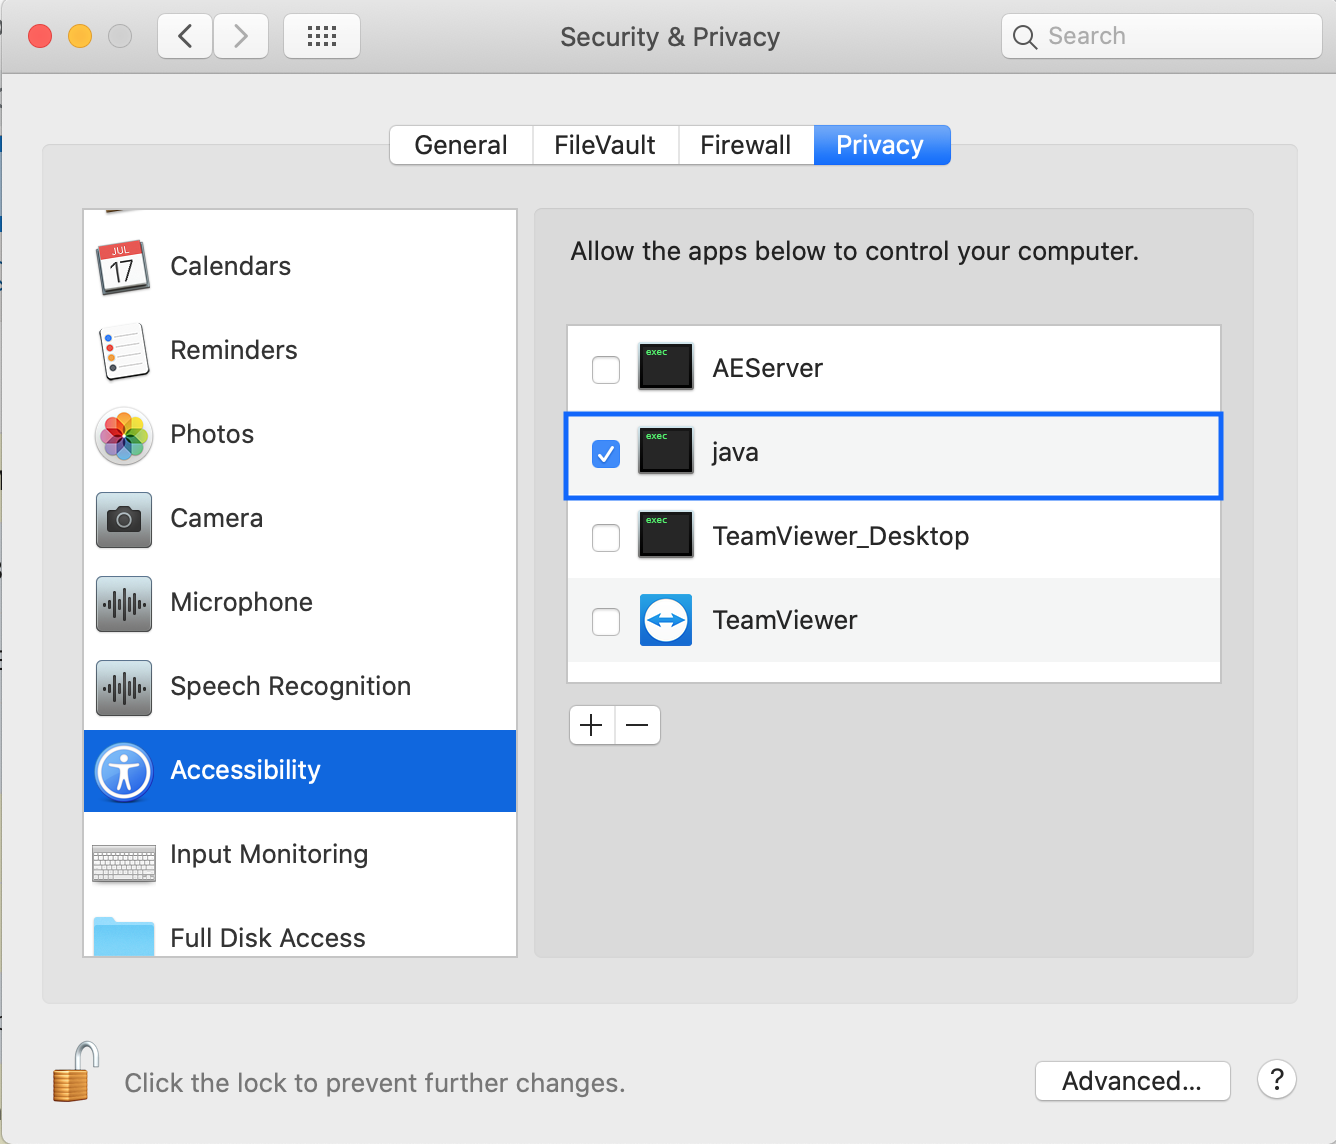
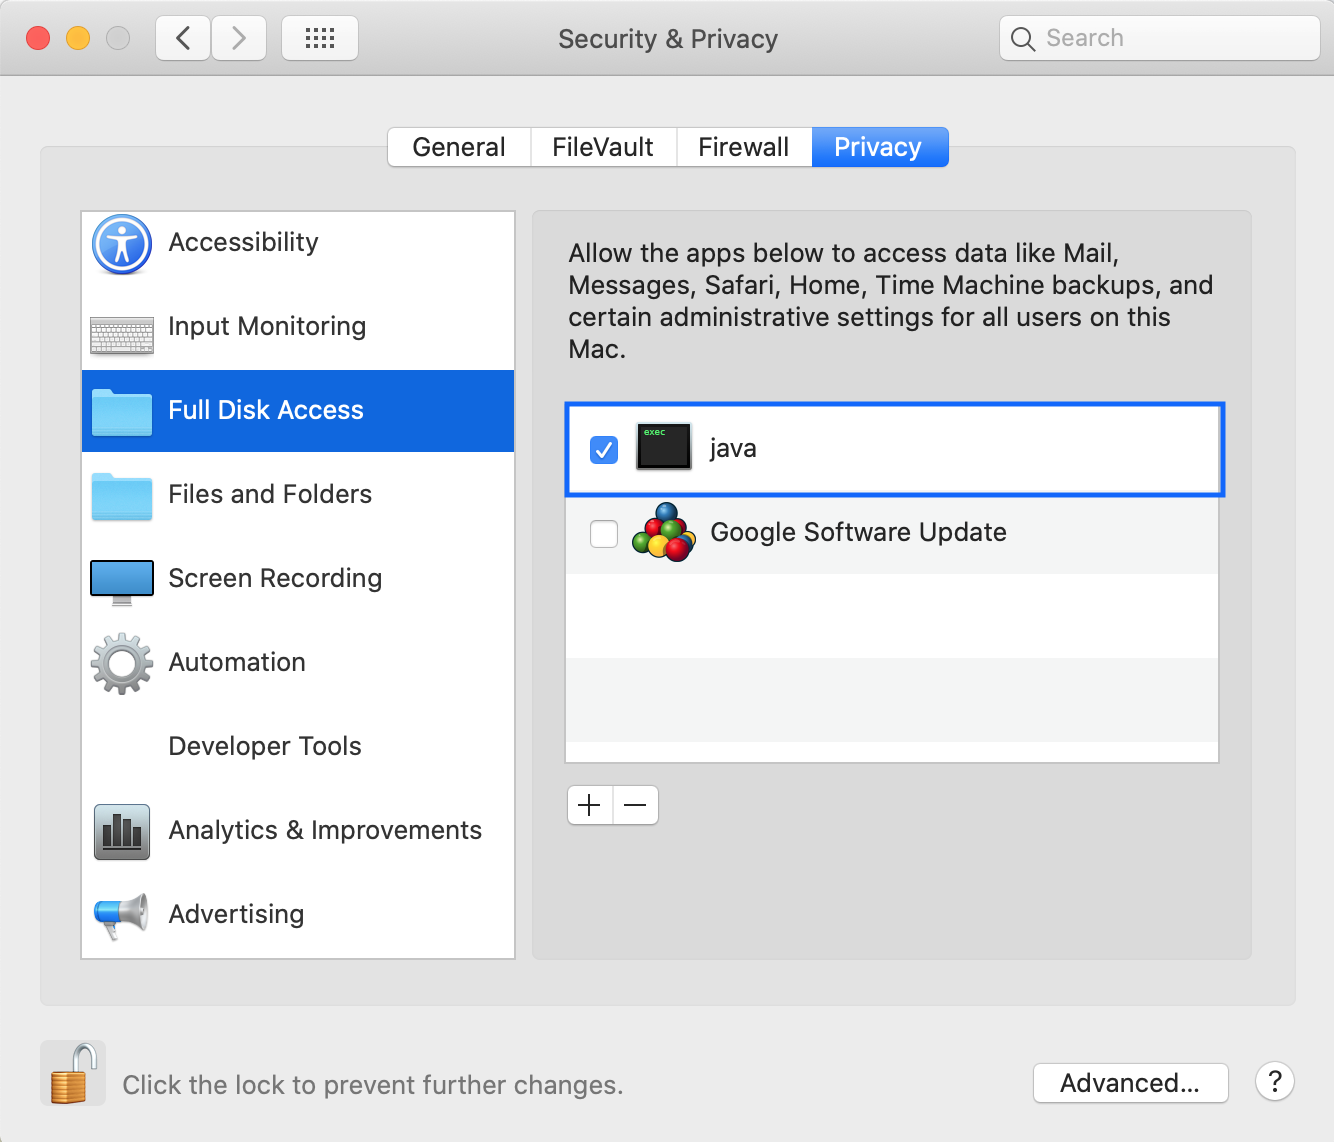
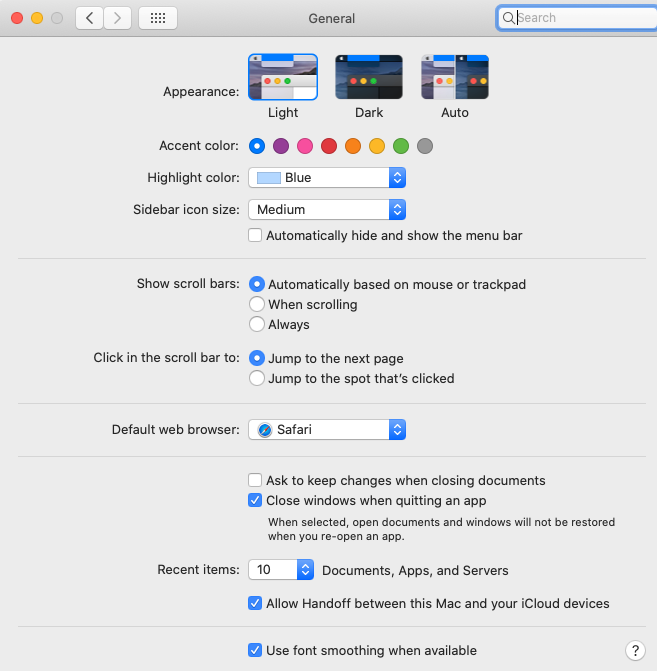
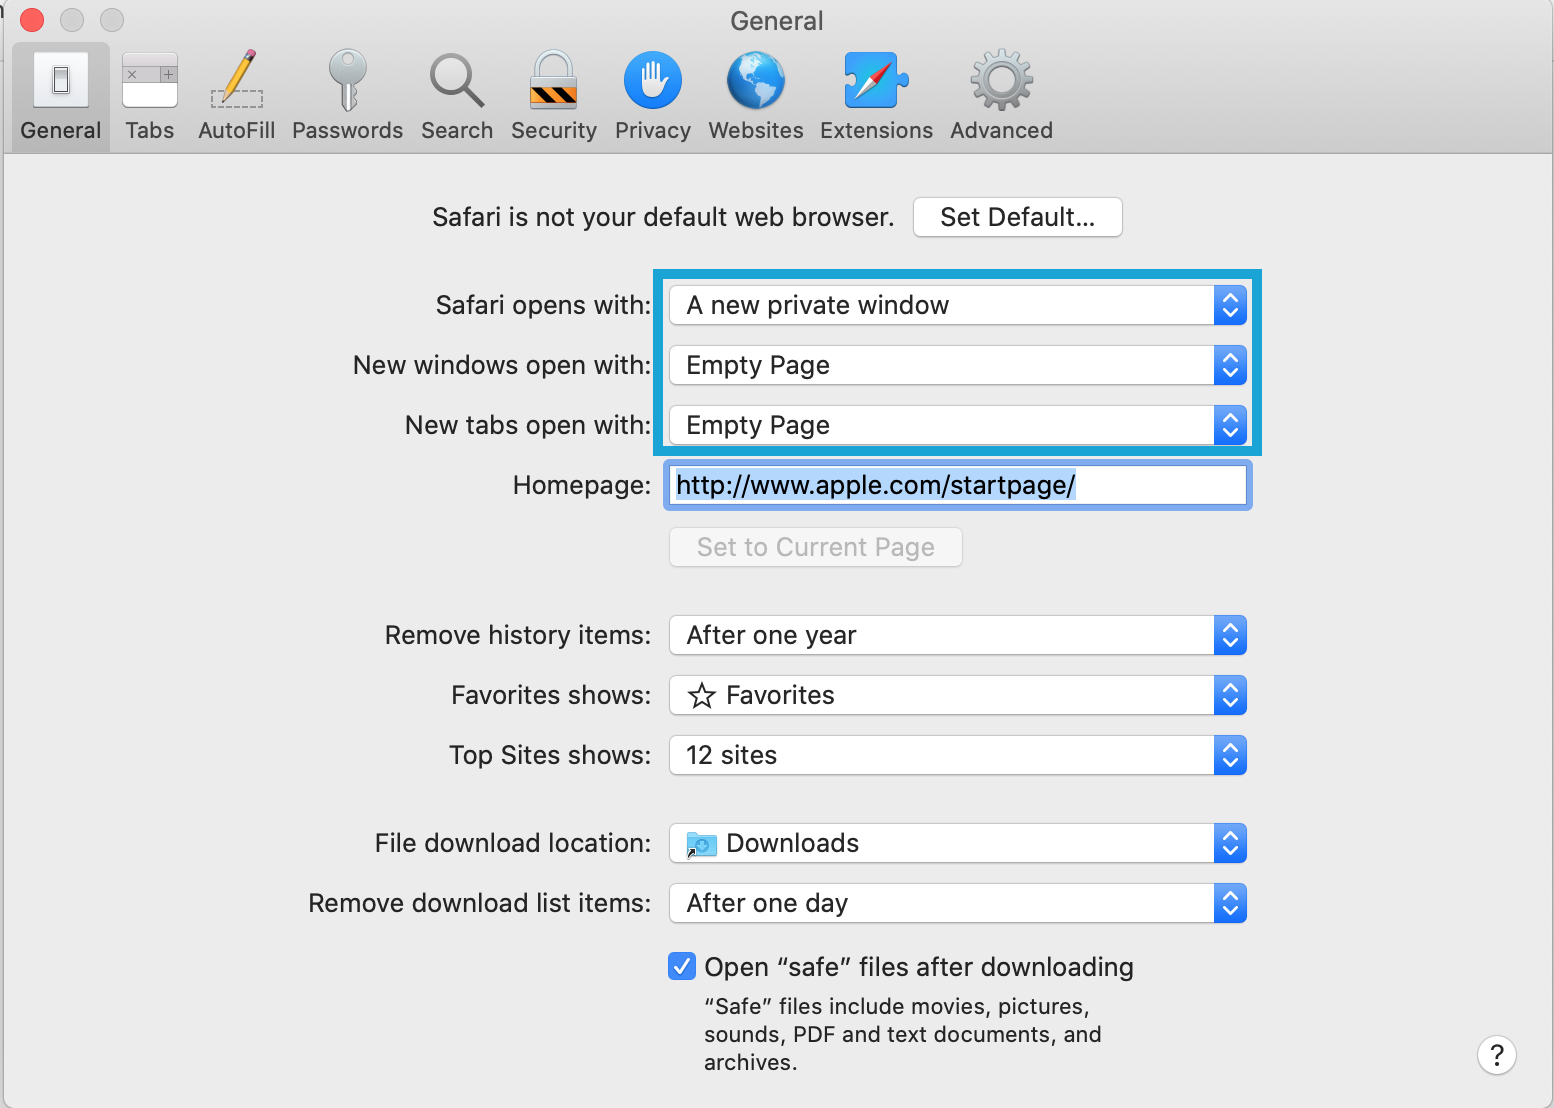
If you want to record/playback Test Designer script with Safari, make sure you select Safari as your default system browser in the Preferences General tab
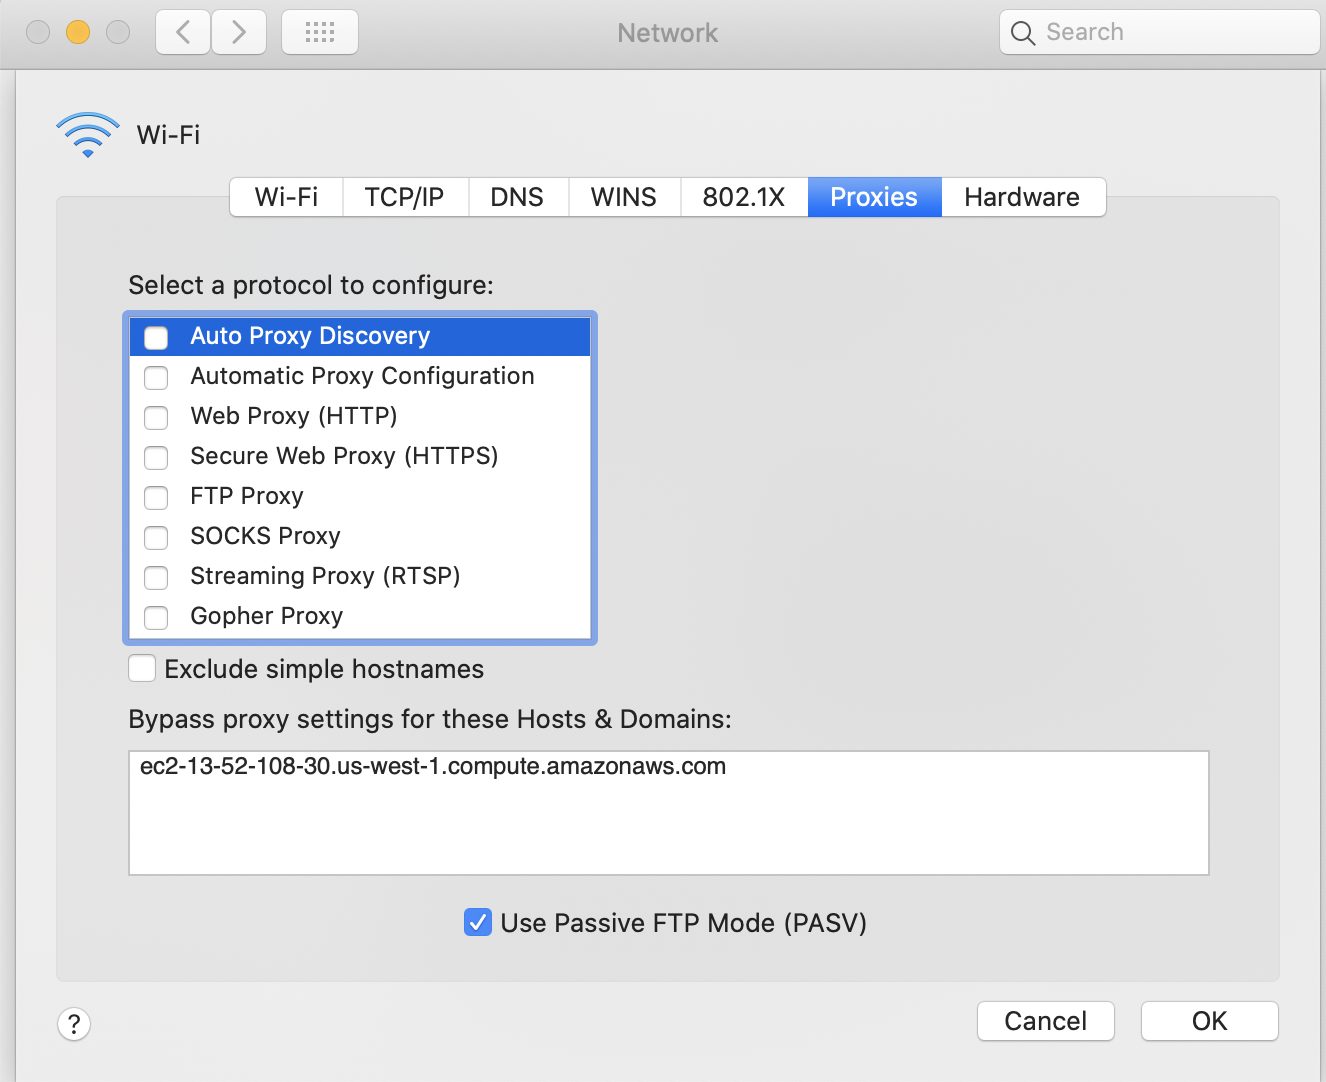
In the Network preferences, Proxies settings: set the Bypass proxy settings to your AIQ server DNS
Safari Preferences
This configuration is necessary to be able to record and playback using Test Designer IDE using a Safari browser.
Safari opens with: A new private window. New window open with Empty PageNew tabs open with Empty Page
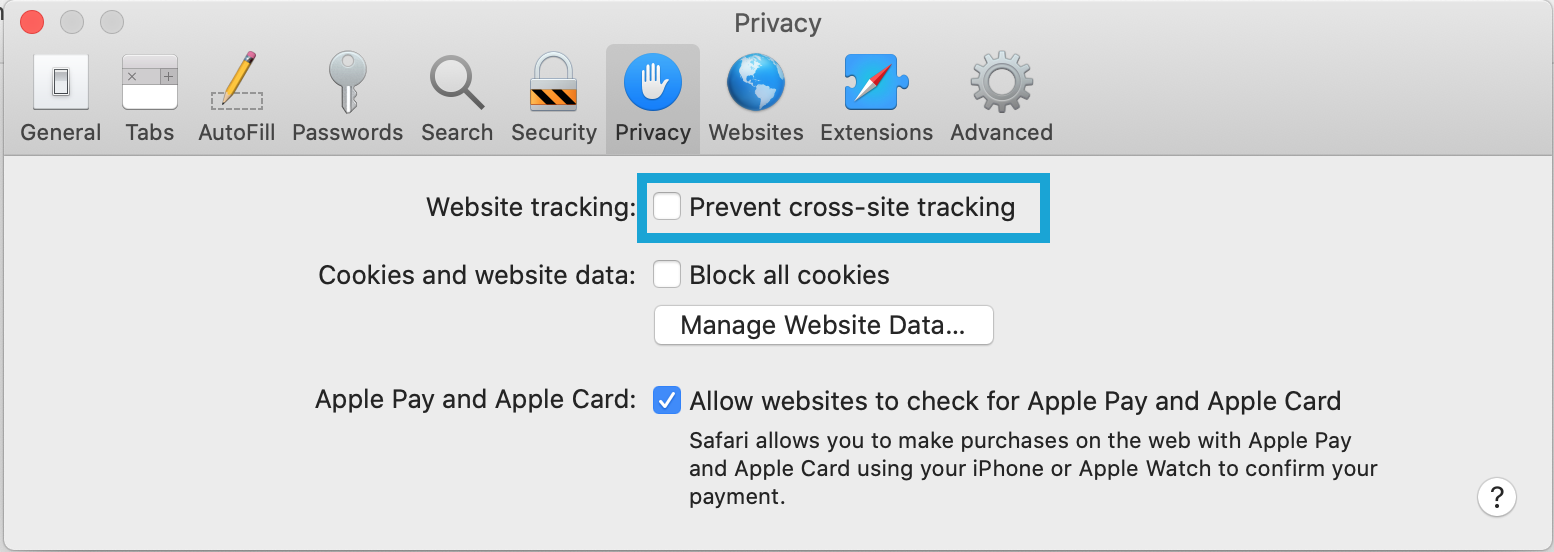
Select "When a new tab or window opens, make it active" in Tabs section
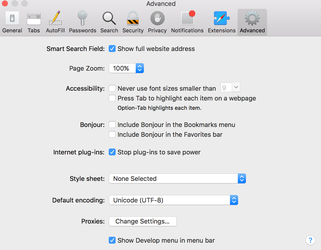
Other optional settings in Safari Advanced tab:
Apvance Certificate
Checkonly if the Appvance Certificate is present (only needed if after the above steps you have Test Designer IDE recording problems)
The client installer for Test Designer scripts should automatically install Appvance 2020 SSL certificate in MacOS and in Mozilla Firefox (if present). But if you have problems recording on HTTPS sites, do validate if the certificate "Appvance 2020" is installed in the MacOS and/or Firefox.
Verifying the Appvance certificate is installed in MacOS
To check the MacOS certificates open the Keychain Access application and click over the tab. You should be able to find the "Appvance 2020" certificate with a blue dot (meaning it is trusted)needed astemporarily induring thismigration image:cleanup.
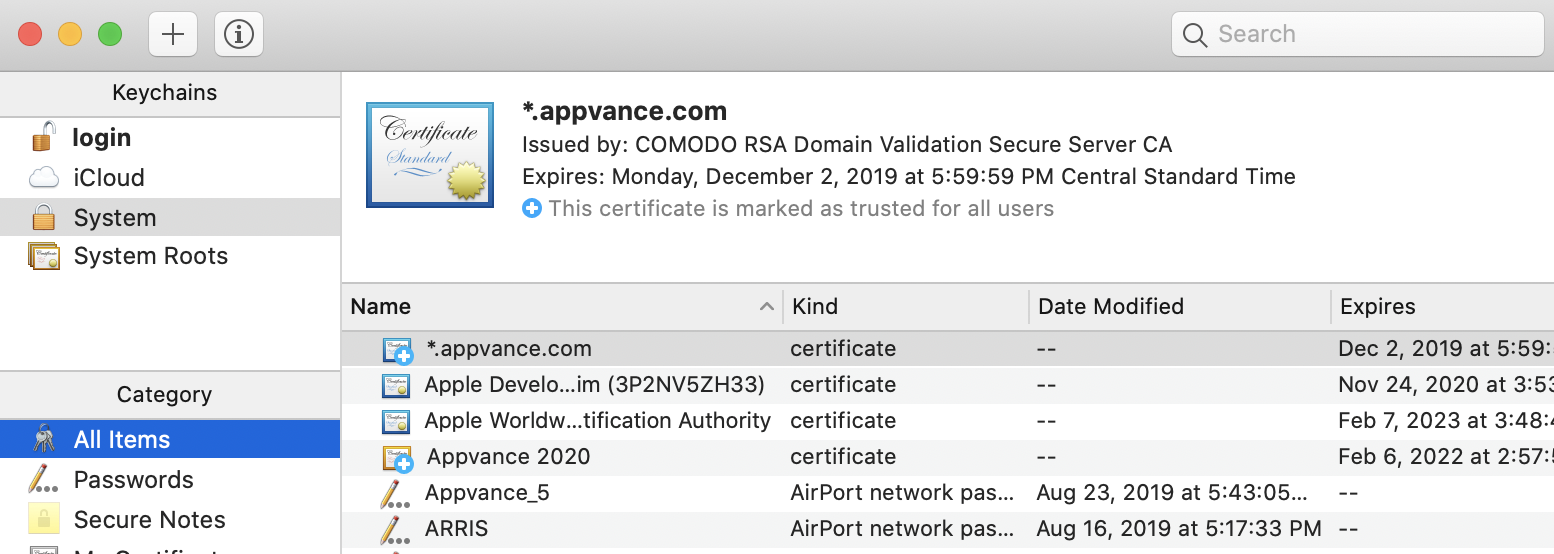
Catalina updates (May 2019) requires that the Appvance2020 certificate needs to be installed both in System and login keychains.
Installing the Appvance certificate in MacOS
If the certificate is not installed in Mozilla Firefox, you can download it from this link:https://aiq-client-installer.s3-us-west-2.amazonaws.com/appvance2020.cerThen click the "Import" button in the Firefox Certificate Manager and select the downloaded "appvance2020.cer" file.
Double-click the appvance2020.cer file and it will be added to the Keychain Access application. Locate the Appvance 2020 in the System Keychain and doble click over it to see its details. Expand the Trust option and select Always Trust in the first select box.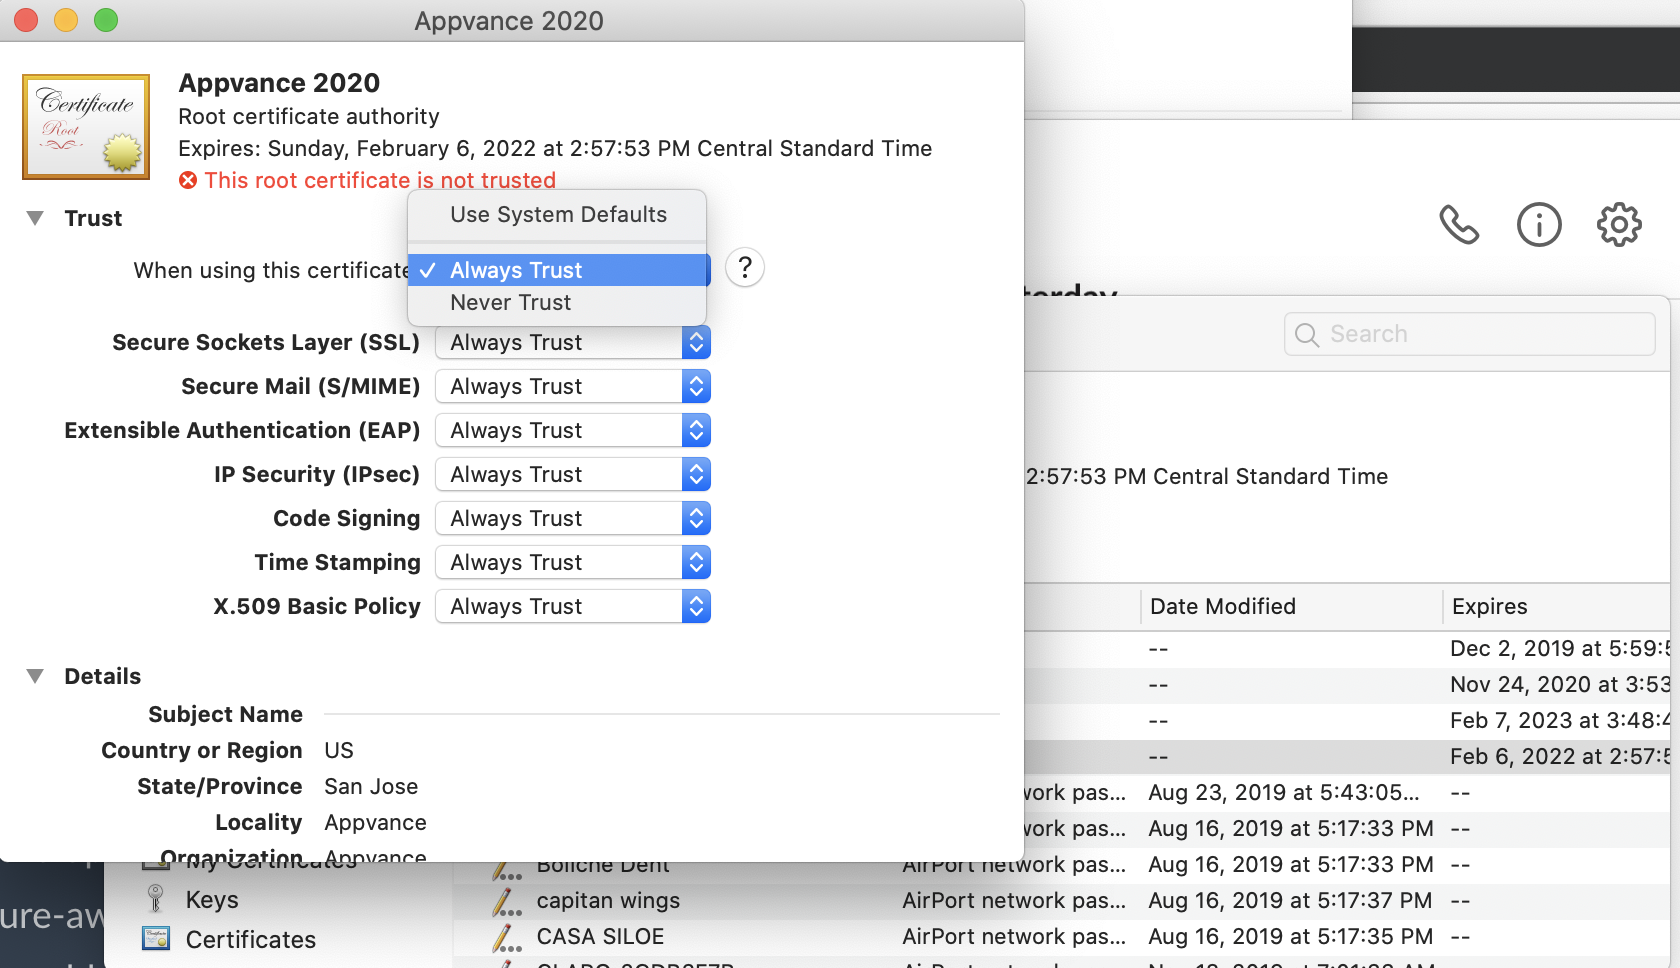 The OS will ask for your password to trust this certificate and the screen should look like this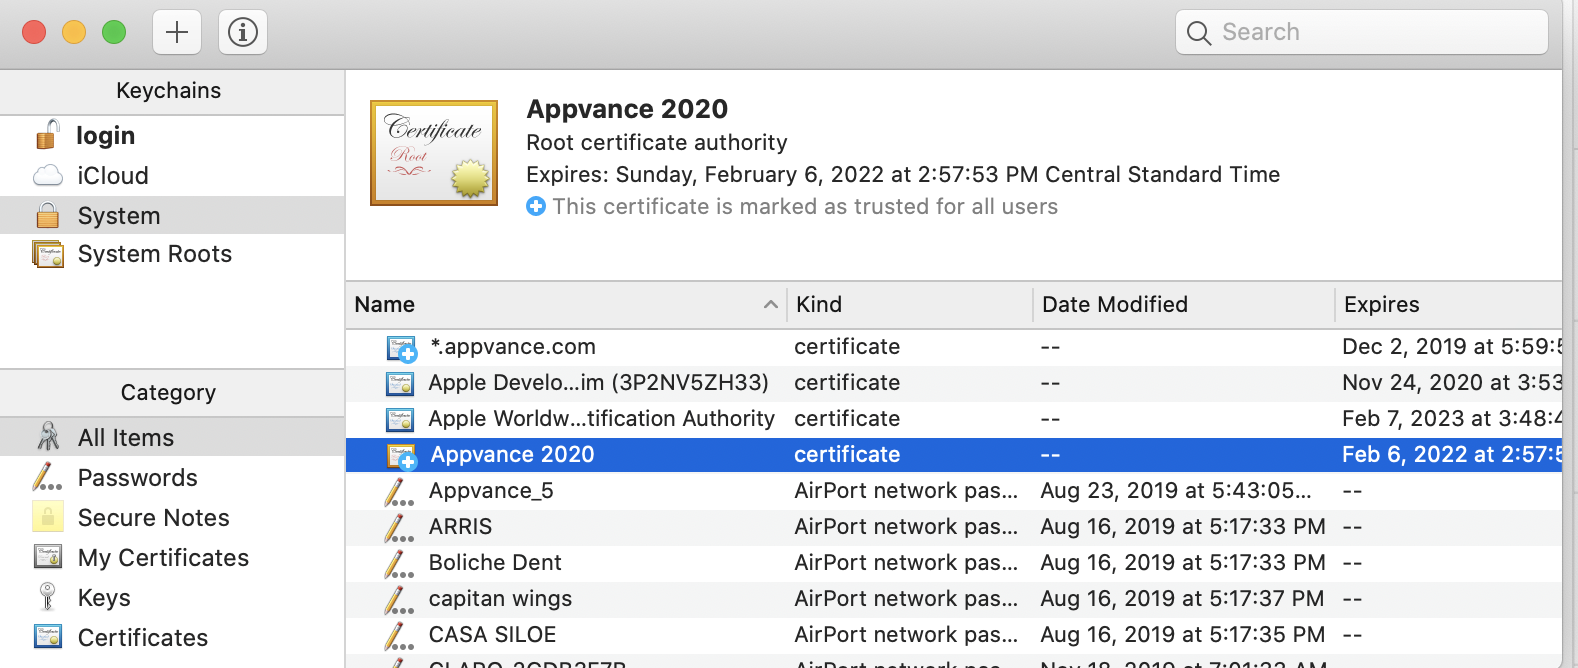
Verifying the Appvance certificate is installed in Firefox
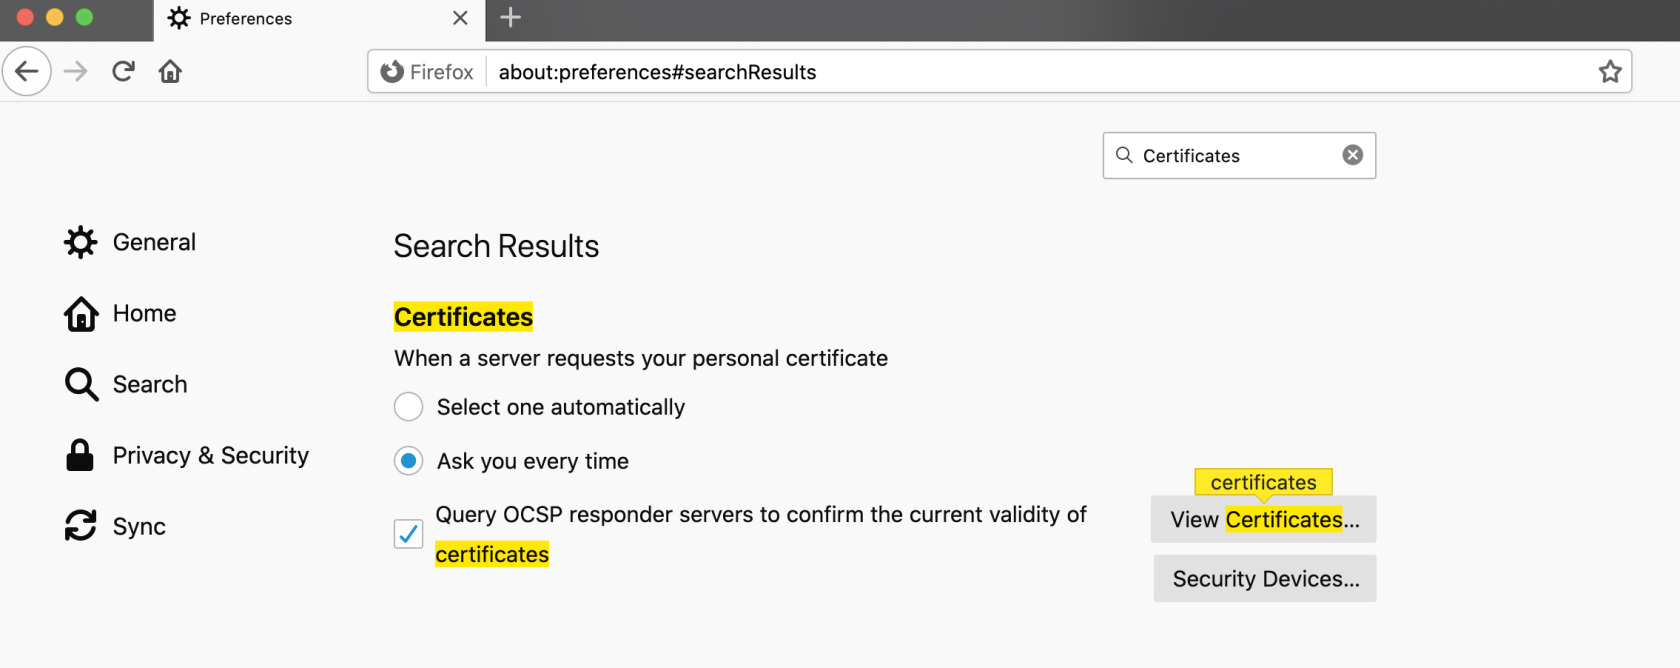
To check if the certificate is installed on Mozilla Firefox, open Firefox and open the Preferences, then type "Certificates" in the search input box. Click the View Certificates button to open the Certificates Manager:
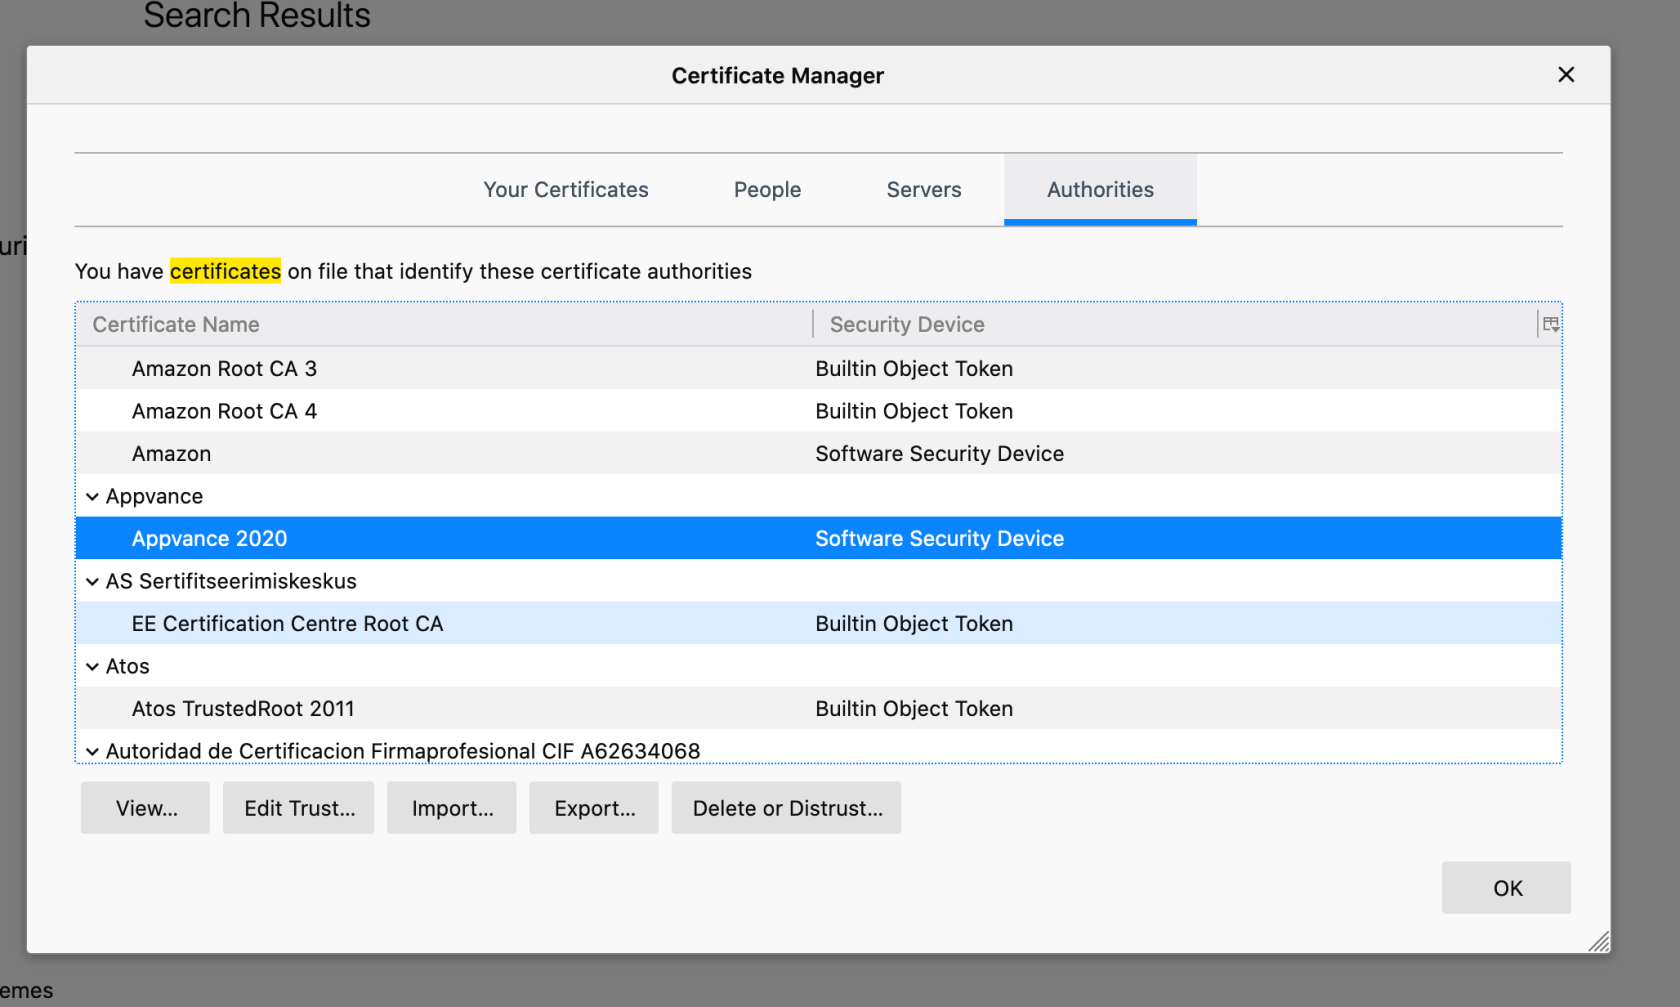
In the Certificate Manager, click the "Authorities" tab and scroll down until you find the Appvance 2020 certificate
Installing the Appvance certificate in Firefox
If the certificate is not installed in Mozilla Firefox, you can download it from this link:https://aiq-client-installer.s3-us-west-2.amazonaws.com/appvance2020.cer
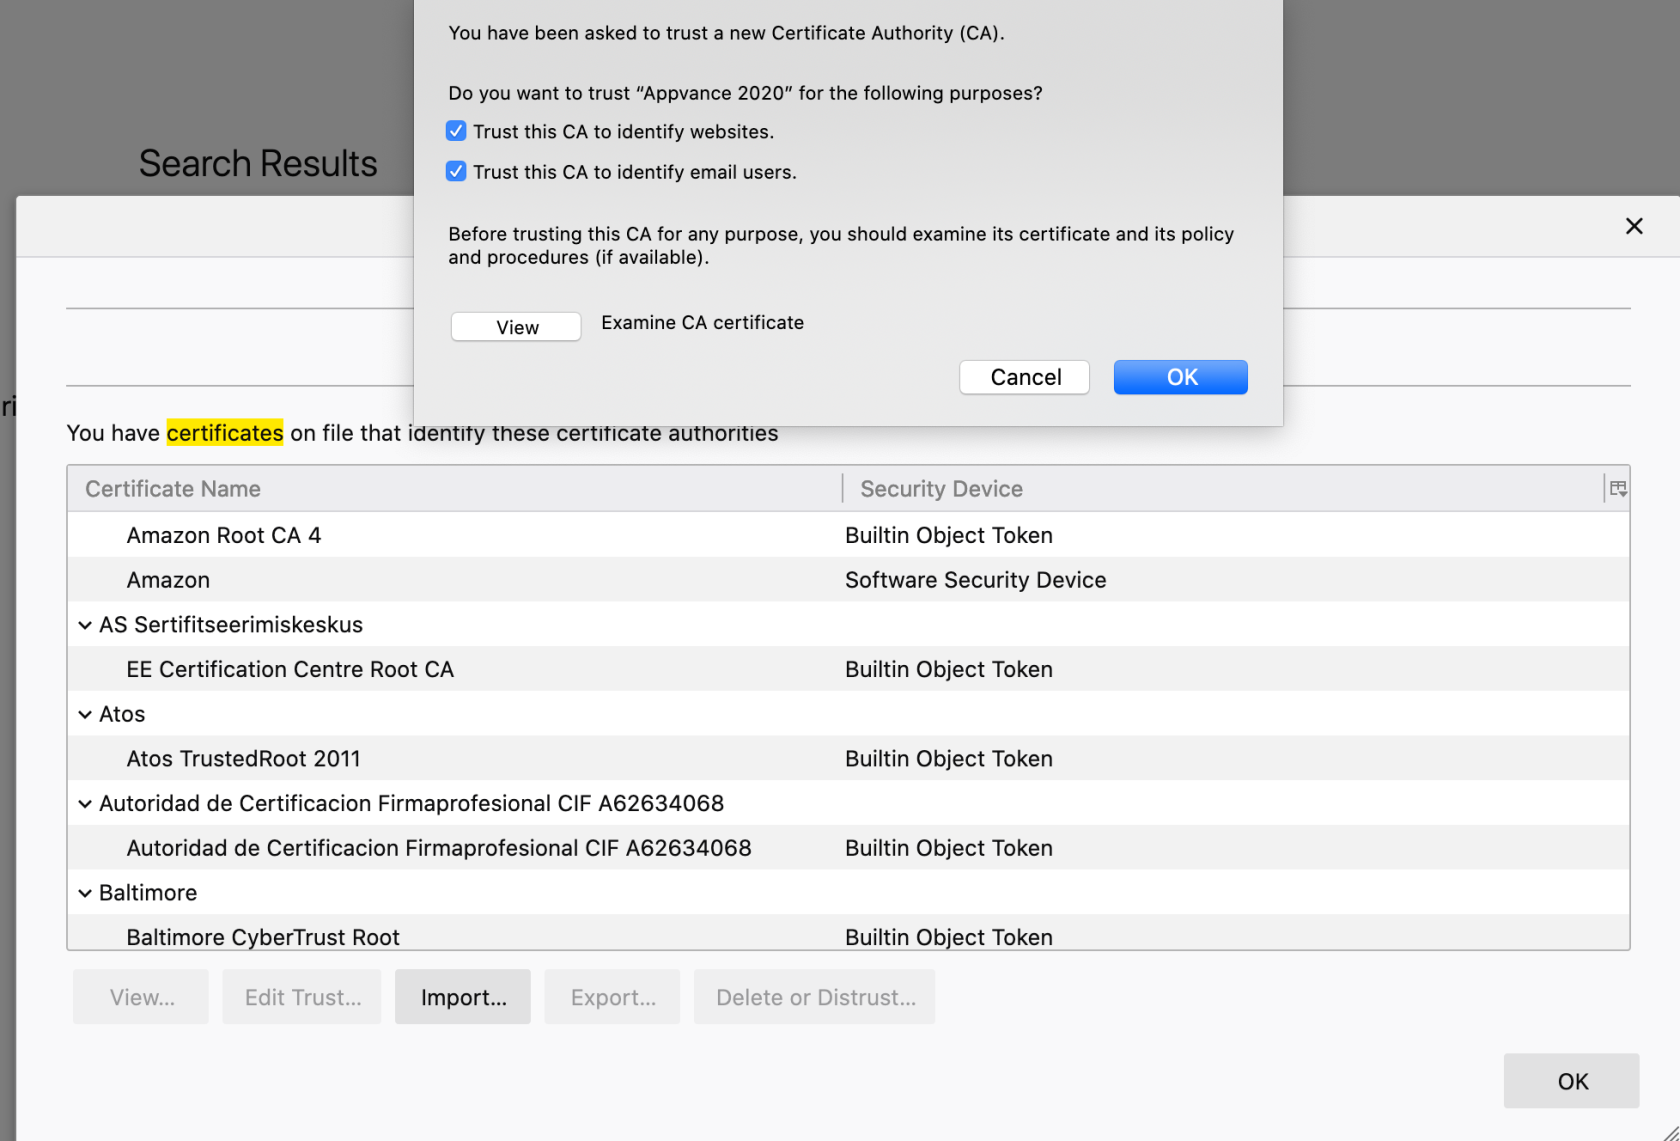
Then click the "Import" button in the Firefox Certificate Manager and select the downloaded "appvance2020.cer" file. Then click both trust checkboxes as in this image, and click Ok.
Next step: MySQL Install & Setup
Last updated: JulyOctober 31,7, 20242026
If you have any feedback on this topic, please contact us at documentation@appvance.ai